
Are you looking to explore the Matic Mainnet and take advantage of its high scalability and low transaction fees? In this step-by-step guide, we’ll show you how to unlock Matic Mainnet using the popular Ethereum wallet, Metamask.
Metamask is a browser extension that allows you to interact with various Ethereum networks, including the Matic Mainnet. By following these simple steps, you’ll be able to seamlessly switch to the Matic Mainnet and start transacting with ease.
Step 1: Install Metamask
If you haven’t already, start by installing the Metamask browser extension. You can find it on the official Metamask website or in the extension store of your preferred browser. Once installed, create a new wallet or import your existing one.
Step 2: Switch Network to Matic
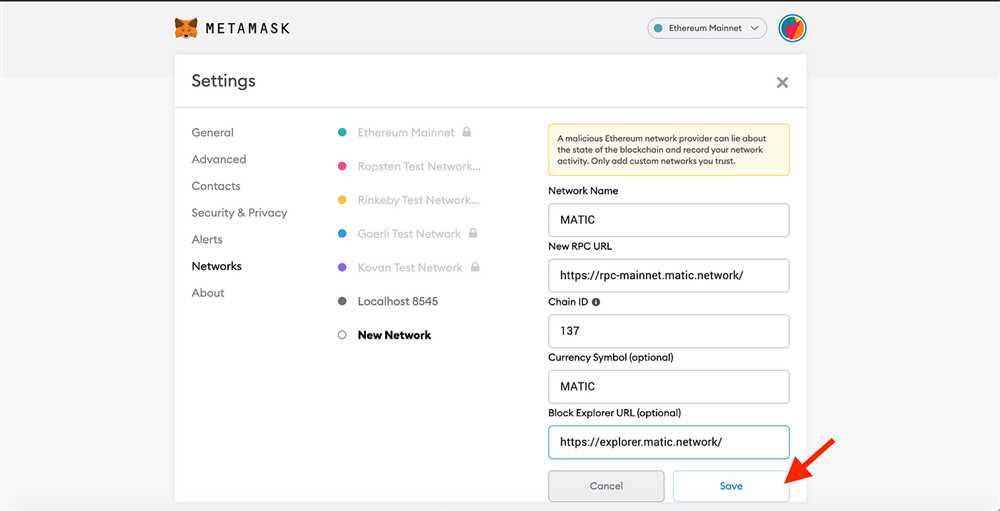
After setting up your Metamask wallet, click on the network dropdown located at the top of the Metamask interface. From the list of available networks, select “Custom RPC” to add a new network manually. Enter the following details:
- Network Name: Matic Mainnet
- New RPC URL: https://rpc-mainnet.matic.network
- ChainID: 137
- Currency Symbol: MATIC
Step 3: Add the Matic Mainnet
Once you’ve entered the correct details, click on “Save” to add the Matic Mainnet to your Metamask wallet. You should now see Matic Mainnet as an option in the network dropdown. Select it to switch to the Matic Mainnet network.
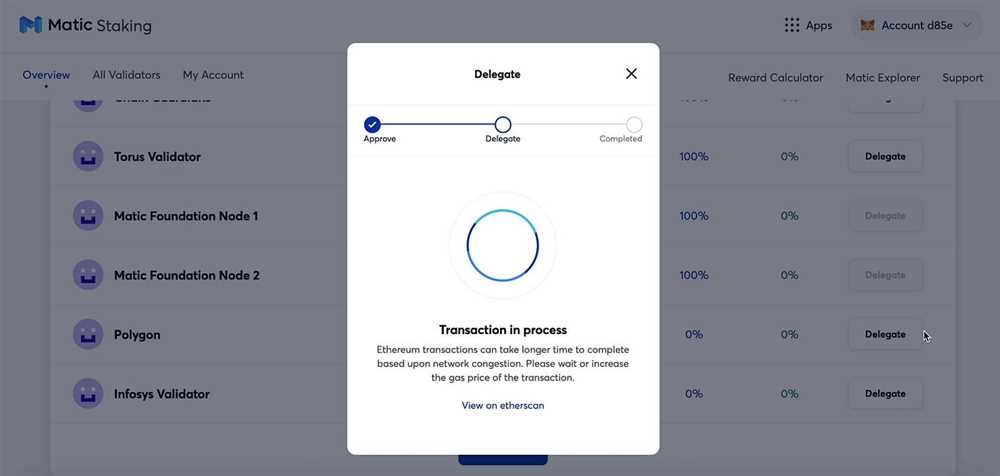
Step 4: Transfer Funds
Now that you’re connected to the Matic Mainnet, you’ll need to transfer your funds to this network to start transacting. Simply click on the “Assets” tab in your Metamask wallet and select the asset you want to transfer. Click on “Send” and enter the recipient’s address along with the amount you wish to transfer.
And that’s it! You’ve successfully unlocked the Matic Mainnet using Metamask. Enjoy the benefits of fast and affordable transactions on the Matic network.
Note: Make sure you have some ETH in your Metamask wallet to cover gas fees for transactions on the Matic Mainnet.
Setting Up Metamask
Metamask is a popular browser extension that allows users to interact with Ethereum-based dapps. To get started, follow these steps to set up Metamask:
- Download and install the Metamask extension for your preferred browser. It is available for Chrome, Firefox, and Brave.
- Once the extension is installed, click on the Metamask icon in your browser’s toolbar.
- A welcome screen will appear, click on “Get Started” to begin the setup process.
- Create a new wallet by clicking on “Create a Wallet” and follow the instructions to set up a password.
- After setting up a password, Metamask will generate a unique 12-word recovery phrase. Make sure to write it down and store it in a secure place. This phrase is used to recover your wallet in case you forget your password or lose access to your device.
- Confirm your recovery phrase by selecting the words in the correct order.
- Once your recovery phrase is confirmed, your Metamask wallet is set up and ready to use.
- To use Metamask with the Matic mainnet, you need to add the Matic network to your wallet. Click on the network dropdown at the top of the Metamask window and select “Custom RPC”.
- In the “New RPC URL” field, enter the Matic mainnet URL: https://rpc-mainnet.matic.network.
- Enter a suitable network name, such as “Matic Mainnet”, and click on “Save” to add the network.
Congratulations! You have successfully set up Metamask and added the Matic mainnet to your wallet. You can now start using Metamask to interact with Matic-based dapps and explore the Matic ecosystem.
Configuring Network
In order to unlock the Matic mainnet on Metamask, you will need to configure your network settings. Here’s a step-by-step guide on how to do it:
- Open your Metamask extension on your browser.
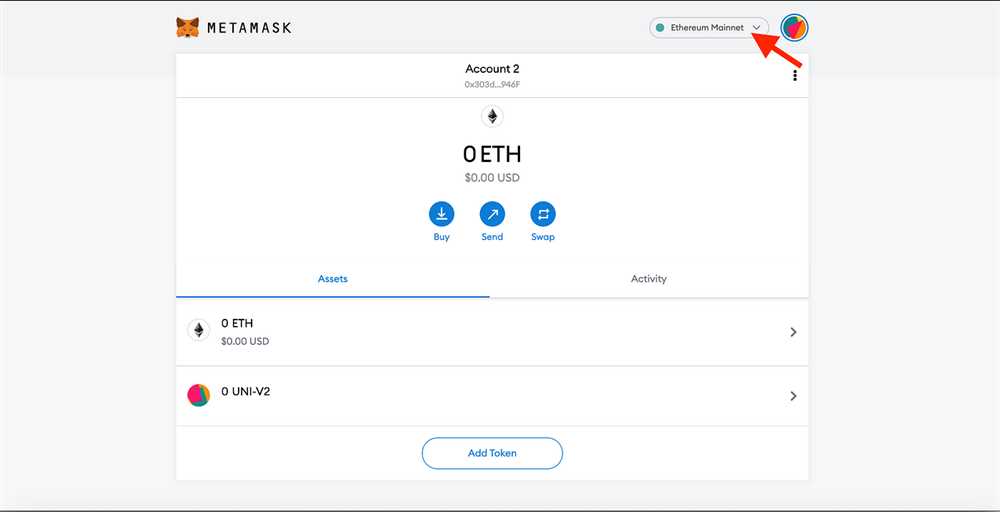
- Click on the network dropdown at the top of the Metamask interface. It will display the current network you are connected to.
- Scroll down and select “Custom RPC” at the bottom of the dropdown list.
- A form will appear where you can input the network details.
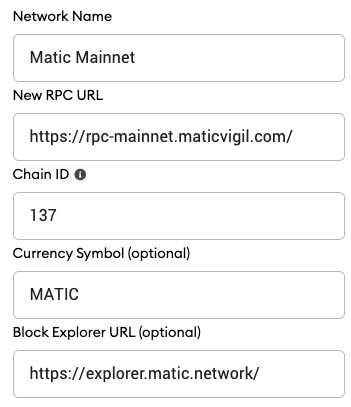
- Fill in the following details:
| Network Name | RPC URL | Chain ID | Currency Symbol |
|---|---|---|---|
| Matic Mainnet | https://rpc-mainnet.maticvigil.com | 137 | MATIC |
- Click on “Save” to save the network configuration.
- Once the configuration is saved, you will see “Matic Mainnet” as one of the networks in the dropdown list. Click on it to switch to the Matic Mainnet.
- You have successfully configured the Matic Mainnet on Metamask! Now you can interact with Matic dApps and use MATIC tokens.
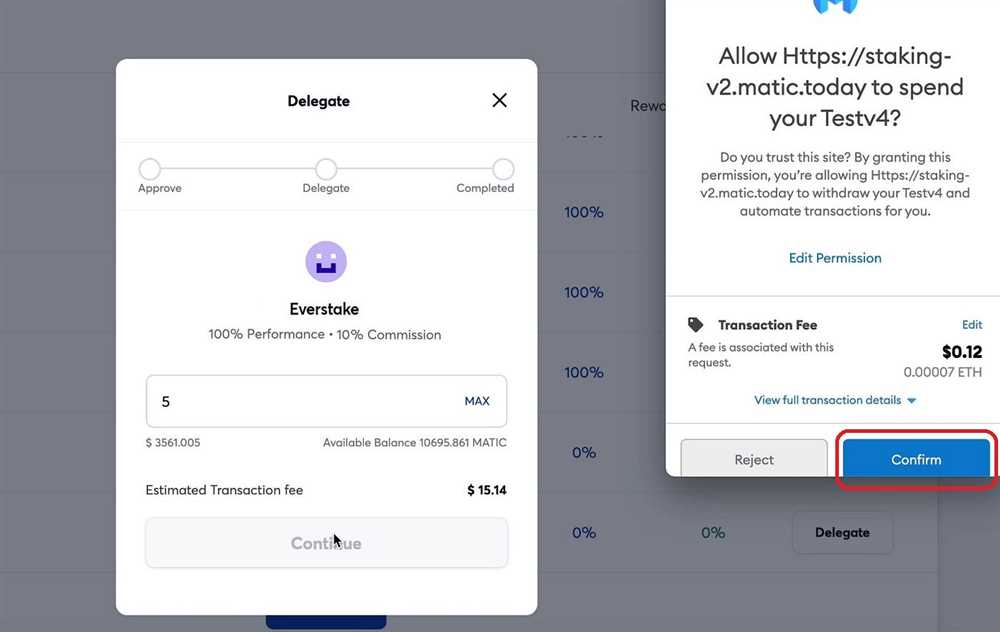
Note: Make sure you have enough ETH in your Metamask wallet to cover any transaction fees when using the Matic Mainnet.
Adding Matic Mainnet
To unlock the Matic Mainnet on your MetaMask wallet, follow these steps:
Step 1:
Open your MetaMask wallet extension in your browser.
Step 2:
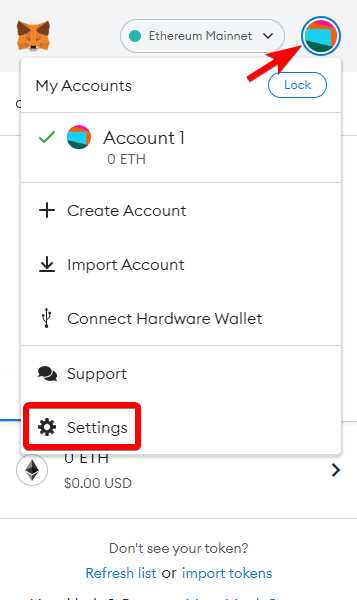
Click on the account icon in the top right corner of the MetaMask wallet interface.
Step 3:
From the account dropdown menu, select “Settings”.
Step 4:
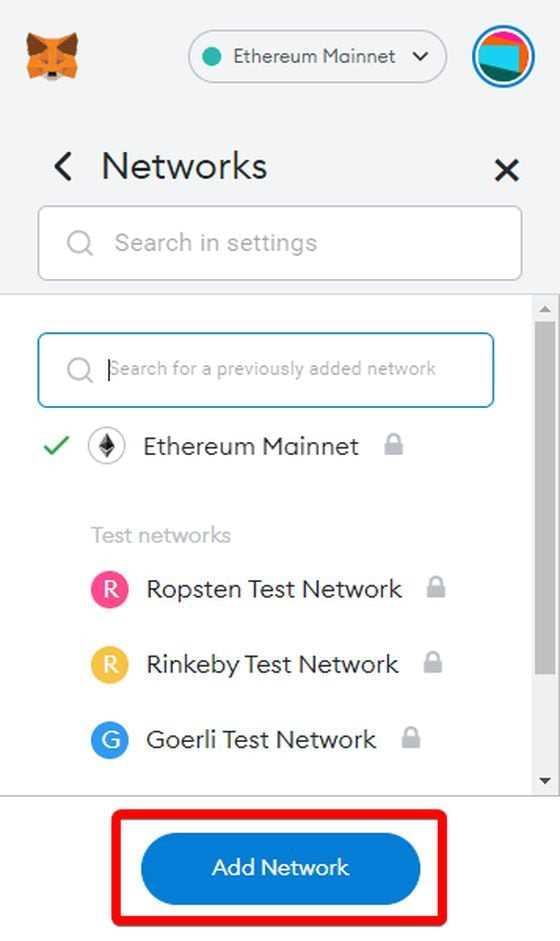
In the settings menu, click on “Networks”.
Step 5:
Click on the “Add Network” button.
Step 6:
Fill in the following details:
Network Name: Matic Mainnet
New RPC URL: https://rpc-mainnet.maticvigil.com/
Chain ID: 137
Symbol: MATIC
Block Explorer URL: https://explorer.matic.network/
Step 7:
Click on the “Save” button.
Step 8:
Make sure that you have selected the Matic Mainnet from the networks dropdown menu on the MetaMask wallet interface.
Now you have successfully added the Matic Mainnet to your MetaMask wallet and can unlock its full potential.
Unlocking Matic Mainnet
Unlocking the Matic Mainnet is a straightforward process that requires using the Metamask wallet. Here is a step-by-step guide to help you unlock the Matic Mainnet:
Step 1: Install Metamask
If you don’t have Metamask installed, you will need to install it first. Metamask is a browser extension wallet that allows you to interact with decentralized applications (dApps) on the Ethereum network.
Step 2: Switch Network to Matic Mainnet
After installing Metamask, click on the network selection dropdown on the top of the Metamask extension. Select the “Custom RPC” option and enter the following details:
- Network Name: Matic Mainnet
- New RPC URL: https://rpc-mainnet.matic.network
- Chain ID: 137
- Symbol: MATIC
- Block Explorer URL: https://explorer-mainnet.maticvigil.com
Click on the “Save” button to save the network settings.
Step 3: Import Matic Mainnet Account
To unlock your Matic Mainnet account, you will need to import it into Metamask. Click on the Metamask extension and select “Import Account”. Enter your Matic Mainnet account’s private key or seed phrase and click on “Import”.
Step 4: Confirm Account Balance
Once you have imported your Matic Mainnet account, you should see your account balance on the Metamask extension. Verify that the balance matches your expectations to ensure that your account is unlocked successfully.
By following these steps, you will be able to unlock the Matic Mainnet on your Metamask wallet and start using decentralized applications on the Matic network.
What is Matic Mainnet?
Matic Mainnet is the main network of Matic, a Layer 2 scaling solution for Ethereum. It aims to provide faster and cheaper transactions compared to the Ethereum mainnet.
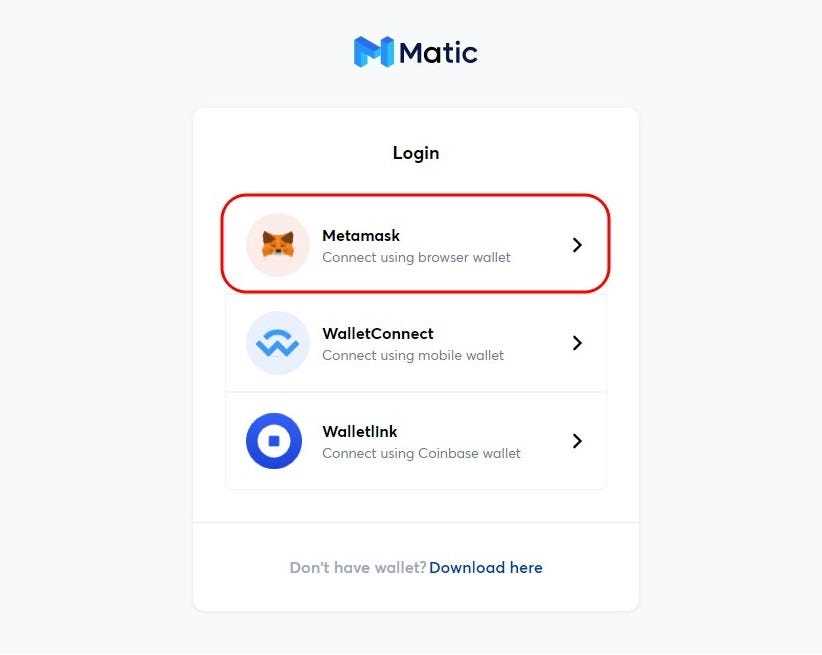
What is Metamask?
Metamask is a cryptocurrency wallet and browser extension that allows users to interact with decentralized applications (dApps) on the Ethereum blockchain. It acts as a bridge between users and the Ethereum network.
Why would I want to unlock Matic Mainnet using Metamask?
Unlocking Matic Mainnet using Metamask allows you to access and interact with decentralized applications that are built on the Matic network. It also enables you to take advantage of the faster and cheaper transactions offered by Matic Mainnet.
How do I unlock Matic Mainnet using Metamask?
To unlock Matic Mainnet using Metamask, you need to follow these steps: 1. Open your Metamask wallet. 2. Click on the network dropdown menu and select “Custom RPC”. 3. Enter the Matic Mainnet details, such as the network name, RPC URL, chain ID, and currency symbol. 4. Click “Save” and you should now be connected to the Matic Mainnet.
What are the benefits of using Matic Mainnet?
Matic Mainnet offers several benefits, including faster transaction speeds, lower transaction fees, and improved scalability compared to the Ethereum mainnet. It also supports the use of Ethereum-compatible tokens and smart contracts, making it easier for developers and users to migrate their applications and assets to the Matic network.