
Metamask is a popular Ethereum wallet that allows users to manage their digital assets and interact with decentralized applications (dApps). One of the main features of Metamask is the ability to send and receive tokens. Whether you are new to crypto or an experienced user, this ultimate guide will provide you with valuable tips and tricks for sending tokens to Metamask.
1. Connecting Metamask to your favorite Ethereum wallet.
Before you can send tokens to Metamask, you need to connect your wallet to your preferred Ethereum wallet. Metamask supports various wallets, including Ledger, Trezor, and Coinbase Wallet. To connect your wallet, simply go to the Metamask settings, click on “Connect Hardware Wallet,” and follow the instructions provided by your wallet provider.
2. Adding custom tokens to Metamask.
If you want to send tokens that are not listed by default in your Metamask wallet, you need to add them as custom tokens. To do this, open Metamask, click on the account profile picture, select “Add Token,” and provide the contract address, token symbol, and decimal places. Once added, the tokens will appear in your Metamask wallet, and you can easily send them to other addresses.
3. Double-checking the recipient’s address.
When sending tokens to Metamask, it is crucial to double-check the recipient’s address to avoid any mistakes. Blockchain transactions are irreversible, meaning that if you send tokens to the wrong address, you might lose them forever. Always verify the address by copying and pasting it from a trusted source or scanning the recipient’s QR code.
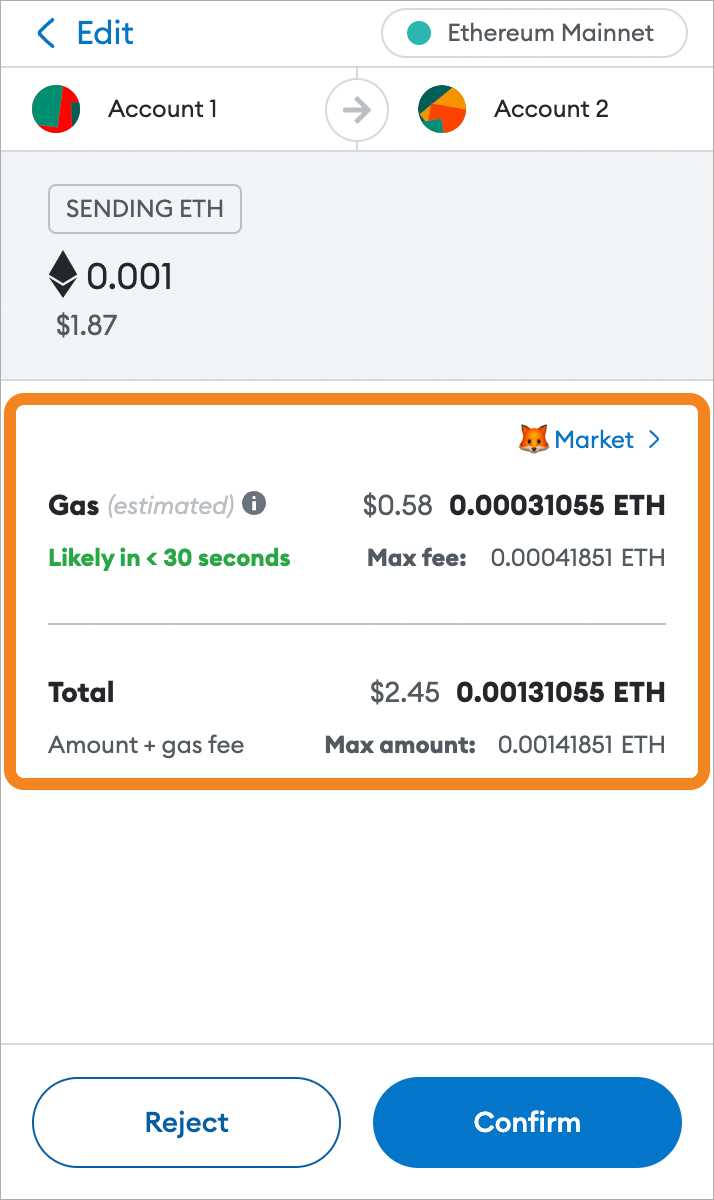
4. Setting the correct gas fees.
Gas fees are a critical aspect of the Ethereum network and determine the speed and cost of your token transactions. When sending tokens to Metamask, make sure to set the appropriate gas fees to ensure timely confirmation and avoid unnecessary expenses. You can check the current gas prices on platforms like gasnow.org and adjust the fees accordingly in the Metamask transaction settings.
5. Confirming the transaction details.
Prior to finalizing the token transfer, take a moment to review and confirm all the transaction details displayed in Metamask. Verify the token amount, recipient address, gas fees, and any additional information required by the token’s smart contract. This extra step will help prevent any mistakes or potential losses during the token sending process.
By following these tips and tricks, you can enhance your experience when sending tokens to Metamask. Remember to always stay vigilant and double-check every detail before confirming any transaction. Happy token sending!
What is Metamask and How Does it Work

Metamask is a browser extension that allows users to interact with the Ethereum blockchain. It serves as a digital wallet for storing and managing Ethereum and ERC-20 tokens. With Metamask, users can securely access decentralized applications (dApps) directly from their browsers without the need for a separate wallet.
Key Features of Metamask

Metamask provides several key features that make it a popular choice among Ethereum users:
- Wallet Management: Metamask enables users to create multiple wallets, manage private keys, and securely store their funds.
- Secure Browsing: It acts as a secure bridge between the user’s browser and the Ethereum blockchain, allowing them to browse and interact with dApps safely.
- Token Support: Metamask supports a wide range of Ethereum tokens, including popular ERC-20 tokens.
- Transaction History: Users can easily track their transaction history within the Metamask interface.
- Ethereum Network Support: Metamask supports multiple Ethereum networks, such as the mainnet, testnets, and custom networks.
- Integration with Other Services: It can be integrated with various wallets, exchanges, and dApps to provide a seamless user experience.
How Metamask Works
Metamask works by injecting a JavaScript library into the user’s browser, which enables them to interact with the Ethereum blockchain. Here’s a simplified overview of the process:
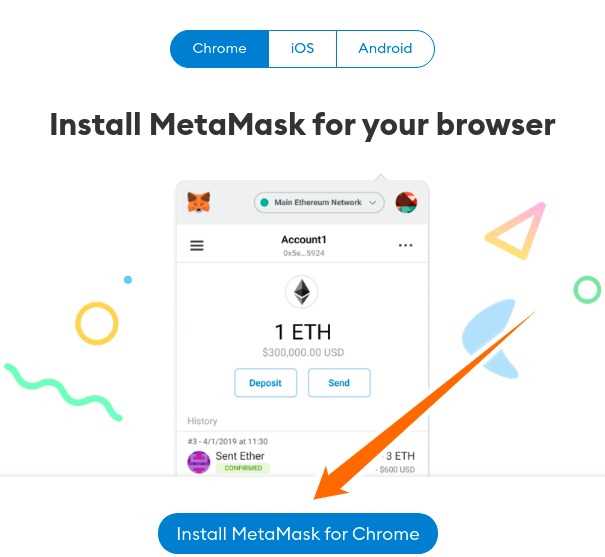
- Installation and Setup: Users install the Metamask browser extension and set up their wallets by creating a new one or importing an existing one using their private key or seed phrase.
- Connecting to the Ethereum Network: After setting up their wallet, users can connect to the Ethereum network of their choice through the Metamask interface.
- Interacting with dApps: Once connected, users can browse and interact with dApps by approving transactions, signing messages, and accessing their wallet’s balance.
- Transaction Confirmation: When a user initiates a transaction, Metamask prompts them to review and confirm the details before broadcasting it to the Ethereum network.
- Transaction Verification: Once the transaction is broadcasted, users can track its progress on the Ethereum network and view the transaction status within Metamask.
Overall, Metamask simplifies the process of interacting with the Ethereum blockchain by providing a user-friendly interface and secure wallet management features. It bridges the gap between users and decentralized applications, making it easier for anyone to leverage the benefits of blockchain technology.
Steps to Send Tokens to Metamask Wallet
Sending tokens to your Metamask wallet is a simple process that allows you to store and manage your tokens securely. Follow the steps below to send tokens to your Metamask wallet:
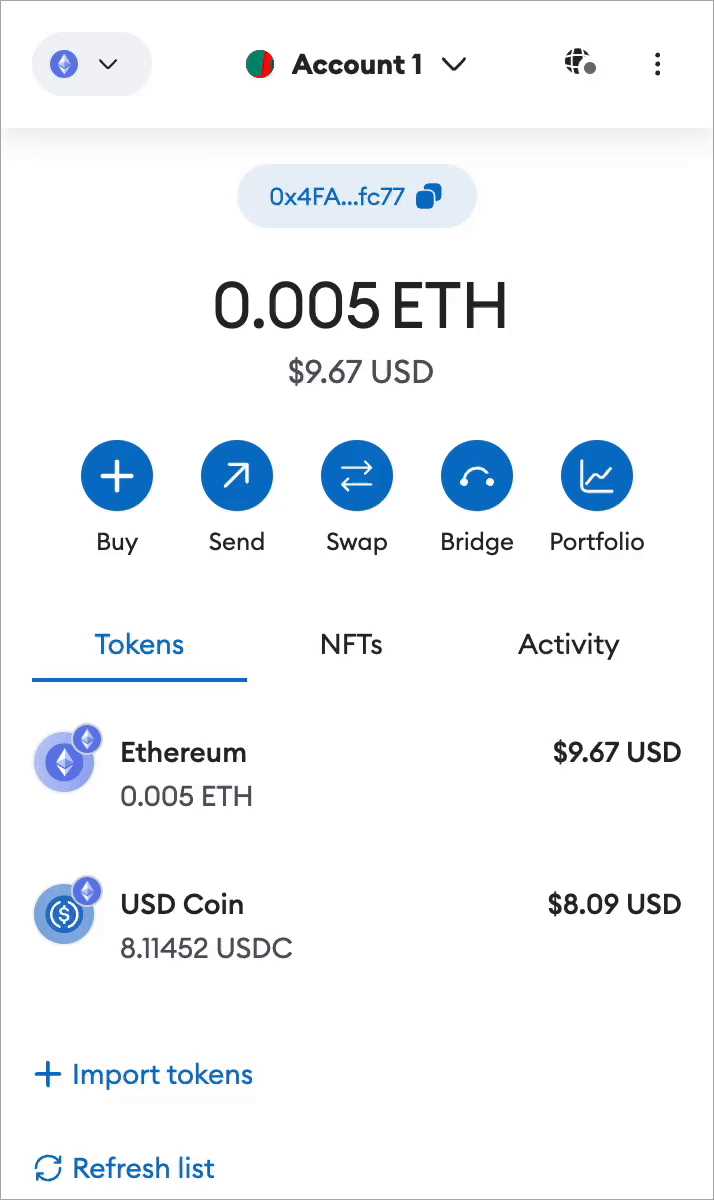
Step 1: Copy your Metamask wallet address
First, open your Metamask extension in your browser and copy your wallet address. This is the address you will use to receive tokens.
Step 2: Access the token you want to send
Next, access the token you want to send. This can be in a cryptocurrency exchange or another wallet. Make sure you have the token address and the amount you want to send available.
Step 3: Add the token to Metamask

In order for the token to appear in your Metamask wallet, you need to add it manually. To do this, click on the “Add Token” button in the Assets tab of your Metamask wallet. Enter the token contract address and follow the prompts to add the token.
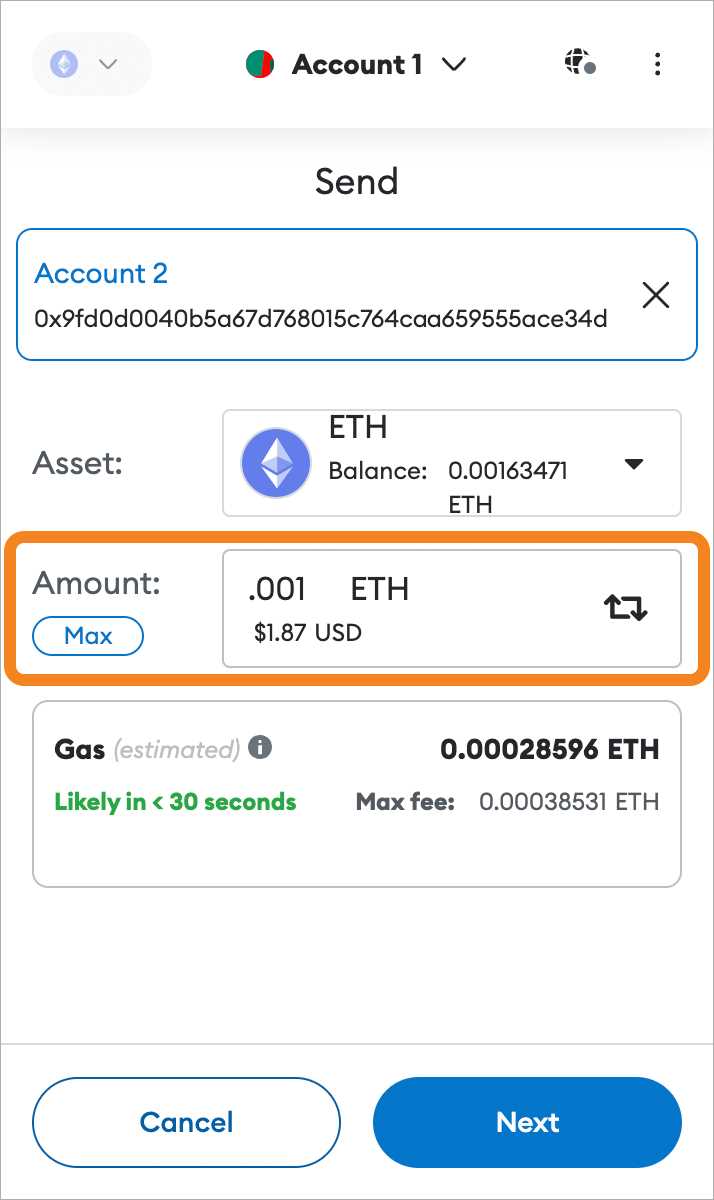
Step 4: Initiate the token transfer
Once the token is added to your Metamask wallet, go to the “Send” tab. Enter the recipient’s wallet address, the amount of tokens you want to send, and any additional details required by the token. Double-check the information to ensure it is accurate.
Step 5: Confirm the transaction

After reviewing the transaction details, click on the “Confirm” or “Send” button to initiate the token transfer. Metamask will prompt you to confirm the transaction and may require you to pay a gas fee in Ether to process the transfer. Confirm the transaction and wait for it to be confirmed on the blockchain.
Step 6: Check the transaction status
Once the transaction is confirmed, you can check the status on the blockchain explorer or within your Metamask wallet. The tokens should now appear in your Metamask wallet, and you can view the transaction details for future reference.
| Step | Description |
|---|---|
| Step 1 | Copy your Metamask wallet address |
| Step 2 | Access the token you want to send |
| Step 3 | Add the token to Metamask |
| Step 4 | Initiate the token transfer |
| Step 5 | Confirm the transaction |
| Step 6 | Check the transaction status |
Tips and Tricks for a Successful Token Transfer
When sending tokens to your Metamask wallet, it’s important to follow a few tips to ensure a successful transfer. Here are some helpful tricks to keep in mind:
- Double-check the recipient address: Before initiating the transfer, always double-check the recipient wallet address. One small typo can result in the loss of your tokens, so take the time to verify the address.
- Ensure sufficient gas: Tokens transfers on the Ethereum network require gas fees. Make sure you have enough ETH in your wallet to cover the gas fees associated with the transfer. Insufficient gas can result in a failed or stuck transaction.
- Set an appropriate gas price: The gas price determines how quickly your transaction will be processed. Setting a too low gas price may result in a delayed transaction, while setting a too high gas price may lead to unnecessary fees. Research the current gas prices and choose an appropriate option based on your needs.
- Be aware of token decimals: Some tokens have decimal places, meaning that you may need to adjust the value when sending them. For example, if a token has 18 decimals and you want to send 10 tokens, you would need to input “10000000000000000000” as the value.
- Consider testing with a small amount: If you’re unsure about the process or new to token transfers, consider sending a small amount of tokens as a test transaction first. This allows you to familiarize yourself with the process and ensure everything goes smoothly before sending a larger amount.
- Keep track of transaction details: After initiating a token transfer, make sure to keep track of the transaction details, such as the transaction hash or ID. This information can be useful for monitoring the progress of your transfer on the blockchain.
- Stay updated on network congestion: The Ethereum network can experience periods of high congestion, which can result in slower transaction times and higher gas fees. Stay updated on the current network congestion to make informed decisions about when to initiate your token transfer.
By following these tips and tricks, you can increase the likelihood of a successful token transfer to your Metamask wallet. Remember to always exercise caution and double-check your actions to avoid any unnecessary mistakes.
How do I send tokens to my Metamask wallet?
To send tokens to your Metamask wallet, you first need to copy your wallet address from your Metamask extension. Then, go to the platform or exchange where you have the tokens and find the option to withdraw or send. Paste your wallet address into the recipient field, specify the amount of tokens you want to send, and confirm the transaction. The tokens will be sent to your Metamask wallet.
Can I send any type of token to my Metamask wallet?
Yes, you can send any type of ERC20 token to your Metamask wallet. Metamask supports a wide range of ERC20 tokens, which are the most common type of tokens on the Ethereum network. However, it’s important to note that Metamask does not support all types of tokens, such as ERC721 tokens. Make sure to check whether the token you want to send is compatible with Metamask before initiating the transaction.