
Metamask is a popular cryptocurrency wallet that allows users to securely store, manage, and interact with their digital assets. One of the key features of Metamask is the ability to deposit funds into the wallet, which enables users to trade, invest, or simply hold their cryptocurrencies.
Depositing funds into Metamask is a straightforward process that can be completed in just a few simple steps. First, you’ll need to ensure that you have an active Metamask wallet and that you’re signed in. If you don’t have a wallet yet, you can easily create one by visiting the Metamask website and following the instructions.
Once you’re signed in to your Metamask wallet, you can deposit funds by navigating to the “Assets” tab and selecting the cryptocurrency you wish to deposit. Metamask supports a wide range of cryptocurrencies, including Bitcoin, Ethereum, and many others. After selecting the desired cryptocurrency, you’ll see a “Deposit” button, which you can click to initiate the deposit process.
The Importance of Depositing Funds

Depositing funds into your Metamask wallet is a crucial step in accessing and utilizing the features and functionalities of the platform. By depositing funds, you ensure that you have a sufficient balance to make transactions, interact with decentralized applications (dApps), and participate in various activities within the Ethereum ecosystem.
1. Seamless Transactions
By depositing funds into your Metamask wallet, you eliminate the need to manually transfer funds every time you want to make a transaction. Having a balance in your wallet allows for seamless and efficient transactions, as you can simply authorize transfers directly from your wallet without the hassle of navigating through multiple external platforms.
2. Access to dApps
Depositing funds into Metamask is essential for interacting with decentralized applications (dApps). Many dApps, including decentralized finance (DeFi) protocols, require users to have a balance in their wallets in order to participate. By depositing funds, you gain access to a wide range of dApps, enabling you to lend, borrow, trade, and engage in other financial activities on the Ethereum blockchain.
| Benefits of Depositing Funds | Explanation |
|---|---|
| Convenience | Having funds readily available in your wallet allows for quick and convenient transactions. |
| Flexibility | With a deposited balance, you can easily switch between different dApps and explore various opportunities within the Ethereum ecosystem. |
| Participation | Depositing funds enables you to actively participate in the decentralized nature of the Ethereum blockchain and contribute to its growth. |
| Rewards | Many dApps offer rewards and incentives to users who have deposited funds, giving you an opportunity to earn additional tokens or benefits. |
Overall, depositing funds into Metamask not only allows for seamless transactions and access to dApps but also opens doors to a multitude of opportunities within the Ethereum ecosystem. By taking this important step, you position yourself to fully embrace the benefits of blockchain technology and participate actively in the decentralized future.
Why Depositing Funds is Essential
Depositing funds into your MetaMask wallet is an essential step for any user looking to engage with decentralized finance (DeFi) applications and cryptocurrencies on the Ethereum network. Here are a few reasons why depositing funds is important:
| Access to DeFi Apps: | By depositing funds into your MetaMask wallet, you gain access to a wide range of DeFi applications such as decentralized exchanges (DEXs), lending platforms, yield farming protocols, and more. These apps allow you to earn interest, trade tokens, and participate in various DeFi strategies. |
| Send and Receive Ether: | With funds in your MetaMask wallet, you can easily send and receive Ether (ETH) and other ERC-20 tokens. This is particularly useful when interacting with other wallets, exchanges, or participating in token sales or initial coin offerings (ICOs). |
| Secure Your Funds: | By depositing funds into your MetaMask wallet, you gain control over your assets and reduce the risk of losing them due to hacks, exchange failures, or centralization issues. MetaMask is a non-custodial wallet, meaning you have sole control over your private keys and funds. |
| Participate in Governance: | Many decentralized protocols and platforms require users to hold certain tokens in order to participate in governance decisions. By depositing funds into your MetaMask wallet, you can actively engage in voting, proposing changes, and shaping the future of the projects you support. |
| Explore the Ethereum Ecosystem: | Depositing funds into MetaMask opens up a world of possibilities within the Ethereum ecosystem. You can interact with smart contracts, join decentralized autonomous organizations (DAOs), and explore innovative blockchain applications across various industries. |
Overall, depositing funds into MetaMask is a crucial step for anyone wanting to fully participate in the exciting world of decentralized finance and the Ethereum ecosystem. It provides access to a wide range of applications, enhances security, and empowers users with control over their assets.
Setting Up Metamask for Deposits
Metamask is a convenient and secure wallet that allows you to interact with decentralized applications (DApps) on the Ethereum blockchain. Before you can start depositing funds into Metamask, you will need to set it up and connect it to your preferred Ethereum network.
Step 1: Install Metamask

The first step is to install the Metamask extension on your web browser. You can find Metamask on the Google Chrome, Firefox, and Brave web stores. Simply search for “Metamask” and click on the “Add to Chrome” or similar button to install it.
Step 2: Create a New Wallet
Once you have installed Metamask, click on the extension icon in your browser toolbar. You will be prompted to create a new wallet or import an existing one. Choose the “Create a Wallet” option and follow the instructions to set up a new wallet. Make sure to choose a strong password and keep it safe.
Step 3: Choose a Security Phrase
After creating a new wallet, Metamask will generate a unique list of 12 random words known as the seed phrase. This seed phrase is used to restore your wallet if you ever lose access to it. Make sure to write down your seed phrase and keep it in a secure place. Do not share it with anyone.
Step 4: Connect to the Ethereum Network
Once your wallet is created, you need to connect Metamask to the Ethereum network. Click on the network dropdown menu in the top center of the Metamask popup and choose the desired network, such as the Ethereum Mainnet or a test network like Ropsten or Kovan.
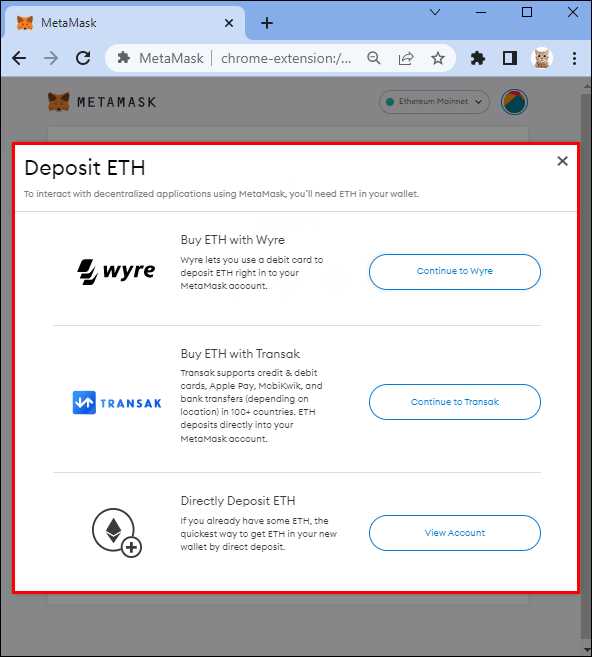
Step 5: Fund Your Metamask Wallet
After connecting to the Ethereum network, you can now deposit funds into your Metamask wallet. There are several ways to do this, such as purchasing ETH from an exchange and sending it to your Metamask address, or receiving ETH from another wallet or person. Make sure to double-check the recipient address to avoid any mistakes.
You have now successfully set up Metamask for deposits. With your wallet connected to the Ethereum network and funds in your wallet, you are ready to start using Metamask to interact with DApps and explore the decentralized finance (DeFi) ecosystem.
Creating a Metamask Wallet
To start using Metamask, you need to create a wallet. Follow these steps to create a new Metamask wallet:
- Install the Metamask browser extension by visiting the official Metamask website or the extension store of your preferred browser.
- Click on the extension icon in your browser toolbar to open Metamask.
- Click on “Get Started”.
- Read and accept the terms of use and privacy policy.
- Create a new password for your Metamask wallet. Make sure to use a strong, unique password and keep it secure.
- Backup your wallet by writing down the secret backup phrase. This phrase is very important and will be used to restore your wallet if you lose access to it.
- Confirm the secret backup phrase by selecting the ordered words in the correct sequence.
- Your Metamask wallet is now created and ready to use!
Remember to never share your secret backup phrase with anyone and keep it in a safe place. With your wallet created, you can now start depositing funds into your Metamask wallet and explore the world of decentralized finance (DeFi)!
Connecting Metamask to Your Browser
In order to start using Metamask, you need to connect it to your browser. Here’s how you can do it:
Step 1: Install Metamask
If you haven’t already done so, you need to install the Metamask extension in your browser. Metamask is available for Chrome, Firefox, and Brave browsers. Visit the browser’s extension store and search for “Metamask”. Once you find it, click on the “Install” button and follow the instructions to add it to your browser.
Step 2: Create a Metamask Account
After installing the Metamask extension, you need to create a new Metamask account. Click on the Metamask icon in your browser’s toolbar and click on “Create a Wallet”. Follow the instructions to set up a new account by providing a strong password and accepting the terms of use.
Step 3: Import an Existing Account
If you already have a Metamask account and want to connect it to your browser, you can import it instead of creating a new one. Click on the Metamask icon in your browser’s toolbar and click on “Import Wallet”. Enter your account’s seed phrase or private key and click on “Import” to connect your existing account.
Step 4: Connect Metamask to Your Browser
Once you have created or imported a Metamask account, you need to connect it to your browser. Click on the Metamask icon in your browser’s toolbar and click on the “Connect” button. You may be prompted to authorize Metamask to access your browser’s data or request certain permissions. Follow the on-screen instructions and click “Allow” to grant the necessary permissions.
After completing these steps, Metamask will be successfully connected to your browser. You can now use Metamask to deposit funds, interact with decentralized applications, and manage your Ethereum wallet directly from your browser.
Depositing Funds into Metamask
In order to start using Metamask and interacting with decentralized applications (DApps), you will need to deposit funds into your Metamask wallet. Here are the steps to deposit funds into Metamask:
- Open your Metamask extension by clicking on the fox icon in your browser.
- If you don’t have a wallet set up, you will need to create one by following the prompts on the screen. Make sure to set a strong password and securely store your wallet seed phrase.
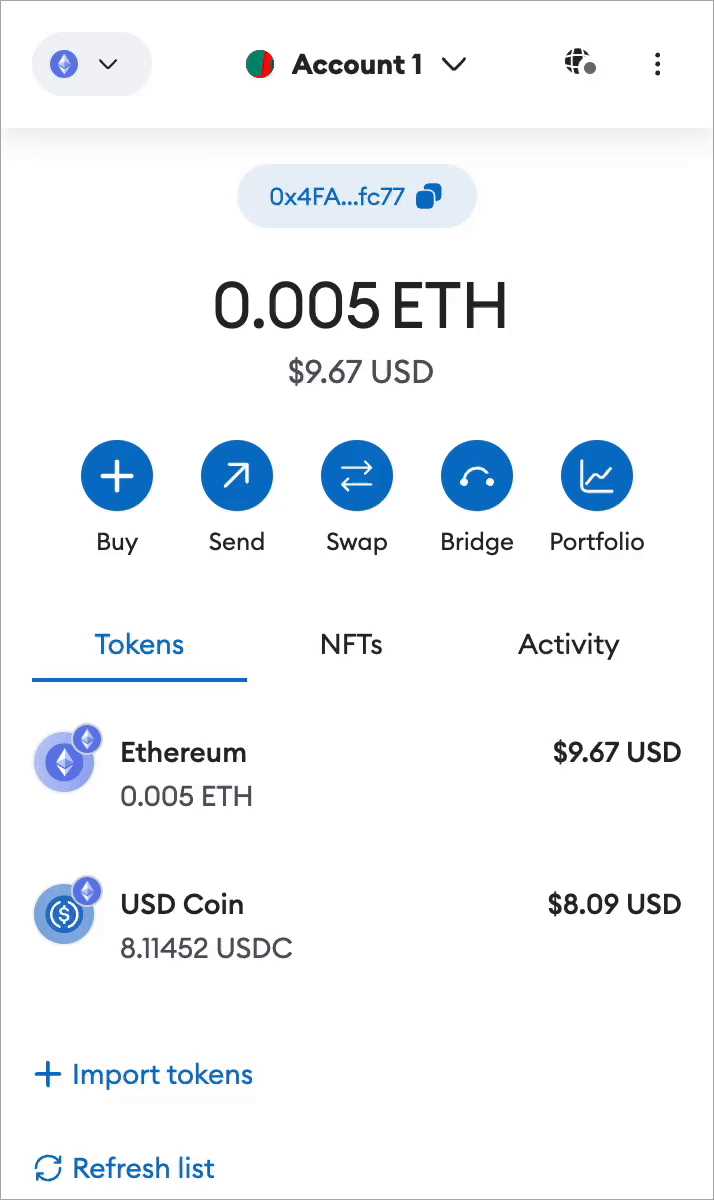
- Once your wallet is set up, click on the account dropdown menu and select the account you want to deposit funds into.
- Click on the “Receive” button to view your wallet’s receiving address.
- Copy the receiving address to your clipboard.
- Go to the platform or exchange where you hold the funds you want to deposit into Metamask.
- Initiate a withdrawal or transfer of funds to your Metamask wallet.
- Paste the receiving address from your clipboard into the appropriate field on the platform or exchange.
- Double-check that the address is correct and confirm the transaction.
- Wait for the transaction to be confirmed on the blockchain, which may take some time depending on network congestion.
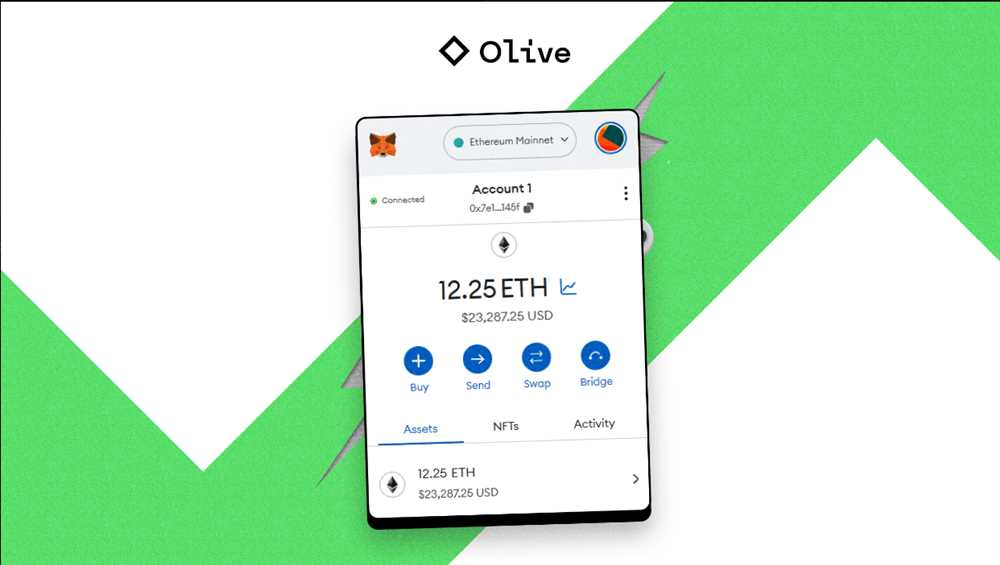
- Once the transaction is confirmed, you will see the deposited funds in your Metamask wallet balance.
It’s important to note that the process may vary slightly depending on the platform or exchange you are using to deposit funds into Metamask. Always double-check the receiving address and make sure you are following the correct steps for the specific platform or exchange.
Now that you have funds in your Metamask wallet, you can start using them to interact with DApps and participate in decentralized finance (DeFi) activities.
Do I need to have Ether to deposit funds into Metamask?
Yes, you need to have Ether (ETH) in your Metamask wallet in order to deposit funds. Ether is the native cryptocurrency of the Ethereum blockchain and is used to pay for transaction fees. You will need to pay a small fee in Ether to complete the deposit transaction.
Can I deposit other cryptocurrencies into Metamask?
Yes, you can deposit other cryptocurrencies into Metamask by using a decentralized exchange (DEX) or a centralized exchange that supports Ethereum. You will need to first convert your desired cryptocurrency into an Ethereum-based token (ERC-20 or ERC-721) and then transfer it to your Metamask wallet address.
Are there any fees for depositing funds into Metamask?
Yes, there are fees associated with depositing funds into Metamask. These fees are known as gas fees and they are required to pay for the execution of smart contracts on the Ethereum blockchain. The fees vary depending on the network congestion and the complexity of the transaction. You can adjust the gas fee in Metamask to prioritize the speed of the transaction or reduce the cost.