
So you’ve been investing in cryptocurrencies and have accumulated a significant amount in your Metamask wallet. Now, you’re ready to cash out and transfer the funds to your bank account. But how do you go about doing that? In this tutorial, we will guide you through the simplest way to cash out your Metamask wallet and transfer the funds directly to your bank account.
Firstly, it’s important to note that in order to cash out your Metamask wallet, you will need to have a verified account on a cryptocurrency exchange that supports fiat withdrawals. Some popular exchanges that offer this service include Coinbase, Kraken, and Binance. Make sure to research and choose an exchange that is trusted and reputable.
Once you have selected an exchange and created an account, the next step is to link your Metamask wallet to the exchange. This can usually be done by connecting your Metamask wallet to the exchange using a wallet address or private key. Follow the specific instructions provided by the exchange to link your wallet successfully.
After your Metamask wallet is linked to the exchange, you will need to initiate a withdrawal request. This can usually be done by navigating to the withdrawal section of the exchange platform and selecting the option to withdraw funds from your linked Metamask wallet. Specify the amount you wish to cash out and choose your bank account as the destination for the funds.
Once you have verified all the details of your withdrawal request, submit the request and wait for the exchange to process it. The processing time can vary depending on the exchange and the amount of funds being withdrawn. Once the withdrawal is processed, the funds will be transferred to your bank account, and you can access them directly.
It’s important to note that withdrawing funds from your Metamask wallet to a bank account may involve fees and additional verification steps, depending on the exchange you choose. Make sure to familiarize yourself with the fees and requirements of the exchange before initiating the withdrawal.
Now that you know the simplest way to cash out your Metamask wallet and transfer the funds to your bank account, you can proceed with confidence. Remember to always prioritize security and choose reputable exchanges to ensure the safety of your funds.
Setting Up Your Metamask Wallet
If you’re new to Metamask, follow these simple steps to set up your wallet:
Step 1: Install the Metamask Extension
First, you’ll need to install the Metamask extension on your preferred web browser. Metamask supports major browsers like Google Chrome, Firefox, and Brave. Visit the browser extension store and search for “Metamask”. Click on the appropriate result and follow the instructions to install it.
Step 2: Create a New Wallet
After installing the extension, you’ll see the Metamask fox icon on your browser toolbar. Click on it to open the wallet interface. From there, click on the “Get Started” button to begin the wallet setup process.
Next, you’ll be prompted to create a new wallet by agreeing to the terms and conditions. Make sure to read them carefully and click on the “I Agree” button if you accept them.
Then, Metamask will ask you to set up a password for your wallet. Choose a strong password that includes a combination of upper and lower case letters, numbers, and special characters. Confirm the password by entering it again in the specified field.
Finally, you’ll be provided with a secret backup phrase or seed phrase. This phrase consists of a series of 12 or 24 words that can be used to restore your wallet in case anything goes wrong. Write down the phrase and store it in a secure place.
Step 3: Connect to a Network
Once you’ve set up your wallet, you’ll need to connect it to a blockchain network. By default, Metamask is set to the Ethereum mainnet. However, you can also connect it to other networks like the Ropsten testnet or the Binance Smart Chain.
To change the network, click on the network dropdown menu at the top of the wallet interface. Select the desired network from the list. If you’re not sure which network to choose, stick with the Ethereum mainnet.
Congratulations! You have successfully set up your Metamask wallet and connected it to a blockchain network. Now you can start using it to store and transact with cryptocurrencies.
Linking Your Bank Account to Metamask
In order to cash out your Metamask wallet funds to a bank account, you need to link your bank account to Metamask. Here’s a step-by-step guide to follow:
Step 1: Install the Metamask Extension
If you haven’t already, install the Metamask extension on your web browser. It’s available for Google Chrome, Firefox, and Brave browsers. Create a new wallet or import an existing one using your seed phrase.
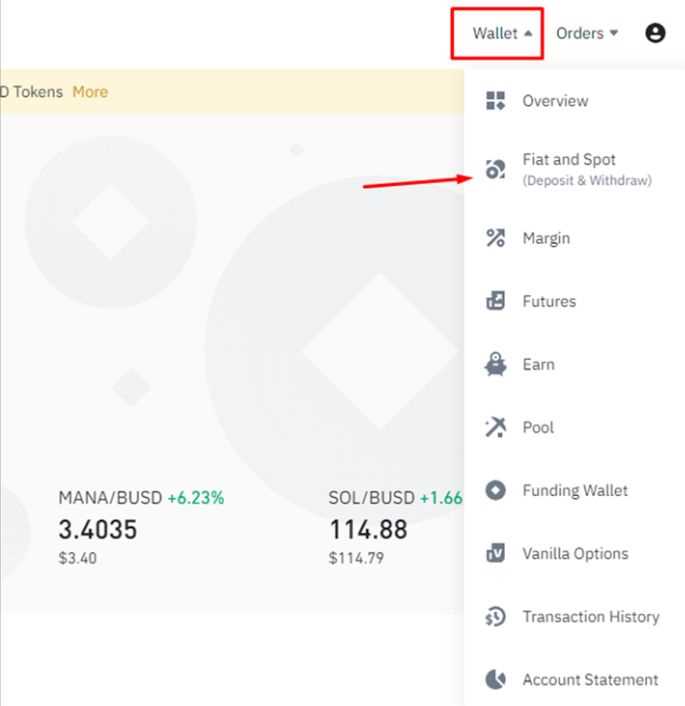
Step 2: Navigate to the Wallet Options
Once Metamask is installed and set up, open the extension and navigate to the wallet options. Click on the three dots in the top right corner of the extension and select “Settings”.
Step 3: Add a Bank Account
In the settings menu, find the “Bank Account” option and click on it to add a bank account. Here, you will need to provide your bank account details, such as your account number, routing number, and the name of the bank.
Step 4: Verify Your Bank Account
After adding your bank account details, Metamask will ask you to verify your account. This is usually done by sending a small amount of money to your bank account and asking you to confirm the exact amount received. Follow the instructions provided to complete the verification process.
Step 5: Cash Out to Your Bank Account

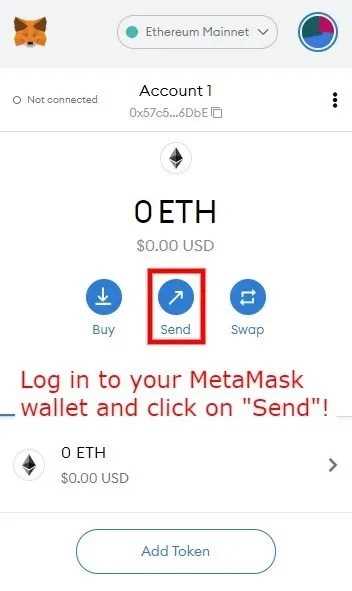
Once your bank account is linked and verified, you can proceed to cash out your Metamask wallet funds to your bank account. Go to the “Transfer” or “Cash Out” section in Metamask and follow the instructions to initiate the transfer. Enter the amount you want to transfer and confirm the transaction.
It’s important to note that the process of linking your bank account to Metamask may vary depending on the platform or exchange you’re using. Always refer to the official documentation or support resources for specific instructions.
Note: Be cautious when linking your bank account to any digital wallet or platform. Make sure that you are using a trusted and secure service, and be aware of any potential risks or fees associated with the transfer process.
Transferring Funds From Metamask to Your Bank Account
Once you have accumulated funds in your Metamask wallet, you may want to transfer them to your bank account to access them in traditional fiat currency. Here are the steps to follow:
Step 1: Verify Your Bank Account
Before you can transfer funds, ensure that your bank account is verified with the necessary information. This typically includes providing your account number, routing number, and other required details.
Step 2: Choose a Cryptocurrency Exchange
In order to convert your cryptocurrency into fiat currency, you will need to use a cryptocurrency exchange. Research and choose a reputable exchange that supports the cryptocurrency you wish to convert.
Step 3: Create an Account on the Cryptocurrency Exchange
Once you have chosen an exchange, you will need to create an account. Provide the required information and complete any verification processes that the exchange requires.
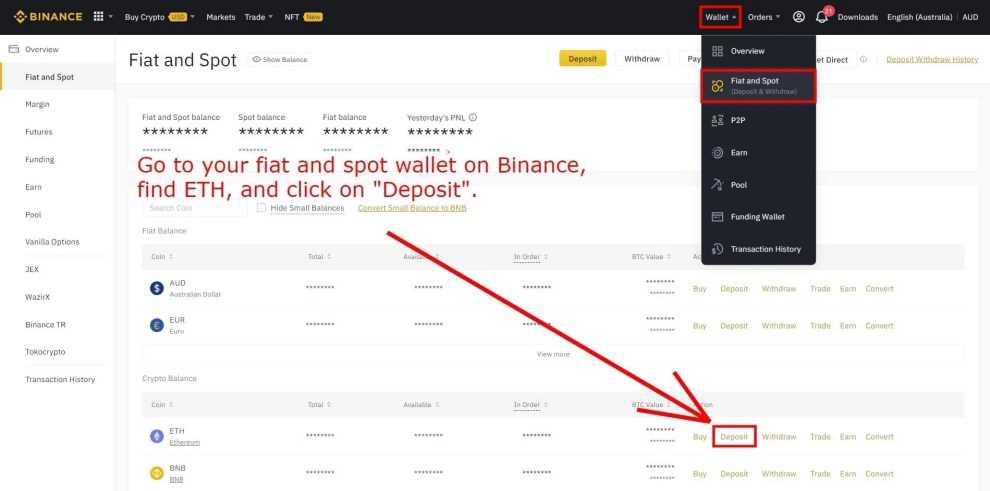
Step 4: Deposit Your Cryptocurrency
Once your account is set up, you can deposit the cryptocurrency from your Metamask wallet to the exchange. Follow the instructions provided by the exchange to ensure a successful deposit.
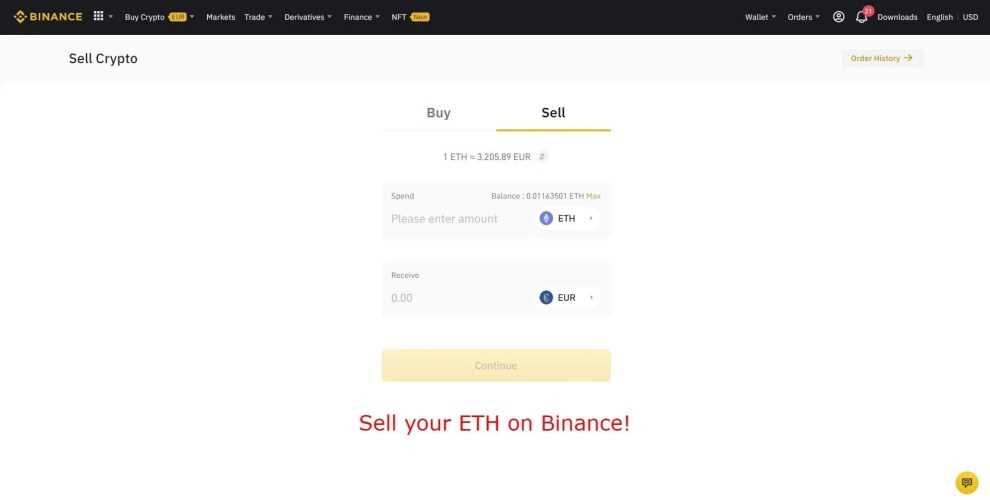
Step 5: Sell Your Cryptocurrency
After depositing your cryptocurrency, you can navigate to the trading section of the exchange and sell your cryptocurrency for fiat currency. Choose the trading pair that corresponds to the cryptocurrency you hold and the fiat currency you wish to receive (e.g., ETH/USD).
Step 6: Withdraw Funds to Your Bank Account
Once you have sold your cryptocurrency for fiat currency, you can proceed to withdraw the funds to your bank account. Follow the withdrawal instructions provided by the exchange, ensuring that you enter the correct bank account details.
Note: Withdrawal fees and processing times may vary depending on the exchange and the method you choose to transfer funds to your bank account. It is recommended to review the exchange’s withdrawal policies before proceeding.
By following these steps, you can easily transfer funds from your Metamask wallet to your bank account and access your funds in traditional fiat currency. Remember to exercise caution when using cryptocurrency exchanges and ensure that you are using reputable platforms for your transactions.
Verifying and Confirming the Transaction
Before finalizing the transaction to cash out your Metamask wallet to a bank account, it is essential to verify and confirm the details to ensure accuracy and prevent any mistakes. Follow these steps to verify and confirm the transaction:
Step 1: Review the Transaction Details
Double-check the transaction details, including the wallet address and the amount you are going to cash out. Make sure that the information is correct and matches your intentions.
Step 2: Check Gas Fees
Verify the gas fees associated with the transaction. Gas fees are the charges for processing the transaction on the Ethereum network. Ensure that you have enough ETH in your Metamask wallet to cover the transaction fees.
Step 3: Confirm the Transaction
Once you have verified the transaction details and ensured that you have sufficient ETH to cover the gas fees, click the “Confirm” button to proceed with the transaction. Metamask will provide you with a summary of the transaction, including the gas fees. Review the summary one last time before proceeding.
Step 4: Wait for Confirmation
After confirming the transaction, you will need to wait for the transaction to be approved and confirmed by the Ethereum network. This process may take some time, depending on network congestion and gas fees. Monitor the progress of the transaction using the Ethereum block explorer or Metamask.
Step 5: Check for Successful Transaction
Once the transaction is confirmed, you can check your bank account to ensure that the funds have been successfully deposited. It may take a few business days for the funds to appear in your bank account, depending on the banking system and any additional processing times.
Step 6: Keep Records and Receipts
Finally, it is important to keep records of the transaction, including transaction IDs, confirmation emails, and any other relevant documentation. These records will be useful for tracking purposes and to address any issues or disputes that may arise.
By following these steps to verify and confirm the transaction, you can ensure a smooth and secure process when cashing out your Metamask wallet to a bank account.
Finalizing the Cash Out Process
Once you have successfully connected your MetaMask wallet to an exchange platform and converted your cryptocurrency to fiat currency such as US dollars, you are almost ready to cash out to your bank account. However, there are a few important steps you need to take to ensure a smooth process.
1. Verify Your Bank Account Information
Before initiating the cash out process, it is crucial to double-check that you have entered the correct bank account information. Make sure the account number, routing number, and beneficiary name are accurate. Any mistakes in these details can result in delayed or failed transactions.
2. Review the Cash Out Terms and Conditions
Before finalizing the cash out process, take the time to read and understand the terms and conditions provided by the exchange platform. Pay close attention to any fees or withdrawal limits that may apply. It is important to be aware of any additional charges or restrictions that could impact the amount you receive in your bank account.
Note: Some exchange platforms may impose minimum withdrawal amounts or charge a fixed fee for cashing out.
3. Initiate the Cash Out Transaction
Once you have verified your bank account details and reviewed the terms and conditions, you can proceed with initiating the cash out transaction. Look for the specific option or button on the exchange platform that allows you to withdraw or cash out your funds.
Tip: Some platforms may require you to go through additional security steps, such as providing a unique transaction code or verifying your identity, before you can complete the cash out process.
4. Monitor the Transaction Status
After initiating the cash out transaction, it is advisable to monitor the status of the transfer closely. The exchange platform may provide a transaction ID or reference number that you can use to track the progress of the transfer.
Keep an eye out for any notifications or updates from the exchange platform regarding the status of your cash out request. If there are any delays or issues, contact the platform’s customer support for assistance.
By following these steps and carefully finalizing the cash out process, you can successfully transfer funds from your MetaMask wallet to your bank account.
Can I transfer money from my Metamask wallet to a bank account?
Yes, you can transfer money from your Metamask wallet to a bank account. This tutorial will show you the simplest way to do it.
Is it easy to cash out my Metamask wallet to a bank account?
Yes, it is relatively easy to cash out your Metamask wallet to a bank account. By following this tutorial, you will be able to do it step-by-step.