
Welcome to our step-by-step tutorial on how to integrate your Ledger wallet with MetaMask! If you are a cryptocurrency enthusiast who uses both Ledger and MetaMask, you probably have had the desire to connect these two powerful tools together for a seamless and secure experience. In this tutorial, we will guide you through the process, providing you with clear and concise instructions so that you can easily integrate your Ledger wallet with MetaMask.
MetaMask is a popular browser extension that allows you to interact with decentralized applications (DApps) on the Ethereum blockchain. It provides a user-friendly interface and allows you to manage your Ethereum accounts and interact with smart contracts. On the other hand, Ledger is a hardware wallet that stores your private keys offline. By integrating your Ledger wallet with MetaMask, you can enjoy the security benefits of Ledger while enjoying the convenience and functionality of MetaMask.
Integrating your Ledger wallet with MetaMask is a straightforward process that only requires a few simple steps. First, you will need to install the Ledger Live software, if you haven’t already done so. Then, you will need to connect your Ledger device to your computer and update the firmware, if necessary. Afterward, you can install the MetaMask extension in your browser and set it up to recognize your Ledger wallet. Once the integration is complete, you will be able to manage your Ethereum accounts and interact with DApps using the combination of your Ledger wallet and MetaMask.
What is Metamask and Why Integrate It with Ledger Wallet?
Metamask is a browser extension that allows users to interact with the Ethereum blockchain. It acts as a digital wallet, allowing users to manage their Ethereum accounts and securely store their private keys. Metamask makes it easy for users to make transactions, sign messages, and interact with decentralized applications (DApps) directly from their web browser.
Integrating Metamask with Ledger Wallet offers an enhanced level of security for Ethereum transactions. By using a hardware wallet like Ledger, users can store their private keys offline, away from the vulnerability of being exposed to the internet. When integrated with Metamask, users can make transactions and sign messages using their Ledger device, adding an extra layer of protection against potential hacks or theft.
Integrating Metamask with Ledger Wallet also allows users to easily manage multiple Ethereum accounts. Ledger supports multiple accounts, and by connecting it to Metamask, users can access and switch between their different accounts seamlessly. This makes it convenient for users who have several Ethereum addresses or who manage multiple wallets for different purposes to keep track of their funds and transactions.
In summary, integrating Metamask with Ledger Wallet provides users with heightened security for Ethereum transactions, the ability to manage multiple accounts, and a user-friendly interface for interacting with the Ethereum blockchain. It is a powerful combination that enhances the overall experience and security of using Ethereum and decentralized applications.
Step 1: Setting up your Ledger Wallet
Before integrating your Ledger Wallet with Metamask, you must first set up and initialize your Ledger device. Follow these steps to ensure your Ledger device is properly prepared:
Step 1.1: Connect your Ledger device
Connect your Ledger device to your computer using the provided USB cable. Make sure your Ledger device is powered on.
Step 1.2: Update firmware
It is important to have the latest firmware installed on your Ledger device to ensure compatibility and security. To update your firmware, open the Ledger Live application on your computer and follow the on-screen instructions to install any available updates.
Step 1.3: Set up a new wallet
Once your Ledger device is up to date, open the Ledger Live application on your computer. Follow the on-screen instructions to set up a new wallet. Make sure to securely record your recovery phrase and set a strong PIN code for your device.
Note: It is essential to properly record your recovery phrase and keep it in a safe and secure location. This recovery phrase is the only way to restore access to your wallet if your Ledger device is lost, stolen, or damaged.
Step 1.4: Install required Ledger apps
To integrate your Ledger Wallet with Metamask, you will need to install the necessary Ledger apps on your device. Open the Ledger Live application and navigate to the Manager section. Search for the Ethereum app and click the “Install” button. Follow the on-screen instructions to install the app. Repeat this process for any other blockchain apps you wish to integrate with Metamask.
Once you have completed these steps, your Ledger Wallet is ready to be integrated with Metamask. Proceed to the next step to learn how to connect your Ledger device to Metamask.
Step 2: Installing and Configuring Metamask
Metamask is a browser extension that allows you to interact with decentralized applications on the Ethereum blockchain. In this step, we will guide you through the process of installing and configuring Metamask on your web browser.
To install Metamask, follow these steps:
- Open the web browser of your choice.
- Go to the Metamask website (https://metamask.io).
- Click on the “Get Chrome Extension” button if you are using Google Chrome browser, or select the appropriate option for your browser.
- The browser will redirect you to the extension store, such as the Chrome Web Store. Click on the “Add to Chrome” button to install Metamask.
- Once the installation is complete, you will see the Metamask icon added to your browser’s toolbar.
Now that you have installed Metamask, you need to configure it with your Ledger wallet. Follow these steps to configure Metamask:
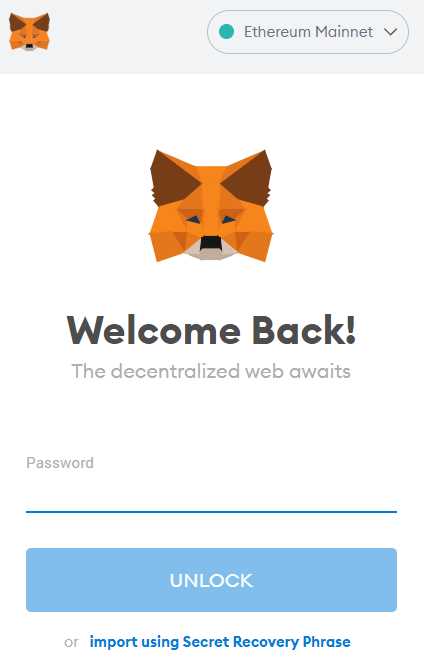
- Click on the Metamask icon in your browser’s toolbar.
- A pop-up window will appear with the Metamask welcome screen. Click on the “Get Started” button.
- You will be presented with the terms of use. Read it carefully and click on the “Accept” button.
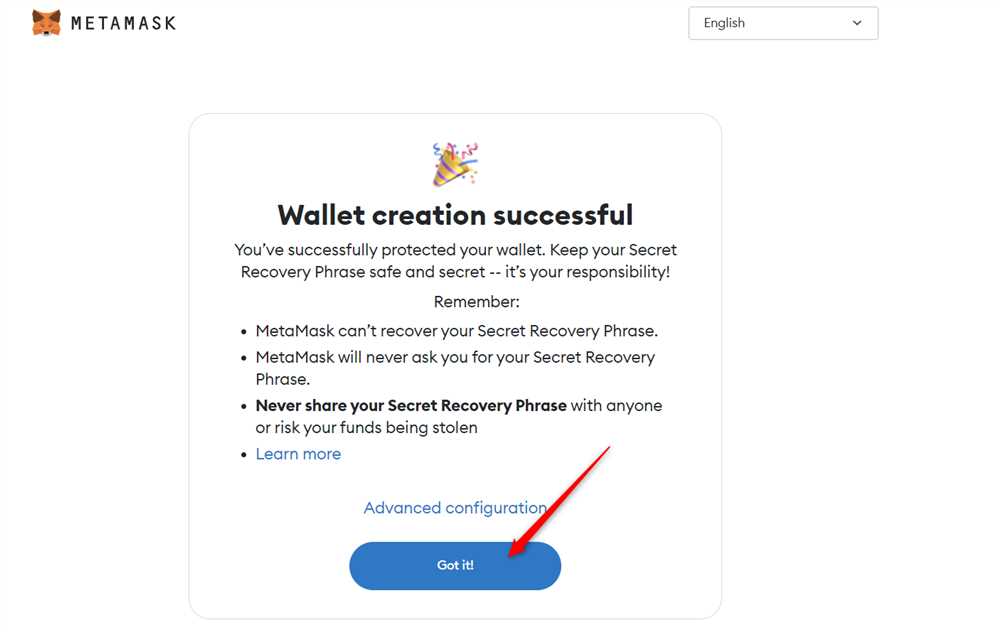
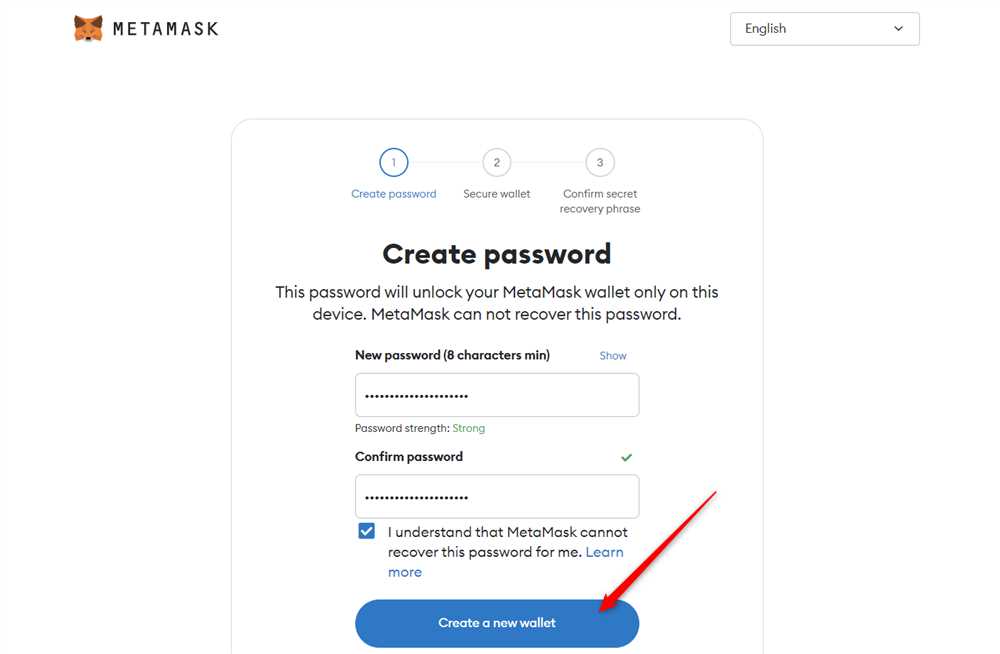
- Create a new wallet by selecting the “Create a Wallet” option. Follow the instructions to set up a password and backup your seed phrase. It is important to keep your seed phrase in a safe place, as it is necessary to recover your wallet.
- Once your wallet is created, click on the account icon in the top-right corner and select “Import Account”.
- On the import page, select the “Hardware” tab and choose “Ledger” from the options.
- Connect your Ledger wallet to your computer and unlock it with your PIN code.
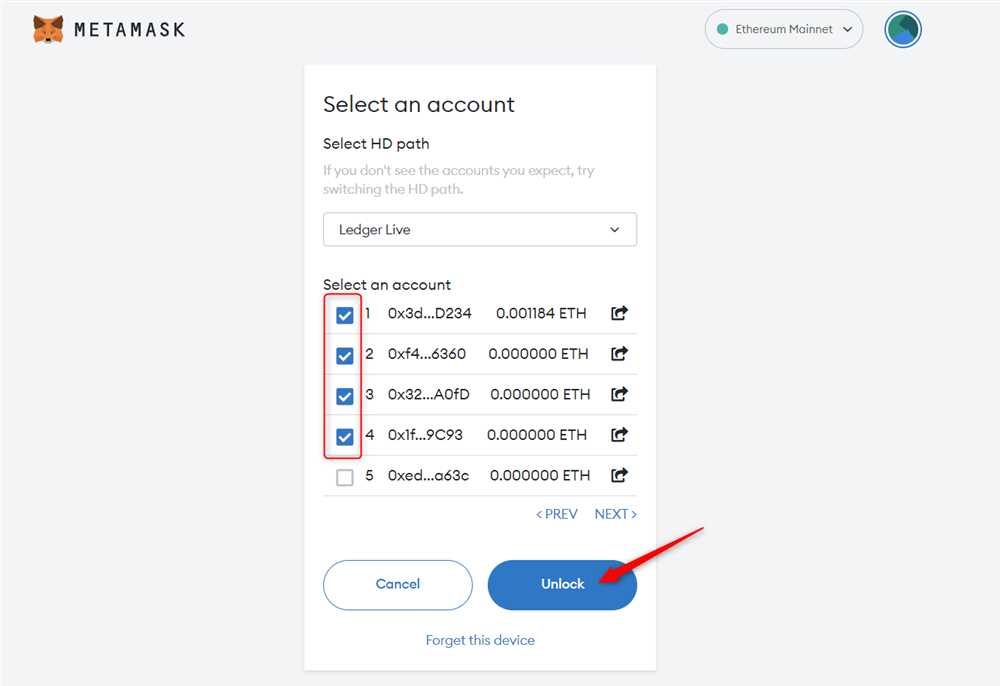
- Click on the “Connect” button in Metamask and select the Ledger wallet you want to use from the list.
- Metamask will display your Ledger account address. Confirm that it matches the address displayed on your Ledger device.
- Your Ledger wallet is now successfully integrated with Metamask. You can now use Metamask to interact with decentralized applications using your Ledger wallet.
Make sure to keep Metamask and your Ledger wallet software up to date to benefit from the latest security features and improvements.
Step 3: Connecting your Ledger Wallet with Metamask
Now that you have set up your Ledger wallet and installed the Metamask extension, it’s time to connect the two together.
Here are the steps you need to follow:
- Open the Metamask extension in your browser.
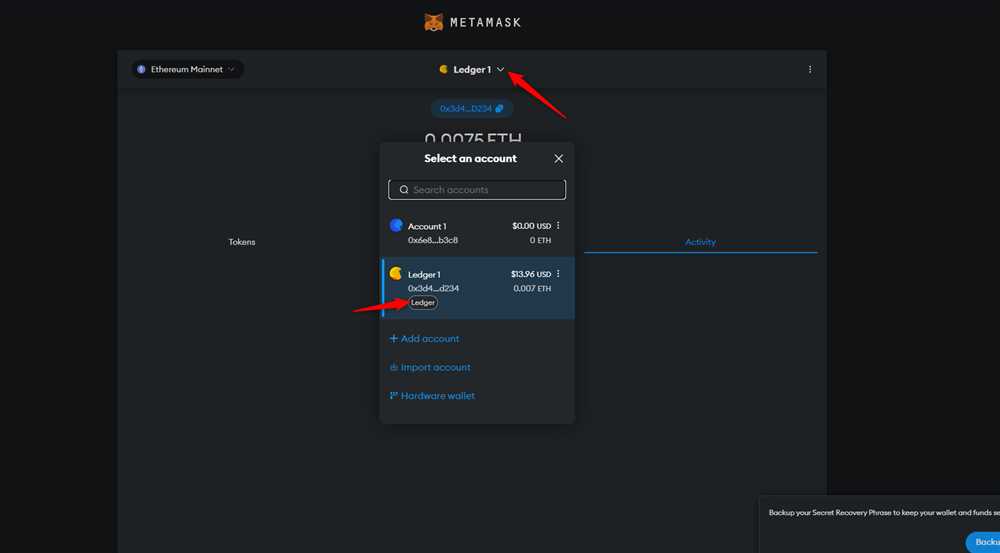
- Click on the profile icon in the top right corner of the Metamask window.
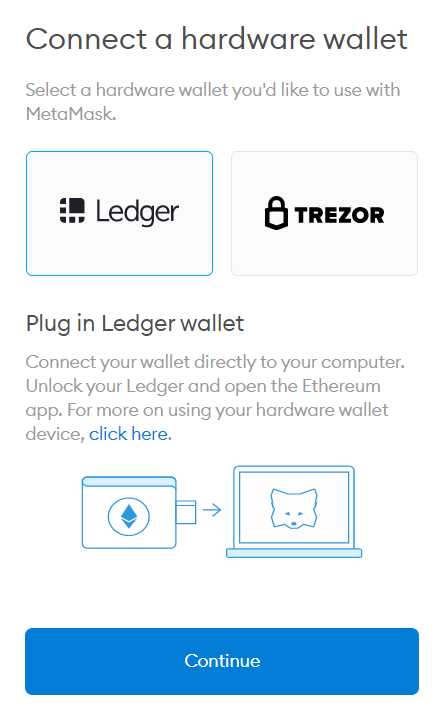
- Select “Connect Hardware Wallet” from the dropdown menu.
- Choose “Ledger” as the type of hardware wallet you want to connect.
- A pop-up window will appear, asking you to confirm the connection. Click on “Connect” to proceed.
- Connect your Ledger device to your computer using the USB cable.
- Unlock your Ledger device and select the Ethereum app.
- In the Metamask window, click on “Connect” to establish the connection.
Once the connection is established, you will see your Ledger wallet displayed as an option in the “Accounts” section of Metamask. You can now use this wallet to interact with Ethereum dapps and manage your ETH and ERC-20 tokens.
Remember to always keep your Ledger device and recovery phrase safe, as they are your keys to accessing your funds. Never share your recovery phrase with anyone and double-check the websites you visit to avoid phishing attempts.
Note: The steps outlined above are for connecting a Ledger wallet specifically. If you are using a different hardware wallet, the process may vary slightly.
What is Metamask?
Metamask is a web browser extension that functions as a cryptocurrency wallet and a gateway to decentralized applications (dApps) on the Ethereum blockchain. It allows users to manage their Ethereum accounts, store ETH and other ERC-20 tokens, and securely interact with dApps directly from their web browser.
Do I need a Ledger Wallet to use Metamask?
No, you don’t need a Ledger Wallet to use Metamask. Metamask can be used with any Ethereum account or wallet. However, integrating your Ledger Wallet with Metamask provides an extra layer of security, as it allows you to securely store your private keys on your Ledger device and sign transactions directly from the device.
Can I use my Ledger Wallet with other wallets besides Metamask?
Yes, you can use your Ledger Wallet with other wallets besides Metamask. Ledger supports integration with various wallet applications, including MyEtherWallet, MyCrypto, and many others. This allows you to access and manage your Ledger Wallet funds using different wallet interfaces, depending on your preferences and needs.