
MetaMask is a popular Ethereum wallet that allows users to store, manage, and interact with decentralized applications (dApps). If you’re new to MetaMask and wondering how to send USDC (US Dollar Coin) to your wallet, this step-by-step guide is for you.
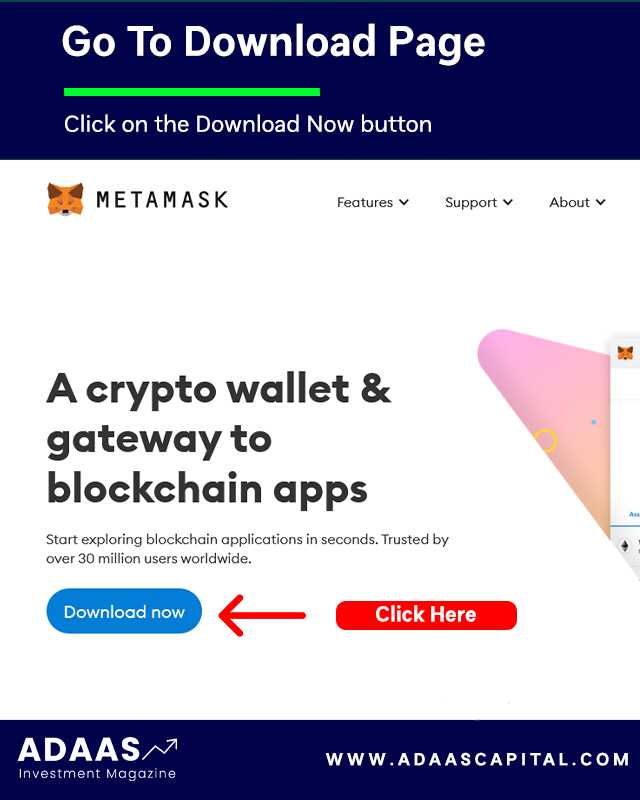
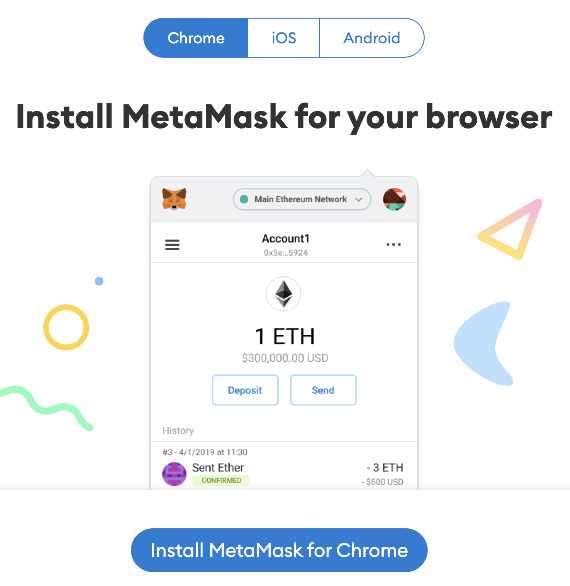
Before you begin, it’s important to note that you’ll need to have an existing MetaMask wallet set up. If you don’t have one yet, you can easily create one by downloading the MetaMask extension for your preferred web browser.
To send USDC to your MetaMask wallet, follow these simple steps:
- Step 1: Login to your MetaMask wallet. Make sure you’re on the correct network (Ethereum mainnet or any other supported network).
- Step 2: Once logged in, click on the “Assets” tab at the bottom of the MetaMask interface. This will show a list of your existing assets.
- Step 3: Scroll down the list and click on the “Add Token” button.
- Step 4: In the “Token Contract Address” field, paste the USDC token contract address: 0xa0b86991c6218b36c1d19d4a2e9eb0ce3606eb48.
- Step 5: MetaMask will automatically fill in the rest of the details, including the token symbol and decimal places. Click on the “Next” button.
- Step 6: Review the token details and click on the “Add Tokens” button to confirm the addition of USDC to your wallet.
- Step 7: Once the USDC token is added to your wallet, go back to the “Assets” tab and locate USDC in the list.
- Step 8: Click on the USDC token and select the “Send” option.
- Step 9: Enter the recipient’s wallet address and the amount of USDC you want to send. Double-check all the details and click on the “Next” button.
- Step 10: MetaMask will show a summary of the transaction. Review the details and click on the “Confirm” button to initiate the transfer.
- Step 11: Wait for the transaction to be confirmed on the blockchain. Once confirmed, the USDC will be successfully sent to the recipient’s wallet.
By following these simple steps, you can easily send USDC to your MetaMask wallet and start participating in the world of decentralized finance (DeFi). Remember to always double-check the recipient’s wallet address and transaction details before confirming any transfer to ensure the security of your funds.
A Beginner’s Guide to Sending USDC to MetaMask
If you’re new to the world of cryptocurrencies and want to send USDC to your MetaMask wallet, you’re in the right place. In this beginner’s guide, we’ll walk you through the step-by-step process to make it easy and hassle-free.
Step 1: Set Up MetaMask
Before you can send USDC to your MetaMask wallet, you’ll need to set it up. This involves installing the MetaMask browser extension and creating a new wallet or importing an existing one.
Step 2: Obtain USDC
In order to send USDC, you’ll first need to obtain some. You can do this by purchasing USDC from a cryptocurrency exchange or receiving it as a payment from someone else.
Step 3: Connect MetaMask to the USDC Wallet
Once you have USDC in your possession, you’ll need to connect your MetaMask wallet to a USDC wallet. This can be done by adding the USDC token to your MetaMask account. You’ll need to copy the USDC contract address and add it as a custom token in MetaMask.
Step 4: Send USDC to MetaMask

Now that you have your MetaMask wallet set up and connected to the USDC wallet, you can send USDC to it. To do this, open your MetaMask wallet, click on the “Send” button, enter the recipient’s MetaMask address, specify the amount of USDC you want to send, and click “Send”. Confirm the transaction and wait for it to be processed.
Important:
Make sure you double-check the recipient’s MetaMask address before sending any USDC. Once a transaction is initiated, it cannot be reversed.
Step 5: Verify the Transaction
After sending USDC to your MetaMask wallet, you should verify the transaction on the blockchain. You can do this by searching for the transaction hash on an explorer like Etherscan. This will provide you with the transaction details and confirm the success of your transfer.
That’s it! You’ve successfully sent USDC to your MetaMask wallet. Now you can use your USDC to participate in decentralized applications, trade it for other cryptocurrencies, or simply hold it as an investment.
Remember to always exercise caution when dealing with cryptocurrencies and only transact with trusted parties.
Step 1: Setting Up MetaMask Wallet
To send USDC to MetaMask, you first need to set up a MetaMask wallet. MetaMask is a popular Ethereum wallet that allows you to manage your Ethereum-based assets and interact with decentralized applications (dApps).
Follow the step-by-step guide below to set up your MetaMask wallet:
| Step | Description |
|---|---|
| 1 | Install the MetaMask browser extension by visiting the official MetaMask website or by searching for “MetaMask” in the Chrome Web Store, Firefox Add-ons, or Microsoft Edge Add-ons. |
| 2 | Once installed, click on the MetaMask icon in your browser’s toolbar. |
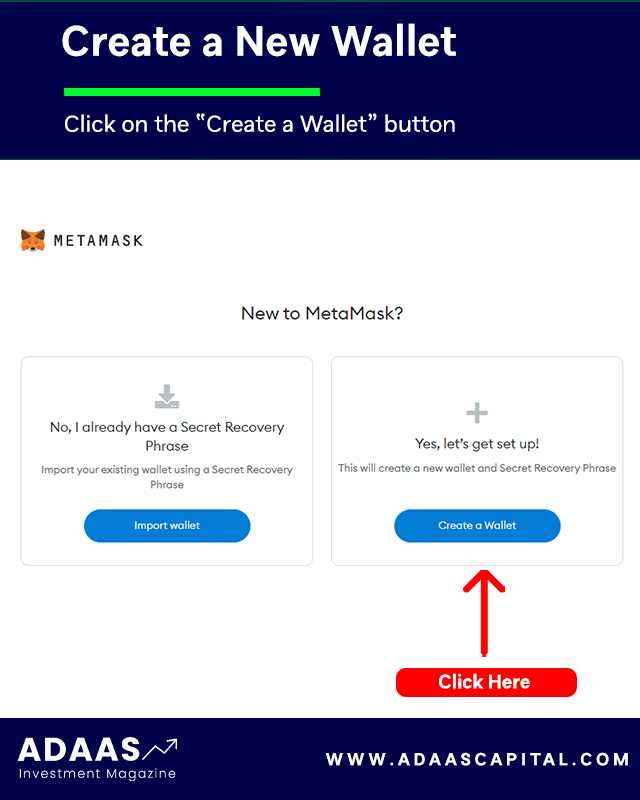
| 3 | Click on “Get Started” to begin the wallet setup process. |
| 4 | Create a new wallet by clicking on “Create a Wallet” and then “Continue”. |
| 5 | Create a strong password for your MetaMask wallet and click on “Create”. Make sure to remember this password as it will be required to access your wallet in the future. |
| 6 | Read and agree to the terms of service by checking the box and clicking on “Agree”. |
| 7 | You will be shown a mnemonic phrase (also known as a seed phrase) consisting of 12 random words. It is extremely important to write down and store this phrase in a safe and secure place. This phrase can be used to restore access to your wallet in case you forget your password or lose access to your device. |
| 8 | Confirm the mnemonic phrase by selecting the words in the correct order and clicking on “Confirm”. |
| 9 | Your MetaMask wallet has now been successfully set up. You can now access your wallet by entering your password. To enhance security, it is recommended to enable additional security features such as biometrics or hardware wallet integration. |
Congratulations! You have completed the first step of setting up your MetaMask wallet. Continue to the next step to learn how to connect your wallet to the Ethereum network and receive USDC.
Step 2: Buying USDC on a Crypto Exchange

Now that you have set up your MetaMask wallet, it’s time to buy USDC (USD Coin) on a crypto exchange. Here is a step-by-step guide on how to do it:
1. Choose a crypto exchange:
There are numerous crypto exchanges available where you can buy USDC. Some popular options include Coinbase, Binance, Kraken, and Bitstamp. Research different exchanges and choose the one that suits your needs in terms of fees, security, and user experience.
2. Create an account:
Once you have selected an exchange, you will need to create an account. This usually involves providing your email address, creating a password, and verifying your identity. Follow the instructions provided by the exchange to set up your account.
3. Deposit funds:
After creating an account, you will need to deposit funds into your exchange wallet. Most exchanges support various deposit methods, including bank transfers, credit/debit cards, and cryptocurrency deposits. Choose the method that is most convenient for you and follow the instructions to deposit funds into your account.
4. Find USDC:
Once your funds are deposited, search for USDC on the exchange. In most cases, you can easily find it by typing “USDC” in the search bar. Make sure you select the correct trading pair, such as USDC/USD or USDC/BTC.
5. Place a buy order:
Now it’s time to place a buy order for USDC. Specify the amount of USDC you want to purchase and review the order details, including the current price and any applicable fees. Once you are satisfied with the details, confirm your purchase.
6. Wait for the transaction to complete:
After placing the buy order, you will need to wait for the transaction to complete. The time it takes depends on the exchange and the current market conditions. You can usually track the progress of your transaction on the exchange’s website or app.
7. Withdraw USDC to your MetaMask wallet:
Once the transaction is complete and you have successfully purchased USDC, it’s time to withdraw it to your MetaMask wallet. Go to your exchange wallet, select USDC, and choose the option to withdraw or send. Enter your MetaMask wallet address as the recipient and confirm the withdrawal.
8. Confirm the transaction:
After initiating the withdrawal, you may need to confirm the transaction by entering a verification code or approving it through email or SMS. Follow the instructions provided by the exchange to complete the withdrawal process.
And that’s it! You have successfully bought USDC on a crypto exchange and are ready to continue with the next step of sending it to your MetaMask wallet.
Step 3: Adding USDC to MetaMask Wallet
Once you have set up your MetaMask wallet and made sure you have some Ether (ETH) in it, you’re ready to add USDC to your wallet. Follow these steps to add USDC:
- Open MetaMask: Click on the MetaMask extension in your browser toolbar or open the MetaMask app on your mobile device.
- Access the Wallet: If you are using the browser extension, click on the MetaMask icon in the toolbar and enter your password to unlock your wallet. If you are using the mobile app, use your PIN or biometric authentication to access your wallet.
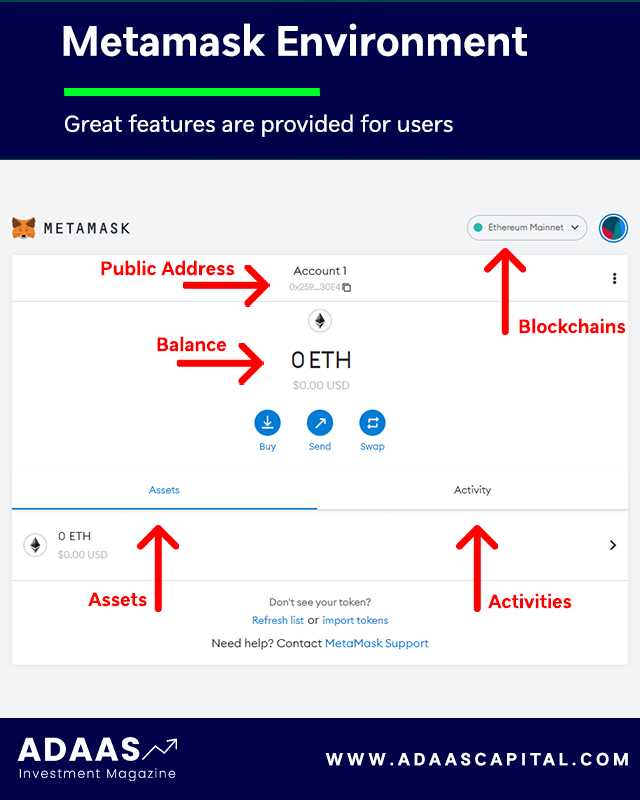
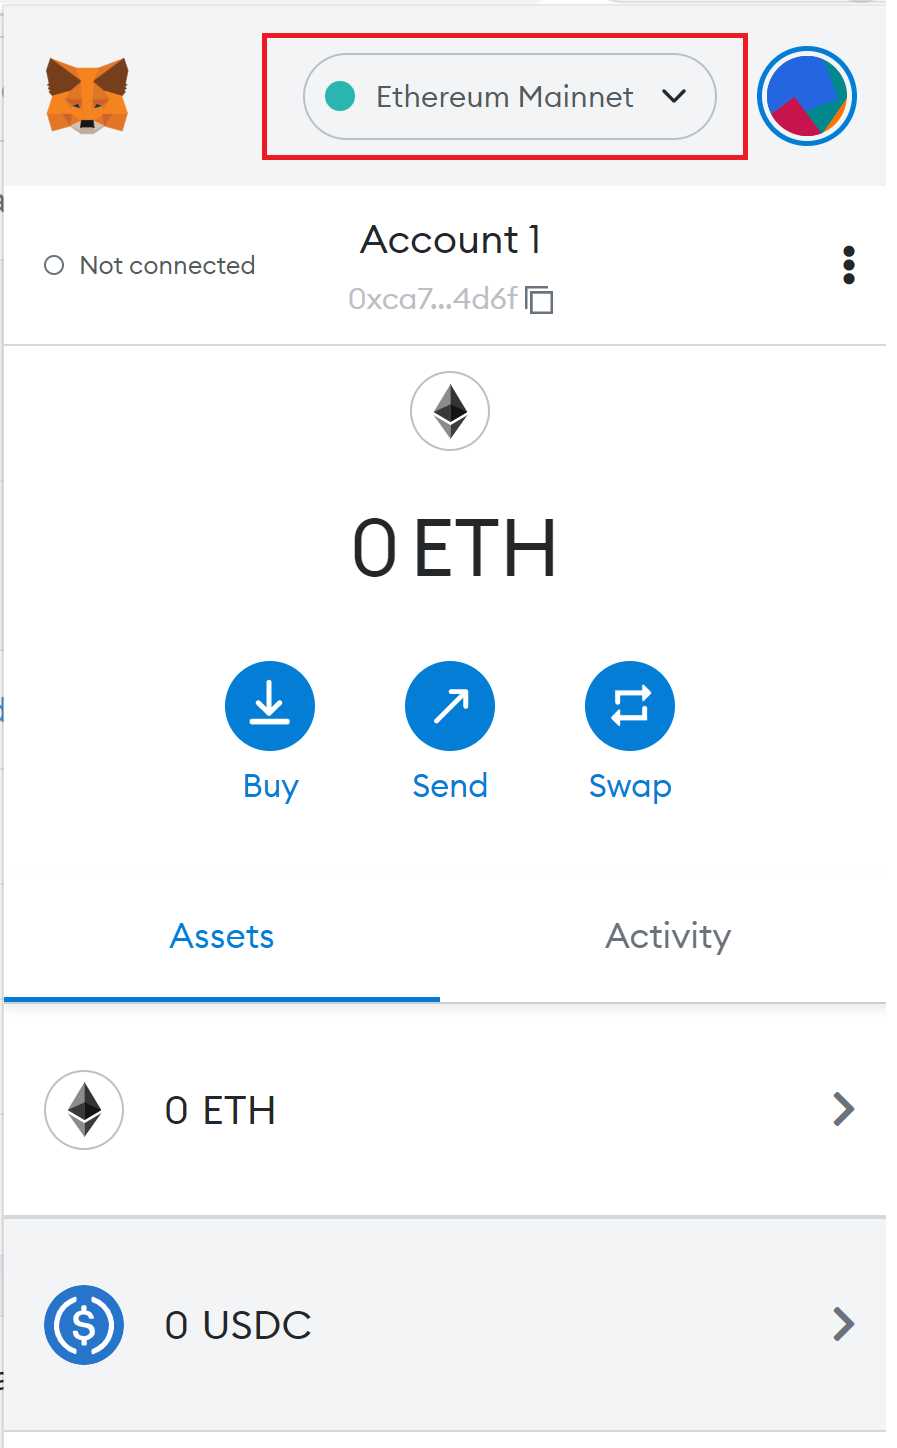
- Switch to Mainnet: In MetaMask, make sure you are connected to the Ethereum Mainnet. You can verify this by checking the network displayed at the top of the wallet.
- Click on the “Assets” tab: In the MetaMask interface, click on the “Assets” tab to view your existing tokens in the wallet.
- Search for USDC: Scroll down the page until you see the “Add Token” button. Click on it to open the token search menu.
- Enter USDC contract address: In the token search menu, enter the USDC contract address: 0xa0b86991c6218b36c1d19d4a2e9eb0ce3606eb48. Make sure the token displayed is “USD Coin (USDC)” and click “Next”.
- Add USDC to MetaMask: On the next screen, you will see a summary of the USDC token. Click on “Add Tokens” to add USDC to your MetaMask wallet.
- Confirmation: A confirmation message will appear, indicating that USDC has been successfully added to your wallet.
Now you have successfully added USDC to your MetaMask wallet! You can view your USDC balance and use it for transactions and interactions with decentralized applications.
Step 4: Sending USDC from MetaMask
Now that you have successfully connected your MetaMask wallet to the USDC token, you can proceed with sending USDC to another address or wallet. Follow the step-by-step guide below:
- Open your MetaMask wallet and ensure that you are on the “Assets” tab.
- Click on the USDC token to select it.
- On the USDC token page, click on the “Send” button.
- Enter the recipient’s wallet address in the “To” field. Make sure to double-check the address to avoid any errors.
- Specify the amount of USDC you want to send in the “Amount” field.
- Review the transaction details, including the gas fees, and make sure everything is correct.
- Click on the “Next” button to proceed to the confirmation screen.
- Confirm the transaction by clicking on the “Confirm” button.
- Wait for the transaction to be processed. This may take some time depending on the network congestion.
- Once the transaction is confirmed, you will be able to see the transaction details and the updated balance of your USDC tokens in your MetaMask wallet.
By following these steps, you can easily send USDC from your MetaMask wallet without any hassle.
What is USDC?
USDC stands for USD Coin, which is a stablecoin pegged to the US dollar. It is a digital currency that can be used for online transactions and is built on the Ethereum blockchain.
How can I send USDC to MetaMask?
To send USDC to MetaMask, you first need to have a MetaMask wallet. Then, you can obtain the USDC tokens from a cryptocurrency exchange or another wallet. Once you have the USDC tokens, you can go to MetaMask, click on the “Assets” tab, select USDC, and click on the “Deposit” button. Follow the instructions to complete the transaction.
Can I send USDC to MetaMask from any wallet?
Yes, you can send USDC to MetaMask from any wallet that supports the Ethereum blockchain. As long as you have the USDC tokens in your wallet, you can transfer them to your MetaMask wallet by following the appropriate steps.
Are there any fees involved in sending USDC to MetaMask?
Yes, there may be fees involved in sending USDC to MetaMask. The fees will depend on the Ethereum network and the current gas prices. When sending USDC, you will see a gas fee estimation, which represents the cost of the transaction. This fee goes to the miners who process the transaction on the Ethereum network.