
If you are new to the world of cryptocurrency, you may have heard about MetaMask, one of the most popular wallets for storing and managing Ethereum and ERC-20 tokens. But before you can start using MetaMask for crypto transactions, you need to add some ETH to your wallet.
In this step-by-step guide, we will walk you through the process of adding ETH to your MetaMask wallet, so you can start sending and receiving Ethereum and participating in the decentralized finance (DeFi) ecosystem.
Step 1: Install MetaMask Extension
The first step is to install the MetaMask extension in your web browser. MetaMask is available as a browser extension for Google Chrome, Firefox, and Brave. Simply visit the respective web store for your browser and search for MetaMask. Install the extension and follow the prompts to set up your wallet.
Step 2: Create a New MetaMask Wallet
Once the extension is installed, click on the MetaMask icon in your browser to open the wallet. Click on “Create a Wallet” to start the setup process. Follow the instructions to create a strong password and back up your wallet seed phrase. Make sure to store the seed phrase in a secure location, as it can be used to restore access to your wallet.
Step 3: Add ETH to Your MetaMask Wallet
Now that your wallet is set up, you need to add some ETH to it. There are several ways to do this, but one of the easiest ways is to use a cryptocurrency exchange. Sign up for an exchange that supports Ethereum and complete the verification process if required.
Note: Make sure to use a reputable exchange and take necessary security precautions when dealing with cryptocurrency.
Step 4: Generate Your MetaMask Wallet Address
Once you have purchased ETH on the exchange, you need to send it to your MetaMask wallet. To do this, you will need your MetaMask wallet address. In MetaMask, click on the account icon and select “Copy Address” to copy your wallet address to the clipboard.
Step 5: Send ETH to Your MetaMask Wallet
Go back to the exchange and navigate to the withdrawal or send funds section. Paste your MetaMask wallet address into the designated field and enter the amount of ETH you want to send. Double-check all the details to ensure accuracy, and then confirm the transaction.
Once the transaction is confirmed, the ETH will be sent to your MetaMask wallet. You can now use your ETH within the MetaMask wallet for various purposes, such as participating in DeFi projects, trading on decentralized exchanges, and more.
Adding ETH to your MetaMask wallet is a crucial step in getting started with Ethereum and the wider world of cryptocurrencies. By following this step-by-step guide, you can securely store and manage your ETH, enabling you to take advantage of the numerous opportunities available in the crypto space.
How to Add ETH to Metamask for Crypto Transactions
To perform cryptocurrency transactions using Ethereum (ETH) on Metamask, you first need to add ETH to your Metamask wallet. Follow these step-by-step instructions to add ETH to your Metamask wallet:
Step 1: Install Metamask Extension
If you haven’t already, install the Metamask browser extension on your preferred web browser. Metamask is available for Chrome, Firefox, and Brave browsers. After installation, create a new wallet or restore your existing wallet using the seed phrase.
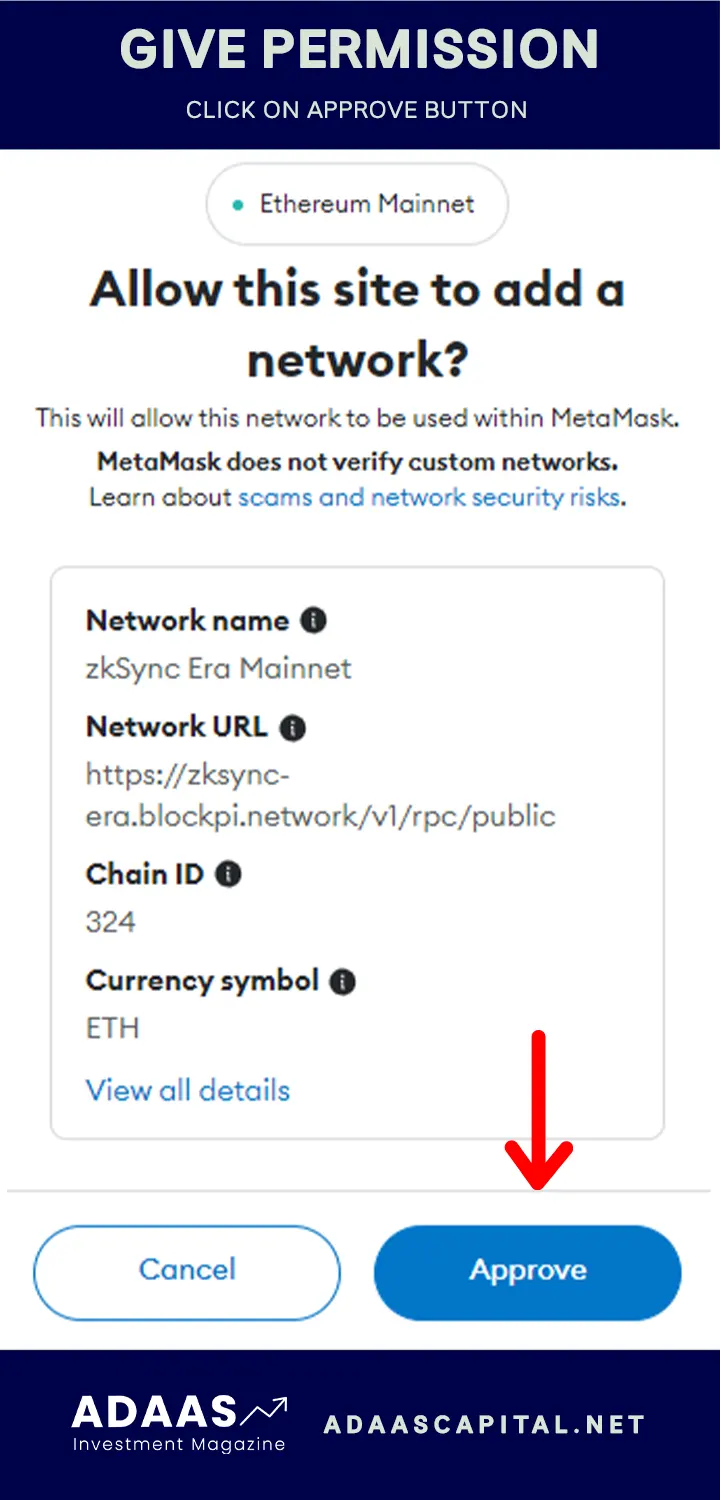
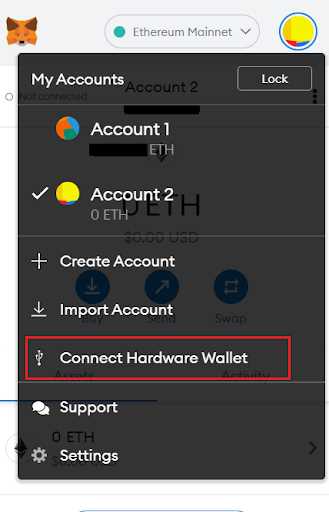
Step 2: Connect Metamask to a Network
Open the Metamask extension and click on the network selection dropdown menu. Choose the network you want to connect to, such as the Ethereum Mainnet or a test network like Ropsten or Kovan. Ensure that the network you choose supports ETH transactions.
Step 3: Receive ETH Address
After connecting to the desired network, click on the account icon in Metamask to view your wallet address. This address is where you will receive ETH. You can copy your address or scan the QR code associated with it.
Step 4: Purchase ETH
There are several ways to acquire ETH, including cryptocurrency exchanges, peer-to-peer marketplaces, and decentralized finance platforms. Choose a suitable method and purchase the desired amount of ETH. Make sure to specify your Metamask wallet address as the destination for the purchased ETH.
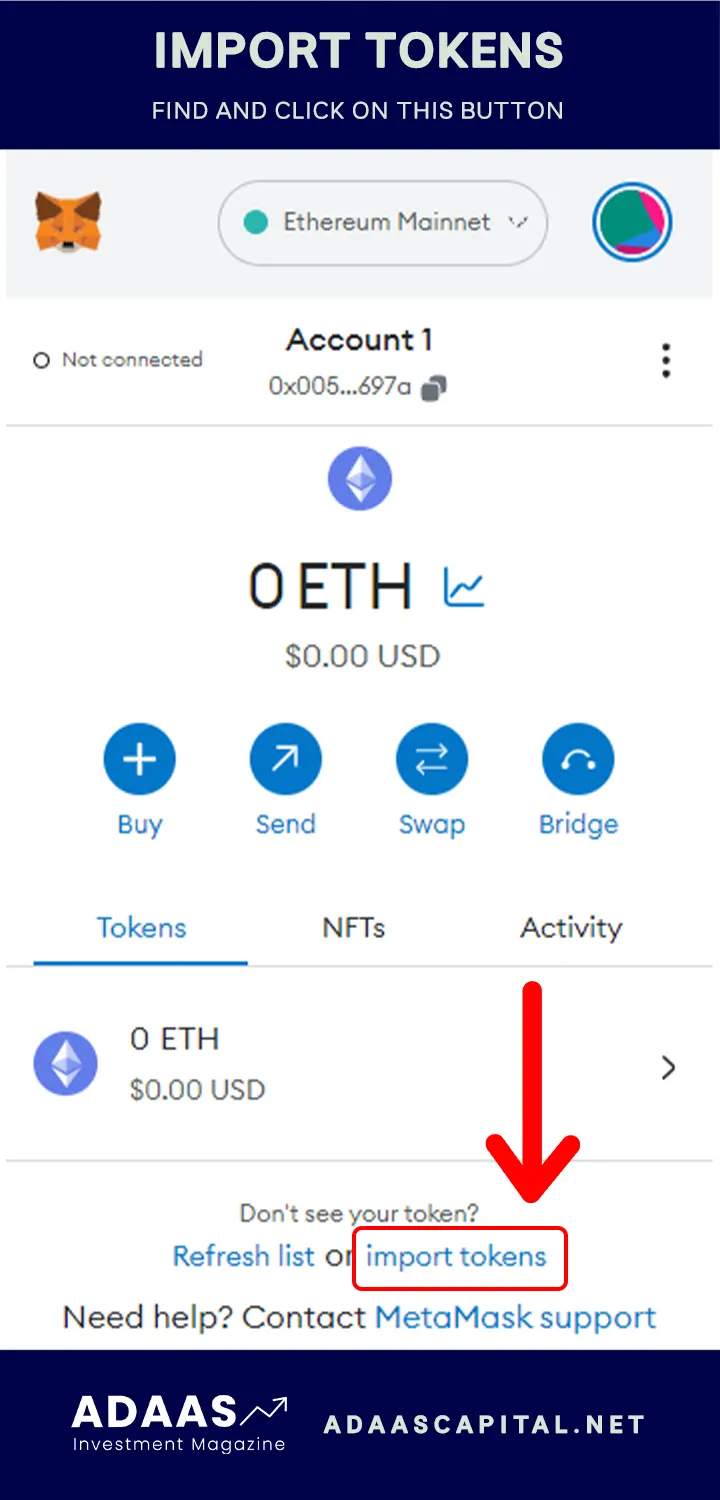
Step 5: Add ETH to Metamask
Once you have purchased ETH, navigate to your Metamask wallet. Click on the “Assets” tab, then select “Add Token” or “Add Custom Token” depending on the version of Metamask you are using. Enter the token contract address, symbol, and decimals for ETH, then click “Add.”
| Token Details | |
|---|---|
| Token Contract Address: | [Enter Token Contract Address] |
| Token Symbol: | [Enter Token Symbol] |
| Decimals: | [Enter Decimals] |
After adding the ETH token to Metamask, you should see your ETH balance reflected in your wallet. You can now use your added ETH to perform cryptocurrency transactions within the Metamask ecosystem.
Remember to exercise caution and perform due diligence when engaging in cryptocurrency transactions. Always double-check the wallet address and the network you are using to prevent any potential loss of funds.
Step 1: Install and Set Up Metamask
The first step in adding ETH to Metamask for crypto transactions is to install and set up the Metamask extension in your browser. Metamask is a digital wallet that allows you to interact with the Ethereum blockchain.
Installation

To install Metamask:
- Open your preferred browser (Chrome, Firefox, or Brave).
- Go to the official Metamask website or search for “Metamask” in your browser’s extension store.
- Click on the “Add to Chrome/Firefox/Brave” button on the Metamask website or in the extension store.
- Follow the instructions to complete the installation process.
Setting Up Metamask
Once Metamask is installed, you need to set up your wallet:
- Click on the Metamask icon in your browser’s toolbar.
- A welcome screen will appear, click on the “Get Started” button.
- You will be prompted to create a new wallet or import an existing one. Choose the option that suits you best.
- If you are creating a new wallet, set a strong password and click on “Create”.
- Metamask will generate a unique 12-word seed phrase. Write it down and store it in a safe place. This phrase is crucial for recovering your wallet if you lose access to it.
- Confirm your seed phrase by selecting the words in the correct order.
- Your wallet is now set up and ready to use! You can customize the wallet name and add any additional accounts you want.
Once you have successfully installed and set up Metamask, you can move on to the next steps to add ETH to your wallet.
Step 2: Create a Wallet
To add ETH to your Metamask wallet, you first need to create a wallet. Follow the steps below to create a wallet:
- Open the Metamask application on your device.
- If you have an existing wallet, click on the profile picture or the account icon on the top right corner of the screen. Then, click on “Create Account” to create a new wallet. If this is your first time using Metamask, proceed to the next step.
- Click on the “Get Started” button.
- Read and accept the terms of service.
- Create a strong password for your wallet. Make sure it is unique and secure.
- Click on “Create” to create your wallet.
- After creating your wallet, you will be given a 12-word seed phrase. Write down this seed phrase and keep it in a safe place. This seed phrase is the only way to restore your wallet if you lose access to it.
- Confirm your seed phrase by entering the words in the correct order. This step is important to ensure that you have written down the seed phrase correctly.
- Once you have confirmed your seed phrase, your wallet will be created and you will be able to see your account address.
- Congratulations, you have successfully created a wallet on Metamask!
Now that you have created your wallet, you can proceed to the next step to add ETH to your Metamask wallet.
Step 3: Purchase ETH
Now that you have set up your Metamask wallet and connected it to your desired exchange, it’s time to purchase some ETH. Here’s how:
1. Log in to your exchange account and navigate to the “Markets” or “Trading” section.
2. Look for the ETH trading pair. It may be listed as ETH/USD or ETH/BTC, depending on the exchange.
3. Once you have located the ETH trading pair, you can place a buy order. Enter the amount of ETH you want to purchase, keeping in mind any minimum order requirements.
4. Review your order details to ensure accuracy, such as the price and total cost of the transaction. Take note of any fees that may apply.
5. Click on the “Buy” or “Place Order” button to confirm your purchase.
6. Depending on the exchange, you may need to wait for the order to be processed and filled by a seller. This can take a few minutes or longer, depending on market conditions.
Note: Make sure you have sufficient funds in your exchange account to cover the cost of the ETH purchase, including any applicable fees.
Once your buy order has been completed and the ETH is credited to your exchange account, you are ready to proceed to the next step of adding ETH to your Metamask wallet.
Remember to keep your exchange account secure and enable any available security features, such as two-factor authentication, to protect your funds.
Step 4: Add ETH to Metamask
Now that you have your Metamask wallet set up, it’s time to add some ETH to it so that you can start making crypto transactions. Here’s a step-by-step guide on how to do that:
Step 1: Purchase ETH
The first thing you need to do is purchase some ETH. You can do this on various cryptocurrency exchanges or platforms. Choose a reputable exchange, create an account, and follow their instructions on how to buy ETH using your preferred method of payment.
Step 2: Generate Deposit Address
Once you have purchased ETH, you’ll need to generate a deposit address on Metamask to receive the funds. Open up your Metamask extension, click on the account icon, and select “Copy Address” to obtain your deposit address.
Step 3: Transfer ETH to Metamask
Go back to the cryptocurrency exchange where you purchased ETH and navigate to the withdrawal or transfer section. Paste your Metamask deposit address into the recipient field and enter the amount of ETH you want to send. Double-check all the details before confirming the transaction.
Step 4: Wait for Confirmation
After initiating the transfer, you’ll need to wait for the transaction to be confirmed on the Ethereum network. This can take a few minutes to a few hours, depending on network congestion. You can track the progress of your transaction using the transaction ID provided by the exchange.
Step 5: Check your Balance
Once the transaction is confirmed, you can check your Metamask wallet to see if the ETH has been successfully added. Open up your Metamask extension and navigate to the account where you made the deposit. You should see your new balance reflected.
That’s it! You have now successfully added ETH to your Metamask wallet. You’re now ready to start using your ETH to make crypto transactions.
Why is it important to add ETH to Metamask for crypto transactions?
Adding ETH to Metamask is important because it allows you to pay for transaction fees on the Ethereum network. Without ETH in your wallet, you won’t be able to make any transactions on the network.
How do I add ETH to Metamask?
To add ETH to Metamask, you can either purchase ETH from a cryptocurrency exchange and transfer it to your Metamask wallet address, or you can receive ETH from someone else by providing them with your Metamask wallet address. Once you have ETH in your wallet, it will automatically be available for use in any transactions you make on the Ethereum network.
Can I use any other cryptocurrency instead of ETH for transactions in Metamask?
No, Metamask only supports transactions in ETH. Other cryptocurrencies may have different blockchains and require their own wallets. If you want to use a different cryptocurrency, you will need to find a wallet that supports that specific cryptocurrency.
What is the advantage of using Metamask for crypto transactions?
The advantage of using Metamask for crypto transactions is that it provides a secure and convenient way to interact with the Ethereum network. It allows you to manage your ETH and interact with decentralized applications (dApps) directly from your browser. Metamask also provides a user-friendly interface for signing transactions and managing your account.