
Welcome to our step-by-step guide on how to send Bitcoin to your Metamask wallet! Metamask is a popular browser extension wallet that allows you to securely store and manage your Ethereum-based assets, including Bitcoin. By following this easy guide, you will learn how to transfer Bitcoin from your existing wallet to your Metamask wallet, giving you greater control over your digital assets.
Step 1: Install Metamask
If you haven’t already done so, the first step is to install the Metamask wallet. Simply visit the Metamask website and download the extension for your preferred browser. Once installed, create a new wallet or import an existing one by following the instructions provided. Remember to securely store your recovery phrase in case you need to restore your wallet in the future.
Step 2: Access Your Bitcoin Wallet
In order to send Bitcoin to your Metamask wallet, you will first need to access your existing Bitcoin wallet. This can be a hardware wallet, software wallet, or an exchange account. Open your Bitcoin wallet and navigate to the send or withdrawal section, which will allow you to initiate a transaction.
Step 3: Generate a Receiving Address
In your Metamask wallet, click on the account icon to view your wallet address. This will be a string of alphanumeric characters. Copy this address to your clipboard. Return to your Bitcoin wallet and enter this address as the recipient of the transaction. Double-check that you have entered the correct address to avoid any loss of funds.
Step 4: Initiate the Transaction
Specify the amount of Bitcoin you wish to send to your Metamask wallet. Some wallets may require you to enter the amount in Bitcoin, while others might ask for the amount in a specific fiat currency. Review the transaction details and confirm to initiate the transfer. Depending on the network congestion and fee settings, the transaction may take some time to be confirmed on the Bitcoin network.
By following these simple steps, you can easily send Bitcoin to your Metamask wallet and enjoy the added security and convenience of managing your assets within the Metamask ecosystem. Remember to always double-check addresses and keep your recovery phrase safe to ensure the safety of your digital assets.
How to Send Bitcoin to Your Metamask Wallet
Metamask is a popular cryptocurrency wallet that allows users to securely store and manage their digital assets. While it is primarily known for supporting Ethereum and other ERC20 tokens, you can also use Metamask to send and receive Bitcoin.
Step 1: Set up Metamask Wallet
If you haven’t already, download and install the Metamask wallet extension for your preferred web browser. Follow the instructions to set up your wallet and create a new account.
Step 2: Obtain Your Bitcoin Receiving Address
In order to receive Bitcoin to your Metamask wallet, you’ll need to obtain your Bitcoin receiving address. To do this, open your Metamask wallet and click on the account icon in the top right corner. Select ‘Copy Address’ to copy your Bitcoin receiving address to your clipboard.
Step 3: Purchase Bitcoin
Next, you’ll need to purchase Bitcoin in order to send it to your Metamask wallet. Depending on your location and preference, you can use a cryptocurrency exchange or peer-to-peer marketplaces to buy Bitcoin. Follow the provided instructions to make your purchase.
Step 4: Send Bitcoin to Metamask Wallet
Once you have purchased Bitcoin, navigate to the cryptocurrency exchange or marketplace’s ‘Send’ or ‘Withdraw’ feature. Paste your Metamask wallet’s Bitcoin receiving address into the designated field. Double-check that the address is correct to avoid any potential loss of funds.
Specify the amount of Bitcoin you want to send to your Metamask wallet and complete any additional steps required by the exchange or marketplace.
Note: Bitcoin transactions may take some time to confirm on the blockchain. Be patient and wait for the transaction to be confirmed before proceeding.
Step 5: Verify Your Bitcoin in Metamask Wallet
After the transaction is confirmed, you should be able to see the Bitcoin balance in your Metamask wallet. Open your Metamask wallet and navigate to the ‘Assets’ or ‘Tokens’ section to view your Bitcoin holdings. You can now manage and use your Bitcoin within the Metamask wallet.
Remember to always keep your Metamask wallet and Bitcoin receiving address secure. Be cautious when sharing it and avoid clicking on suspicious links or providing your wallet details to unknown sources.
That’s it! You have successfully sent Bitcoin to your Metamask wallet. Enjoy managing your digital assets securely and conveniently with Metamask.
Step 1: Install and Set Up Metamask Extension
To begin sending Bitcoin to your Metamask wallet, you’ll first need to install and set up the Metamask extension. Metamask is a cryptocurrency wallet that enables you to securely manage your virtual currencies and connect with decentralized applications (DApps) on the Ethereum network.
Here’s how you can install and set up Metamask:
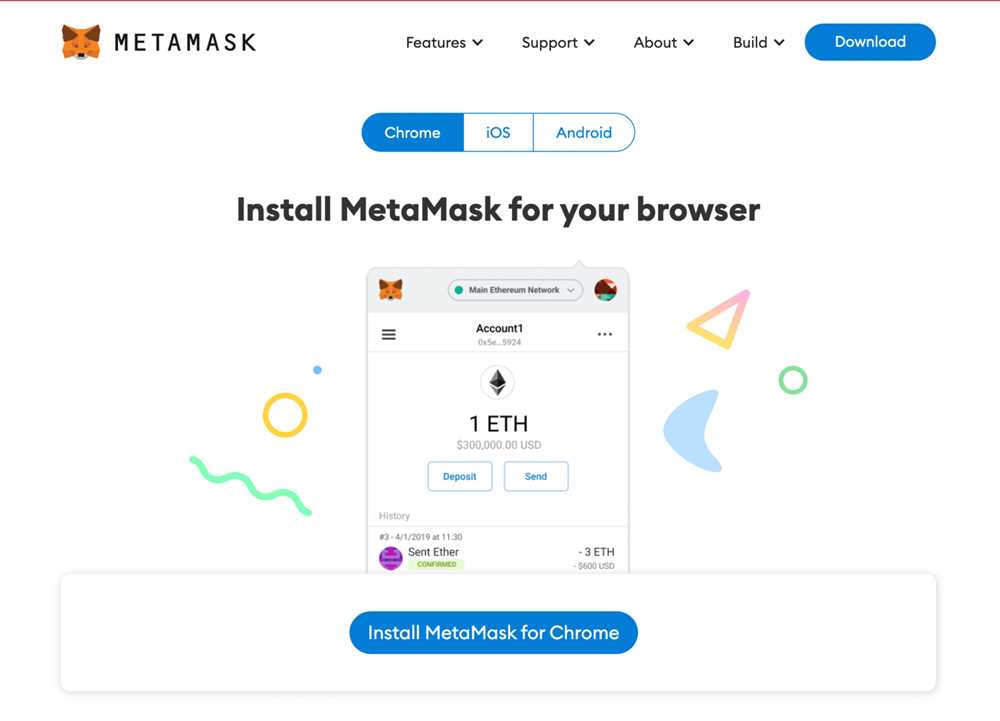
- Open your favorite web browser (Chrome, Firefox, or Brave) and search for “Metamask” in the Chrome Web Store or the respective extension gallery for your browser.
- Click on the “Add to Chrome” (or equivalent) button to start the installation process.
- After the installation is complete, you’ll see the Metamask icon appear in your browser’s toolbar.
- Click on the Metamask icon to open the extension.
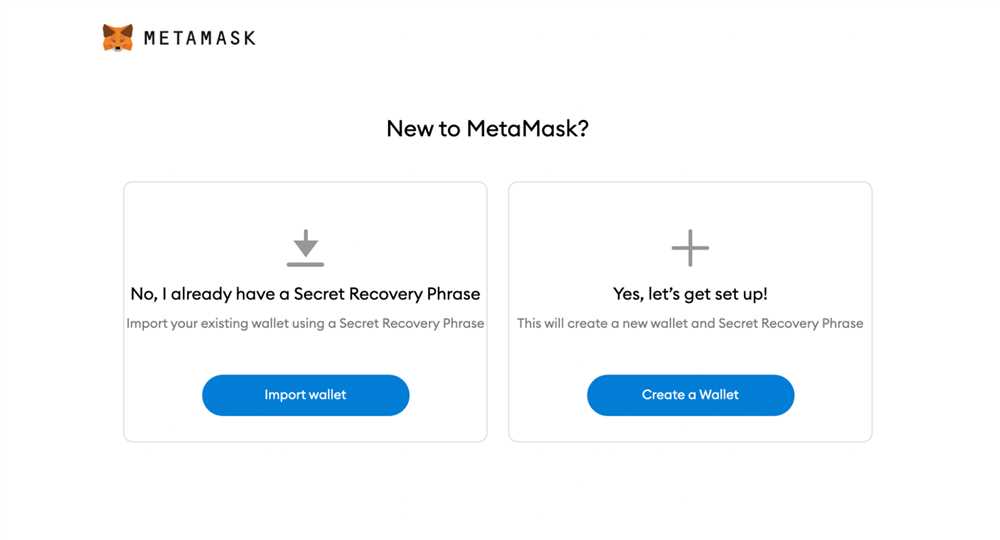
- A new window will appear with a warm welcome from the Metamask team. Click on the “Get Started” button to continue.
- You’ll be presented with two options for creating a new wallet – “Import Wallet” or “Create Wallet.” Select “Create Wallet.”
- Read and accept the terms of use and privacy notice. It’s essential to familiarize yourself with these documents to ensure you understand how Metamask protects your data and operates.
- Set a strong, unique password for your wallet. Ensure it’s a combination of letters, numbers, and special characters to enhance the security of your account.
- Click “Create” to complete the creation of your Metamask wallet.
- Metamask will generate a seed phrase, which acts as a backup for your wallet. Write down the seed phrase and store it in a secure location. This seed phrase can be used to recover your wallet in case you forget your password or lose access to your account.
- Confirm the seed phrase by selecting the words in the correct order, as shown on the screen.
- Once the seed phrase is verified, your wallet will be created, and you’ll be able to see your Ethereum address on the main Metamask screen.
Congratulations! You’ve successfully installed and set up the Metamask extension. Your Ethereum wallet is now ready to receive Bitcoin and other cryptocurrencies.
Step 2: Generate a Bitcoin Address in Metamask
After setting up your Metamask wallet, the next step is to generate a Bitcoin address. Follow the steps below:
Step 2.1: Open Metamask
Open your Metamask extension or mobile app and make sure you are logged in to your wallet.
Step 2.2: Switch to the Bitcoin Network
In the Metamask interface, click on the network name at the top of the window. From the dropdown menu, select “Custom RPC”.
Next, click on “Network Name” and enter “Bitcoin” as the network name. In the “New RPC URL” field, enter the URL for the Bitcoin network – “https://mainnet.rsk.co”.
Finally, click on “Save” to switch to the Bitcoin network.
Step 2.3: Generate a Bitcoin Address
In the Metamask interface, click on the account icon at the top right corner of the window. From the dropdown menu, select “Create Account”.
A new Bitcoin address will be generated, and you will see it listed in your Metamask accounts.
Make sure to copy this Bitcoin address or save it securely, as you will need it to receive Bitcoin.
Congratulations! You have successfully generated a Bitcoin address in your Metamask wallet. In the next step, we will learn how to send Bitcoin to this address.
Step 3: Obtain Bitcoin to Send to Your Metamask Wallet
In order to send Bitcoin to your Metamask wallet, you first need to obtain some Bitcoin. There are a few different ways you can do this:
| Method | Description |
|---|---|
| 1. Buy Bitcoin from an Exchange | You can purchase Bitcoin from a cryptocurrency exchange using fiat currency, such as USD or EUR. Some popular exchanges include Coinbase, Binance, and Kraken. Simply create an account on the exchange, link your payment method, and buy Bitcoin. |
| 2. Receive Bitcoin as Payment | If you are a freelancer or provide goods/services online, you may have the option to receive Bitcoin as payment. Simply provide your Bitcoin address to the payer, and they can send Bitcoin directly to your wallet. |
| 3. Participate in Bitcoin Mining | If you have the necessary hardware and technical knowledge, you can participate in Bitcoin mining. This involves using powerful computers to solve complex mathematical problems and earn Bitcoin as a reward. |
Choose the method that best suits your needs and acquire the desired amount of Bitcoin. Make sure to keep your Bitcoin secure by properly storing your private keys and wallets.
Once you have obtained Bitcoin, you can proceed to the next step and learn how to send it to your Metamask wallet.
Step 4: Send Bitcoin to Your Metamask Wallet
Once you have set up your Metamask wallet and connected it to your cryptocurrency exchange account, you can proceed to send Bitcoin to your wallet. This step will allow you to have full control over your Bitcoin and use it for transactions, investments, and other purposes.
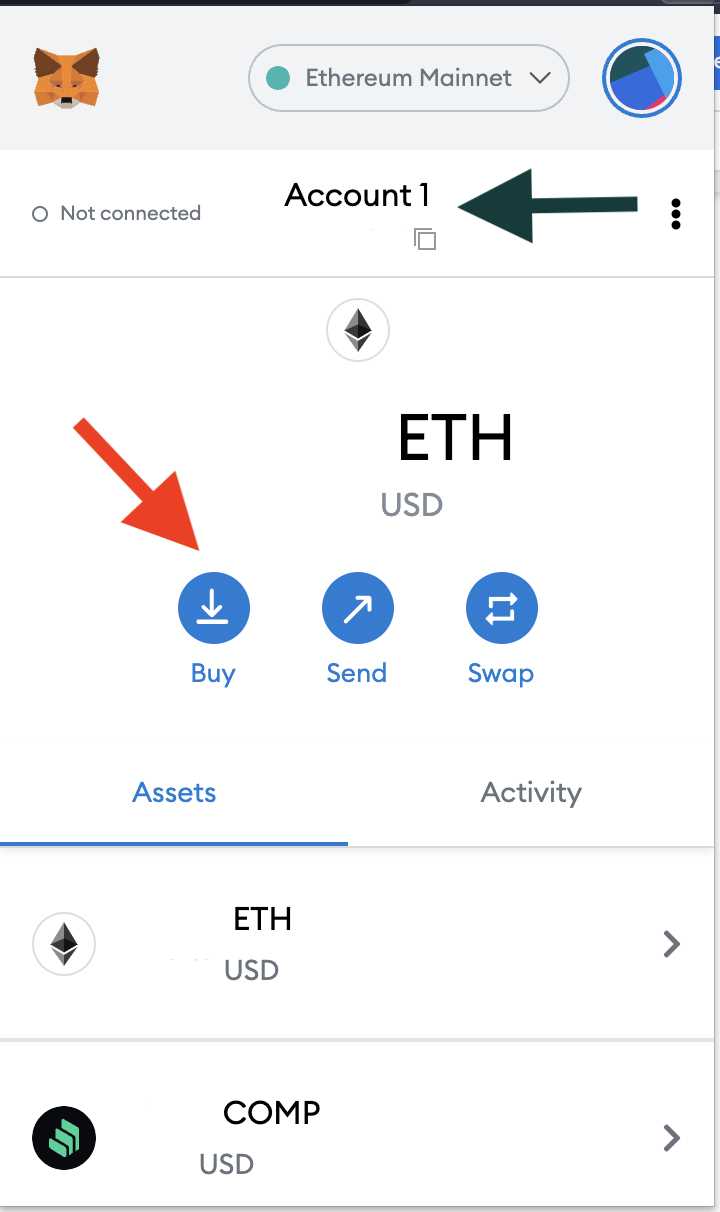
1. Get Your Metamask Wallet Address
Before sending Bitcoin to your Metamask wallet, you need to obtain your wallet address. To do this, follow these steps:
- Open the Metamask extension in your browser and click on the account icon.
- Select “Account Details” from the dropdown menu.
- Copy the provided wallet address or click on “Copy” to copy it to your clipboard.
2. Send Bitcoin from Your Exchange Account
Next, you will need to send Bitcoin from your exchange account to your Metamask wallet. To do this, follow these steps:
- Log in to your cryptocurrency exchange account.
- Navigate to the “Withdraw” or “Send” section of the platform.
- Enter your Metamask wallet address as the recipient address.
- Specify the amount of Bitcoin you want to send.
- Double-check the recipient address to ensure it matches your Metamask wallet address.
- Review and confirm the transaction.
It is essential to double-check the wallet address to avoid sending Bitcoin to the wrong address. Sending cryptocurrency to an incorrect address can result in irreversible loss of funds.
Please note that the process of sending Bitcoin may vary slightly depending on the cryptocurrency exchange platform you are using. Refer to the platform’s documentation or support resources for detailed instructions.
Once the transaction is confirmed and the Bitcoin is sent, it may take some time for the transfer to be processed and reflected in your Metamask wallet. You can track the transaction status using the transaction ID provided by the exchange platform.
Once the Bitcoin appears in your Metamask wallet, you can start using it for various purposes, such as sending it to other wallets, exchanging it for other cryptocurrencies, or participating in decentralized applications (DApps).