
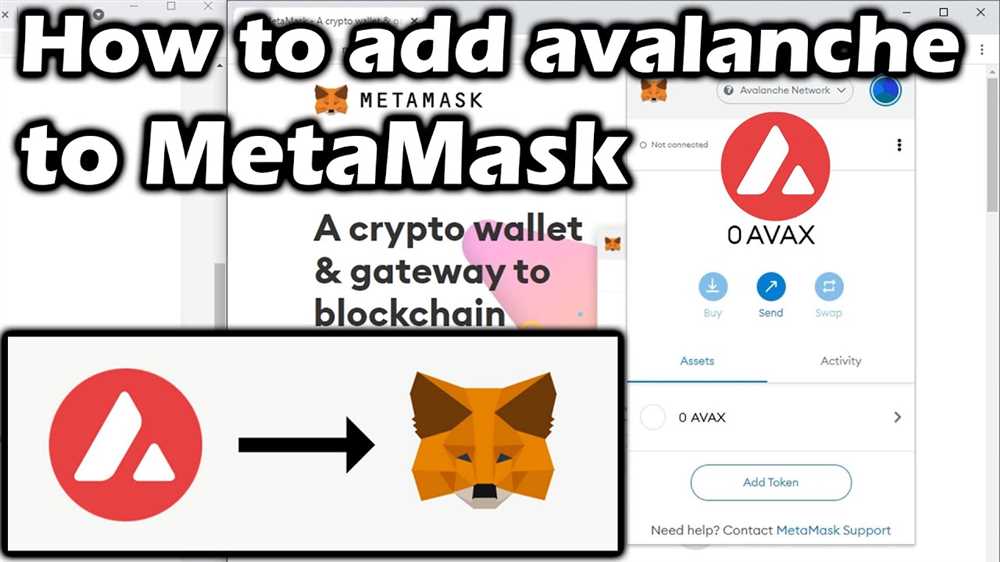
Metamask is a popular and user-friendly wallet that allows you to interact with decentralized applications (dApps) on the Ethereum blockchain. However, with the rise of other blockchain networks, such as Avalanche (Avax), it is now possible to add Avax to your Metamask wallet as well. In this step-by-step guide, we will walk you through the process of adding Avax to Metamask, so you can easily trade and manage your Avax assets.
Step 1: Install Metamask Extension
If you don’t have Metamask installed in your browser, the first step is to download and install the Metamask extension. Metamask is available for popular browsers like Chrome, Firefox, and Brave. Once installed, open the extension and create a new wallet or import an existing one by following the on-screen instructions.
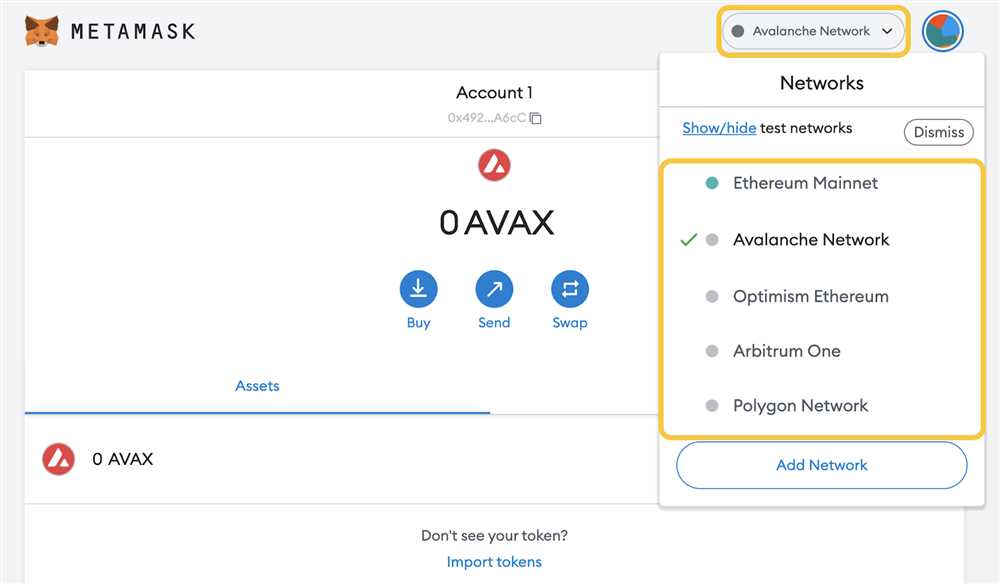
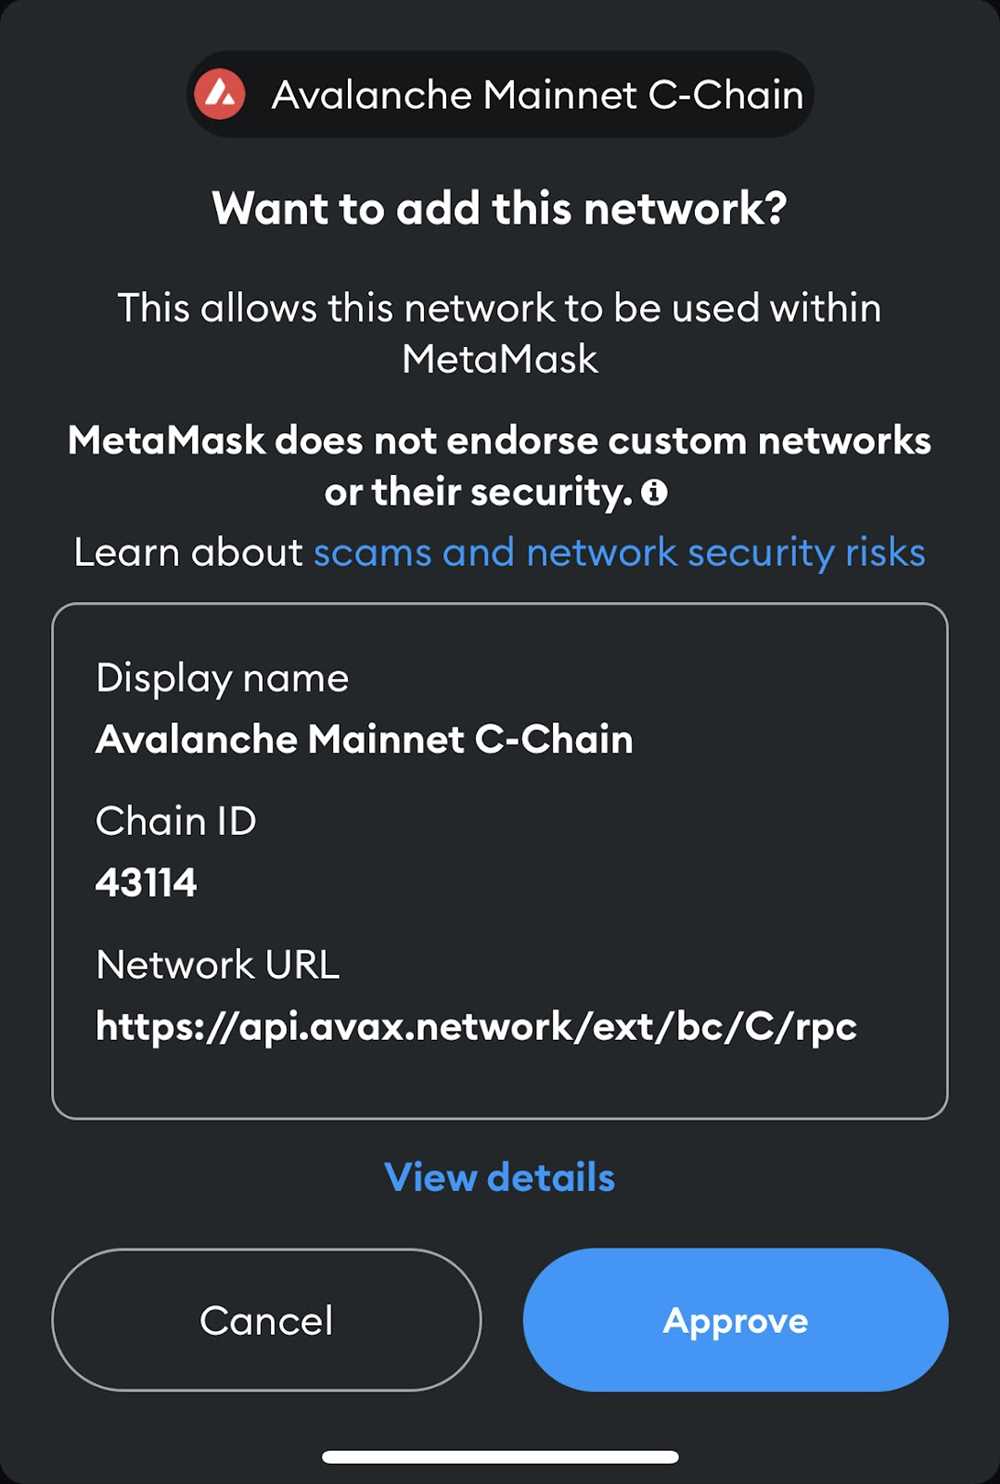
Step 2: Switch to Avalanche Network
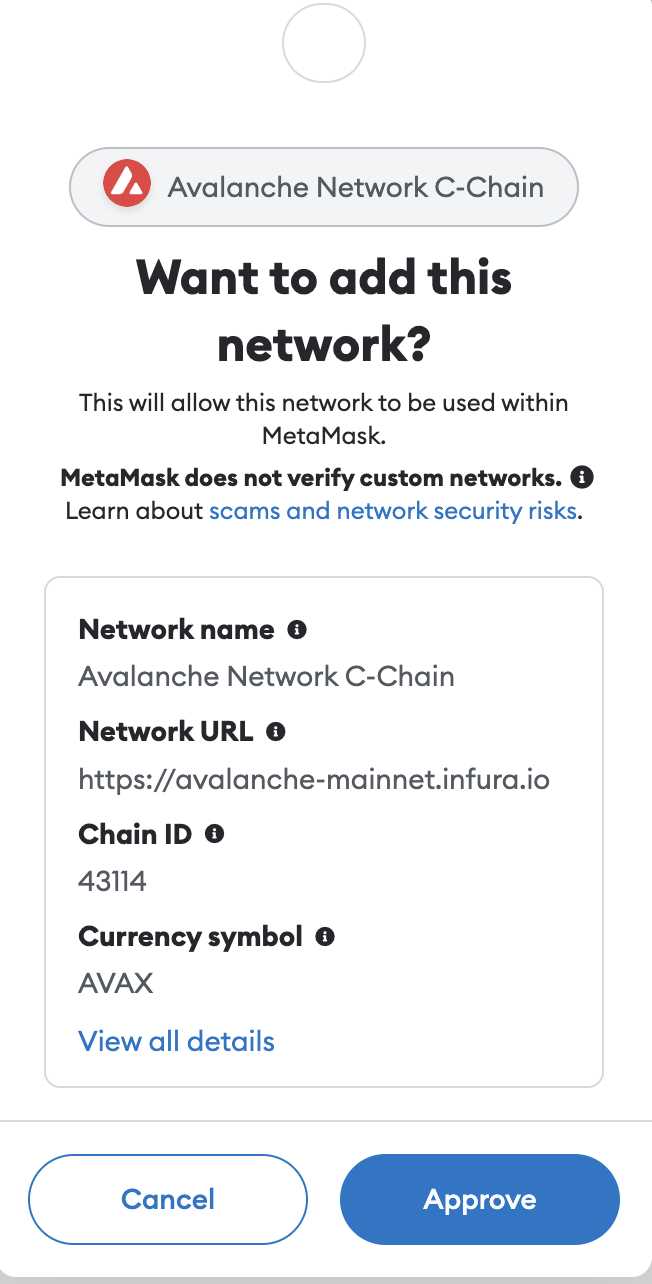
After setting up your Metamask wallet, you need to switch to the Avalanche network. To do this, click on the network dropdown in the Metamask extension and select “Custom RPC”. In the field that appears, enter the Avalanche network details:
Network Name: Avalanche Mainnet
New RPC URL: https://api.avax.network/ext/bc/C/rpc
ChainID: 43114
Symbol: AVAX
Step 3: Add Avax to Metamask
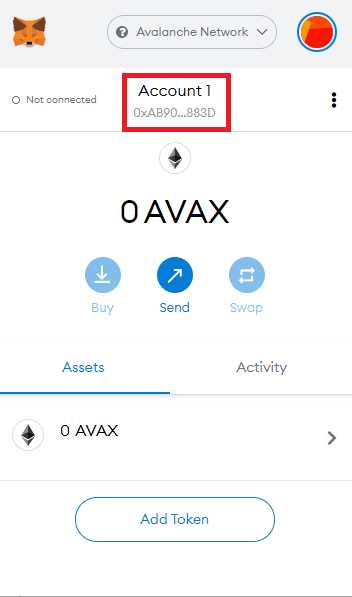
Now that you have switched to the Avalanche network, you can add Avax to your Metamask wallet. In the Metamask extension, click on “Add Token” and select “Custom Token”. In the token address field, enter the following Avax token address: 0xB31f66AA3C1e785363F0875A1B74E27b85FD66c7. Metamask will automatically fill in the token symbol and decimals of precision.
Note: The Avax token address mentioned above is for the Avalanche Mainnet. If you are on a different Avalanche network, make sure to use the correct token address.
Step 4: Verify and Confirm
After entering the Avax token address, click on “Next” and then “Add Tokens”. Metamask will verify the token details and add Avax to your wallet. You should now be able to see your Avax balance in your Metamask wallet.
Conclusion
By following this step-by-step guide, you have successfully added Avax to your Metamask wallet. Now you can easily trade and manage your Avax assets directly from Metamask. Enjoy the benefits of being part of the Avalanche ecosystem while using the familiar interface of Metamask.
A Beginner’s Guide: How to Add Avax to Metamask in 4 Easy Steps
Metamask is a popular digital wallet used for storing and managing cryptocurrencies. If you’re new to the world of crypto and want to add Avax (short for Avalanche) to your Metamask wallet, you’ve come to the right place. Follow these simple steps to get started:
Step 1: Install Metamask Extension
If you haven’t already, install the Metamask extension in your preferred web browser. You can find it in the Chrome Web Store or the Firefox Add-ons marketplace. Once installed, create a new wallet or import an existing one.
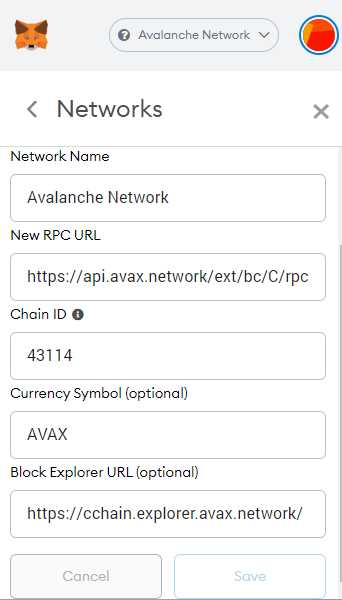
Step 2: Access the Avalanche Network
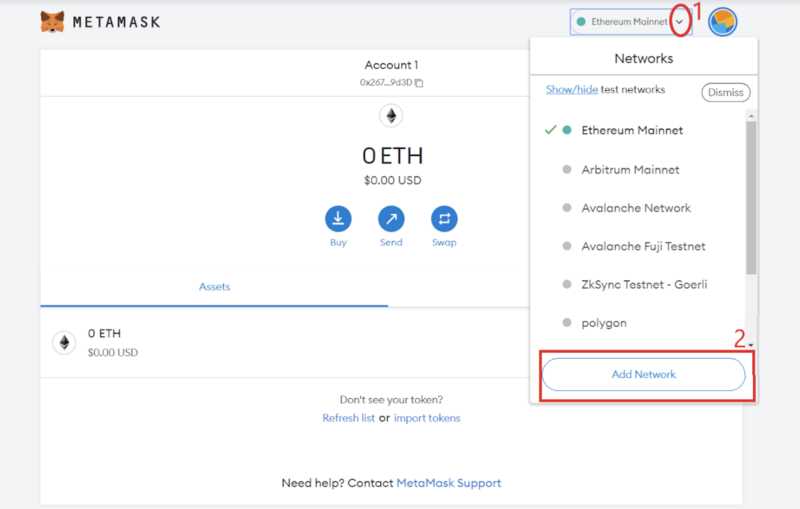
After setting up your Metamask wallet, you need to connect it to the Avalanche network. In the Metamask extension, click on the network selection dropdown and choose “Custom RPC”.
Next, enter the Avalanche network details:
Network Name: Avalanche Mainnet
New RPC URL: https://api.avax.network/ext/bc/C/rpc
ChainID: 43114
Symbol: AVAX
Explorer URL: https://cchain.explorer.avax.network/
Click on the “Save” button to add the Avalanche network to your Metamask wallet.
Step 3: Obtain Avax Tokens
To add Avax tokens to your Metamask wallet, you need to obtain them from a cryptocurrency exchange. Sign up for an account on a reputable exchange that supports Avax trading and deposit the desired amount of Avax into your account.
Once you have Avax in your exchange account, withdraw the tokens to your Metamask wallet. Make sure to double-check the withdrawal address to avoid any mistakes.
Step 4: Add Avax to Metamask
Now that you have Avax tokens in your Metamask wallet, you need to add them as a custom token. Open your Metamask extension and click on the “Assets” tab. Scroll down and click on “Add Token”.
In the “Token Contract Address” field, enter the Avax token contract address:
Paste the Avax token contract address here
Metamask should automatically fill in the “Token Symbol” and “Decimals of Precision” fields. Click on “Next” and then “Add Tokens” to complete the process.
Congratulations! You have successfully added Avax to your Metamask wallet. You can now view and manage your Avax tokens within the Metamask extension.
Remember to keep your Metamask wallet secure by following best practices and never share your private key or seed phrase with anyone.
Disclaimer: Cryptocurrency investments are subject to market risk. Make sure to do your own research before investing and consult a financial advisor if needed.
Download and Install Metamask Extension
Metamask is a cryptocurrency wallet and browser extension that allows you to interact with decentralized applications (DApps) on the blockchain. To add Avax to Metamask, you first need to download and install the Metamask extension for your browser. Follow these steps to get started:
|
1. Open your preferred web browser (Chrome, Firefox, or Brave) and go to the Metamask website: https://metamask.io/ |
|
2. Click on the “Download” button to download the Metamask extension. |
|
3. You will be redirected to the browser extension store page (Chrome Web Store for Chrome, Firefox Add-ons for Firefox, etc.). Click on the “Add to Chrome” or “Add to Firefox” button to start the installation process. |
|
4. A popup will appear asking for confirmation to add the extension. Click on the “Add extension” button to proceed. |
|
5. The Metamask extension will be installed in your browser, and the Metamask icon will appear in the top-right corner near the browser’s search bar. |
|
6. Click on the Metamask icon to open the extension. |
|
7. A welcome screen will appear. Click on the “Get Started” button. |
|
8. Create a new wallet or import an existing one by following the instructions provided by Metamask. |
|
9. Set up a password and back up your seed phrase (important for wallet recovery). |
|
10. Congratulations! You have successfully downloaded and installed the Metamask extension. Now you can start adding Avax to your wallet. |
Create a New Wallet on Metamask
To add Avax to Metamask, you’ll need to start by creating a new wallet on the Metamask platform. Follow these steps to get started:
- First, open the Metamask website or extension in your browser.
- Click on the “Get Started” button.
- In the next screen, click on the “Create a Wallet” option.
- Choose a strong password and enter it in the designated field. Make sure to remember this password as you’ll need it to access your wallet in the future.
- Click on the “Create” button to proceed.
- The next screen will present you with a unique set of words, also known as a seed phrase. This phrase is crucial as it can be used to recover your wallet in case of a lost password or device. Note down these words in the right order and keep them in a safe place, away from prying eyes.
- After writing down the seed phrase, click on the words in the given order to verify that you have noted them correctly.
- You may be prompted to set up a password or biometric authentication, depending on your device’s capabilities. This extra layer of security ensures that only you can access your wallet.
- Once the setup is complete, you’ll have successfully created a new wallet on Metamask. You can now use this wallet to hold and manage your Avax.
Now that your wallet is set up, you can proceed with the next steps to add Avax to your Metamask wallet.
Connect Metamask to the Avalanche Network
In order to add Avax to your Metamask wallet, you first need to connect Metamask to the Avalanche network. Follow the step-by-step guide below to do so:
Step 1: Install and Set Up Metamask
If you haven’t already, install the Metamask browser extension for your preferred web browser. Once installed, create a new wallet or import your existing wallet to Metamask.
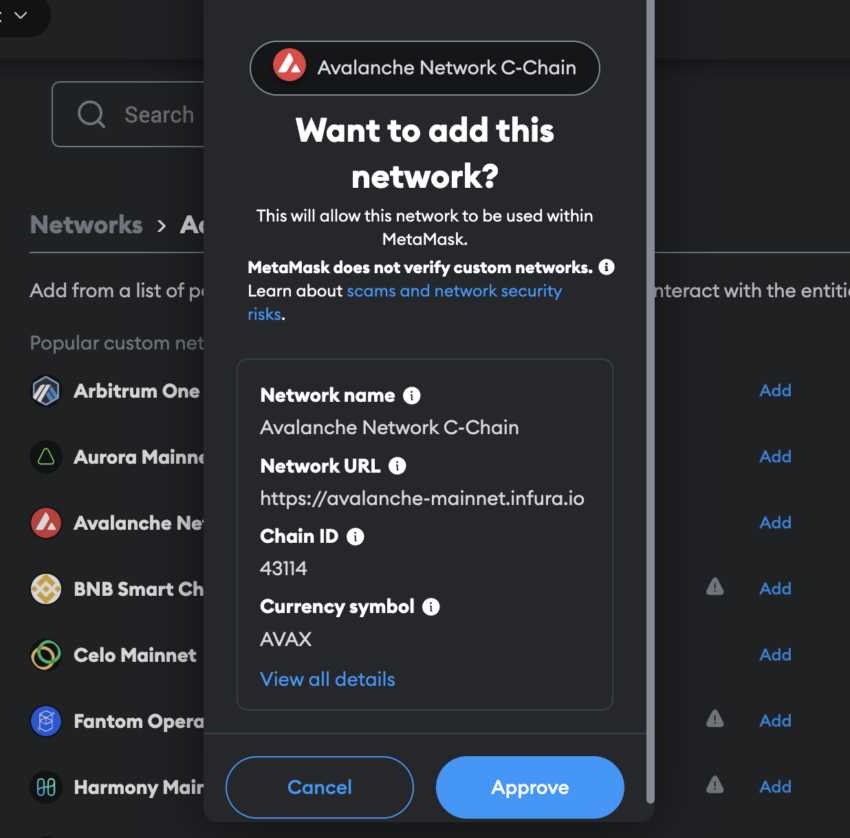
Step 2: Switch to the Avalanche Network
Open the Metamask extension and click on the network dropdown. Select “Custom RPC” to switch to a custom network.
Network Name: Avalanche
New RPC URL: https://api.avax.network/ext/bc/C/rpc
Chain ID: 43114
Symbol: AVAX
Block Explorer URL: https://cchain.explorer.avax.network/
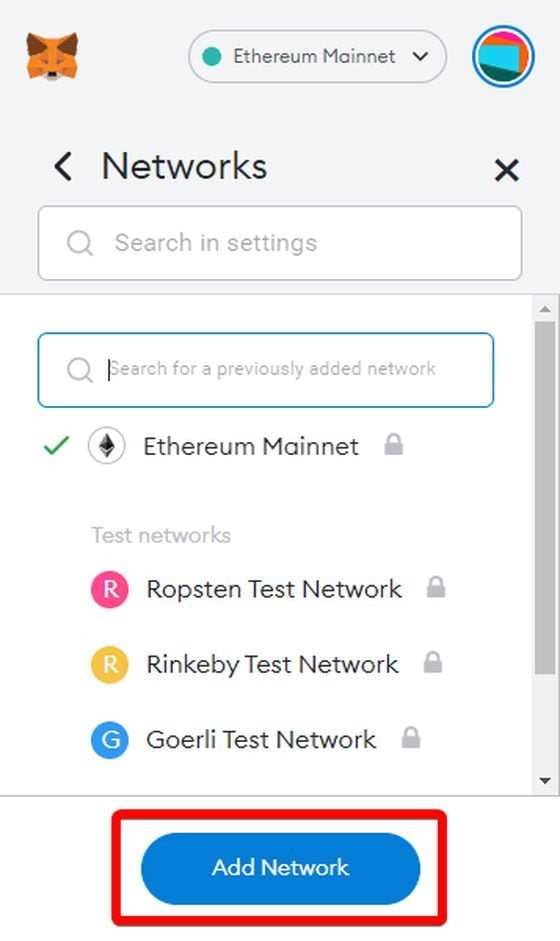
Step 3: Add the Avalanche Network

After entering the above information, click on the “Save” button to add the Avalanche network to Metamask.
Note: Make sure you are on the Avalanche network before proceeding to the next steps.
Now that you have successfully connected Metamask to the Avalanche network, you can proceed with adding Avax to your wallet. Follow the next steps in the guide to complete the process.
Add Avax Token to Metamask
If you are using Metamask, you can easily add the Avax token to your wallet. This will allow you to send and receive Avax tokens directly from within Metamask.
Step 1: Open the Metamask Extension
First, make sure you have the Metamask extension installed in your browser. If you don’t have it installed, you can download it from the official Metamask website.
Once you have the extension installed, click on the Metamask icon in your browser toolbar to open the wallet.
Step 2: Access the Avax Token
On the Metamask wallet, click on the “Assets” tab at the top of the page. Then, click on the “Add Token” button.
In the “Add Token” window, click on the “Custom Token” tab.
Step 3: Enter the Token Contract Address
To add the Avax token, you will need to enter the token contract address. The Avax token contract address is: 0x…. Make sure to copy the entire address correctly.
Paste the Avax token contract address into the “Token Contract Address” field. The remaining fields should automatically populate with the token information.
Step 4: Add Avax Token
After entering the token contract address, click on the “Next” button to proceed.
You will be asked to confirm the token details. Review the information and click on the “Add Tokens” button to add the Avax token to your Metamask wallet.
Once the Avax token has been added, you will be able to see your Avax balance and make transactions using Avax directly from within Metamask.
Note: Make sure you are on the correct network (for example, the Avalanche network) in Metamask to view and interact with Avax tokens.
What is Avax?
Avax, short for Avalanche, is a decentralized platform that aims to provide users with a fast, secure, and highly scalable blockchain network. It utilizes a consensus protocol called Snowman, which allows for high transaction throughput and low fees.
Can I add Avax to my Metamask wallet?
Yes, you can add Avax to your Metamask wallet by following a few simple steps. First, open your Metamask wallet and click on the “Networks” dropdown menu. Then, select “Custom RPC” and enter the Avax network details, including the RPC URL and the chain ID. Once you save the changes, you should be able to see and interact with Avax in your Metamask wallet.
Are there any risks involved in adding Avax to Metamask?
While adding Avax to Metamask is generally safe, there are some risks to be aware of. One potential risk is the possibility of interacting with malicious smart contracts or decentralized applications (dApps) on the Avax network. It’s important to do thorough research and exercise caution when interacting with unfamiliar dApps or providing sensitive information. Additionally, always make sure to keep your Metamask wallet secure by enabling strong passwords and enabling two-factor authentication.