
Welcome to our step-by-step tutorial on unlocking the power of the Metamask extension for Chrome! If you’re an avid user of cryptocurrencies and decentralized applications, you’ve probably heard of Metamask. This powerful browser extension allows you to securely store and manage your Ethereum assets, interact with smart contracts, and seamlessly explore the world of blockchain-based applications.
In this tutorial, we’ll walk you through the process of installing Metamask, creating a new wallet, and connecting it to your favorite decentralized applications. Whether you’re a beginner or an experienced blockchain enthusiast, you’ll find valuable information and clear instructions to help you unlock the full potential of this amazing tool.
Why Metamask?
Metamask is not just any ordinary wallet – it’s a gateway to the decentralized world. With Metamask, you can access the power of the Ethereum blockchain right from your browser, without the need to run a full node or download the entire blockchain. It provides a user-friendly interface, making it easy for anyone to interact with blockchain applications and manage their digital assets with confidence.
So, whether you’re interested in participating in an upcoming ICO, trading on a decentralized exchange, or playing blockchain-based games – Metamask is an essential tool that empowers you to do just that.
Getting Started
First things first, let’s get you set up with Metamask. If you haven’t already, make sure you have Google Chrome installed on your computer. Once you have Chrome ready, you can easily add the Metamask extension by visiting the Chrome Web Store and searching for “Metamask”. Click on the “Add to Chrome” button, and you’re on your way to unlocking the power of the Ethereum blockchain!
Now that you’ve installed Metamask, it’s time to create your wallet. Follow our step-by-step instructions to set up your first wallet and start exploring decentralized applications in no time!
What is the Metamask Extension?
The Metamask Extension is a browser plugin that allows users to interact with the Ethereum blockchain. It serves as a digital wallet, enabling users to securely store and manage their Ether (ETH) and other tokens. Metamask also acts as a bridge between dApps (decentralized applications) and the Ethereum network, allowing users to seamlessly access and use dApps directly from their browser.
Metamask simplifies the process of using decentralized applications, which typically require users to have some knowledge of Ethereum and interact with the blockchain through complex steps. With Metamask, users can easily manage their digital assets and interact with dApps with just a few clicks.
Not only does Metamask provide a user-friendly interface for interacting with the Ethereum network, but it also enhances security. Users can set up a password and create a backup phrase, which adds an extra layer of protection to their wallet. Additionally, Metamask offers gas fee estimation, ensuring that users have a smooth and efficient transaction experience on the Ethereum network.
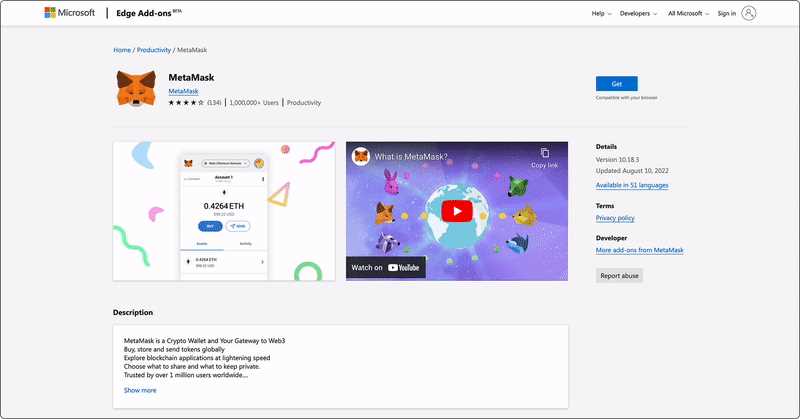
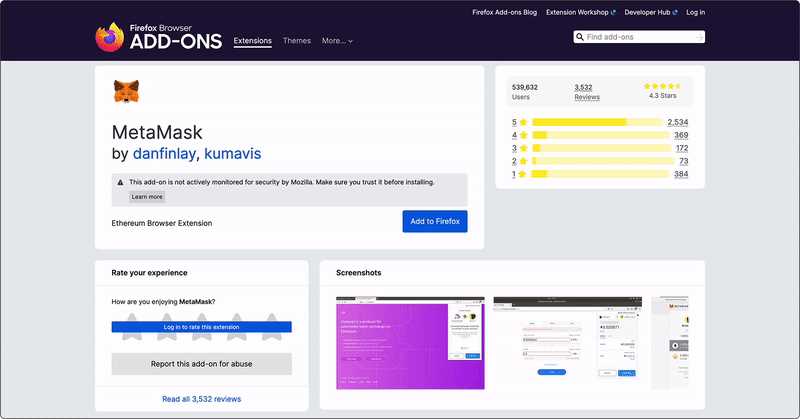
The Metamask Extension is available for the Chrome browser and can be downloaded and installed for free from the Chrome Web Store. It is widely used by developers, traders, and enthusiasts in the Ethereum ecosystem.
| Key Features of Metamask |
|---|
| 1. Securely store and manage Ether (ETH) and other tokens |
| 2. Convenient access to decentralized applications (dApps) |
| 3. User-friendly interface for interacting with the Ethereum network |
| 4. Password protection and backup phrase for added security |
| 5. Gas fee estimation for efficient transactions on the Ethereum network |
Getting Started
To unlock the power of the Metamask extension for Chrome, follow these step-by-step instructions:
| Step 1: | Open the Chrome browser and go to the Chrome Web Store. |
| Step 2: | Search for “Metamask” in the search bar and click on the first result. |
| Step 3: | Click on the “Add to Chrome” button to install the extension. |
| Step 4: | Once the installation is complete, you will see the Metamask icon added to your Chrome toolbar. |
| Step 5: | Click on the Metamask icon to open the extension. |
| Step 6: | Click on the “Get Started” button to create a new wallet. |
| Step 7: | Follow the on-screen instructions to set up a password for your wallet and write down the secret backup phrase. |
| Step 8: | Once the setup is complete, you will have access to your Metamask wallet and can begin using it to interact with decentralized applications (dApps) and manage your cryptocurrency funds. |
Congratulations! You are now ready to unlock the power of the Metamask extension for Chrome and explore the world of decentralized finance.
Installing the Metamask Extension
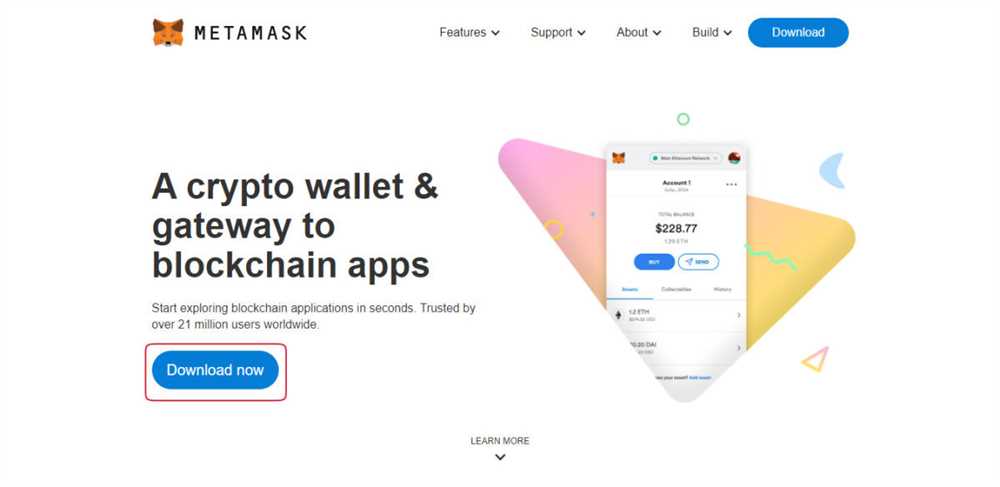
If you’re interested in exploring the world of decentralized applications and interacting with the Ethereum blockchain, one essential tool you need is the Metamask extension for Chrome. Metamask is a wallet and a gateway that allows you to connect your browser to the Ethereum blockchain.
Step 1: Open the Chrome Web Store
To begin with, open your Google Chrome browser and navigate to the Chrome Web Store.
Step 2: Search for Metamask
In the search bar located at the top left corner of the Chrome Web Store, type “Metamask” and hit the enter key. The search results will display the Metamask extension.
Step 3: Add to Chrome
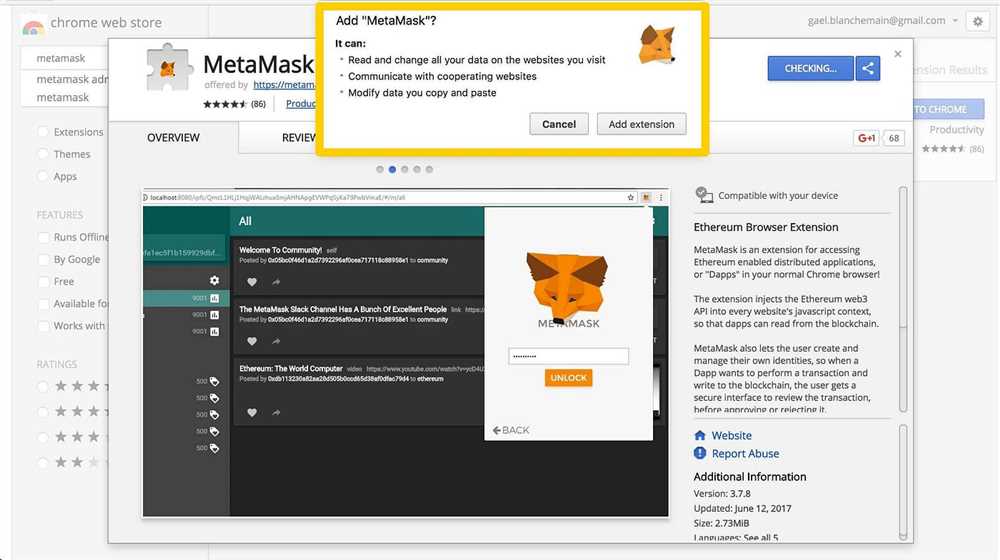
Click on the Metamask extension from the search results. On the Metamask page, click on the “Add to Chrome” button. A pop-up will appear asking for your confirmation to add the extension. Click “Add extension” to proceed.
Once the extension is added, you will see the Metamask logo next to the address bar in your Chrome browser.
Step 4: Create a New Wallet
Click on the Metamask logo, and a new tab will open displaying the Metamask welcome page. Here, you can set a password for your wallet and then create a new wallet by following the instructions provided. Make sure to keep your password and seed phrase safe and secure as they are crucial for accessing your wallet.
Congratulations! You have successfully installed the Metamask extension on your Chrome browser and set up a new wallet. The next step is to import your existing wallet or fund your new wallet to start using Metamask to interact with decentralized applications.
Creating a New Wallet
If you’re new to Metamask or don’t currently have a wallet, the first step is to create a new wallet. Metamask allows you to easily generate a new wallet right in the browser.
To create a new wallet, follow these steps:
- Install the Metamask extension in Chrome if you haven’t already.
- Click on the Metamask icon in the top-right corner of your browser.
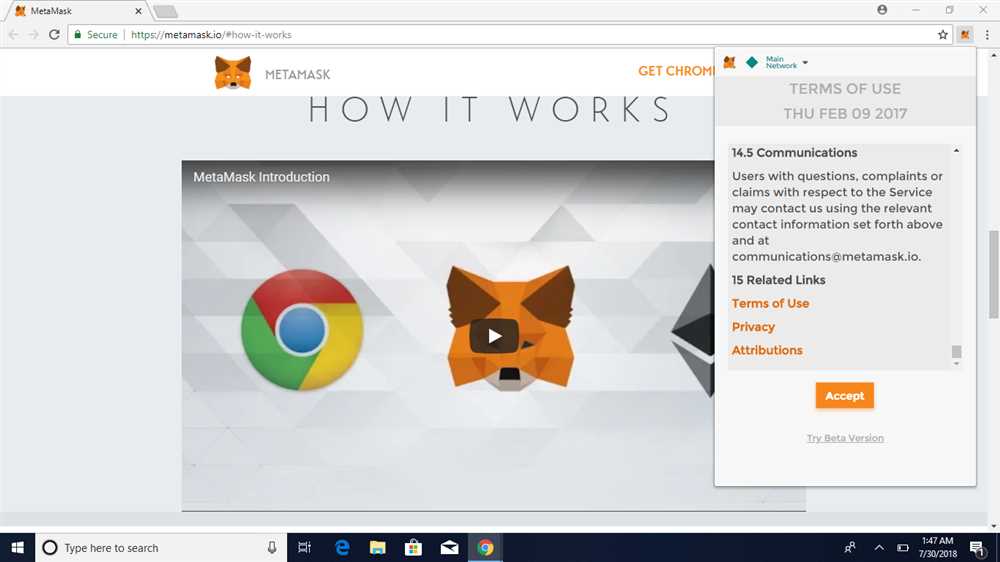
- A login screen will appear. Click on the “Create a Wallet” button.
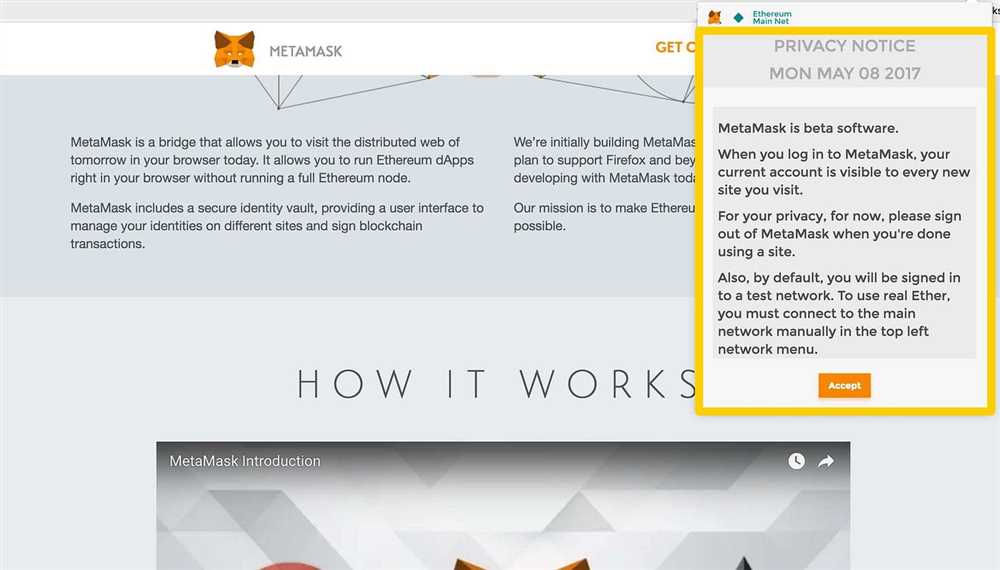
- Read the terms of use and, if you agree, click on the “Accept” button.
- You’ll be prompted to create a password for your wallet. Make sure to choose a strong password that you can remember.
- After entering your password, click on the “Create” button.
- Metamask will generate a unique set of seed words for your wallet. It is extremely important to write down these words and keep them in a safe place. They will be used to recover your wallet if you ever lose access to it.
- Click on the “Next” button.
- You will be asked to confirm your seed words by selecting them in the correct order. This is to ensure that you have written them down correctly. Once you have confirmed your seed words, click on the “Confirm” button.
- Congratulations! You have successfully created a new wallet with Metamask.
It is important to note that your wallet is now locally stored in your browser. You can access it by clicking on the Metamask icon in your browser’s toolbar. From there, you can manage your wallet, view your account balance, send and receive transactions, and interact with decentralized applications on the Ethereum blockchain.
Remember to always keep your seed words and password secure. With these, anyone can access your wallet and steal your funds. Additionally, it’s a good idea to regularly backup your wallet to avoid losing access to it.
Using the Metamask Extension
Metamask is a powerful extension for Chrome that allows you to interact with decentralized applications (dApps) on the Ethereum blockchain. In this section, we will explore how to use the Metamask extension to unlock its full potential.
-
Install the Metamask Extension: To get started, open the Chrome browser and search for “Metamask Extension” in the Chrome Web Store. Click on the “Add to Chrome” button and follow the installation instructions.
-
Set Up your Metamask Wallet: Once the extension is installed, click on the Metamask icon in the top-right corner of your browser to open the extension. Click on the “Get Started” button and follow the on-screen instructions to set up your wallet. Make sure to securely store your seed phrase as it is the only way to recover your wallet if you lose access to it.
-
Connect to the Ethereum Mainnet: By default, Metamask connects to the Ethereum Mainnet. If you want to interact with any Ethereum-based dApps, make sure your extension is connected to the Mainnet. To check or change the network, click on the network dropdown menu and select “Ethereum Mainnet”.
-
Import or Export Wallet: If you already have an Ethereum wallet, you can import it into Metamask by clicking on the account icon in the top-right corner of the extension and selecting “Import Account”. Similarly, you can also export your Metamask wallet by clicking on the same account icon and selecting “Export Account”. This allows you to use your wallet on multiple devices and with different Ethereum interfaces.
-
Send and Receive Ether: To send or receive Ether, click on the account icon in the top-right corner of the extension and select “Send” or “Receive” respectively. Follow the on-screen instructions to complete the transactions.
-
Interact with dApps: One of the main features of Metamask is its ability to interact with Ethereum-based dApps. To do this, simply visit a dApp’s website, and when prompted, authorize the connection with your Metamask wallet. You can approve or reject transactions and interact with the dApp’s functionalities directly through the Metamask extension.
With these steps, you are now ready to unlock the full power of the Metamask extension. Start exploring the world of decentralized applications and take control of your Ethereum wallets with ease!
Connecting to a dApp
To connect to a decentralized application (dApp) using the Metamask extension for Chrome, follow these steps:
Step 1: Install Metamask
If you haven’t already, install the Metamask extension for Chrome by visiting the Chrome Web Store and searching for “Metamask”. Click on the “Add to Chrome” button, then confirm the installation by clicking “Add extension”.
Step 2: Set up Metamask
Once installed, click on the Metamask icon in your Chrome browser to open it. Accept the terms of use and create a new account by setting up a password and clicking “Create”. Make sure to securely store and backup your seed phrase provided by Metamask, as it is the only way to recover your account.
Step 3: Connect to a dApp
Now that you have Metamask set up, you can connect to a dApp. Simply navigate to the desired dApp’s website and look for a “Connect Wallet” or similar button. Click on this button, and Metamask will automatically detect the dApp’s request to connect. Review the permissions being requested, then click “Connect” to establish the connection.
Once connected, you can interact with the dApp using Metamask as your wallet. You will be prompted to sign transactions, approve requests, and manage your digital assets as needed.
Remember to exercise caution when connecting to dApps and only interact with trusted and verified applications. Always review the permissions being requested and thoroughly research the dApp before proceeding.
Sending and Receiving Transactions
Metamask allows you to easily send and receive transactions directly from your Chrome browser. Here’s a step-by-step guide on how to do it:
Sending Transactions
- Open your Metamask extension by clicking on the icon in your browser toolbar.
- Make sure you are on the “Send” tab.
- Enter the recipient’s wallet address in the “To” field.
- Enter the amount of cryptocurrency you wish to send in the “Amount” field.
- Choose the appropriate cryptocurrency from the dropdown menu.
- Review the transaction details and gas fees. Adjust the gas fees if necessary.
- Click on the “Next” button to confirm the transaction.
- Enter your Metamask password to sign the transaction.
- Wait for the transaction to be confirmed on the blockchain.
- Once confirmed, you can view the transaction details by clicking on the transaction hash.
Receiving Transactions
To receive transactions through Metamask, follow these steps:
- Provide the sender with your wallet address. You can find it by clicking on the “Account 1” dropdown and selecting “Copy Address to Clipboard”.
- Share your wallet address with the sender through a secure channel.
- Wait for the sender to initiate the transaction.
- Once the transaction is confirmed on the blockchain, the funds will be transferred to your wallet.
Remember to always double-check the wallet address before sending or receiving transactions to avoid any loss of funds or mistakes.
What is the Metamask extension?
The Metamask extension is a cryptocurrency wallet that allows users to interact with decentralized applications (dApps) on the Ethereum network. It can be installed as a browser extension for Chrome and other Chromium-based browsers.
How can I install the Metamask extension?
To install the Metamask extension, open the Chrome Web Store, search for “Metamask” in the search bar, and click on the “Add to Chrome” button. Once installed, you will see the Metamask icon on the top-right corner of your browser.