
Welcome to our step-by-step guide on how to set up the Polygon Network on Metamask! If you’re looking to explore the world of decentralized finance and want to take advantage of the low transaction fees and high scalability offered by Polygon, then this guide is for you.
Metamask is a popular cryptocurrency wallet and browser extension that allows users to interact with decentralized applications (dApps) on the Ethereum blockchain. By adding the Polygon Network to your Metamask wallet, you gain access to a whole new ecosystem of dApps and tokens. So let’s get started!
Step 1: Install Metamask
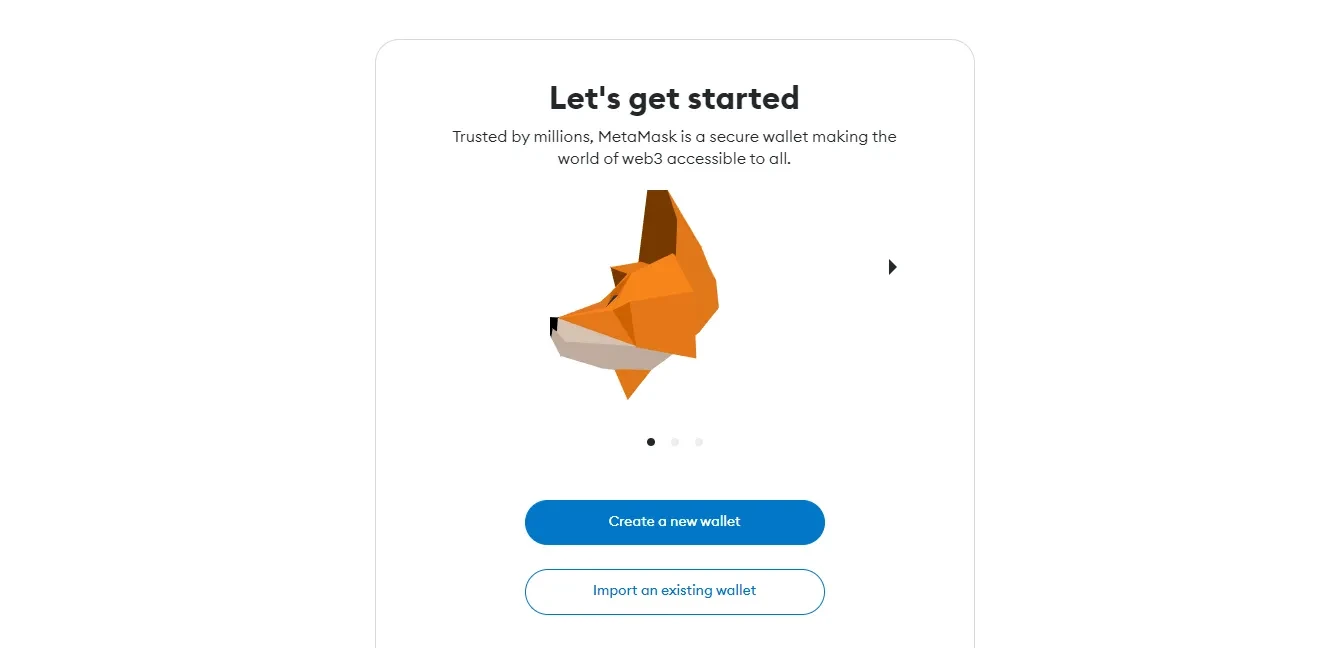
If you haven’t already, start by installing the Metamask extension for your preferred browser. Visit the official Metamask website and follow the instructions to add the extension to your browser. Once installed, create a new wallet or import an existing one.
Step 2: Switch to Polygon Network
With Metamask installed, open the extension and click on the network selection button (usually located at the top of the extension). From the dropdown menu, select “Custom RPC”. This will allow us to add the Polygon Network.
Step 3: Add the Polygon Network
In the “New RPC URL” field, enter the following URL: https://rpc-mainnet.matic.network. For the Network Name, enter “Polygon Mainnet”. You can also choose an icon to represent the Polygon Network. Once done, click “Save” to add the network to Metamask.
Step 4: Connect to the Polygon Network
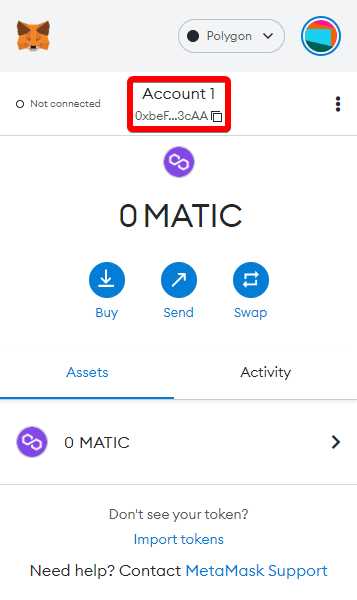
Now that we’ve added the Polygon Network, you’ll see it as an option in the network selection dropdown menu. Click on the network selection button again and choose “Polygon Mainnet”. Your Metamask wallet is now connected to the Polygon Network.
That’s it! You’ve successfully set up the Polygon Network on Metamask. You can now start exploring and interacting with the various dApps and tokens available on the Polygon Network. Enjoy the low fees and lightning-fast transactions that Polygon has to offer!
How to Set Up Polygon Network on Metamask
Metamask is a popular web extension wallet that allows users to interact with decentralized applications (dApps) on various blockchains. One of the blockchains supported by Metamask is the Polygon network, which offers fast and low-cost transactions compared to the Ethereum mainnet. In this guide, we will walk you through the process of setting up the Polygon network on your Metamask wallet.
Step 1: Install the Metamask Extension
If you haven’t already, start by installing the Metamask browser extension. You can find it on the official Metamask website or through popular browser extension stores like Chrome Web Store or Firefox Add-ons. Once installed, open Metamask and create a new wallet or import an existing one.
Step 2: Switch to the Polygon Network
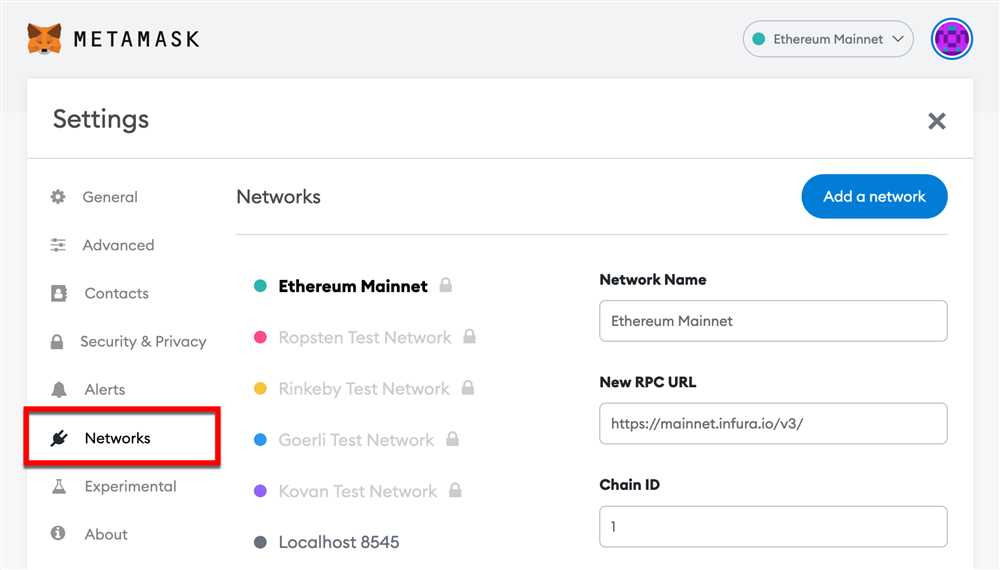
After setting up your wallet, you will see the Metamask icon in the top-right corner of your browser. Click on it to open the Metamask extension. In the Metamask window, you will see the network selection dropdown. By default, it is set to the Ethereum mainnet. Click on it and scroll down to find the “Custom RPC” option.
In the “Custom RPC” section, you will need to enter the necessary details to connect to the Polygon network. Here are the details you need to provide:
Network Name: Enter a name for the network, such as “Polygon” or “Matic”.
RPC URL: Enter the RPC URL for the Polygon network. The RPC URL for the Polygon mainnet is “https://rpc-mainnet.maticvigil.com/”.
Chain ID: Enter the chain ID for the Polygon network. The chain ID for the Polygon mainnet is 137.
Symbol (optional): You can enter the symbol for the network, such as “MATIC”.
After entering the necessary details, click on the “Save” button. Metamask will now switch to the Polygon network.
Step 3: Add Polygon Tokens (Optional)
Now that you have switched to the Polygon network, you may want to add some Polygon tokens to your Metamask wallet. To do this, click on the “Add Token” button in the Metamask extension.
In the token search bar, enter the contract address of the Polygon token you want to add. You can find the contract address on polygonscan.com or by visiting the project’s official website. Metamask will automatically fetch the token details, and you can click on the “Add” button to add it to your wallet.
Once the token is added, you will be able to see your Polygon token balance in the Metamask wallet.
That’s it! You have successfully set up the Polygon network on your Metamask wallet. Now you can start exploring and using dApps on the Polygon network without having to pay high transaction fees on the Ethereum mainnet.
Step 1: Install Metamask Extension
To set up the Polygon Network on Metamask, the first step is to install the Metamask extension on your browser. Follow the steps below to install the extension:
Google Chrome:
- Open Google Chrome and go to the Chrome Web Store.
- Search for “Metamask” in the search bar.
- Click on the “Add to Chrome” button on the Metamask extension.
- A pop-up window will appear. Click on the “Add extension” button.
- The Metamask extension will be added to your browser. You will see the Metamask icon appear next to the address bar.
Mozilla Firefox:
- Open Mozilla Firefox and go to the Mozilla Add-Ons store.
- Search for “Metamask” in the search bar.
- Click on the “Add to Firefox” button on the Metamask extension.
- A pop-up window will appear. Click on the “Add” button.
- The Metamask extension will be added to your browser. You will see the Metamask icon appear next to the address bar.
Once you have installed the Metamask extension, you can proceed to the next step to set up the Polygon Network on Metamask.
Step 2: Create a Wallet on Metamask
After installing the Metamask extension, you will need to set up a wallet to start using the Polygon network. Here’s how you can create a wallet on Metamask:
1. Open Metamask
Once the extension is installed, click on the Metamask icon in your browser’s toolbar to open the Metamask wallet interface.
2. Set Up a New Wallet
On the Metamask homepage, click on “Get Started” to begin setting up your new wallet.
3. Create a Password
Enter a strong password for your wallet. Make sure to use a combination of letters, numbers, and special characters to enhance security. Click on “Create” to continue.
4. Secret Backup Phrase
Metamask will then generate a secret backup phrase consisting of 12 words. This phrase is crucial for restoring access to your wallet in case of loss or device changes. Write down the backup phrase and store it in a safe place.
5. Confirm the Backup Phrase
To ensure you have correctly written down the backup phrase, Metamask will ask you to confirm the words in the correct order. Select each word according to their respective position in the phrase to proceed.
6. Wallet Set Up Complete
Upon successfully confirming the backup phrase, your wallet set up on Metamask is complete. You can now start using your wallet to interact with the Polygon network and explore the decentralized applications (dApps) available on Polygon.
Note: It is extremely important to store your secret backup phrase securely and never share it with anyone. Losing access to your backup phrase can result in permanent loss of your wallet and funds.
Step 3: Set Up Polygon Network
Once you have the Metamask extension added to your browser and have created a wallet, you are ready to set up the Polygon network on your Metamask.
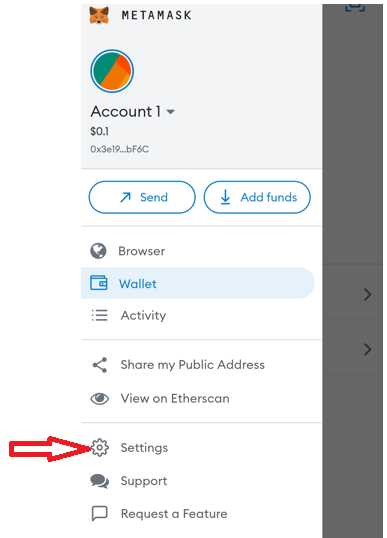
Step 3.1: Open Metamask
Click on the Metamask extension icon in your browser to open it. If you haven’t logged in with your wallet yet, enter your password or phrases to log in.
Step 3.2: Switch Network
On the top of the Metamask window, you will see the Ethereum mainnet selected by default. Click on the network name and a dropdown menu will appear.
Select “Custom RPC” from the dropdown menu to manually add the Polygon network.
Step 3.3: Add Polygon Network Details
In the “New RPC URL” field, enter the RPC URL for the Polygon network:
https://rpc-mainnet.maticvigil.com/
In the “ChainID” field, enter the Chain ID for the Polygon network:
137
In the “Symbol” field, enter the symbol of the network:
MATIC
In the “Block Explorer URL” field, enter the URL of the Polygon network’s block explorer:
https://explorer.matic.network/
Ensure that all the details are entered correctly.
Step 3.4: Save the Network
After entering the network details, click on the “Save” button to save the Polygon network on your Metamask.
Once the network is saved, you will see the Polygon network selected as the active network on the Metamask window.
Note: Make sure you have a small amount of ETH in your wallet to cover transaction fees on the Polygon network.
Congratulations! You have successfully set up the Polygon network on your Metamask. You are now ready to start using decentralized applications on the Polygon network.
What is Polygon Network?
Polygon Network, previously known as Matic Network, is a Layer 2 scaling solution for Ethereum that aims to provide faster and cheaper transactions.
Why should I set up Polygon Network on Metamask?
Setting up Polygon Network on Metamask allows you to interact with decentralized applications (dApps) that are built on the Polygon Network without incurring high transaction fees and experiencing slow transaction times.