
Are you interested in exploring the exciting world of Ethereum and its decentralized applications? Metamask is the perfect tool to help you navigate the Ethereum Mainnet with ease. Whether you’re a beginner or an experienced user, this step-by-step guide will walk you through the process of setting up and using Metamask to interact with the Ethereum Mainnet.
Step 1: Install Metamask
The first step is to install the Metamask extension on your web browser. Metamask is compatible with Chrome, Firefox, and Brave, and can be found in the respective extension marketplaces. Simply search for “Metamask” and click “Add to Chrome” or the equivalent button for your browser.
Note: Metamask is also available as a mobile app for iOS and Android devices.
Step 2: Create a New Wallet
Once you’ve installed Metamask, open the extension and click on “Create a Wallet.” Follow the prompts to set a password and create a backup phrase. Make sure to write down your backup phrase and keep it in a safe place. This backup phrase is essential for recovering your wallet in case your computer or device is lost or damaged.
Step 3: Connect to the Ethereum Mainnet
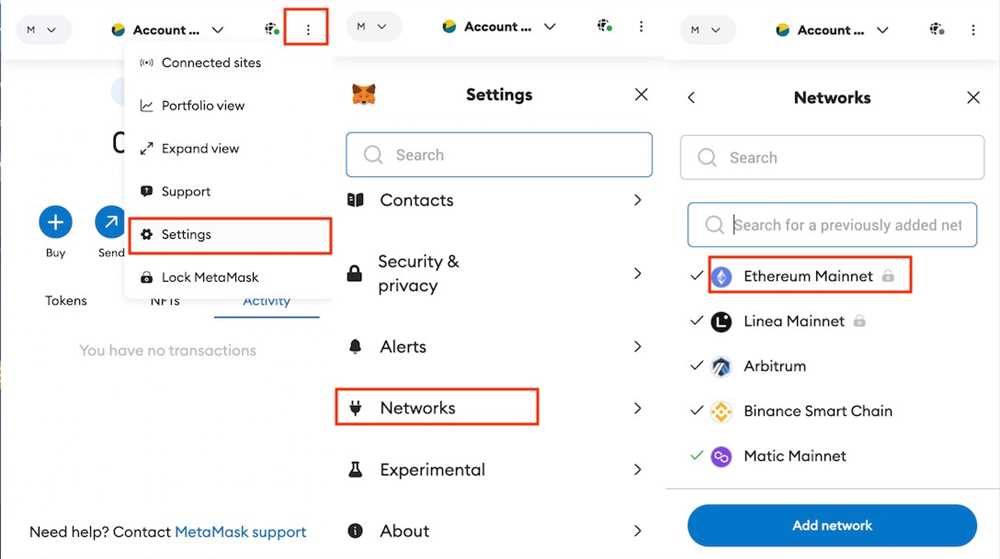
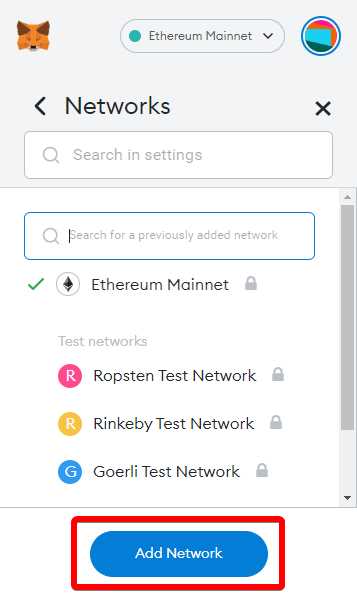
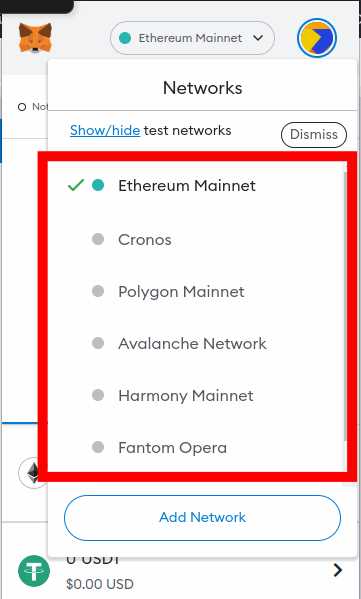
After creating your wallet, you will be asked to select a network. Click on the current network, and from the dropdown menu, select “Ethereum Mainnet.” Metamask will automatically connect to the Ethereum Mainnet.
Step 4: Fund Your Wallet
Now that you’re connected to the Ethereum Mainnet, you need to fund your wallet with Ether (ETH), the native currency of the Ethereum network. You can either purchase ETH from a cryptocurrency exchange or receive it from another Ethereum user.
Note: You will need a small amount of ETH to cover transaction fees when interacting with decentralized applications on the Ethereum Mainnet.
Step 5: Explore the Ethereum Ecosystem
You’re now ready to explore the vast Ethereum ecosystem and interact with decentralized applications (dApps) on the Ethereum Mainnet. Metamask provides a user-friendly interface for accessing dApps and managing your Ethereum transactions. Simply visit a dApp’s website and click on the Metamask extension to connect and authorize transactions.
Remember to exercise caution and do thorough research before interacting with any dApp or engaging in any transactions.
Conclusion
Metamask is an indispensable tool for anyone looking to navigate the Ethereum Mainnet. By following this step-by-step guide, you can easily install Metamask, create a wallet, connect to the Ethereum Mainnet, fund your wallet, and explore the exciting world of decentralized applications. Start your Ethereum journey today and unlock the full potential of this groundbreaking blockchain technology.
How to Use Metamask
Metamask is a browser extension that allows you to interact with the Ethereum network. Whether you are a developer or a regular user, Metamask provides a user-friendly interface to manage your Ethereum wallets and interact with decentralized applications (dApps).
Installation
To get started with Metamask, you first need to install the extension. Metamask can be installed on popular web browsers such as Google Chrome, Mozilla Firefox, Brave, and Microsoft Edge. Simply visit the respective browser’s extension store and search for Metamask. Click on the “Add to Chrome” (or relevant browser) button, and the extension will be installed on your browser.
Creating and Importing Wallets
Once Metamask is installed, you can create a new wallet by clicking on the Metamask extension icon in your browser toolbar. Follow the on-screen instructions to set up a new wallet. Make sure to securely store your seed phrase as it can be used to recover your wallet in case of loss or theft.
If you already have an Ethereum wallet or want to import an existing one, click on the “Import Wallet” option and follow the instructions to import your wallet using your private key, JSON file, or hardware wallet.
Connecting to the Ethereum Mainnet
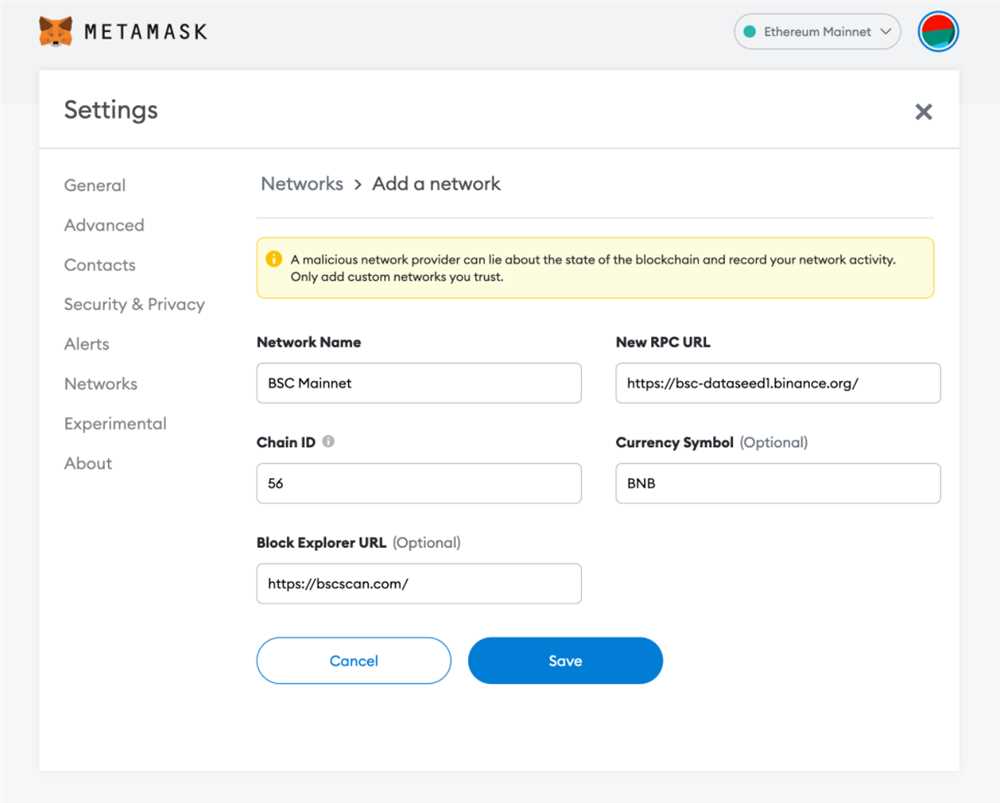
After setting up your wallet, you need to connect Metamask to the Ethereum mainnet to interact with the actual Ethereum network. In the Metamask popup, click on the current network name (e.g., “Ethereum Mainnet”) and select “Main Ethereum Network” from the dropdown menu.
Managing Accounts
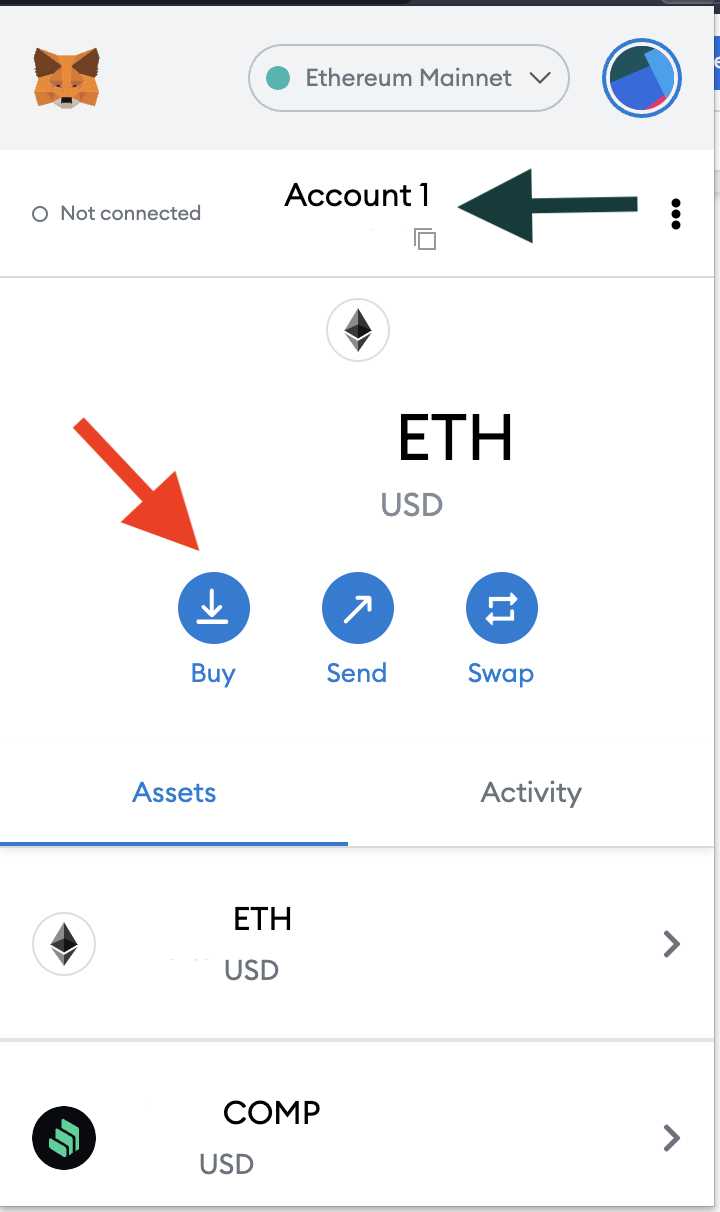
Metamask allows you to manage multiple Ethereum accounts within a single wallet. To add new accounts, click on the account avatar in the top right corner of the Metamask popup and select the “Create Account” option. You can also import existing accounts using the “Import Account” option.
Interacting with dApps
Metamask makes it simple to interact with decentralized applications. When you visit a dApp, such as a decentralized exchange or a blockchain game, Metamask will automatically detect it and show a popup requesting your permission to connect. Review the permissions and click “Connect” to interact with the dApp using your Metamask wallet.
Transacting on Ethereum
When you need to send or receive Ethereum or ERC-20 tokens, Metamask provides a seamless experience. Simply click on the “Send” or “Receive” buttons within the Metamask popup, enter the recipient’s address or scan a QR code, specify the amount and gas fees, and confirm the transaction. Metamask will handle the transaction and show you the status on the Ethereum network.
| Advantages of Using Metamask |
|---|
| 1. Easy wallet management |
| 2. Secure and private transactions |
| 3. Seamless interaction with dApps |
| 4. Customizable gas fees |
Set Up and Install Metamask
To start using Metamask on the Ethereum Mainnet, you will need to set up and install the Metamask extension on your web browser. Follow the steps below to get started:
- Open your web browser and go to the Metamask website.
- Click on the “Get Chrome Extension” button or the “Get Firefox Add-On” button, depending on your web browser.
- You will be redirected to the Chrome Web Store or the Firefox Add-Ons page.
- Click on the “Add to Chrome” button or the “Add to Firefox” button to install the Metamask extension.
- A confirmation dialog box will appear. Click on the “Add extension” button to continue.
- The Metamask extension will be installed and a new tab will open. Click on the “Get Started” button to proceed.
- Create a new Metamask wallet by setting up a password.
- Read and accept the terms of use and privacy policy.
- Click on the “Create” button to create your Metamask wallet.
- You will be provided with a secret backup phrase. Write it down and keep it in a safe place. This phrase can be used to restore your wallet if you ever lose access to it.
- Confirm your backup phrase by selecting the words in the correct order.
- Congratulations! You have successfully set up and installed Metamask on your web browser.
Now you can use Metamask to navigate the Ethereum Mainnet and interact with decentralized applications (dApps) securely and easily.
Connect to the Ethereum Mainnet

Before you can start using Metamask to navigate the Ethereum Mainnet, you first need to connect to it. Follow these steps to connect:
Step 1: Install Metamask
If you haven’t already, install the Metamask wallet extension on your preferred web browser. You can find the extension on the Metamask website or in your browser’s extension store.
Step 2: Set Up Metamask
Once installed, open Metamask and set up your wallet. You will be asked to create a new wallet or import an existing one. Follow the prompts to complete the setup process.
It is important to secure your wallet by creating a strong password and saving your seed phrase in a secure place. This seed phrase will be used to restore your wallet if you ever lose access to it.
Step 3: Connect to the Ethereum Mainnet
After setting up your wallet, you will see the Metamask icon in your browser’s toolbar. Click on the icon to open the Metamask interface.
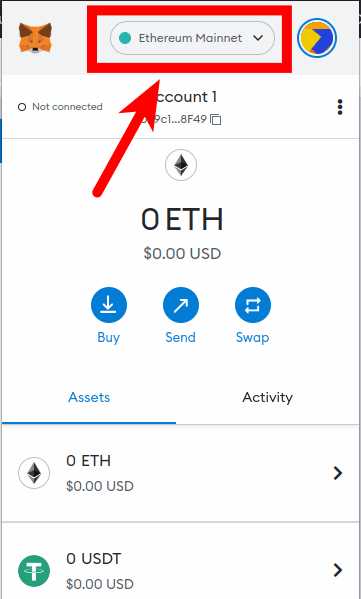
At the top of the Metamask interface, you will see a dropdown menu with different networks. Select “Ethereum Mainnet” from the list to connect to the Ethereum Mainnet.
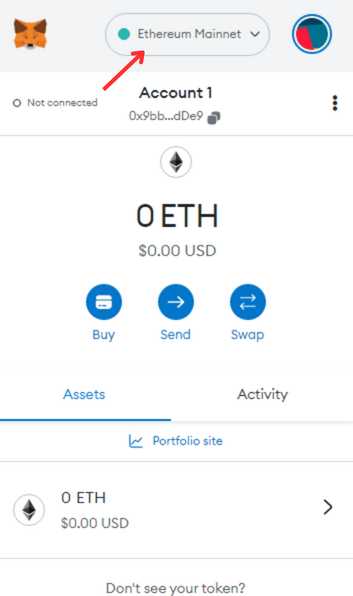
Once connected, you will be able to view your Ethereum address and balance in the Metamask interface. You can now use Metamask to interact with decentralized applications and navigate the Ethereum Mainnet.
Note: Make sure you are connected to the correct network when interacting with decentralized applications. Using the wrong network could result in the loss of your funds.
Remember to always exercise caution and verify the authenticity of the decentralized applications you interact with to protect your funds and personal information.
That’s it! You are now connected to the Ethereum Mainnet and ready to explore the world of decentralized finance and blockchain applications.
Import or Create a Wallet
To get started with Metamask, the first thing you need to do is import or create a wallet. A wallet is a software application that allows you to securely store and manage your Ethereum funds. Metamask makes it easy to import an existing wallet or create a new one.
Importing a Wallet
If you already have an Ethereum wallet and want to use it with Metamask, you can import it by following these steps:
- Click on the Metamask extension icon in your browser toolbar.
- Click on the “Import Wallet” button.
- Enter your wallet’s private key or recovery phrase in the designated field.
- Click on “Import” to import your wallet.
It’s important to note that when you import a wallet, Metamask will not have access to your private key or recovery phrase. Your wallet’s security remains intact, and you can use Metamask to interact with the Ethereum network without compromising your funds.
Creating a New Wallet

If you don’t have an existing Ethereum wallet, you can easily create a new one using Metamask. Here’s how:
- Click on the Metamask extension icon in your browser toolbar.
- Click on the “Create a Wallet” button.
- Enter a strong password for your wallet.
- Click on “Create” to create your new wallet.
It’s essential to choose a strong and unique password to ensure the security of your wallet. Metamask will generate a unique recovery phrase for your wallet, which you should write down and store in a safe place. This recovery phrase can be used to restore your wallet if needed.
Start Navigating and Interacting with the Ethereum Mainnet
Now that you have set up Metamask and connected it to the Ethereum Mainnet, you are ready to start exploring and interacting with the network. Here are a few key steps to get started:
1. Discover Ethereum DApps
Ethereum DApps (Decentralized Applications) are applications that run on the Ethereum blockchain. These can range from decentralized exchanges to decentralized finance platforms, and much more. To discover and access these DApps, follow these steps:
- Open the Metamask extension in your browser.
- Click on the “DApps” tab at the top of the extension.
- Browse through the list of popular DApps or search for specific ones.
- Once you find a DApp of interest, click on it to access and interact with it.
2. Send and Receive Ether (ETH)
Metamask allows you to easily send and receive Ether, the native cryptocurrency of the Ethereum network. To send or receive ETH, follow these steps:
- Click on the Metamask extension in your browser.
- Click on the “Send” or “Receive” tab at the top of the extension.
- If you want to send ETH, enter the recipient’s address, the amount to send, and any additional information.
- If you want to receive ETH, click on the “Copy” button to copy your wallet address and share it with the sender.
- Review the transaction details and confirm the transaction.
3. Explore Ethereum Block Explorer
An Ethereum block explorer allows you to view and explore the Ethereum blockchain. It provides detailed information about transactions, blocks, addresses, and more. To explore the Ethereum Mainnet using a block explorer, follow these steps:
- Open your preferred Ethereum block explorer (such as Etherscan or Etherchain).
- Enter the Ethereum address or transaction hash you want to explore in the search bar.
- Review the information and data provided, such as transaction history, balances, and smart contracts.
- Use the navigation features of the block explorer to explore different blocks, addresses, or transactions.
By following these steps, you can start navigating and interacting with the Ethereum Mainnet using Metamask. Remember to proceed with caution and double-check all transaction details before confirming any actions.
What is Metamask?
Metamask is a cryptocurrency wallet and browser extension that allows users to interact with decentralized applications (dApps) on the Ethereum blockchain.
How can I install Metamask?
To install Metamask, you can visit the official website and download the extension for your preferred browser. Once installed, you will be prompted to create a new wallet or import an existing one.
What is the Ethereum Mainnet?
The Ethereum Mainnet is the main network of the Ethereum blockchain, where real transactions occur and where the majority of decentralized applications are deployed and used.
How can I navigate the Ethereum Mainnet using Metamask?
To navigate the Ethereum Mainnet using Metamask, you need to first ensure that you have selected the Mainnet network in your Metamask settings. Then, you can browse and use various dApps and decentralized services on the Mainnet, such as decentralized exchanges, lending platforms, and more.