
Metamask is a popular web3 wallet that allows users to manage their digital assets and interact with decentralized applications on the Ethereum blockchain. One of the most commonly used cryptocurrencies on the Ethereum network is Dai, a stablecoin pegged to the value of the US dollar. In this step-by-step guide, we will walk you through the process of adding Dai to your Metamask wallet.
Step 1: Install the Metamask Extension
The first step is to install the Metamask browser extension on your preferred web browser. Metamask is available for Google Chrome, Firefox, and Brave. Simply search for “Metamask” in the extension marketplace of your browser and follow the installation instructions.
Step 2: Create or Import a Wallet
Once you have installed Metamask, open the extension and either create a new wallet or import an existing one. If you are creating a new wallet, make sure to write down your seed phrase and store it in a secure location. If you are importing a wallet, enter your private key or seed phrase to access your existing funds.
Step 3: Connect to the Ethereum Mainnet
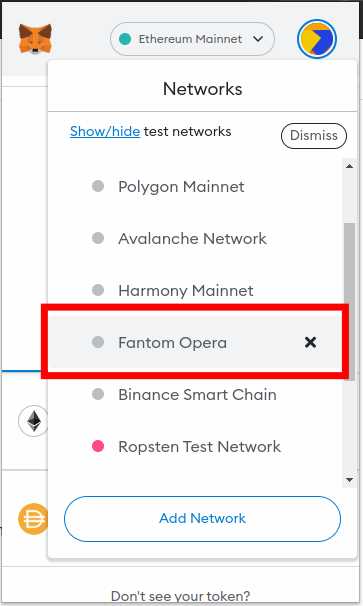
After setting up your wallet, you will need to connect to the Ethereum mainnet. Click on the network dropdown at the top of the Metamask extension and select “Ethereum Mainnet”. If you are using a testnet, such as Ropsten or Kovan, select the appropriate network instead.
Step 4: Add Dai to your Wallet
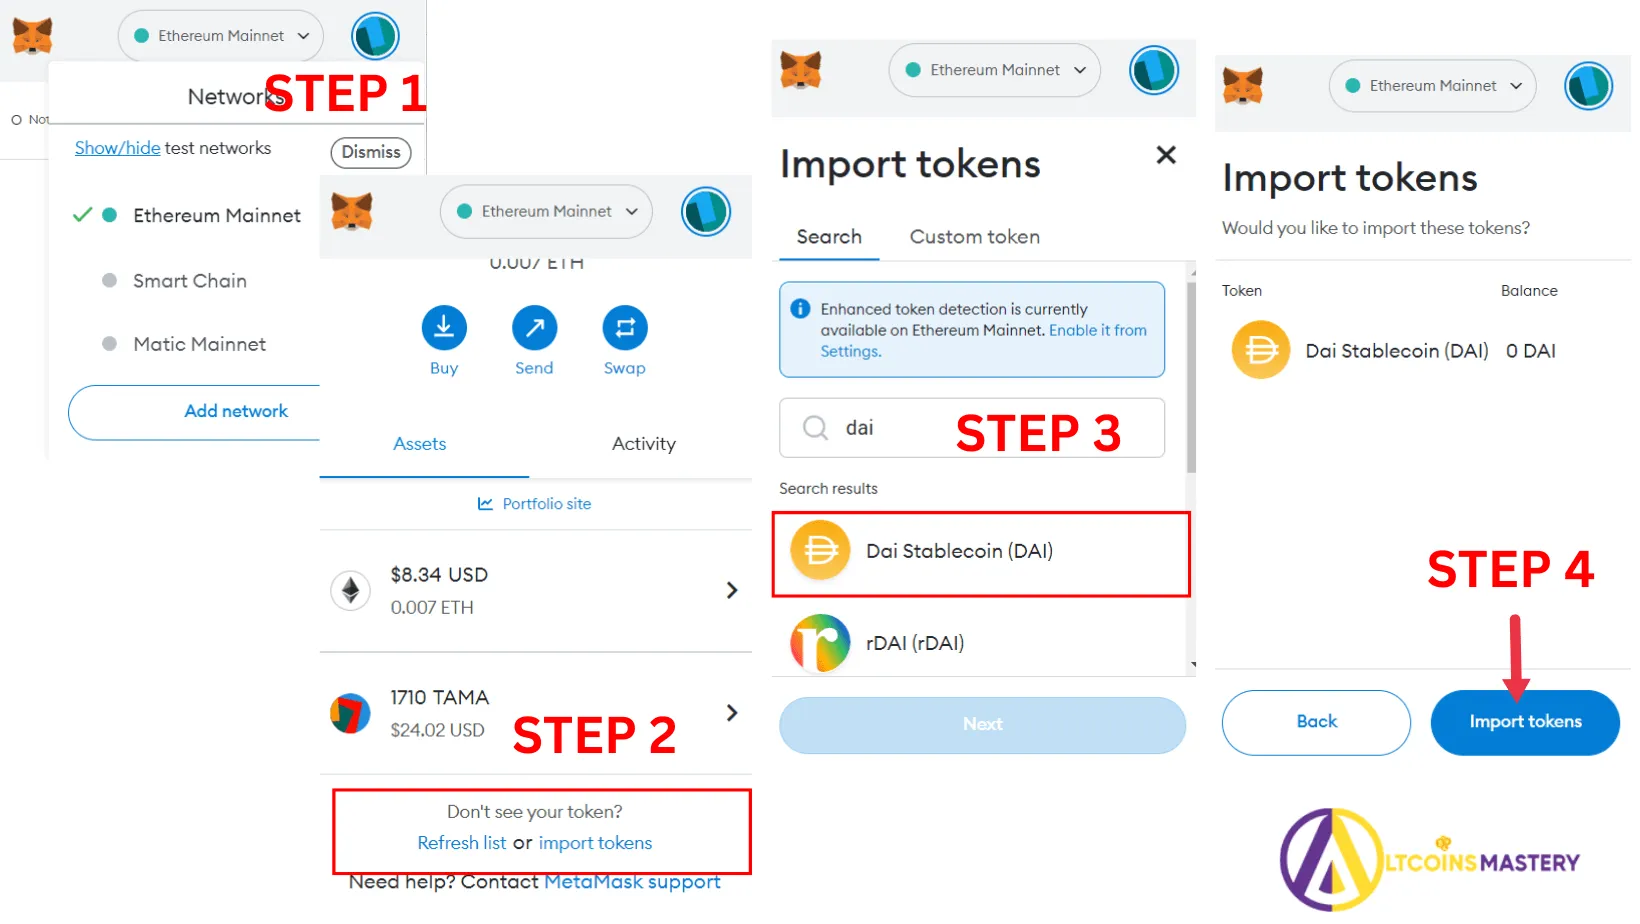
Now that you are connected to the Ethereum mainnet, it’s time to add Dai to your Metamask wallet. Click on the “Assets” tab and then on the “Add Token” button. In the search bar, type “Dai” and select the appropriate token from the list. Click “Next” and then “Add Tokens” to finalize the process.
Step 5: Start Using Dai
Congratulations! You have successfully added Dai to your Metamask wallet. You can now use Dai to make transactions, interact with decentralized applications, or even earn interest by lending it on platforms like Compound or Aave. Enjoy the benefits of decentralized finance with Dai and Metamask!
How to Add Dai to Metamask
Adding Dai to your Metamask wallet is a simple process that allows you to store, send, and receive this stablecoin. Follow the steps below to add Dai to your Metamask:
Step 1: Open your Metamask wallet extension in your browser. If you don’t have Metamask installed, you can download it from the official website and set up a new wallet.
Step 2: Once you have opened your Metamask wallet, click on the “Assets” tab at the top of the interface.
Step 3: Scroll through the list of supported tokens and click on the “Add Token” button.
Step 4: In the search field, type “Dai” to find the Dai token. Once you see it in the search results, click on “Next.”
Step 5: You will see a summary of the Dai token information. Click on the “Add Tokens” button to proceed.
Step 6: Confirm the addition of Dai tokens to your wallet by clicking on the “Add Tokens” button in the confirmation dialog box.
Step 7: Wait for a few moments while the Dai token is added to your Metamask wallet. You will see a success message once the process is completed.
Step 8: Now you can see your Dai balance in the “Assets” tab of your Metamask wallet, along with other supported tokens.
You have successfully added Dai to your Metamask wallet! You can now use the wallet to manage your Dai tokens, including sending or receiving them, interacting with dApps, or even participating in DeFi protocols that support Dai.
Note: Make sure that you are adding the correct Dai token to your Metamask wallet. There may be multiple versions of Dai, so verify the contract address (if applicable) before proceeding with the token addition.
Step 1: Install and Set Up Metamask
Before you can add Dai to your Metamask wallet, you need to have Metamask installed and set up on your browser. Metamask is a browser extension that allows you to interact with the Ethereum blockchain and store your cryptocurrencies securely.
1. Install Metamask Extension
To begin, you’ll need to install the Metamask extension on your browser. Visit the Metamask website or search for the Metamask extension in your browser’s extension store. Once you find it, click on “Add to Chrome” or “Add to Firefox” to install the extension. Follow the prompts to complete the installation process. Finally, click on the Metamask icon in your browser’s toolbar to launch the extension.
2. Set Up Metamask
After launching the Metamask extension, you’ll be prompted to create a new wallet or import an existing one. If you’re new to Metamask, click on “Create a Wallet”. You’ll be asked to set a password for your wallet. Make sure to choose a strong password that you can remember.
Next, you’ll be shown a set of backup phrases. It’s important to write down these phrases and keep them in a safe place. These phrases can be used to recover your wallet in case you forget your password or lose access to your device.
After backing up your wallet, you’ll need to verify your backup phrases. This step ensures that you’ve properly recorded the phrases. Follow the instructions on the screen to complete the verification process.
Once your wallet is set up, you’ll be asked to choose a network. Select the Ethereum mainnet, as Dai is an ERC-20 token on the Ethereum blockchain.
Congratulations! You have now installed and set up Metamask on your browser. You’re ready to move on to the next steps of adding Dai to your wallet.
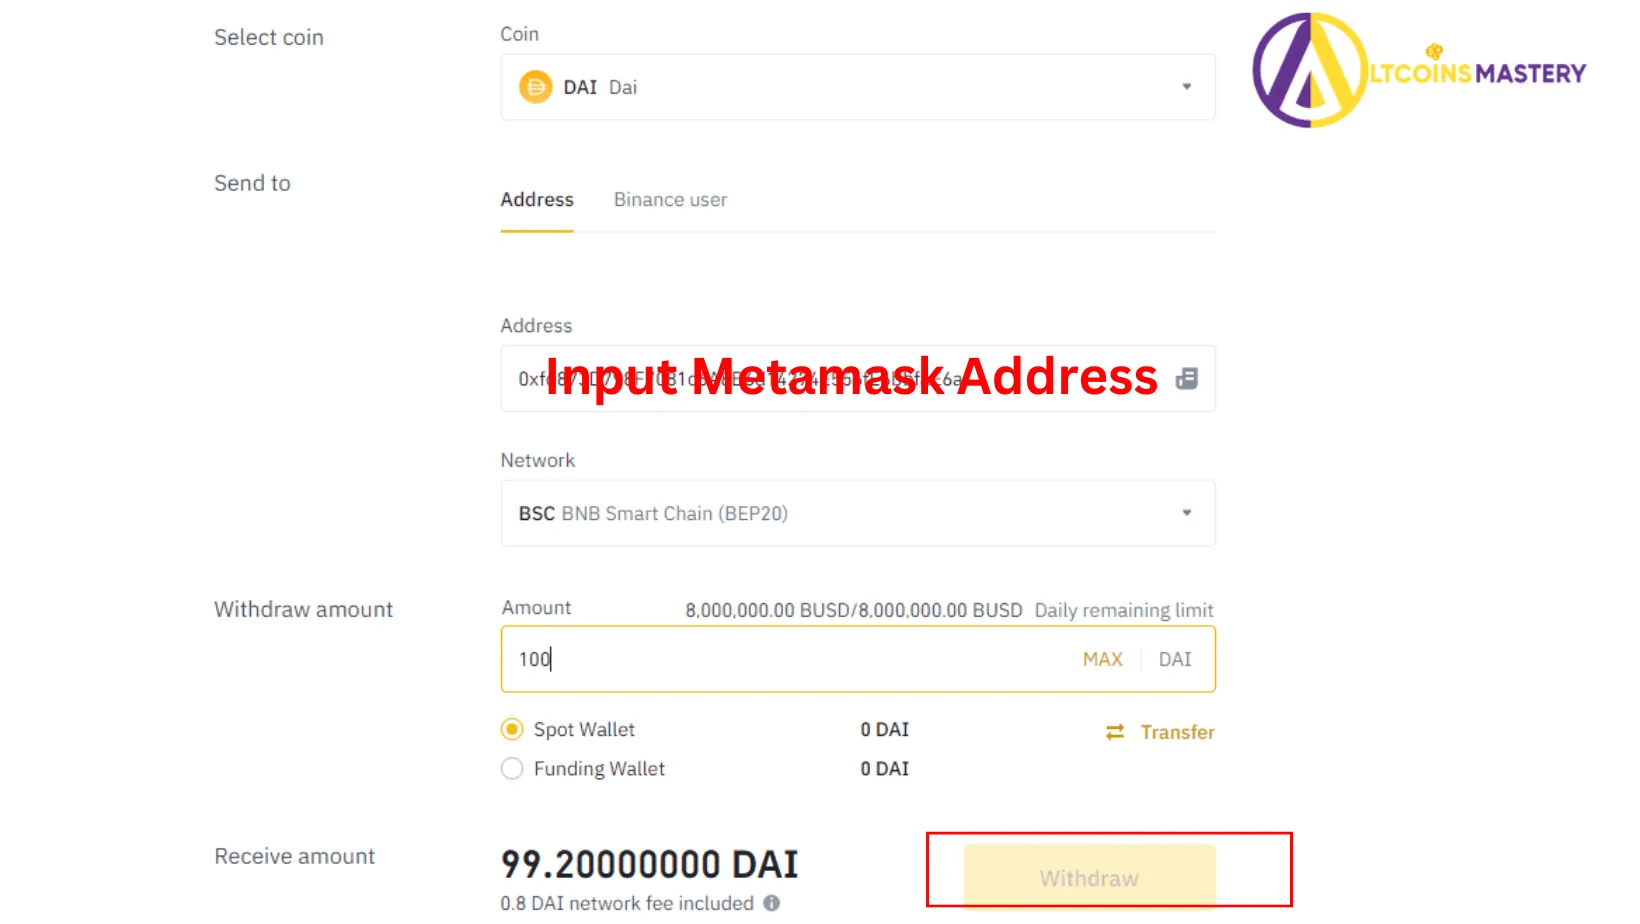
Step 2: Obtain Dai
Before you can add Dai to your Metamask wallet, you will need to obtain some Dai tokens. Dai is a stablecoin that is pegged to the value of the US dollar, meaning that 1 Dai is always equal to 1 US dollar.
There are several ways you can obtain Dai:
| 1. Purchase Dai | If you don’t already have Dai, you can purchase it from a cryptocurrency exchange. There are many exchanges that offer Dai, such as Coinbase, Binance, or Kraken. Simply create an account on one of these exchanges, deposit your desired amount of USD or other cryptocurrencies, and then use those funds to buy Dai. |
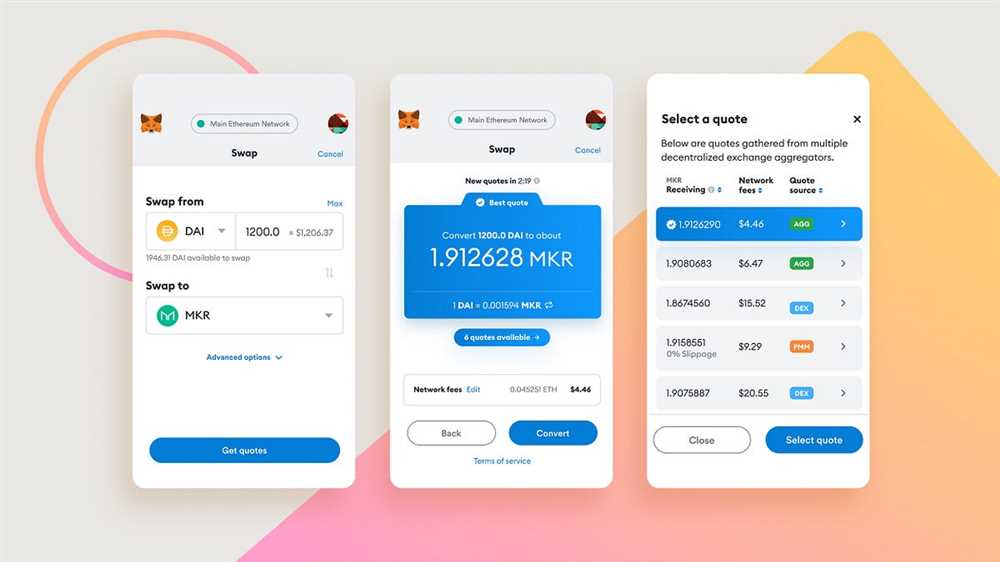
| 2. Convert Ether to Dai | If you already have Ethereum (ETH), you can use a decentralized exchange (DEX) such as Uniswap or Sushiswap to convert your ETH into Dai. These DEX platforms allow you to swap one cryptocurrency for another directly from your wallet without the need for a centralized exchange. |
| 3. Earn Dai | Some platforms or services offer ways to earn Dai by participating in activities such as lending or staking. For example, you can lend your cryptocurrency assets on decentralized lending platforms like Compound or Aave and earn interest in Dai. |
Once you have obtained Dai, you will be ready to proceed to the next step and add it to your Metamask wallet.
Step 3: Add Dai to Metamask
Now that you have installed and set up Metamask, the next step is to add Dai to your wallet. Dai is a stablecoin that is pegged to the value of the US dollar, which makes it a popular choice among cryptocurrency users.
To add Dai to your Metamask wallet, follow these steps:
1. Open the Metamask extension
Click on the Metamask icon in your browser toolbar to open the extension. If you are not already logged in, enter your password and log in to your Metamask account.
2. Go to the “Assets” tab
Once you are logged in, click on the “Assets” tab at the top of the Metamask window. This will open a list of your current assets in your wallet.
3. Click on “Add Token”
At the bottom of the assets list, you will see a button labeled “Add Token.” Click on this button to open the token selection menu.
4. Select “Custom Token”
In the token selection menu, click on the “Custom Token” tab at the top. This will allow you to manually add the Dai token to your wallet.
5. Enter the Dai token contract address
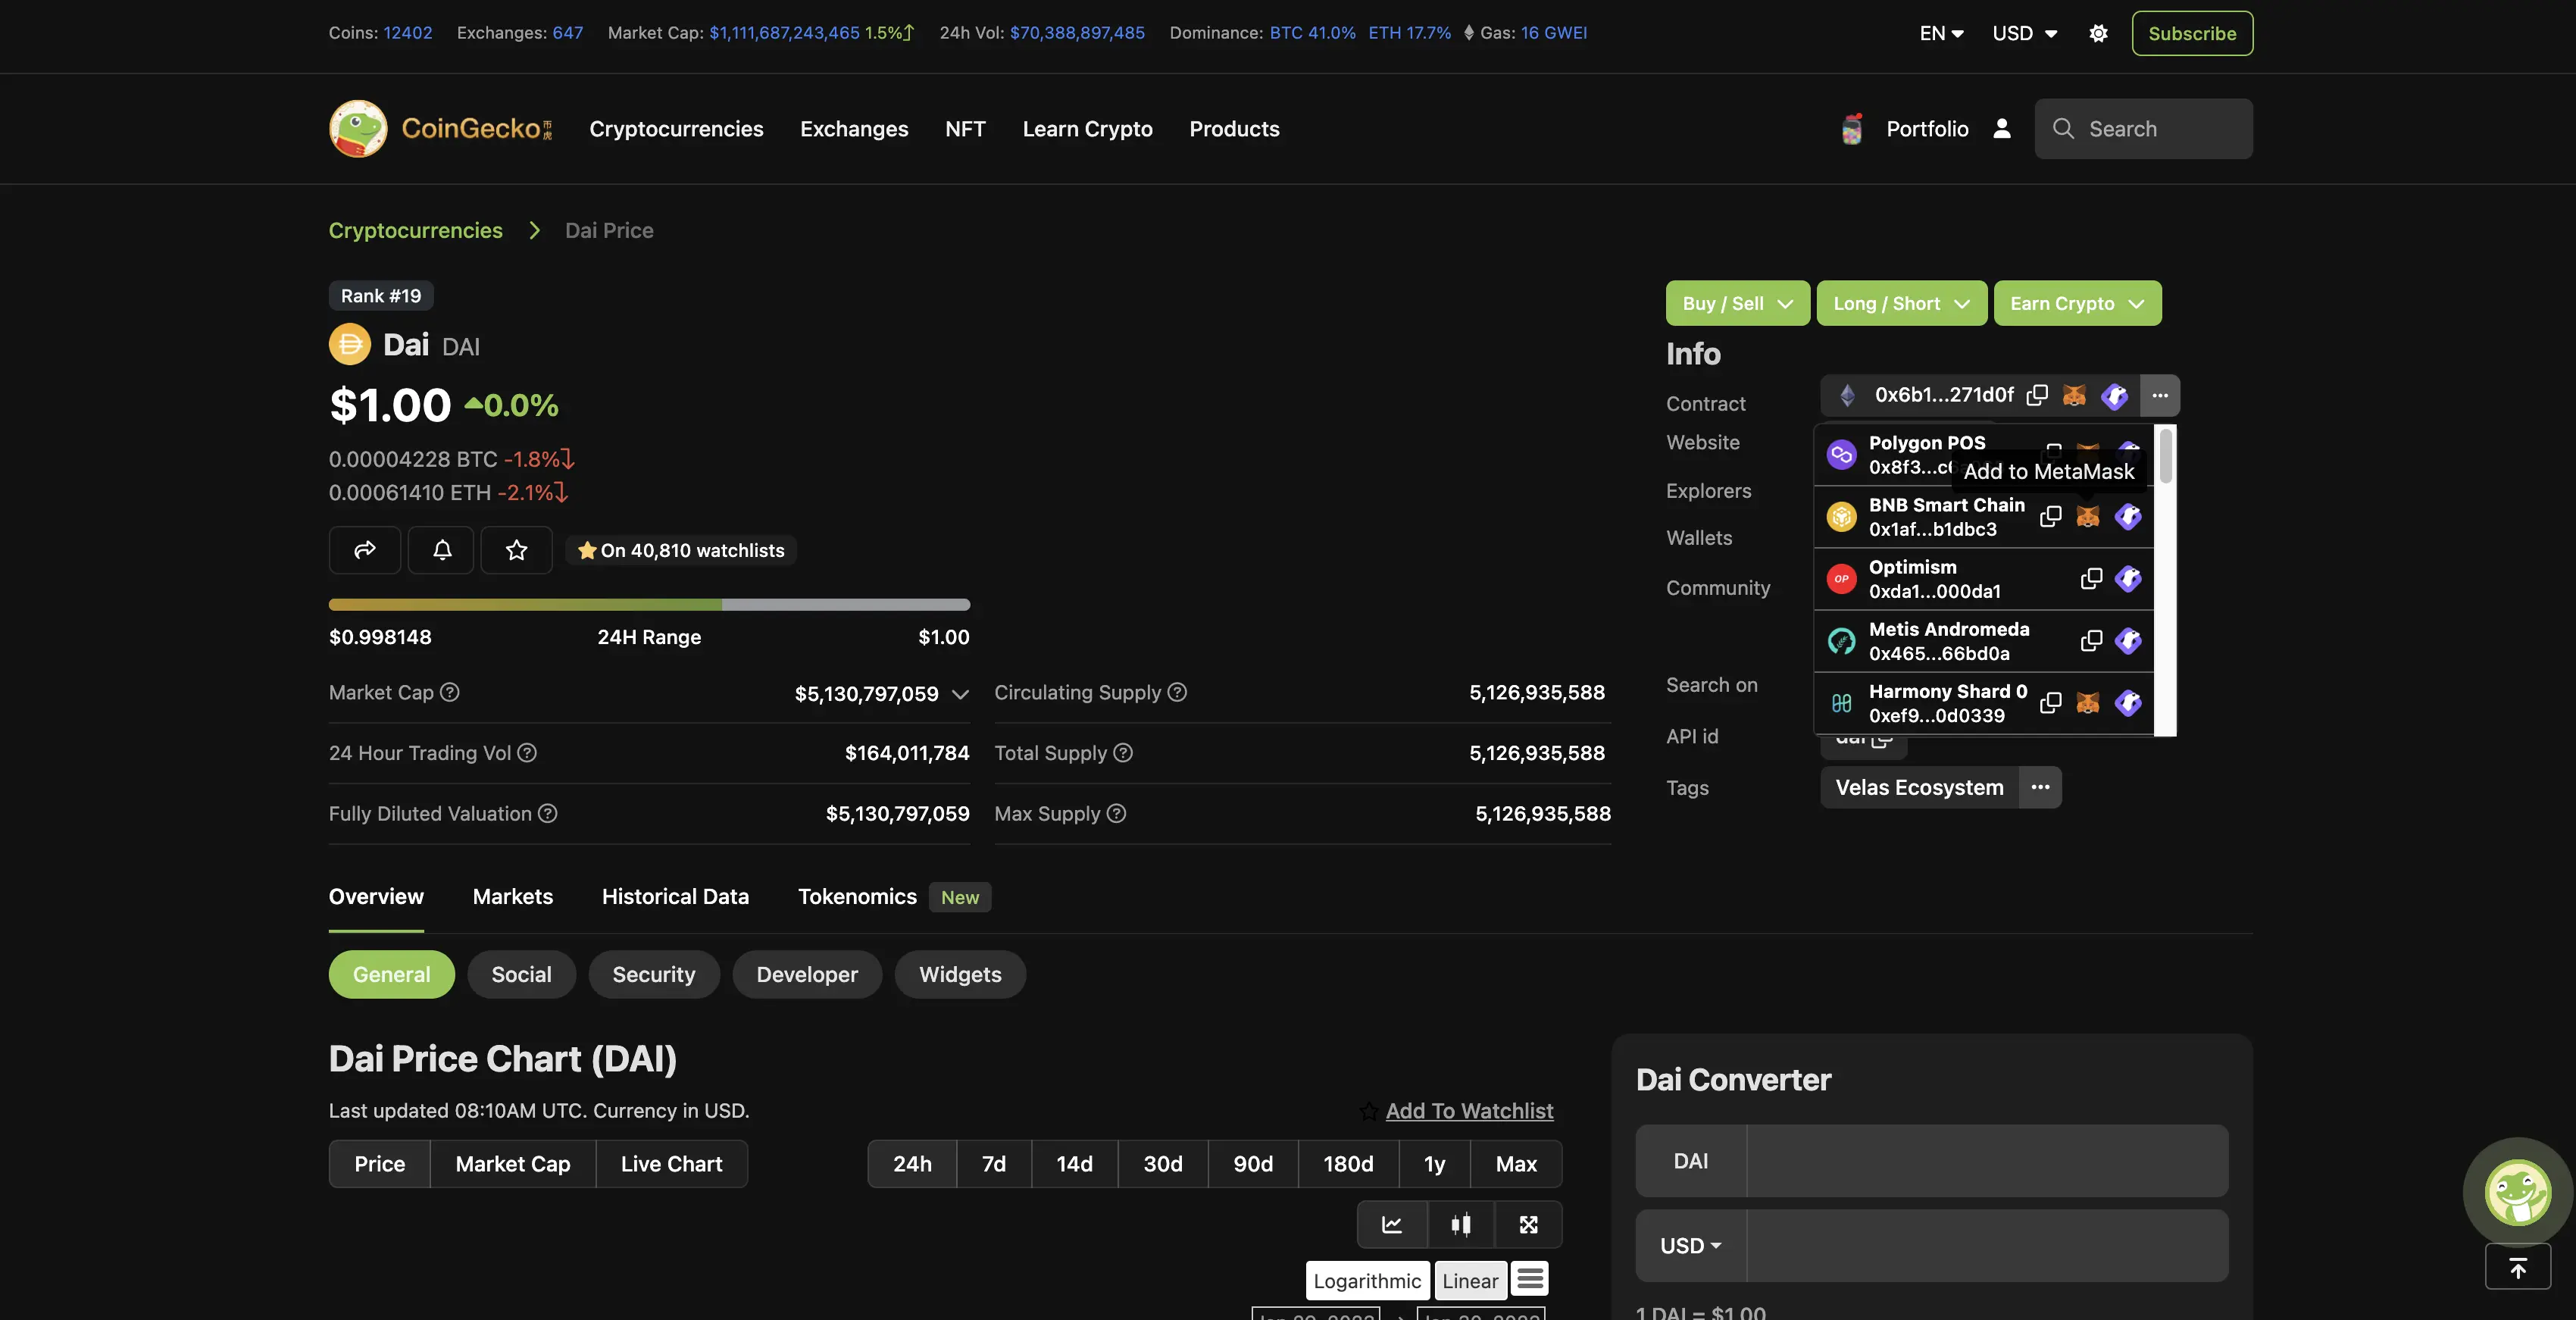
Next, you will need to enter the Dai token contract address. The contract address for Dai is: 0x6B175474E89094C44Da98b954EedeAC495271d0F. Copy and paste this address into the “Token Contract Address” field.
6. Click on “Next”
After entering the contract address, click on the “Next” button to proceed.
7. Confirm the token details
On the next screen, you will see the token details for Dai. Double-check that the token symbol is displayed as “DAI” and the decimals are set to “18.” Once you have confirmed the details, click on the “Add Tokens” button.
Congratulations! You have successfully added Dai to your Metamask wallet. You can now view your Dai balance and use it for transactions within the Metamask ecosystem.
Note: It’s important to always ensure that you are using the correct contract address when adding tokens to your wallet. Using the wrong contract address can result in the loss of your funds.
What is Dai?
Dai is a stablecoin cryptocurrency pegged to the value of the US dollar. It is decentralized and operates on the Ethereum blockchain.
Why would I want to add Dai to Metamask?
Adding Dai to Metamask allows you to easily store, send, and receive Dai from within the Metamask wallet. It provides a convenient way to manage your Dai holdings.
How do I add Dai to Metamask?
To add Dai to Metamask, you need to first obtain Dai tokens. You can purchase Dai from a cryptocurrency exchange or borrow it from a DeFi lending platform. Once you have acquired Dai tokens, you can add them to Metamask by clicking on the “Add Token” button in the wallet interface and entering the contract address or token symbol for Dai.
Can I use other stablecoins instead of Dai in Metamask?
Yes, Metamask supports various stablecoins, including USDC, Tether (USDT), and others. You can add these stablecoins to Metamask by following a similar process as adding Dai. Just make sure to obtain the tokens first and then use the “Add Token” feature in Metamask to add them to your wallet.