
If you’re a cryptocurrency enthusiast, chances are you’ve heard of BEP20 tokens. BEP20 is a technical standard on the Binance Smart Chain (BSC), allowing for the creation and exchange of tokens. Metamask is a popular cryptocurrency wallet that allows users to securely store and manage their digital assets. In this article, we’ll walk you through the simple steps to add a BEP20 wallet to Metamask, enabling you to access and interact with BEP20 tokens with ease.
Step 1: Install Metamask Extension
The first step in adding a BEP20 wallet to Metamask is to install the Metamask extension on your preferred browser. Metamask is compatible with popular browsers such as Google Chrome, Firefox, and Brave. Simply search for “Metamask” in the browser’s extension store and follow the installation instructions.
Step 2: Create or Import a Metamask Account
Once you have installed the Metamask extension, you will need to create a new account or import an existing one. If you’re a new user, click on the “Create a Wallet” option and follow the on-screen instructions to set up a new account. If you already have a Metamask account, you can import it by clicking on the “Import Wallet” option and entering your recovery phrase or private key.
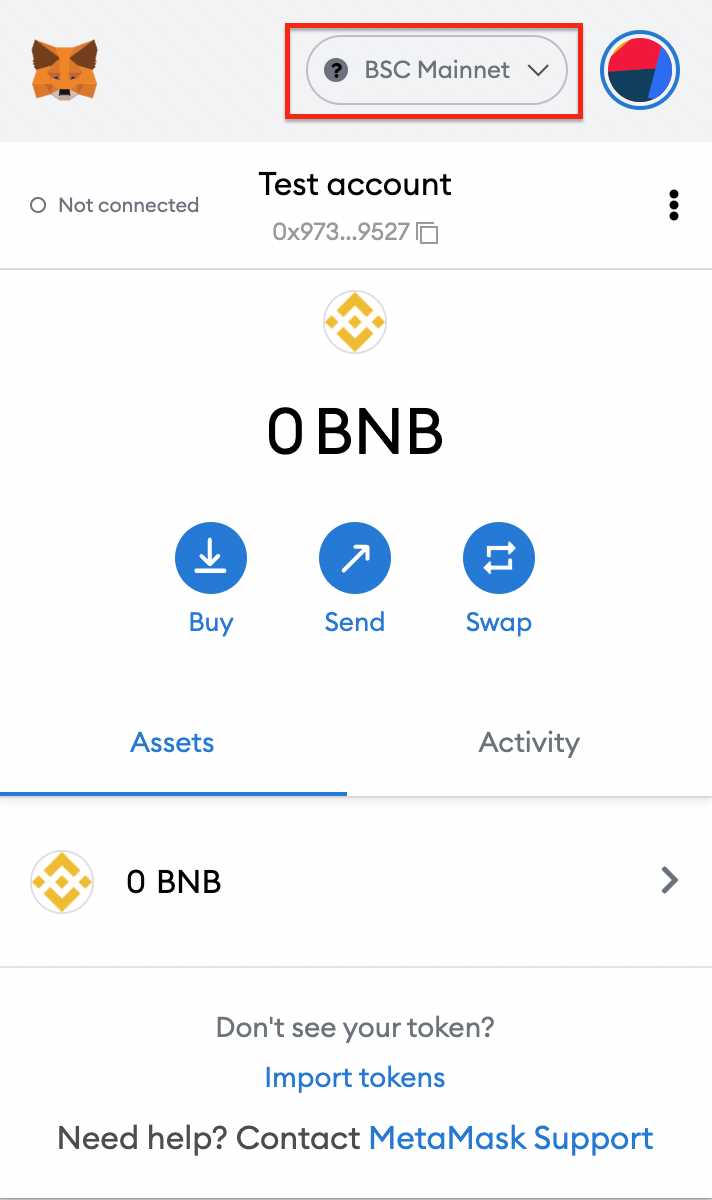
Step 3: Connect to the Binance Smart Chain Network
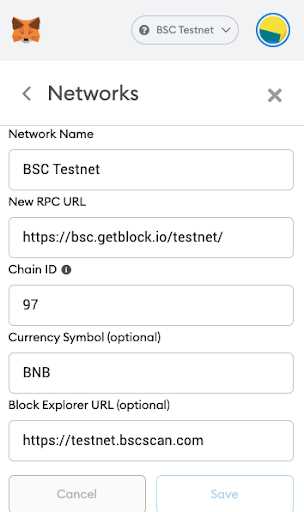
After setting up your Metamask account, the next step is to connect to the Binance Smart Chain network. To do this, click on the network selection dropdown in the Metamask extension and select “Custom RPC”. In the network settings, enter the following details:
Network Name: Binance Smart Chain
New RPC URL: https://bsc-dataseed.binance.org/
Chain ID: 56
Symbol: BNB
Block Explorer URL: https://bscscan.com/
Step 4: Add BEP20 Wallet
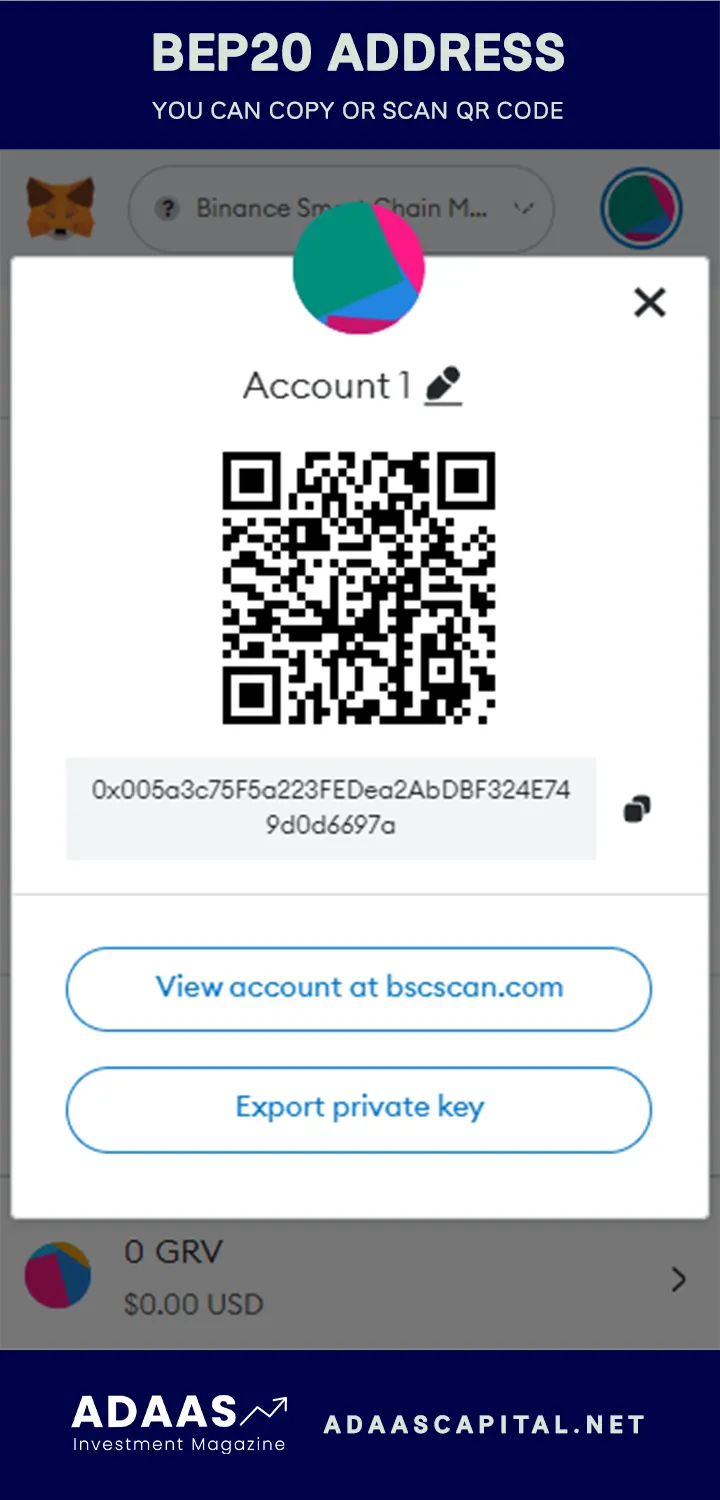
Now that you’re connected to the Binance Smart Chain network, it’s time to add your BEP20 wallet to Metamask. Click on the account icon in the Metamask extension, then select “Import Account”. In the following screen, enter the wallet address or scan the QR code of your BEP20 wallet. Once done, click “Import” to add the wallet to your Metamask account.
Step 5: Interact with BEP20 Tokens
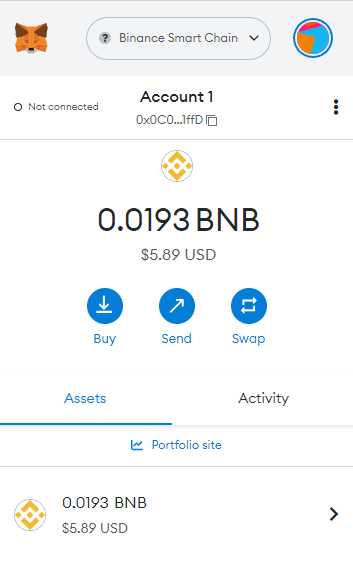
With your BEP20 wallet successfully added to Metamask, you can now start interacting with BEP20 tokens. You can view your token balances, send and receive BEP20 tokens, and even participate in decentralized finance (DeFi) projects built on the Binance Smart Chain. Simply navigate to the “Assets” tab in your Metamask account to get started.
Adding a BEP20 wallet to Metamask opens up a world of possibilities in the Binance Smart Chain ecosystem. By following these simple steps, you can seamlessly manage your BEP20 tokens and participate in the growing decentralized finance space.
Easily Add BEP20 Wallet to Metamask
If you’re looking to add a BEP20 wallet to your Metamask, the process is actually quite simple. By following a few easy steps, you’ll be able to access and manage your BEP20 tokens right from your Metamask wallet. Here’s a simple guide to help you get started:
- Make sure you have the latest version of Metamask installed on your browser. If you don’t have it yet, you can download it from the official Metamask website and install it.
- Open your Metamask wallet and click on the account icon at the top right corner of the screen. From the drop-down menu, select “Add Account”.
- A new window will appear with different options for adding an account. Select the “Binance Smart Chain” option.
- Next, click on the “Import Account” button.
- You will be prompted to enter your private key or recovery phrase. Make sure to enter the correct information to import your BEP20 wallet into Metamask.
- Once you’ve entered the necessary information, click on “Import”.
- Your BEP20 wallet should now be successfully added to Metamask. You can confirm this by checking if your account balance is displayed on the Metamask interface.
- To view and manage your BEP20 tokens, click on the “Assets” tab in Metamask and search for your preferred BEP20 token.
That’s it! You’ve successfully added your BEP20 wallet to Metamask. Now you can easily access and manage your BEP20 tokens right within your Metamask interface. Enjoy seamless integration and a user-friendly experience with your BEP20 wallet and Metamask.
Simple Guide and Steps
If you want to add a BEP20 wallet to your Metamask, you can easily do so by following these simple steps:
Step 1: Install Metamask Extension
The first thing you need to do is install the Metamask extension on your web browser. You can find it in the Chrome Web Store or the Firefox Add-ons Marketplace. Once the extension is installed, you will see the Metamask icon in your browser toolbar.
Step 2: Create a New Wallet
Click the Metamask icon and select “Create a Wallet” to start the wallet creation process. You will be prompted to set a password and agree to the terms of service. Make sure to choose a strong password and keep it safe.
Step 3: Backup Your Seed Phrase
After creating your wallet, Metamask will provide you with a seed phrase. This is a set of 12 or 24 words that can be used to restore your wallet in case you forget your password or lose access to your device. Write down the seed phrase and store it in a safe place.
Step 4: Add the BEP20 Token
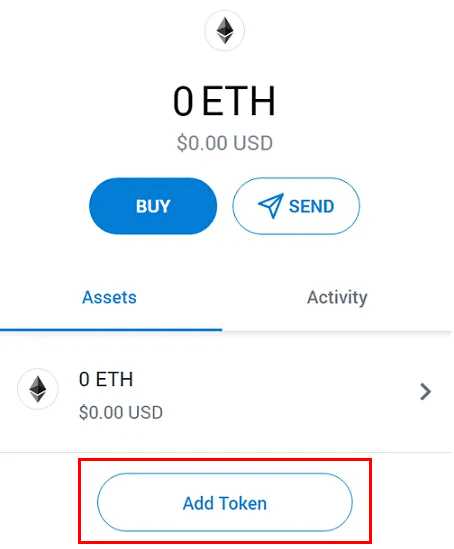
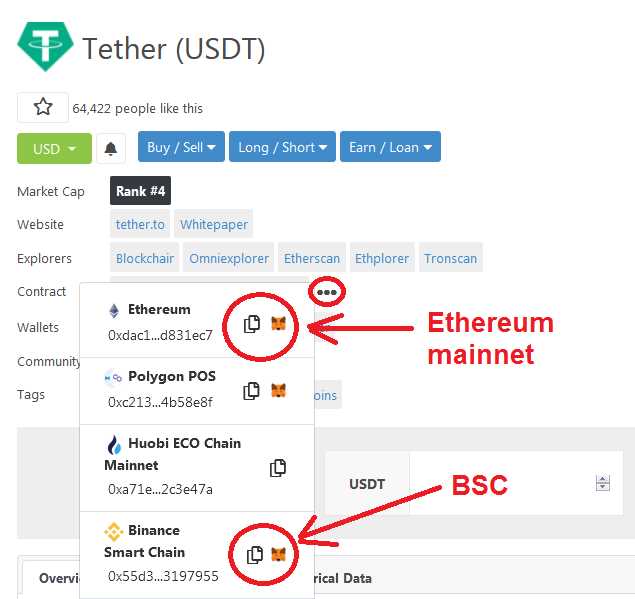
To add a BEP20 wallet, click on the Metamask extension icon and select “Add Token” from the dropdown menu. In the token contract address field, enter the contract address of the BEP20 token you want to add. The token details, including its symbol and decimal places, will be automatically filled in.
Step 5: Confirm and Save
Once you have entered the token contract address, click “Add” to add the token to your wallet. You will be prompted to confirm the addition of the token. Review the details and click “Confirm” to complete the process. The BEP20 token will now be visible in your Metamask wallet.
That’s it! You have successfully added a BEP20 wallet to your Metamask. Now you can easily manage your BEP20 tokens and participate in the Binance Smart Chain ecosystem.
Note: Make sure to double-check the token contract address before adding it to your wallet to avoid any issues or scams.
Disclaimer: This guide is for informational purposes only and should not be considered as financial advice. Always do your own research before making any investment decisions.
Why Add a BEP20 Wallet to Metamask?
Metamask is one of the most popular cryptocurrency wallets that allows users to interact with decentralized applications (DApps) on the Ethereum blockchain. By default, Metamask supports Ethereum and ERC20 tokens. However, if you want to interact with projects built on the Binance Smart Chain (BSC) and use BEP20 tokens, you will need to add a BEP20 wallet to Metamask.
Adding a BEP20 wallet to Metamask provides you with the ability to manage your BEP20 tokens alongside your Ethereum assets. This allows you to seamlessly switch between Ethereum and BSC networks without the need for multiple wallets or applications.
By adding a BEP20 wallet to Metamask, you can:
- Send and receive BEP20 tokens.
- Participate in BSC-based decentralized finance (DeFi) projects.
- Trade BEP20 tokens on decentralized exchanges (DEXs) on the Binance Smart Chain.
- Interact with BSC-based DApps and protocols.
With the increasing popularity of the Binance Smart Chain and the growing number of projects built on it, adding a BEP20 wallet to Metamask opens up a world of opportunities for users to explore and participate in the BSC ecosystem.
Step-by-Step Guide to Adding a BEP20 Wallet
If you are looking to add a BEP20 wallet to your Metamask account, follow these simple steps:
| Step 1: | Open your Metamask wallet and make sure you are on the main screen. |
| Step 2: | Click on the account icon located at the top right corner of the screen. |
| Step 3: | A dropdown menu will appear. Select “Add Account” from the options. |
| Step 4: | A new window will pop up, asking you to choose the type of network. Select “Custom RPC”. |
| Step 5: | In the “Network Name” field, enter a name for your network. It can be anything you like. |
| Step 6: | In the “New RPC URL” field, enter the URL of the BEP20 network you want to connect to. This can usually be found on the project’s website or in their documentation. |
| Step 7: | In the “Chain ID” field, enter the chain ID for the BEP20 network you are connecting to. Again, this information can usually be found in the project’s documentation. |
| Step 8: | Leave the “Symbol” and “Block Explorer URL” fields empty. |
| Step 9: | Click on the “Save” button at the bottom of the window. |
| Step 10: | Once you have saved the network, you will be redirected back to the main screen of your Metamask wallet. Your new BEP20 wallet should now appear in the account dropdown menu. |
That’s it! You have successfully added a BEP20 wallet to your Metamask account. You can now use this wallet to store and manage your BEP20 tokens.
What is Metamask?
Metamask is a cryptocurrency wallet that allows users to securely store and manage their digital assets. It is a browser extension that can be added to popular web browsers like Chrome, Firefox, and Brave.