
Are you interested in exploring different blockchain networks and using decentralized applications (dApps)? One network that has gained popularity recently is Polygon. Polygon is a layer 2 scaling solution for Ethereum, offering faster transactions and lower fees. To start using Polygon and its dApps, you’ll need to add the Polygon network to your Metamask wallet. In this step-by-step guide, we’ll walk you through the process of adding the Polygon network to your wallet.
Step 1: Install Metamask Wallet
If you haven’t already, the first step is to install the Metamask wallet extension in your browser. Metamask is a popular Ethereum wallet that allows you to interact with Ethereum-based dApps. You can download and install Metamask by visiting their official website and following the instructions for your specific browser.
Step 2: Create or Import a Wallet
Once you have installed Metamask, the next step is to create a new wallet or import an existing one. If you are creating a new wallet, make sure to save and secure your seed phrase. If you are importing an existing wallet, you can do so by selecting the option to import using your seed phrase or private key.
Step 3: Switch to the Polygon Network
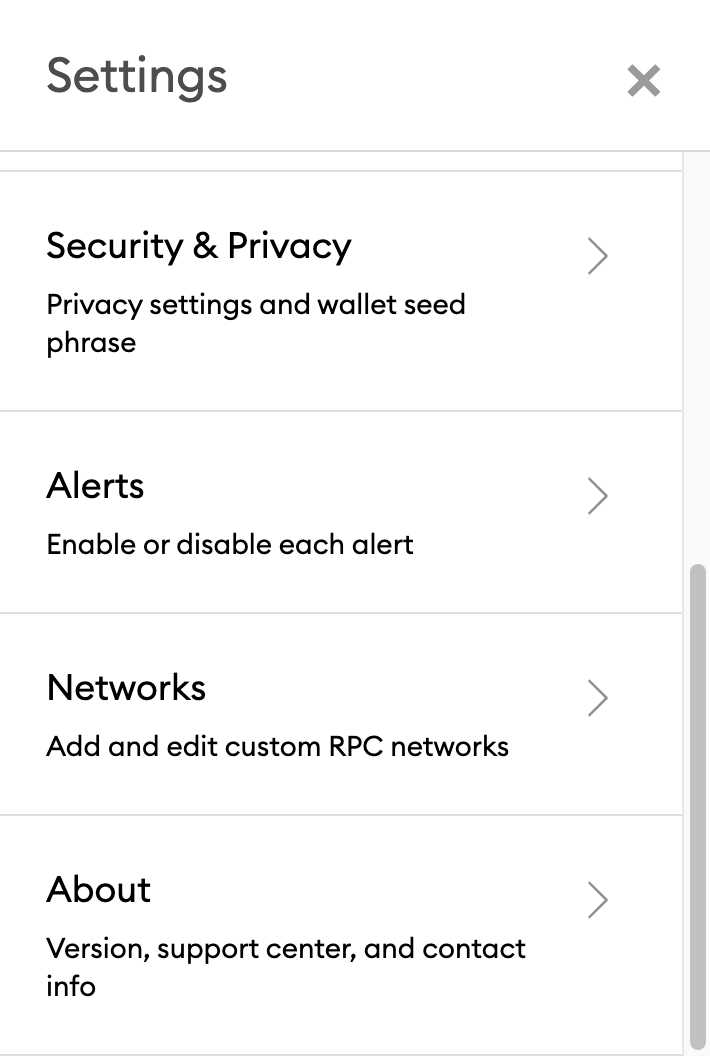
After setting up your wallet, you will need to switch from the Ethereum network to the Polygon network. To do this, click on the network dropdown at the top of the Metamask extension and select “Custom RPC”. In the “New RPC URL” field, enter the RPC URL for the Polygon network, which is https://rpc-mainnet.maticvigil.com/. You can also give the network a custom name like “Polygon” for easier identification.
Step 4: Add the Polygon Network
Once you have entered the RPC URL and given the network a custom name, click on “Save” to add the Polygon network to your Metamask wallet. You will now be connected to the Polygon network.
That’s it! You have successfully added the Polygon network to your Metamask wallet. Now you can explore and use the various dApps and services available on the Polygon network. Just make sure to switch back to the Ethereum network if you want to interact with Ethereum-based dApps. Happy exploring!
Step 1: Install the Metamask Extension
To add Polygon Network to your Metamask wallet, you first need to have the Metamask extension installed in your web browser. Metamask is a cryptocurrency wallet and a gateway to decentralized applications (dApps) on the Ethereum blockchain. Follow the steps below to install the Metamask extension:
Step 1: Open Your Web Browser
Open your preferred web browser (e.g., Chrome, Firefox, Brave) and go to the official Metamask website.
Step 2: Download and Install
On the Metamask website homepage, click on the “Get Started” or “Download” button to download the extension. Choose the appropriate version of the extension for your web browser and operating system.
Once the download is complete, click on the downloaded file to start the installation process. Follow the on-screen instructions to install the Metamask extension.
Note: Make sure to download the extension from the official Metamask website to ensure its authenticity and security.
Step 3: Create Your Metamask Wallet
After the extension is installed, you will see the Metamask icon on your web browser toolbar. Click on the icon to open Metamask.
A welcome screen will appear, and you will be given the option to either import an existing wallet or create a new one. If you don’t have a Metamask wallet yet, choose the “Create a Wallet” option.
Follow the prompts to set up your wallet by creating a password and backing up your recovery seed phrase. This recovery seed phrase is crucial for accessing your wallet in case you forget your password or lose access to your device.
Ensure that you save your recovery seed phrase in a secure location, preferably offline, and never share it with anyone.
| Troubleshooting Tip |
|---|
| If you encounter any issues during the installation or setup process, refer to the official Metamask documentation or community forums for assistance. |
Once your wallet is set up, you are ready to proceed with adding the Polygon Network to your Metamask wallet!
Step 2: Create a New Wallet
In order to add a Polygon Network to your Metamask wallet, you first need to create a new wallet. Follow the steps below to create a wallet:
- Download the Metamask browser extension for your preferred web browser (Chrome, Firefox, or Brave).
- Once the extension is installed, you will see the Metamask icon in your browser toolbar. Click on the icon to open the Metamask wallet.
- Click on the “Create a Wallet” button to begin the wallet creation process.
- Set a strong password for your wallet. Make sure to choose a password that is unique and not easily guessable. Confirm the password when prompted.
- You will be presented with a list of secret words. These words are your wallet’s recovery phrase, which can be used to restore your wallet in case you forget your password. Write down these words and store them in a safe place.
- Once you have written down your recovery phrase, click on the “Next” button to continue.
- Metamask will ask you to confirm your recovery phrase by selecting the correct words from the list. This is done to ensure that you have properly saved the recovery phrase. Select the correct words and click on the “Confirm” button.
- After confirming your recovery phrase, your wallet creation process is complete. You will now be able to access your newly created wallet.
Now that you have created a new wallet, you can proceed to the next step of adding a Polygon Network to your Metamask wallet.
Step 3: Add the Polygon Network
Once you have installed and set up the Metamask wallet, you need to add the Polygon network to it in order to transact on the Polygon network.
Here are the step-by-step instructions to add the Polygon network:
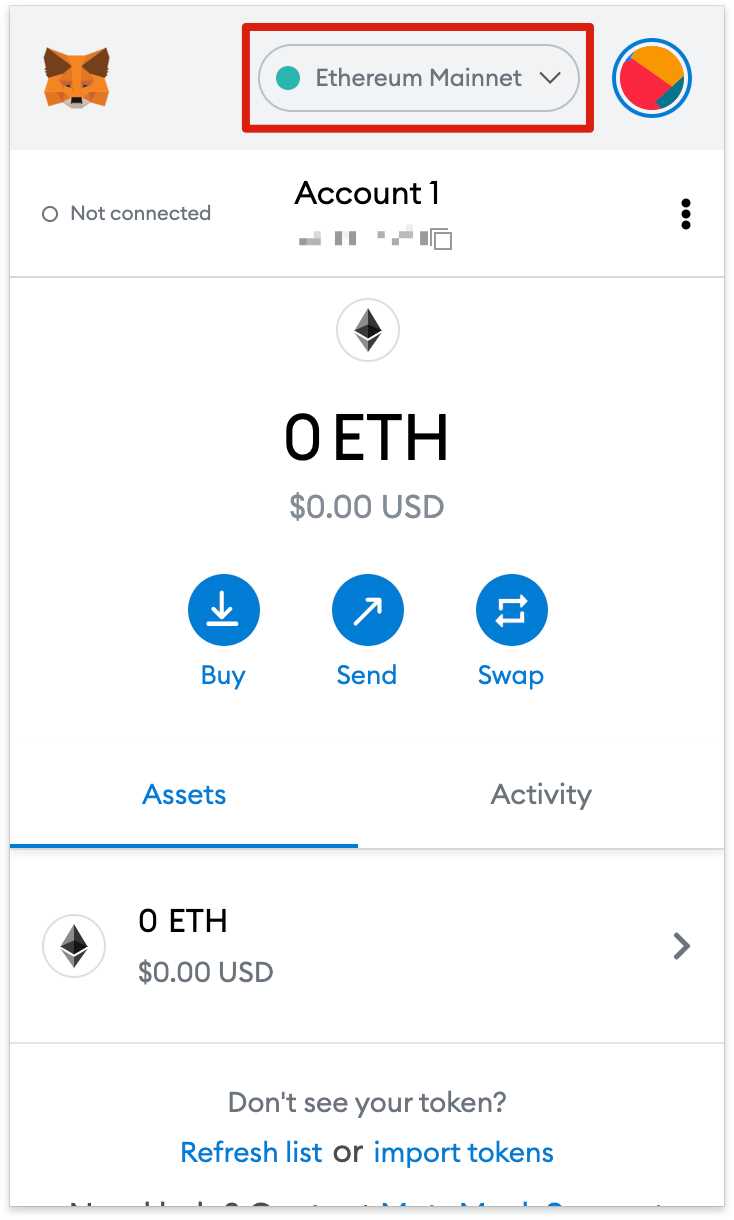
- Open your Metamask wallet by clicking on the extension icon in your browser toolbar.
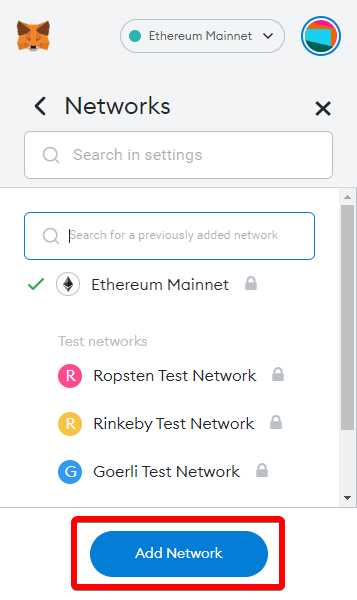
- Click on the network dropdown menu. By default, it should be set to the Ethereum Mainnet.
- Scroll down to the bottom of the network list and click on the “Custom RPC” option.
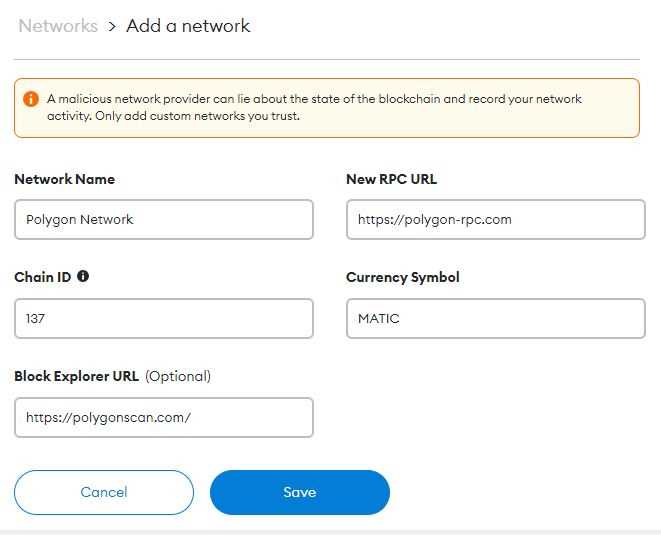
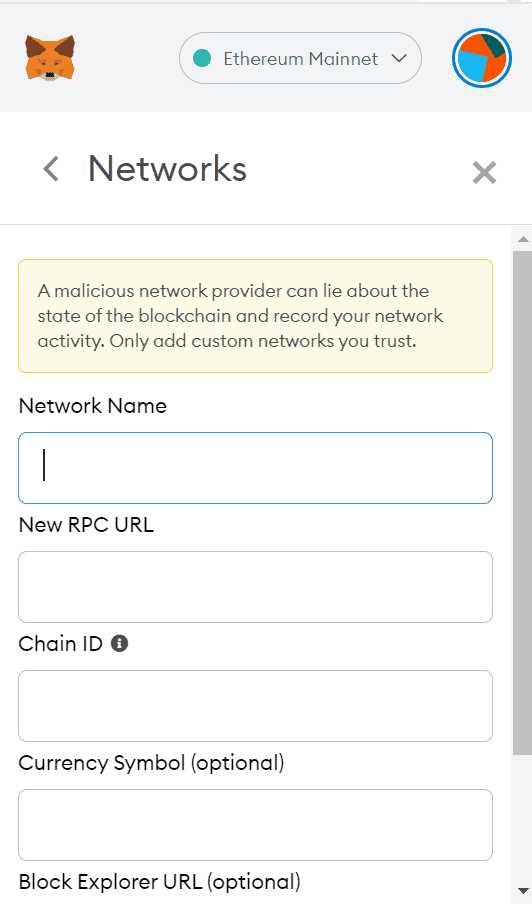
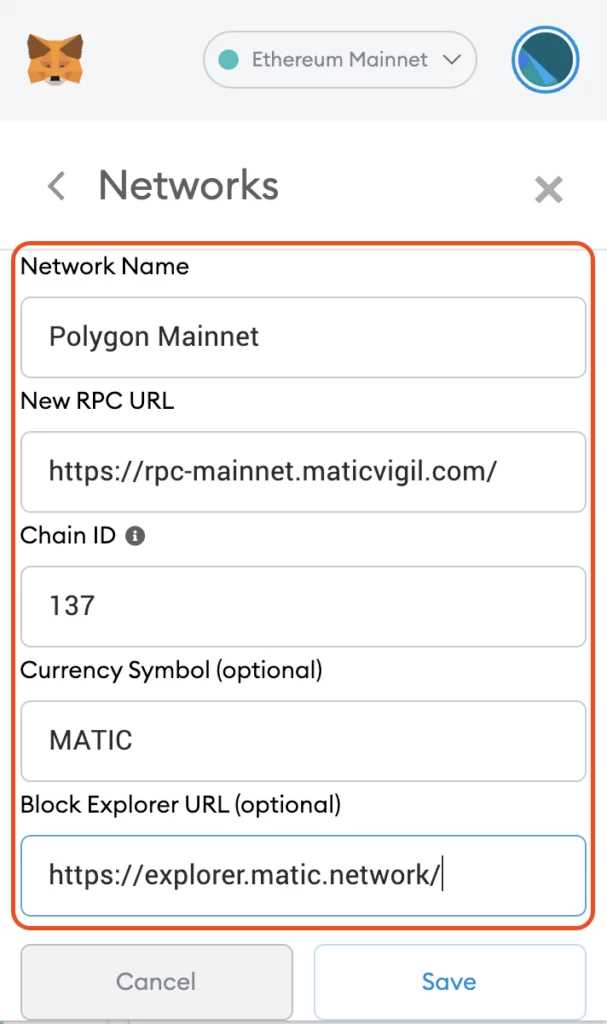
- In the “New RPC URL” field, enter the following URL:
https://rpc-mainnet.matic.network. - In the “Chain ID” field, enter the chain ID for Polygon:
137. - In the “Currency Symbol” field, enter the symbol for the native currency of Polygon:
MATIC. - Click on the “Save” button. The Polygon network should now be added to your Metamask wallet.
Once the Polygon network is added, you will be able to see your Polygon wallet balance and transact on the Polygon network directly from your Metamask wallet.
What is a Polygon network?
A Polygon network is a layer 2 scaling solution for Ethereum. It aims to improve the scalability and reduce the transaction fees of the Ethereum network by introducing additional layer 2 chains.