
Welcome to the world of decentralized finance! If you’re interested in exploring the realm of cryptocurrencies and blockchain technology, one essential tool you’ll need is a Metamask account. Metamask is a popular web extension wallet that allows you to interact with decentralized applications (dapps) on the Ethereum network. In this beginner’s guide, we’ll walk you through the process of setting up a Metamask account and getting started on your journey into the world of decentralized finance.
Before we dive into the setup process, let’s briefly explain the basics. Metamask acts as a bridge between your web browser and the Ethereum blockchain, allowing you to securely store, manage, and transfer your digital assets. It also provides a user-friendly interface for interacting with dapps, making it easier for you to participate in the decentralized ecosystem. With Metamask, you have full control over your funds and digital identity, eliminating the need for intermediaries like banks or centralized exchanges.
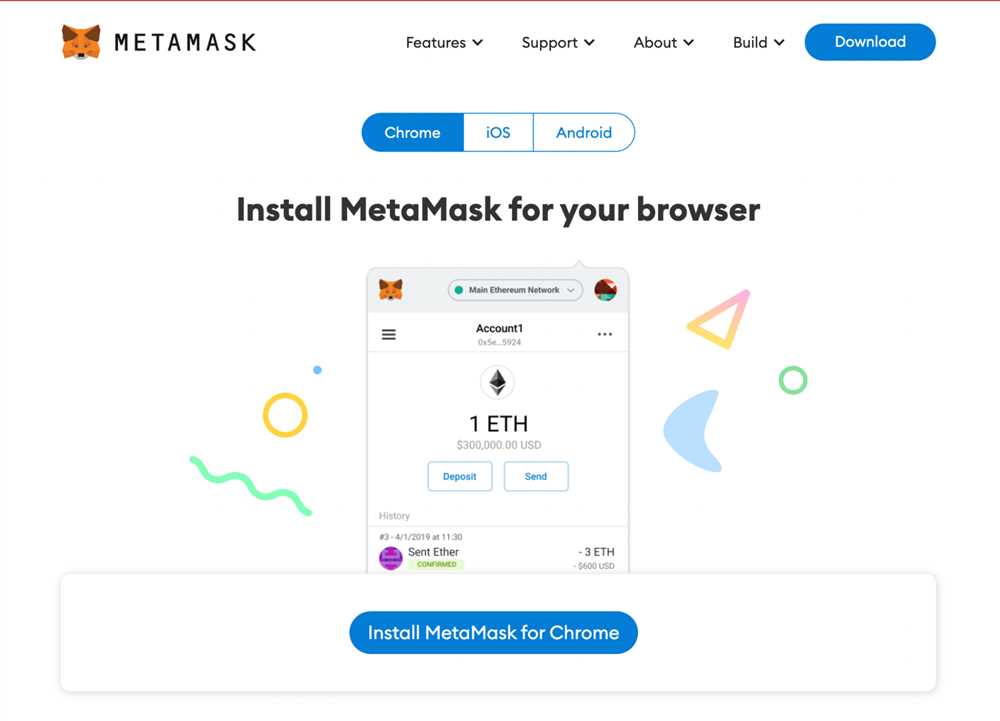
Now, let’s get started with setting up your Metamask account. The first step is to install the Metamask extension on your web browser. You can find the extension on the official Metamask website or in the extension store of your browser. Once installed, you’ll see the Metamask icon in your browser toolbar. Click on it to open the extension and begin the setup process.
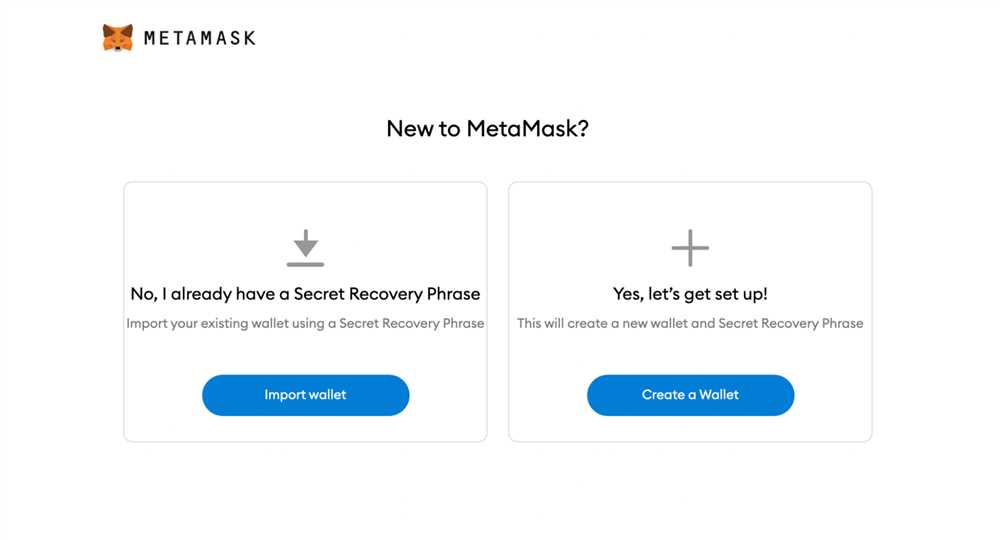
Next, you’ll be prompted to create a new wallet or import an existing one. If you’re new to the world of cryptocurrencies, select “Create a Wallet” to create a new wallet from scratch. Metamask will generate a unique 12-word seed phrase that you need to write down and keep in a safe place. This seed phrase is crucial, as it can be used to restore your wallet if you ever lose access to your device. Remember to never share your seed phrase with anyone and keep it securely stored offline.
Getting Started with Metamask: A Step-by-Step Guide
If you’re new to the world of cryptocurrencies and decentralized applications, setting up a Metamask account is a great first step. Metamask is a web-based wallet that allows you to securely store and manage Ethereum and other ERC-20 tokens. It also acts as a bridge between your web browser and the Ethereum blockchain, enabling you to interact with decentralized applications (DApps) with ease.
Step 1: Install the Metamask Extension
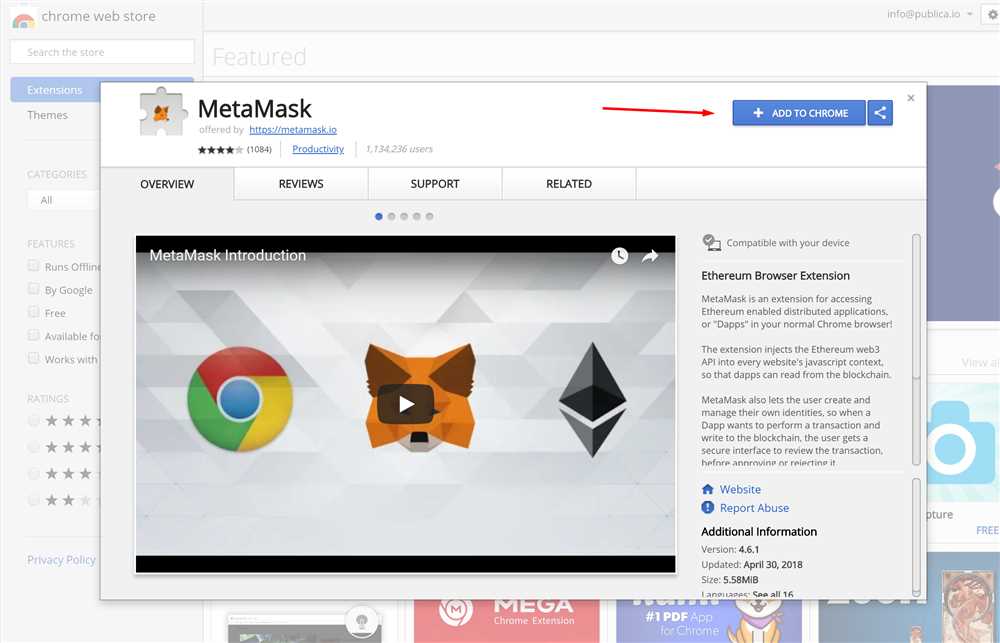
The first thing you’ll need to do is install the Metamask extension in your preferred web browser. Metamask is compatible with Google Chrome, Mozilla Firefox, and Brave, among others. Simply search for “Metamask” in your browser extension marketplace and click on the “Install” button. Once the installation is complete, you’ll see the Metamask icon added to your browser’s toolbar.
Step 2: Create a New Metamask Wallet
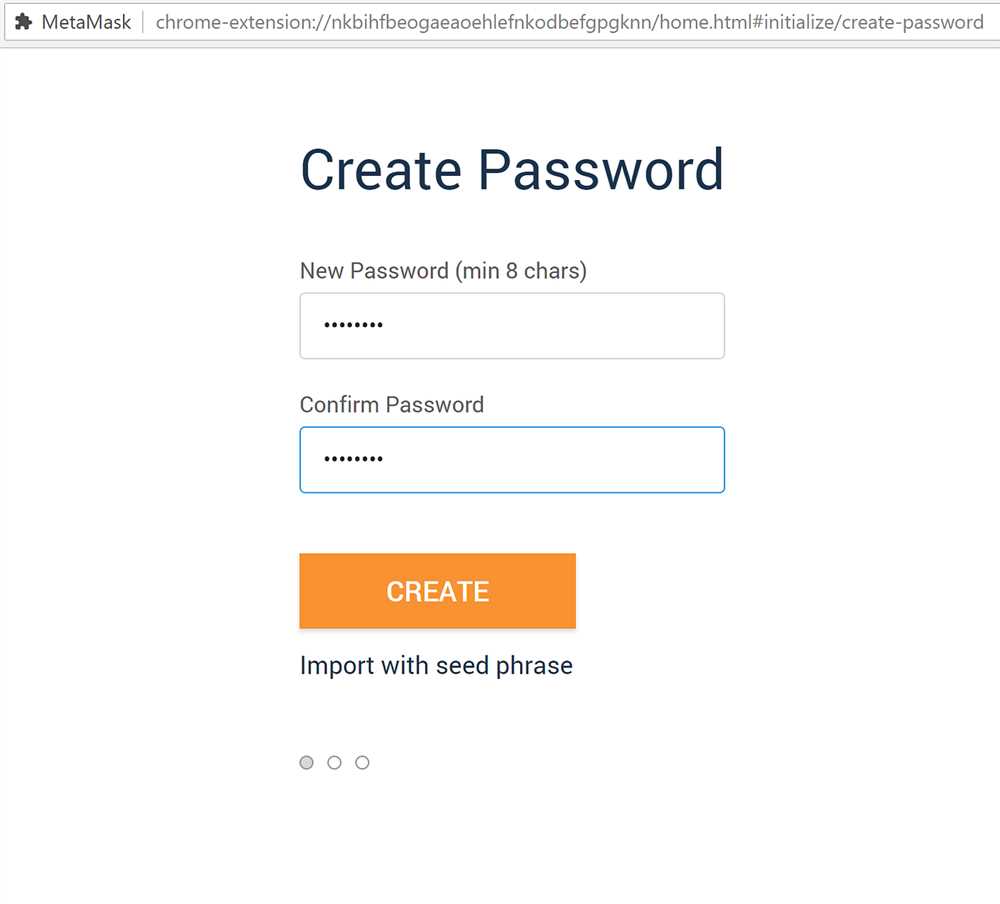
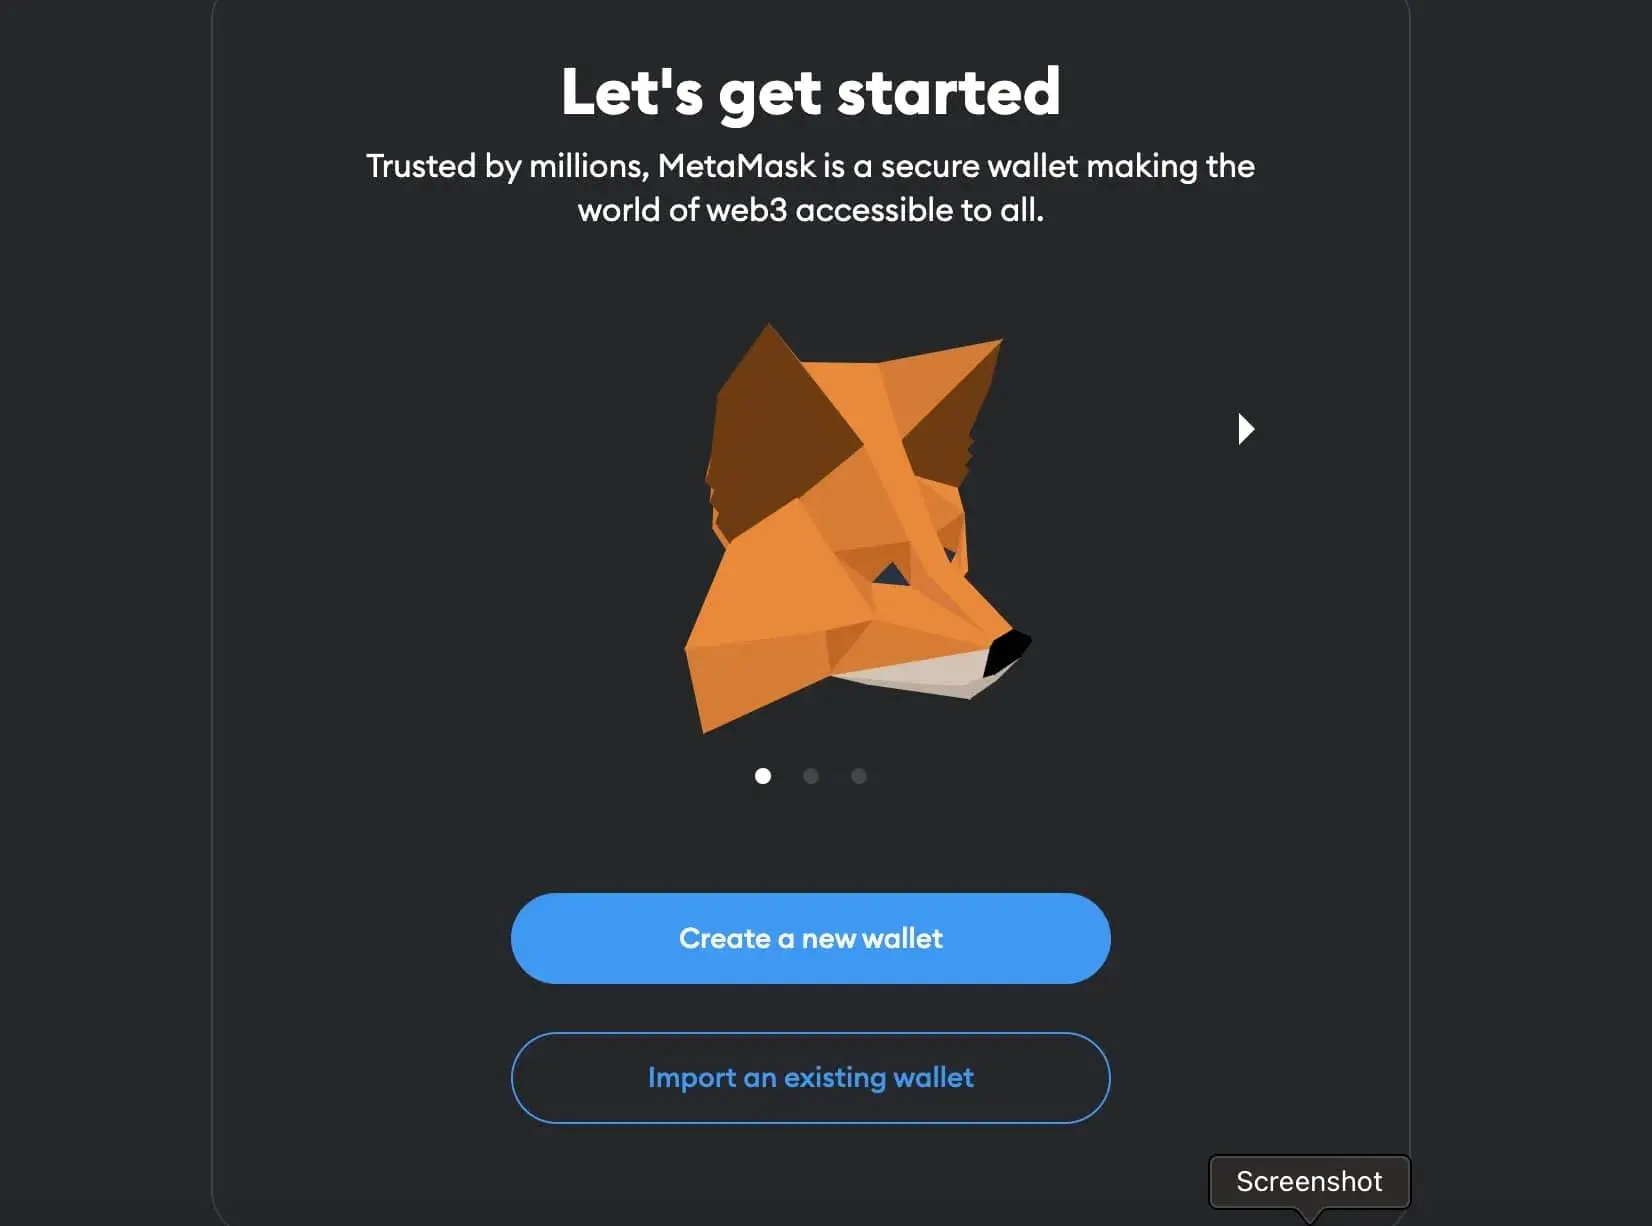
After installing the extension, click on the Metamask icon in your browser’s toolbar. A new tab will open, and you’ll be greeted with the welcome screen. Click on the “Get Started” button to proceed. Next, you’ll need to accept the terms of use and privacy policy. Make sure to read them carefully. After accepting, you’ll be prompted to create a new wallet. Choose a strong password and click on the “Create” button.
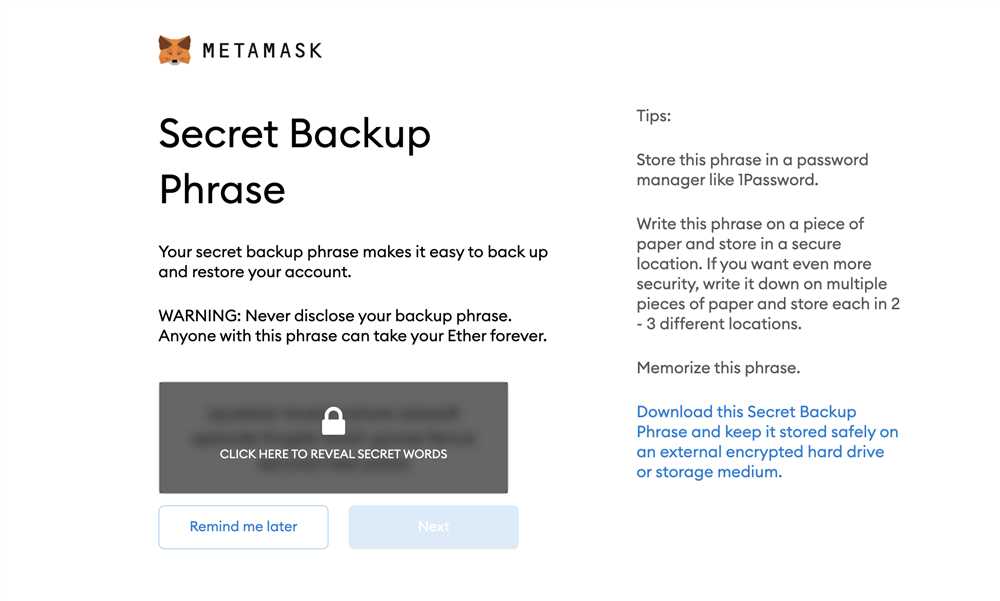
Step 3: Backup Your Seed Phrase
Once your wallet is created, you’ll be presented with a 12-word seed phrase. This seed phrase is crucial for recovering your wallet in case you forget your password or your device is lost. Write down the seed phrase and store it in a safe place. Do not share it with anyone and never enter it on websites or apps other than Metamask.
Step 4: Confirm Your Seed Phrase
To confirm that you’ve written down the seed phrase correctly, you’ll be prompted to select the words in the correct order. This ensures that you have a backup that can be accurately restored. Once you’ve selected the words in the correct order, click on the “Confirm” button.
Step 5: Connect to Ethereum Mainnet or Test Network
After confirming your seed phrase, you’ll be asked to choose a network. If you’re new to Ethereum, it’s recommended to start with the Test network, such as “Ropsten”. This allows you to interact with DApps and try out different functionalities without spending real Ether.
Step 6: Fund Your Wallet
To use Ethereum and DApps, you’ll need to have some Ether in your wallet. There are several ways to acquire Ether, such as purchasing it from a cryptocurrency exchange or receiving it from someone else. Once you have Ether, you can send it to your wallet’s address, which can be found in the Metamask extension under the “Account” tab.
Step 7: Explore and Interact with DApps
Now that your Metamask account is set up and funded, you’re ready to explore the world of decentralized applications. You can visit popular DApp marketplaces, such as OpenSea or Uniswap, and connect your Metamask wallet to start trading or interacting with various DApps.
Remember to always practice good security measures, such as enabling two-factor authentication and keeping your software up to date. Metamask is a powerful tool that gives you control over your digital assets, but it’s important to keep them safe and secure.
Congratulations! You’ve now successfully set up your Metamask account and are ready to dive into the exciting world of cryptocurrencies and decentralized applications.
Creating a Metamask Account
To get started with Metamask, you first need to create an account. Follow these steps to set up your Metamask account:
Step 1: Go to the Metamask website and click on the “Get Started” button.
Step 2: You will be redirected to the Chrome Web Store. Click on the “Add to Chrome” button to install the Metamask extension.
Step 3: Once installed, click on the Metamask icon in your browser’s toolbar to open the extension.
Step 4: In the Metamask extension, click on the “Create a Wallet” button.
Step 5: Set a strong password for your wallet. Make sure to use a combination of uppercase and lowercase letters, numbers, and special characters.
Step 6: Read and accept the terms of use.
Step 7: Metamask will generate a unique set of 12 words called a seed phrase. Write this seed phrase down and keep it in a safe place. This phrase is used to recover your wallet if you ever forget your password.
Step 8: Confirm your seed phrase by selecting the words in the correct order.
Step 9: Congratulations! Your Metamask account has been created. You can now use it to access decentralized applications and manage your digital assets securely.
Remember to keep your password and seed phrase safe and never share them with anyone. This will help protect your funds and personal information from unauthorized access.
Now that you have created your Metamask account, you can start exploring the world of decentralized finance and blockchain technology.
Configuring Metamask for Ethereum Transactions

Once you have successfully set up your Metamask account, you need to configure it for Ethereum transactions. This involves a few simple steps:
Step 1: Connect to an Ethereum Network
Before you can start making transactions on the Ethereum blockchain, you need to connect your Metamask account to an Ethereum network. To do this:
- Click on the current network name at the top of the Metamask extension.
- Select the network you want to connect to from the dropdown menu. You can choose from networks like Mainnet, Ropsten test network, and more.
- Your Metamask account will now be connected to the selected Ethereum network.
Step 2: Add Ethereum Assets
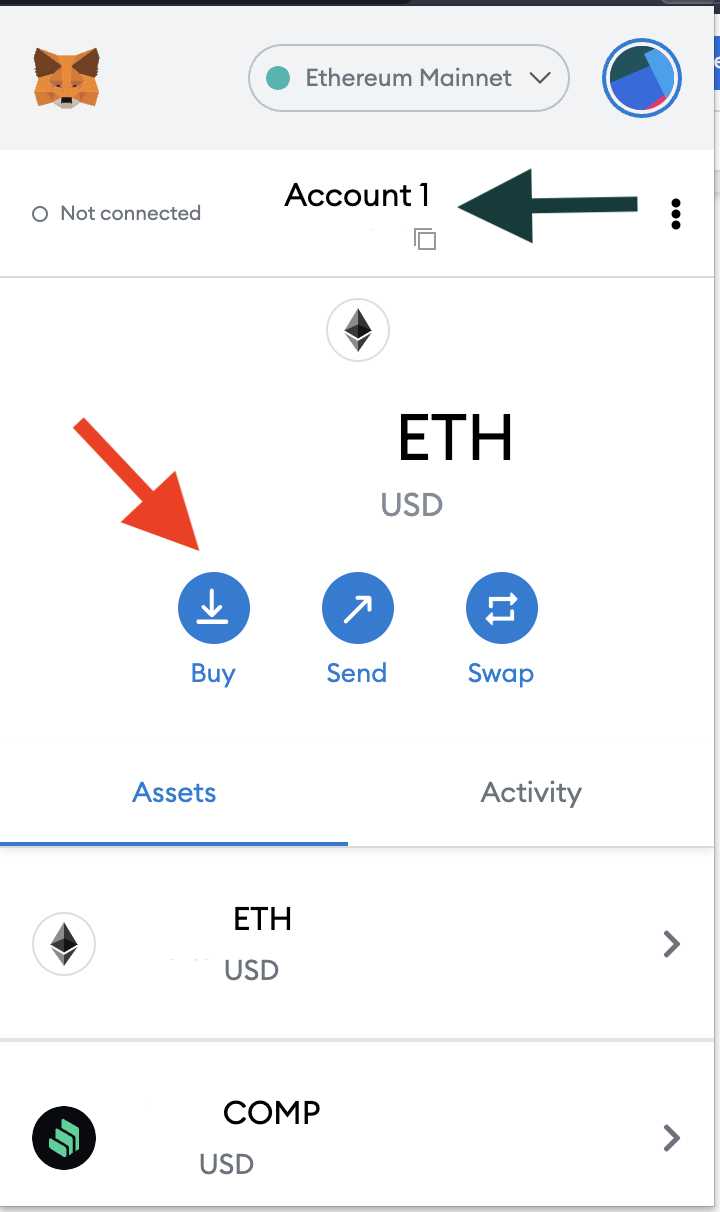
In order to send or receive Ethereum, you need to add ETH to your Metamask account. Here’s how:
- Click on the “Add Token” button on the main Metamask page.
- Enter the contract address of the token you want to add or choose from the list of supported tokens.
- Click “Next” and follow the prompts to add the token to your Metamask account.
- You will now see the added token in your Metamask wallet.
Step 3: Set Gas Fees
Gas fees are the fees you pay for Ethereum transactions. Metamask allows you to set your own gas fees. Here’s how:
- Click on the current gas fee at the top of the Metamask extension.
- Select the desired gas fee from the dropdown menu. Higher gas fees prioritize your transaction and make it faster, but they are more expensive.
- Your gas fee preference will be saved and applied to your future transactions.
Once you have completed these configuration steps, you are ready to start making Ethereum transactions using your Metamask account!
Security Best Practices for Your Metamask Account
When it comes to using Metamask, keeping your account secure should be your top priority. Here are some best practices you should follow to ensure the safety of your account:
1. Enable Two-Factor Authentication (2FA)
Enabling 2FA adds an extra layer of security to your account by requiring you to provide a second form of authentication, such as a code generated by an app on your phone, in addition to your password. This helps prevent unauthorized access even if your password is compromised.
2. Use a Strong and Unique Password
Create a password that is difficult for others to guess and use it exclusively for your Metamask account. Avoid reusing passwords from other accounts, as this increases the risk of your account being compromised if one of those accounts is breached.
3. Keep Your Recovery Phrase Safe
Your recovery phrase is the key to restoring access to your account if you forget your password or lose access to your device. Write it down and store it in a secure location, preferably offline. Never share your recovery phrase with anyone, as it grants full access to your account.
4. Be Mindful of Phishing Attempts
Be cautious of unsolicited emails, messages, or websites asking for your Metamask credentials. Always double-check the URL of the website you’re using and make sure it is the official Metamask site. Enable browser extensions that warn about phishing attempts to add an extra layer of protection.
5. Regularly Update Metamask and Your Browser
Keep your Metamask extension and your browser up to date to ensure you have the latest security patches. Developers are constantly improving security measures, so staying up to date is crucial in safeguarding your account.
6. Use a Hardware Wallet
A hardware wallet, such as a Ledger or Trezor, offers an extra layer of security by storing your private keys offline and out of reach from potential hackers. Consider investing in one if you plan on holding significant amounts of cryptocurrency.
| Best Practice | Description |
|---|---|
| Enable Two-Factor Authentication (2FA) | Adds an extra layer of security to your account by requiring a second form of authentication. |
| Use a Strong and Unique Password | Create a password that is difficult to guess and use it exclusively for your Metamask account. |
| Keep Your Recovery Phrase Safe | Write down your recovery phrase and store it in a secure location offline. |
| Be Mindful of Phishing Attempts | Double-check the website’s URL and be cautious of unsolicited messages asking for your Metamask credentials. |
| Regularly Update Metamask and Your Browser | Keep your software up to date to benefit from the latest security patches. |
| Use a Hardware Wallet | A hardware wallet provides an additional layer of security by storing your private keys offline. |
By following these security best practices, you can minimize the risk of unauthorized access to your Metamask account and ensure the safety of your assets.
Exploring Advanced Features of Metamask
Once you have successfully set up your Metamask account and are comfortable with the basic features, you can start exploring some of the more advanced functionalities it offers. These advanced features will enable you to have more control over your digital assets and provide you with additional security.
1. Adding Custom Networks
In addition to the Ethereum Mainnet, Metamask allows you to add custom networks. This is useful if you want to interact with decentralized applications (dApps) on networks other than Ethereum. To add a custom network, navigate to the Network dropdown menu and select “Custom RPC”. Here, you can enter the network’s details, such as the URL, chain ID, and symbol.
2. Importing and Exporting Accounts
If you have multiple accounts or want to transfer your account to another device, Metamask provides an easy way to import and export accounts. To import an account, navigate to the Account dropdown menu and select “Import Account”. Here, you can enter your account’s private key or seed phrase. To export an account, click on the account name and select “Export Private Key”. It is important to keep your private keys and seed phrases secure and never share them with anyone.
Additionally, you can create multiple accounts within Metamask. This is useful if you want to separate your funds or manage different wallets for various purposes. To create a new account, simply click on the account name and select “Create Account”.
3. Managing Tokens and Tokensale Participation
Metamask allows you to manage tokens directly from your wallet interface. You can add custom tokens by clicking on the “Assets” tab and selecting “Add Token”. Here, you can enter the token contract address, and Metamask will automatically fetch the token’s details, such as its symbol and decimal places.
If you want to participate in a tokensale, you can do so using Metamask. Make sure you have enough Ether in your account to cover the tokensale value and navigate to the dApp’s website. Usually, the website will guide you through the process of participating in the tokensale using Metamask.
Remember to conduct thorough research and exercise caution when interacting with custom networks, adding tokens, or participating in tokensales. Always verify the addresses and details before initiating any transactions.
These are just a few of the advanced features offered by Metamask. By leveraging these functionalities, you can have more control and flexibility in managing your digital assets securely.
What is Metamask and why do I need an account?
Metamask is a wallet and browser extension that allows you to interact with decentralized applications (DApps) on the Ethereum blockchain. You need an account to securely store your digital assets and to transact with DApps.
How do I install the Metamask extension?
To install the Metamask extension, go to the official Metamask website and click on the “Get Chrome Extension” button. Follow the instructions to add the extension to your browser.
How do I create a new Metamask account?
To create a new Metamask account, open the extension and click on the “Create a Wallet” button. Follow the instructions to set a strong password and save your seed phrase. Your account will be created and you can start using it immediately.
Can I use Metamask on my mobile device?
Yes, you can use Metamask on your mobile device. Metamask has a mobile app available for both iOS and Android. Simply download the app from the App Store or Google Play Store, open it, and follow the instructions to create or import your account.