
Are you tired of dealing with slow and complicated crypto transactions? Do you want a seamless and hassle-free way to transfer your digital assets? Look no further! In this step-by-step guide, we will show you how to connect your Metamask wallet to Coinbase, the leading cryptocurrency exchange, and experience a whole new level of convenience.
Step 1: Open your Metamask wallet and make sure you have the latest version installed. If you don’t have Metamask yet, simply download and install it from the official website.
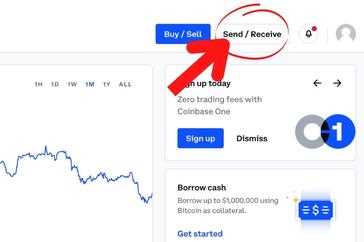
Step 2: Log in to your Coinbase account and navigate to the “Settings” section. Look for the “Wallets” tab and click on it.
Step 3: Scroll down until you find the “Enable Wallet Link” option. Click on it and follow the instructions to set up the integration with Metamask.
Step 4: Once the integration is enabled, open your Metamask wallet and click on the network selection dropdown. Choose “Custom RPC.”
Step 5: In the “New RPC URL” field, enter the custom RPC URL provided by Coinbase. Make sure to save the changes.
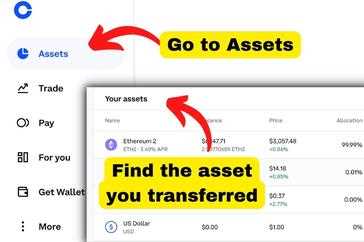
Step 6: Now, go back to your Coinbase account and open the “Wallets” section again. You should see your Metamask wallet listed there.
Step 7: Congratulations! Your Metamask wallet is now successfully connected to Coinbase. You can now enjoy seamless crypto transactions, faster confirmations, and enhanced security.
By following these simple steps, you can take advantage of the best features of both Metamask and Coinbase and streamline your crypto transactions like never before. Say goodbye to slow and frustrating transfers and embrace the future of digital finance.
Note: Make sure to double-check all the steps and enter the correct information to avoid any issues or errors. If you encounter any problems, don’t hesitate to reach out to the customer support of both Metamask and Coinbase for assistance.
Setting Up Metamask
Before you can begin using Metamask, you’ll need to set it up on your device. Follow the steps below to get started:
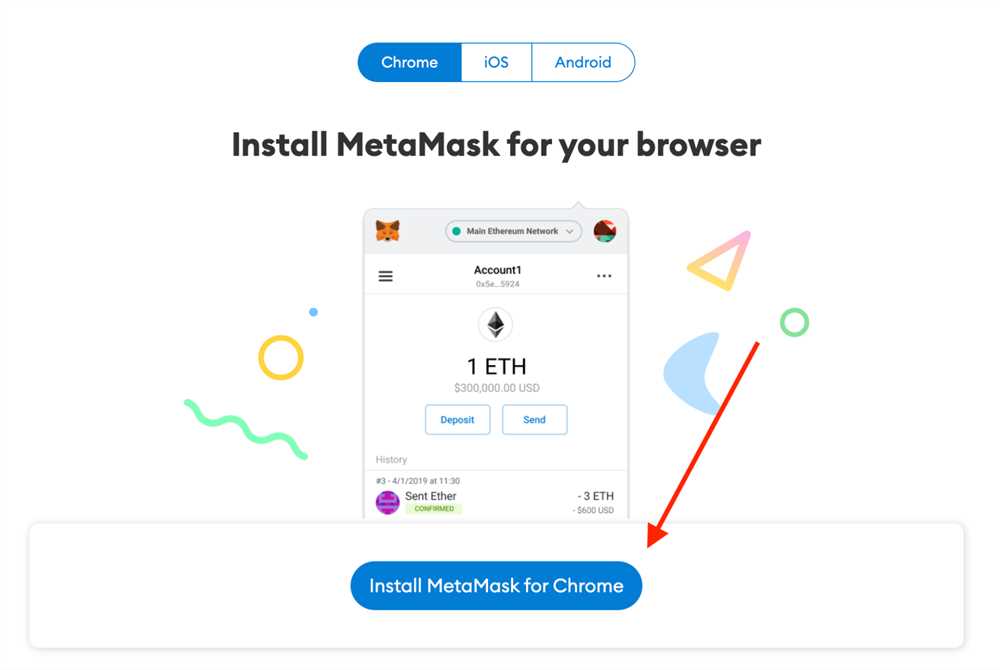
Step 1: Installation
To install Metamask, visit the official Metamask website and download the extension for your preferred browser. Metamask is available for Chrome, Firefox, and Brave.
Step 2: Account Creation
Once you have installed the Metamask extension, open it and click on the “Create a Wallet” option. Follow the on-screen instructions to create a new Metamask account. Be sure to choose a strong password to protect your account.
Note: Make sure to securely store your seed phrase. This phrase will be used to recover your account if you ever forget your password.
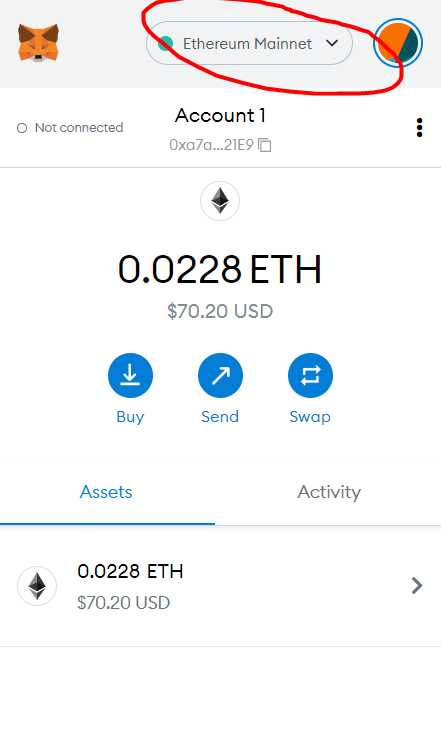
Step 3: Network Connection
After creating your Metamask account, you will need to connect it to the correct network. Click on the network dropdown menu and select the network you want to connect, such as the Ethereum Mainnet or a test network like Ropsten.
Tip: If you want to connect Metamask to Coinbase, choose the Ethereum Mainnet network.
Step 4: Linking Your Coinbase Account
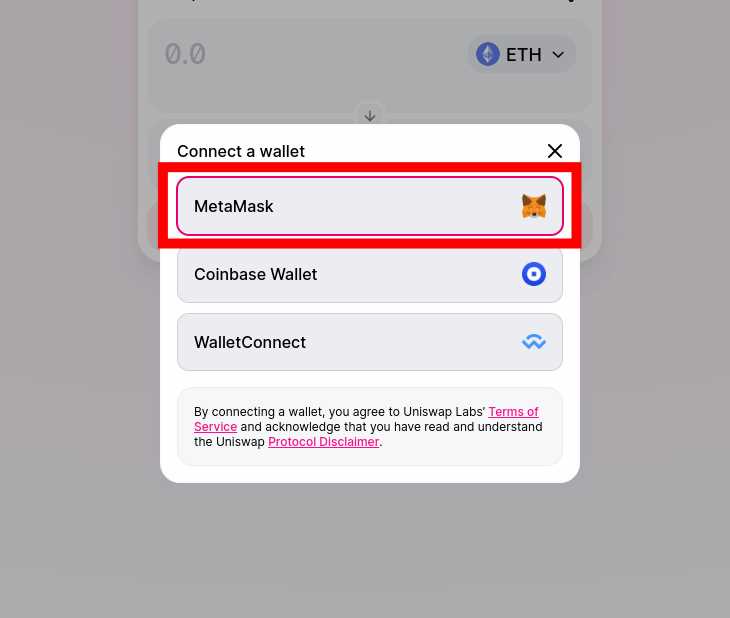
To connect your Metamask account to Coinbase, go to Coinbase and navigate to the wallet section. Find the option to link an external wallet and choose Metamask. Follow the prompts to complete the linking process.
Once you have completed these steps, your Metamask account will be set up and ready to use. You can now seamlessly connect Metamask to Coinbase for hassle-free crypto transactions.
Creating a Coinbase Account
If you want to seamlessly connect your Metamask to Coinbase and start enjoying hassle-free crypto transactions, you will first need to create a Coinbase account. Follow these step-by-step instructions to get started:
- Visit the Coinbase website at www.coinbase.com on your preferred web browser.
- Click on the “Get Started” button located at the top right corner of the homepage.
- Fill in the required information, including your name, email address, and desired password. Make sure to choose a strong password to ensure the security of your account.
- Agree to the Terms of Service and Privacy Policy by ticking the checkboxes.
- Complete the captcha verification to prove that you are not a robot.
- Click on the “Create Account” button to proceed.
- Check your email inbox for a confirmation email from Coinbase.
- Open the email and click on the provided link to verify your email address.
- After verifying your email, you will be redirected to the Coinbase website.
- Set up your security features, such as two-factor authentication, to enhance the security of your account.
- Once your account is fully set up and secured, you can proceed to connect your Metamask wallet to Coinbase for seamless crypto transactions.
By following these simple steps, you will have successfully created a Coinbase account and will be ready to connect it to Metamask. Enjoy the convenience and benefits of seamless crypto transactions with Coinbase and Metamask!
Connecting Metamask to Coinbase
Metamask and Coinbase are two popular platforms for managing cryptocurrencies. While Coinbase is primarily a cryptocurrency exchange, Metamask is a digital wallet that allows you to securely store and manage your crypto assets.
If you already have a Coinbase account and want to connect it with your Metamask wallet, you can follow these simple steps:
Step 1:
First, make sure you have both the Metamask extension and the Coinbase app installed on your device. You can find Metamask on the Chrome Web Store or Firefox Add-ons, while the Coinbase app is available for download on both iOS and Android devices.
Step 2:
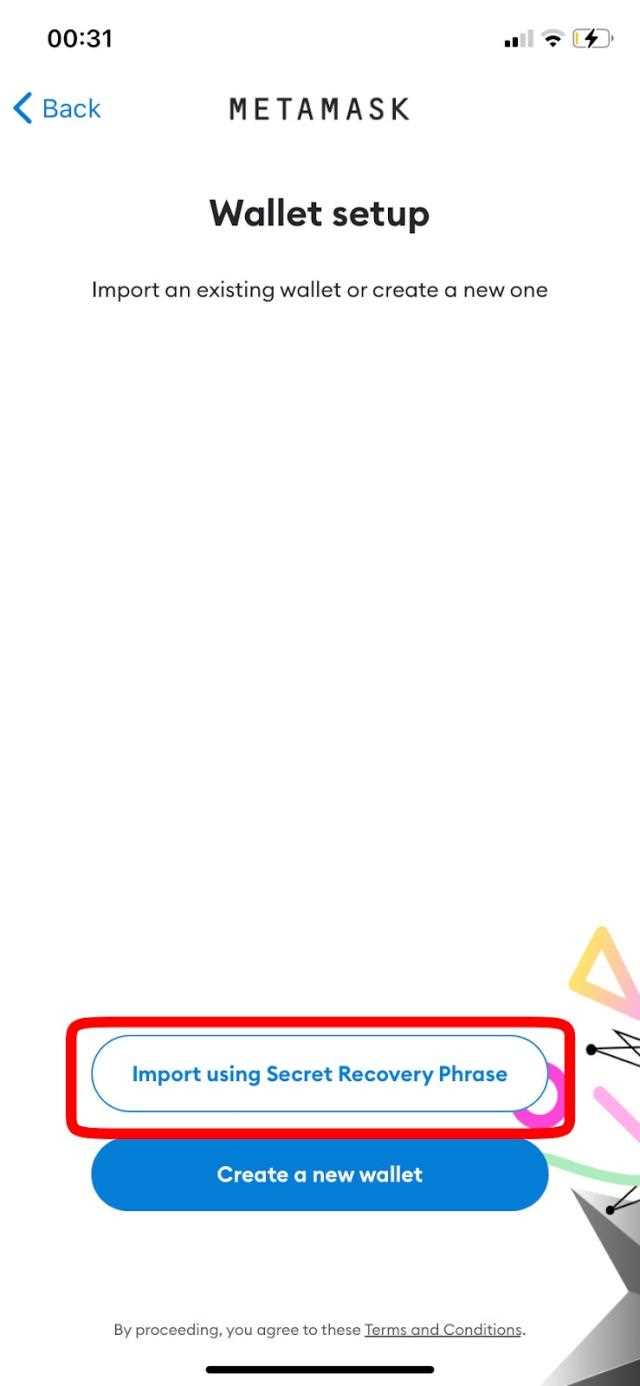
Launch the Metamask extension and create a new wallet or import an existing one using your mnemonic phrase or private key. Make sure to set a strong password to secure your wallet.
Step 3:
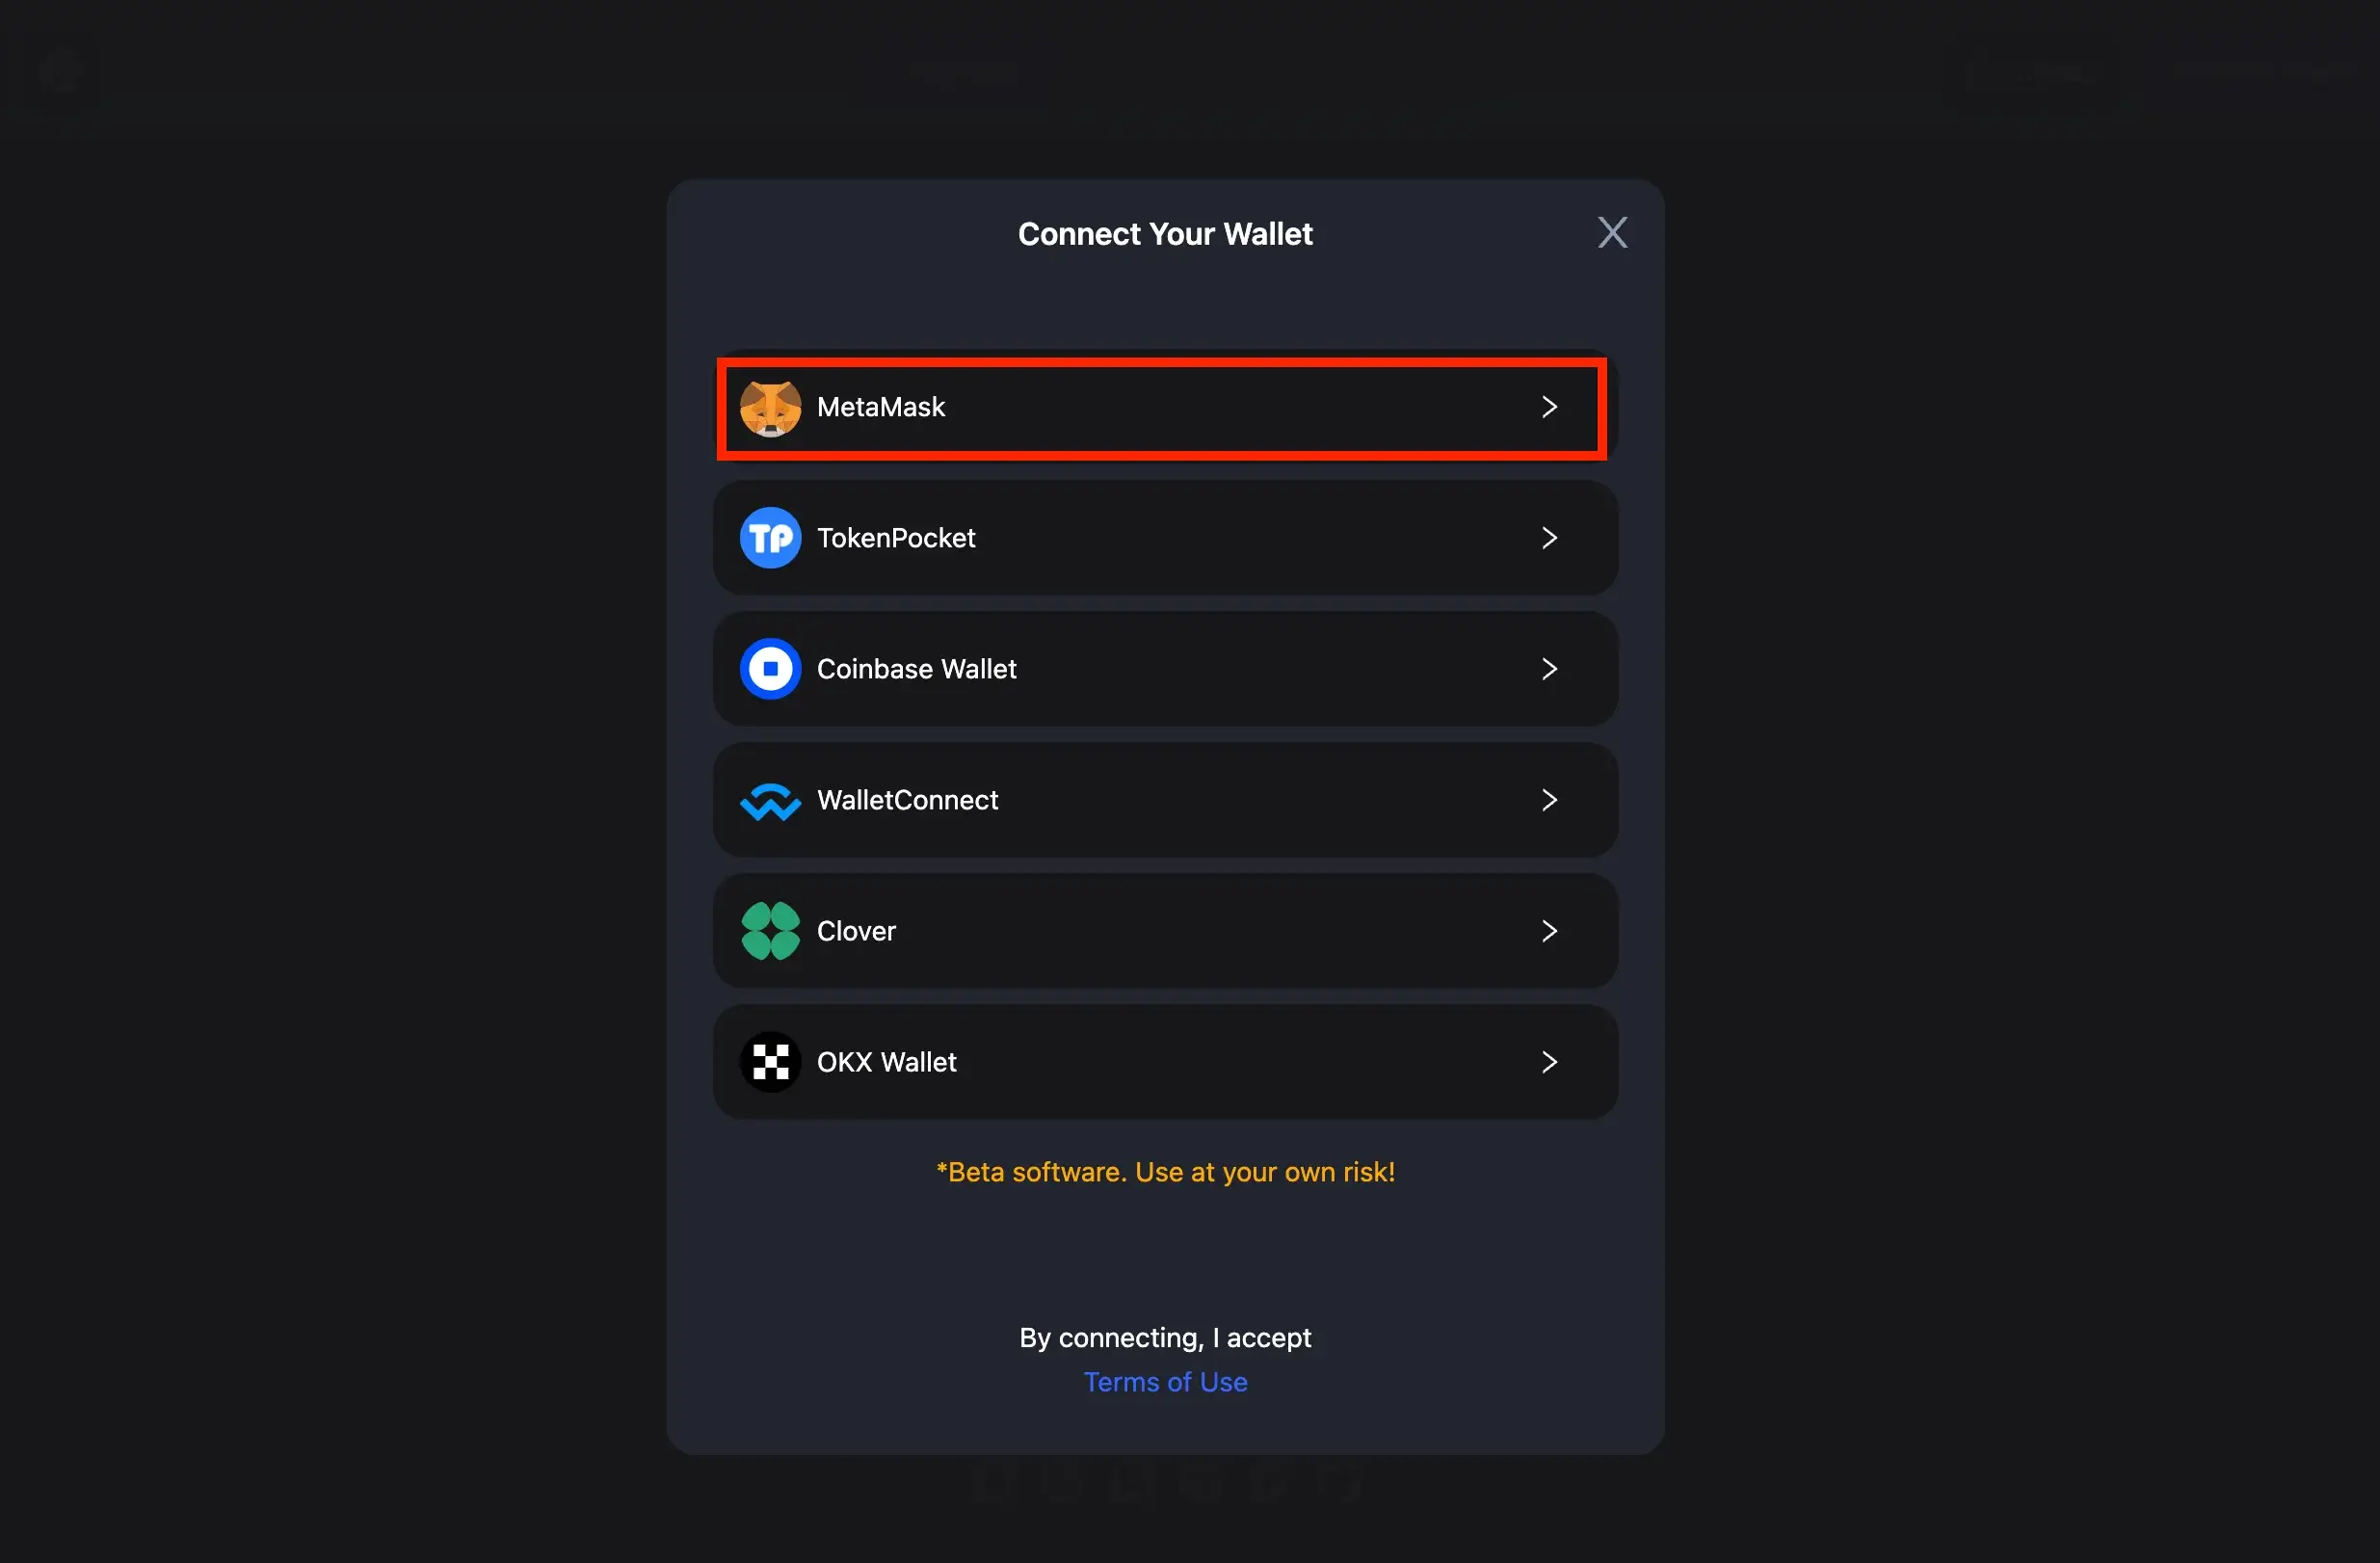
Once your wallet is set up, click on the Metamask icon in your browser’s toolbar and select “Connect with Coinbase” from the dropdown menu.
Step 4:
You will be redirected to Coinbase’s login page. Enter your Coinbase account credentials to authorize the connection with Metamask.
Step 5:
After successfully logging in, you will be prompted to confirm the connection between your Coinbase account and Metamask wallet. Review the information and click “Allow” to proceed.
Step 6:
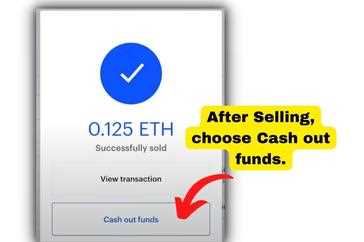
Congratulations! You have successfully connected your Metamask wallet to Coinbase. You can now easily transfer funds between the two platforms and enjoy seamless crypto transactions.
It’s important to note that connecting Metamask to Coinbase allows you to access and manage your Coinbase-held cryptocurrencies directly from your Metamask wallet. This integration gives you greater control and flexibility in managing your digital assets.
So, whether you’re a cryptocurrency trader, investor, or simply looking to explore the world of decentralized finance, connecting Metamask to Coinbase is a smart move. Start enjoying the benefits of seamless crypto transactions today!
Making Seamless Crypto Transactions
Connecting your Metamask wallet to Coinbase is just the first step to making seamless crypto transactions. Once your wallets are linked, you can enjoy a smooth and hassle-free experience in managing and transferring your digital assets.
1. Secure Your Wallets
Before you start any transactions, it’s important to ensure the security of your wallets. Make sure you have enabled two-factor authentication and have set up a strong, unique password for both your Metamask and Coinbase accounts. Additionally, consider using a hardware wallet for an extra layer of protection.
2. Familiarize Yourself with Transaction Fees
When making crypto transactions, you’ll encounter transaction fees. These fees are necessary for processing and validating transactions on the blockchain network. Familiarize yourself with the different fee structures on both Metamask and Coinbase to understand how much you’ll be charged for each transaction.
3. Check Network Congestion
Blockchain networks can experience congestion during peak times, resulting in slower transaction speeds and higher fees. Before making a transaction, it’s advisable to check the current network congestion status. This information can help you choose the most optimal time to conduct your transactions.
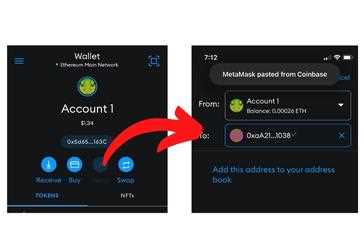
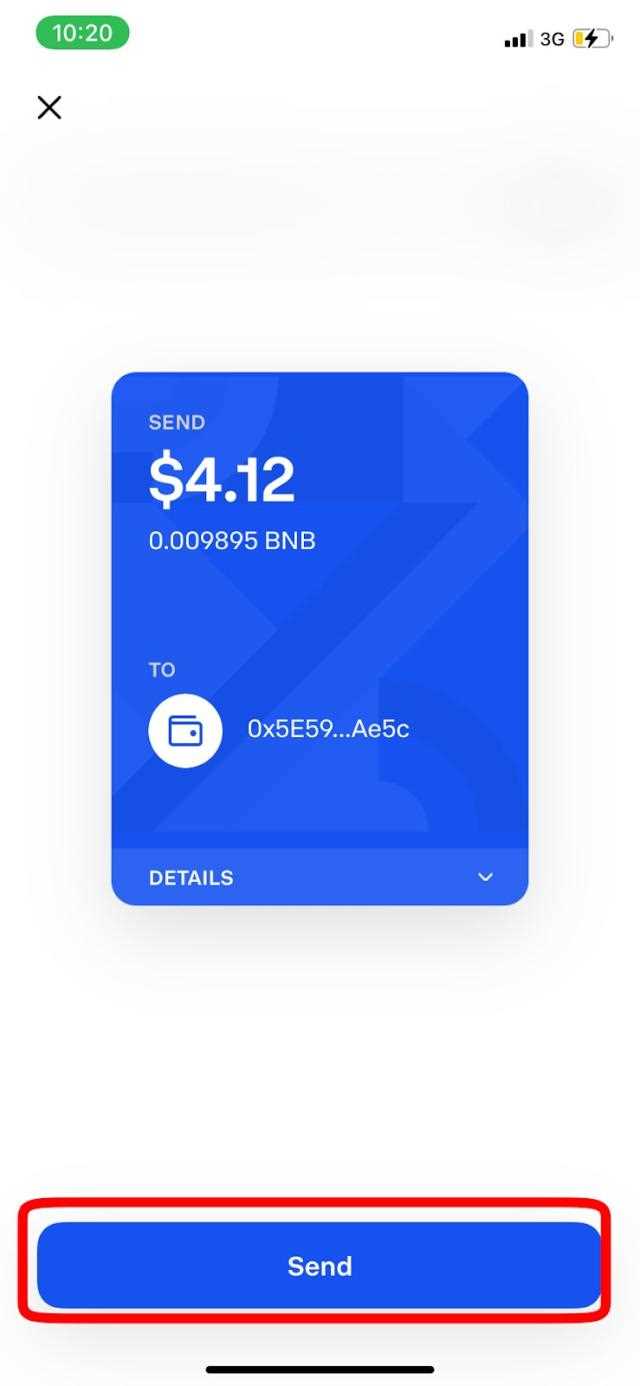
4. Verify Transaction Details
Always double-check the transaction details before confirming any transfers. Ensure that the recipient address is correct and matches the intended recipient. Making even a small typo can result in irreversible loss of funds.
5. Utilize Gas Optimization Techniques
Gas fees can be a significant cost when conducting transactions on the Ethereum network. To optimize gas usage, consider using layer 2 solutions, such as Optimism or Polygon, or use tools like GasToken to reduce overall gas costs.
By following these tips, you can make your crypto transactions seamless and secure. Remember to stay updated on the latest developments in blockchain technology and keep your wallets and private keys safe at all times.
What is Metamask?
Metamask is a cryptocurrency wallet and browser extension that allows you to interact with decentralized applications (Dapps) on the Ethereum network.