
Welcome to our comprehensive step-by-step guide on how to set up Polygon on your Metamask wallet! If you’re interested in exploring the exciting world of decentralized finance (DeFi) and blockchain applications, using Polygon is a great way to get started. By connecting your Metamask wallet to the Polygon network, you’ll gain access to a wide range of high-performance, low-cost, and scalable blockchain solutions.
Metamask is a popular cryptocurrency wallet that allows you to securely store, manage, and interact with your digital assets. It’s compatible with major web browsers and provides a user-friendly interface for interacting with decentralized applications (dApps). By configuring Metamask to work with Polygon, you’ll be able to seamlessly switch between different Ethereum network deployments, including the Polygon mainnet and testnets.
Polygon, formerly known as Matic Network, is a Layer 2 scaling solution for Ethereum. It’s designed to address the scalability issues of the Ethereum network, offering faster transaction times and significantly lower fees. By leveraging Polygon’s infrastructure, developers can build and deploy decentralized applications with ease, while end-users can enjoy a seamless experience with minimal transaction costs.
In this guide, we will walk you through the process of setting up Polygon on your Metamask wallet in a detailed step-by-step manner. By the end, you’ll have a fully configured wallet that can interact with the Polygon network, enabling you to take full advantage of the benefits it offers. So let’s dive in and get started!
Step 1: Installing Metamask Extension
The first step in setting up Polygon on Metamask is to install the Metamask extension. Metamask is a web browser extension that allows users to interact with the Polygon network and access decentralized applications (dApps) built on Polygon.
|
Follow the steps below to install Metamask:
|
|

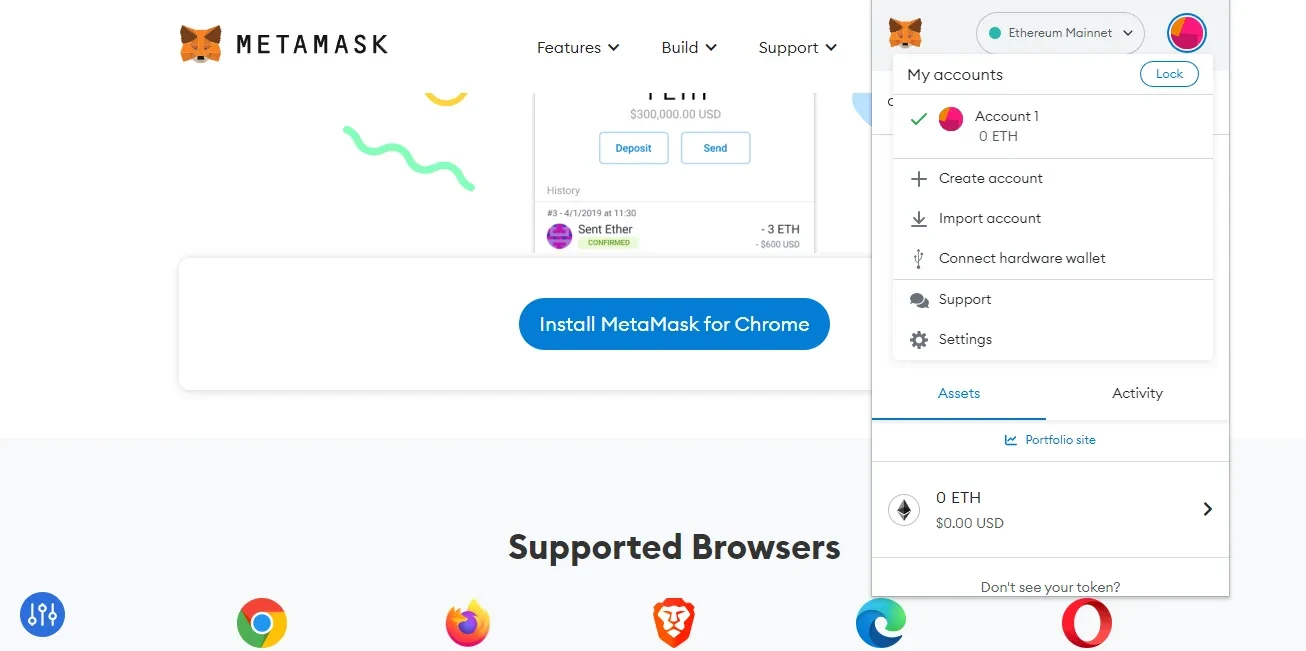
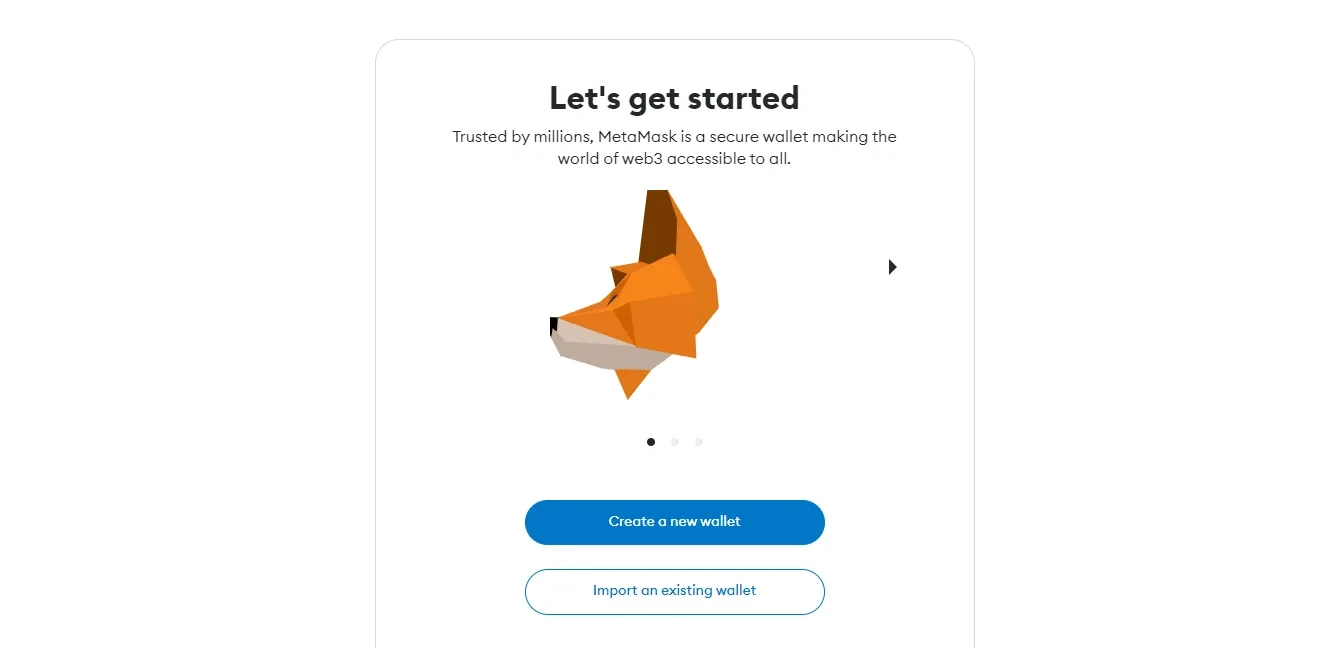
After the installation is complete, you will see the Metamask icon in your browser’s toolbar. Click on the icon to open Metamask.
Once Metamask is open, you will be prompted to create a new wallet or import an existing one. If you already have a Metamask wallet, you can import it using your seed phrase. Otherwise, click on the “Create a Wallet” button to create a new wallet.
A detailed guide on how to set up Metamask for Polygon network
Metamask is a popular cryptocurrency wallet that allows users to interact with decentralized applications (DApps) on various blockchains. If you are looking to connect your Metamask wallet to the Polygon network, follow these step-by-step instructions:
Step 1: Install and Set up Metamask
If you haven’t already, install the Metamask extension for your web browser. Once installed, click on the extension icon and follow the instructions to create a new wallet or import an existing one.
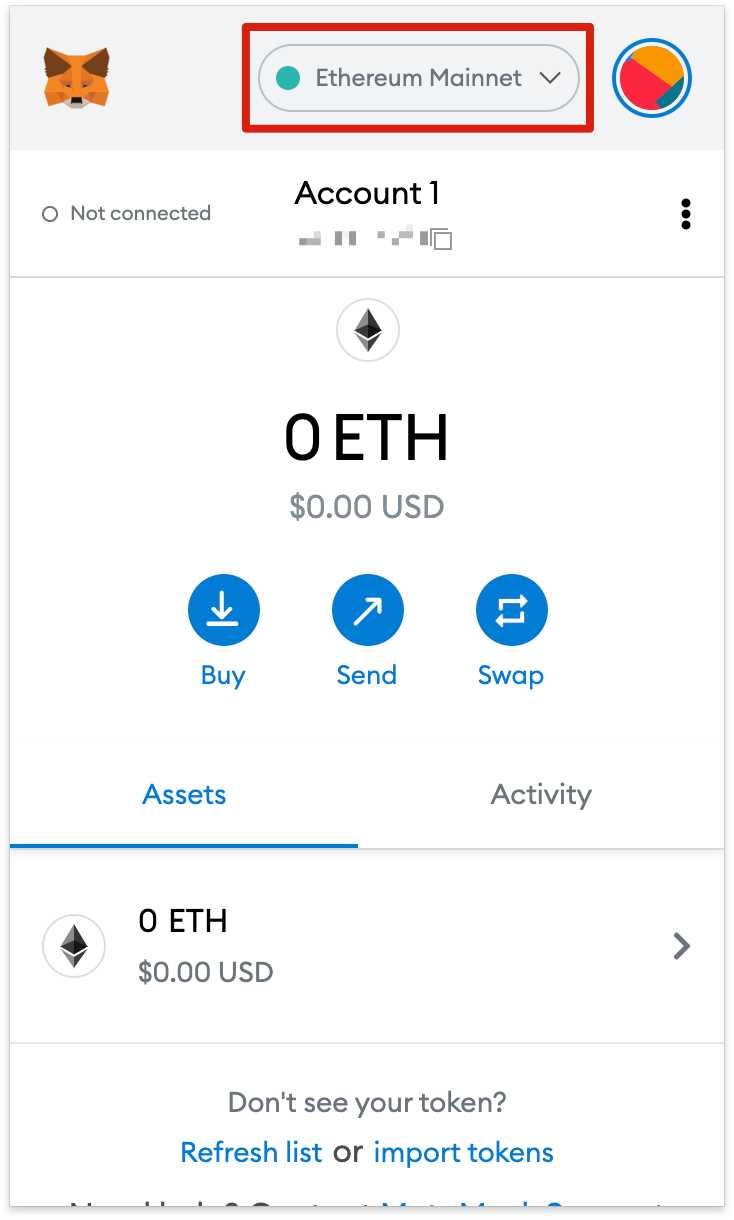
Step 2: Switch to the Polygon Network
Once you have set up your Metamask wallet, click on the network dropdown in the top-right corner and select “Custom RPC”.
Step 3: Configure the Polygon Network
In the “New RPC URL” field, enter the following URL to connect to the Polygon network: https://rpc-mainnet.maticvigil.com/. Enter a name for the network, such as “Polygon Mainnet”, and click “Save”.
Step 4: Switch to the Polygon Network
After saving the network configuration, select the newly created network from the dropdown menu. It should display the name you entered in the previous step (e.g., “Polygon Mainnet”).
Step 5: Verify Connectivity
To ensure that you have successfully connected to the Polygon network, you can visit any Polygon-based DApp or navigate to the “Ethereum” tab in the Metamask extension. Make sure the network displayed is “Polygon Mainnet” and that your account balance is correct.
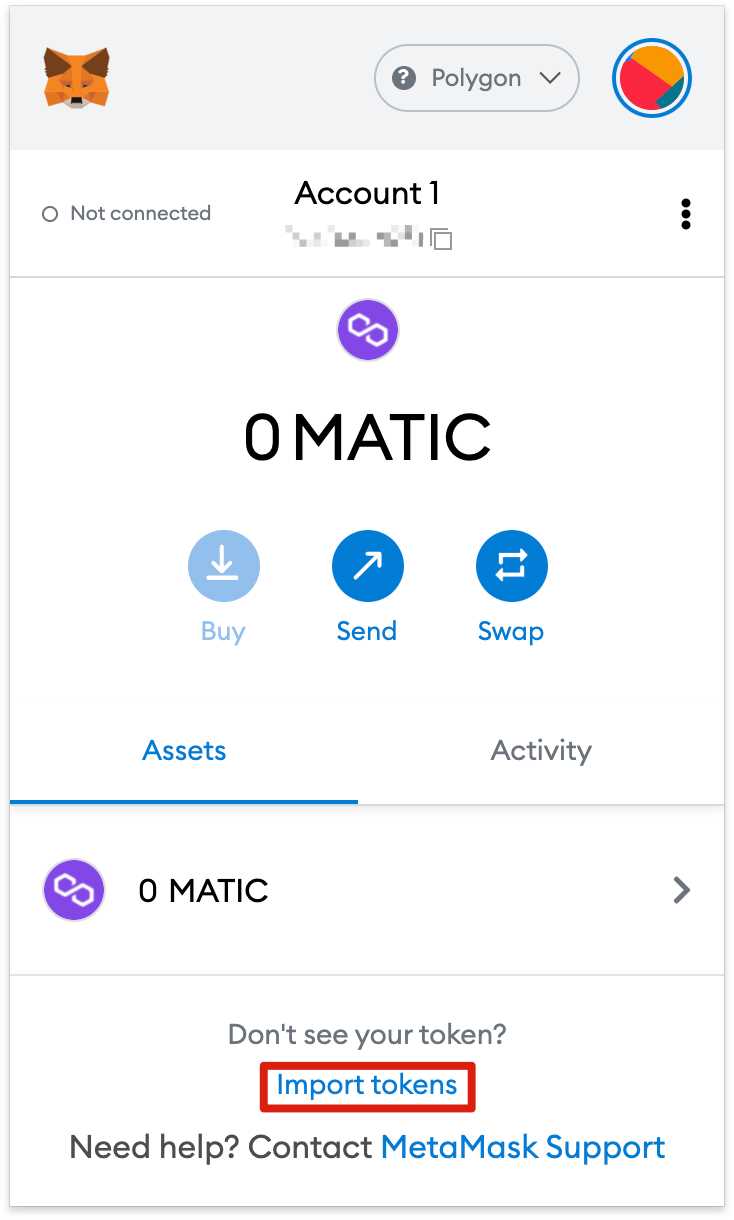
Step 6: Add Custom Tokens
If you have any tokens on the Polygon network that are not automatically displayed in your Metamask wallet, you can manually add them by clicking on “Add Token” and entering the contract address and token symbol.
And that’s it! You have successfully set up Metamask for the Polygon network. Now you can start exploring and using various DApps on the Polygon network using your Metamask wallet.
Step 2: Creating a Polygon Wallet
In order to use the Polygon network, you will need to create a Polygon wallet. This wallet will allow you to store and manage your Polygon tokens and interact with various decentralized applications (dApps) on the network. Follow the steps below to create your Polygon wallet.
1. Install Metamask
Firstly, you will need to install the Metamask browser extension if you haven’t already. Metamask is a popular wallet that allows you to interact with Ethereum-based networks like Polygon. To install Metamask, follow the below steps:
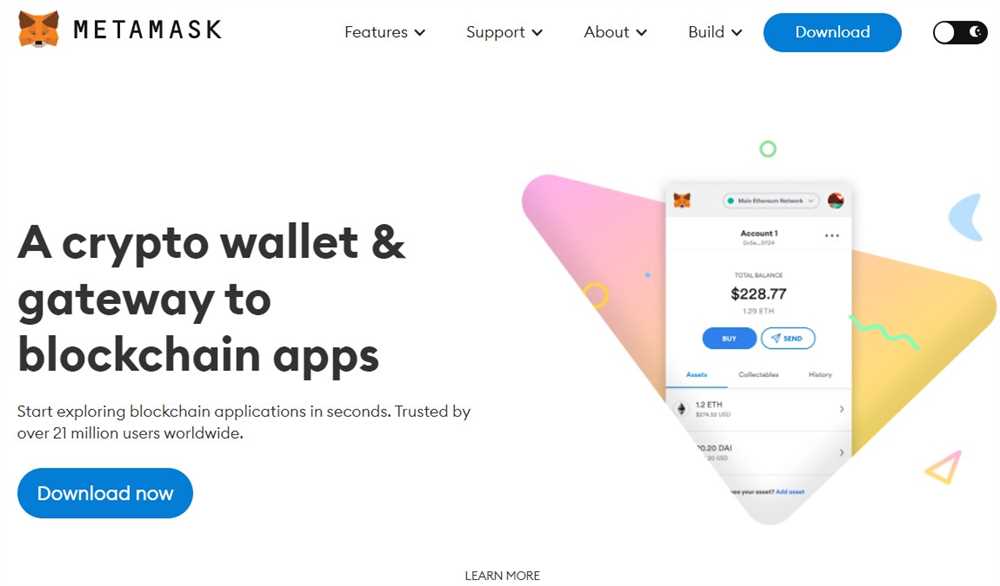
- Open your preferred web browser and visit the Metamask website.
- Click on the “Get Chrome Extension” button if you are using Google Chrome, or “Get Firefox Extension” if you are using Mozilla Firefox.
- Once the extension is installed, you will see the Metamask icon in your browser’s toolbar.
- Click on the icon to launch Metamask and set up your wallet.
2. Set Up Metamask
After installing the Metamask extension, follow the below steps to set up your Polygon wallet:
- Click on the Metamask icon in your browser’s toolbar to open the extension.
- Click on “Create a Wallet” or “Import Wallet” if you already have an existing one.
- Follow the prompts to create a new wallet by setting up a secure password and agreeing to the terms and conditions.
- Backup your wallet by saving the secret backup phrase. This phrase can be used to restore your wallet in case you lose access to it.
- Once your wallet is set up, you can optionally customize the wallet name and add a profile picture.
3. Connect Metamask to Polygon
Now that you have your Metamask wallet set up, you need to connect it to the Polygon network. Follow the below steps to connect Metamask to Polygon:
- Click on the Metamask icon in your browser’s toolbar to open the extension.
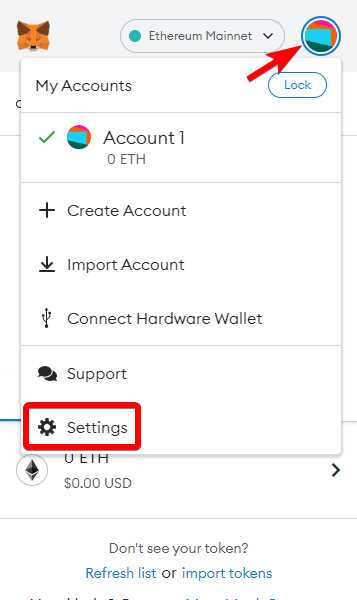
- Click the account icon located at the top right corner of the Metamask window.
- Select “Custom RPC” from the dropdown menu.
- In the “New Network” tab, enter the following details:
- Network Name: Polygon
- RPC URL: https://polygon-rpc.com/ (or any other compatible RPC URL you prefer)
- Chain ID: 137 (or the correct chain ID for the Polygon network)
- Symbol: MATIC
- Block Explorer URL: https://polygonscan.com/ (or any other compatible block explorer URL)
- Click “Save” to add the Polygon network to your Metamask wallet.
Congratulations! You have successfully created your Polygon wallet and connected it to Metamask. Now you can start using Polygon to interact with various dApps and explore the possibilities of the network.
Learn how to create a new wallet and add the Polygon network to Metamask
Metamask is a popular cryptocurrency wallet that allows users to securely manage and interact with decentralized applications (DApps) on the Ethereum blockchain. By default, Metamask is configured to work with the Ethereum network. However, if you want to use Metamask with the Polygon network, you’ll need to configure it accordingly. In this guide, we’ll walk you through the process of creating a new wallet and adding the Polygon network to Metamask.
Create a new wallet
If you don’t have Metamask installed, start by opening your browser and visiting the official Metamask website. From there, download and install the Metamask extension for your browser.
Once Metamask is installed, open the extension and click on the “Get Started” button. You’ll be prompted to create a new wallet. Click on “Create a Wallet” and follow the on-screen instructions to set up your wallet. Make sure to securely store your wallet’s seed phrase, as it will be required to access your funds in the future.
Add the Polygon network to Metamask
After creating your wallet, it’s time to add the Polygon network to Metamask. To do this, follow these steps:
- Click on the network selection dropdown at the top of the Metamask extension and select “Custom RPC”.
- In the “New RPC URL” field, enter the RPC endpoint for the Polygon network. The RPC endpoint for the Polygon mainnet is https://polygon-mainnet.infura.io/v3/your-infura-project-id. If you want to connect to the Polygon testnet, the RPC endpoint is https://polygon-mumbai.infura.io/v3/your-infura-project-id. Make sure to replace “your-infura-project-id” with your Infura Project ID.
- Click on the “Save” button to add the Polygon network to Metamask.
That’s it! You have successfully created a new wallet and added the Polygon network to Metamask. Now you can start using Metamask to interact with DApps on the Polygon network and manage your Polygon-based assets.
Please note that when interacting with the Polygon network, you’ll need to have some MATIC tokens in your wallet to pay for transaction fees. You can acquire MATIC tokens from various exchanges and transfer them to your wallet address.
Disclaimer: It’s important to exercise caution and do your own research before engaging in any cryptocurrency-related activities. This guide is for informational purposes only and should not be considered financial or investment advice.
Step 3: Configuring Metamask for Polygon
After successfully setting up the Polygon network on Metamask, we now need to configure Metamask to connect to the Polygon network.
Step 3.1: Changing Networks
To configure Metamask for Polygon, follow these steps:
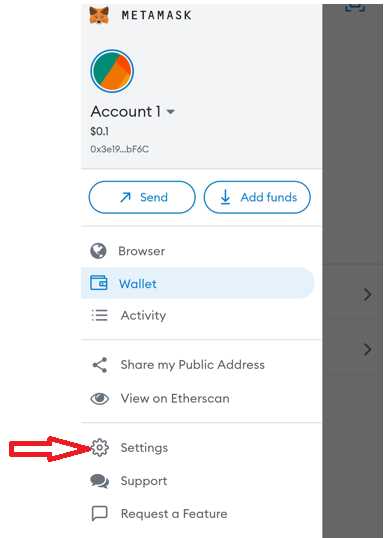
- Open your Metamask extension or app.
- Click on the network selection dropdown located at the top of the Metamask interface.
- Select “Custom RPC” from the network options.
Step 3.2: Adding Network Details
After selecting “Custom RPC”, a form will appear where you need to provide the network details for Polygon. Fill in the following information:
| Network Name | Polygon |
| New RPC URL | https://rpc-mainnet.maticvigil.com (for the mainnet) or https://rpc-testnet.maticvigil.com (for the testnet) |
| Chain ID | 137 (for the mainnet) or 80001 (for the testnet) |
| Currency Symbol | MATIC |
| Block Explorer URL | https://polygonscan.com (for the mainnet) or https://mumbai.polygonscan.com (for the testnet) |
After filling in the details, click on “Save” to add the Polygon network to Metamask.
Congratulations! You have now successfully configured Metamask to connect to the Polygon network. You can now start using Polygon with Metamask for various transactions and interactions with dapps on the Polygon network.
A comprehensive walkthrough to configure Metamask for seamless use with Polygon

Setting up Polygon on Metamask is essential to interact with decentralized applications (dApps) and tokens on the Polygon network. This step-by-step guide will walk you through the process of configuring Metamask for a seamless experience on Polygon.
Step 1: Install Metamask
If you haven’t done so already, install the Metamask browser extension on your preferred web browser. You can download and install it from the official Metamask website.
Step 2: Create or Import an Ethereum Wallet
Launch Metamask and either create a new Ethereum wallet or import an existing one using your private key or seed phrase. Make sure to set a strong password and back up your wallet in a secure location.
Step 3: Switch to the Polygon Network
In the Metamask extension, click on the network dropdown menu and select “Custom RPC.” In the popup window, input the following details for the Polygon network:
| Network Name | RPC URL | Chain ID |
|---|---|---|
| Polygon Mainnet | https://polygon-rpc.com/ | 137 |
| Polygon Testnet (Mumbai) | https://rpc-mumbai.matic.today/ | 80001 |
After entering the details, click on “Save” to switch to the Polygon network.
Step 4: Add Polygon Tokens
To see your Polygon tokens in Metamask, you need to add them as custom tokens. Click on the Metamask extension icon and select “Assets.” In the “Tokens” tab, click on “Add Token” and enter the token contract address for each token you want to add on Polygon.
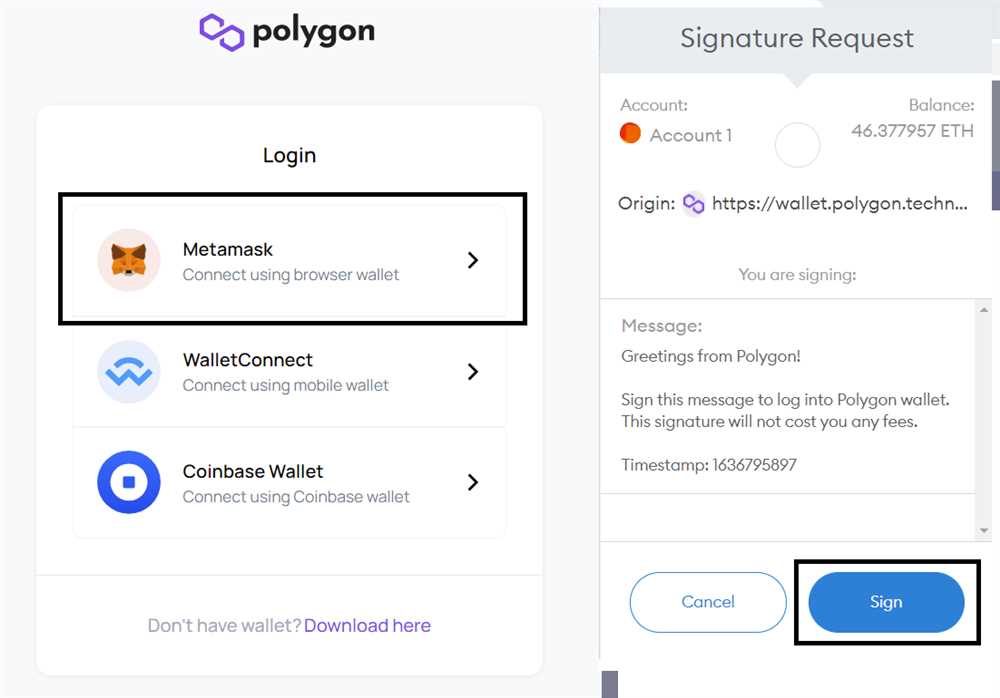
Step 5: Use Metamask with Polygon dApps
With Metamask now properly configured for Polygon, you can easily interact with dApps and tokens on the Polygon network. Simply visit a Polygon dApp and connect your Metamask wallet. You can now seamlessly make transactions and engage with the thriving Polygon ecosystem.
By following this comprehensive walkthrough, you have successfully configured Metamask for seamless use with Polygon. Enjoy the benefits of fast and low-cost transactions on the Polygon network!
What is Polygon?
Polygon is a layer 2 scaling solution for Ethereum that aims to improve scalability and reduce fees on the network.
Why would I want to set up Polygon on Metamask?
Setting up Polygon on Metamask allows you to access and interact with decentralized applications (DApps) and assets on the Polygon network using your existing Metamask wallet.
Can I use the same Ethereum wallet address to interact with Polygon?
Yes, you can use the same Ethereum wallet address to interact with Polygon. When you set up Polygon on Metamask, it creates a bridge between your Ethereum wallet and the Polygon network, allowing you to use the same address and balance.