
Are you interested in securely storing and managing your cryptocurrencies? Coinbase and Metamask are two popular platforms that offer a safe and user-friendly solution. Linking Coinbase to Metamask allows you to transfer funds between both platforms, giving you greater control over your digital assets. In this step-by-step guide, we will walk you through the process of connecting these two platforms, ensuring a seamless and hassle-free experience.
Step 1: Create a Metamask Wallet
If you haven’t already, the first step is to create a Metamask wallet. Metamask is a cryptocurrency wallet and browser extension that allows you to interact with decentralized applications (dApps) on the Ethereum blockchain. You can easily install Metamask by visiting their website and following the instructions for your browser of choice. Once installed, create a new wallet and securely store your recovery phrase.
Step 2: Navigate to Coinbase
Next, open your browser and navigate to the Coinbase website. If you don’t already have an account, sign up for one. Coinbase is a popular cryptocurrency exchange that allows you to buy, sell, and store digital assets. It offers a simple and intuitive interface, making it a great choice for beginners.
Step 3: Find Your Coinbase Wallet Address
Once you have signed in to your Coinbase account, navigate to the “Accounts” tab. Here, you will find a list of your cryptocurrency wallets. Choose the wallet you wish to link to Metamask and click on it. You will then see the wallet address, which is a long string of alphanumeric characters.
Step 4: Add Coinbase Wallet to Metamask
With your Coinbase wallet address in hand, open the Metamask extension in your browser. Click on the account icon at the top right corner and select “Import Account.” A new window will appear, prompting you to enter your Coinbase wallet address. Paste the address into the designated field and click “Import.”
Step 5: Confirm and Connect
After importing your Coinbase wallet address, Metamask will display a confirmation message. Review the details to ensure accuracy, then click “Confirm” to finalize the link. Your Coinbase wallet will now be connected to Metamask, allowing you to easily transfer funds between the two platforms.
By following this step-by-step guide, you can link your Coinbase wallet to Metamask and enjoy the benefits of seamless fund transfers and enhanced control over your digital assets. Remember to always exercise caution when managing cryptocurrencies and keep your wallet information secure.
Step 1: Create a Coinbase Account
Before you can link Coinbase to Metamask, you’ll need to create an account on Coinbase.
To create a Coinbase account, follow these steps:
- Go to the Coinbase website at www.coinbase.com.
- Click on the “Sign Up” button.
- Fill in your personal information, including your name, email address, and a password.
- Agree to the terms of service and privacy policy.
- Click on the “Create Account” button.
- Verify your email address by clicking on the link sent to your email.
- Complete the identity verification process by providing additional information and uploading the required documents.
- Once your account is verified, you can proceed to the next step of linking Coinbase to Metamask.
Creating a Coinbase account is an important first step in setting up your cryptocurrency wallet, as it allows you to buy, sell, and store various cryptocurrencies.
Once your Coinbase account is ready, you can move on to the next step and start linking it to Metamask.
Step 2: Install the Metamask Extension
Metamask is an Ethereum wallet extension that allows you to interact with decentralized applications (DApps) on your browser. In order to link Coinbase to Metamask, you first need to install the Metamask extension in your browser.
Here’s how you can install Metamask:
- Open your preferred web browser (e.g. Google Chrome, Firefox).
- Go to the official Metamask website (https://metamask.io).
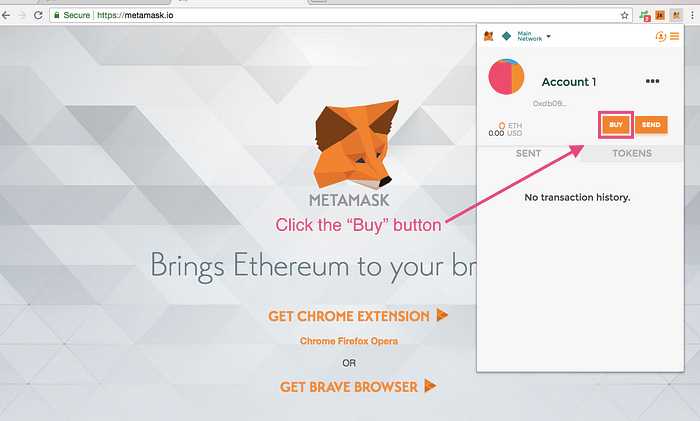
- Click on the “Get Chrome extension” or “Get Firefox extension” button, depending on your browser.
- A new tab will open, which will take you to the respective browser extension store.
- Click the “Add to Chrome” or “Add to Firefox” button to start the installation process.
- A pop-up window will appear, asking for confirmation to add the extension. Click on the “Add extension” button.
- The Metamask extension will start downloading and installing.
- Once the installation is complete, you will see the Metamask icon on your browser’s toolbar.
- Click on the Metamask icon and follow the prompts to create a new wallet or import an existing one.
- Set up your wallet by following the on-screen instructions and securely store your password and seed phrase.
Congratulations! You have successfully installed the Metamask extension in your browser. Now you can proceed to the next step and connect your Coinbase account to Metamask.
Step 3: Generate a New Wallet on Metamask
Once you have successfully connected Coinbase to Metamask, the next step is to generate a new wallet on Metamask. This wallet will be used to securely store your cryptocurrency and interact with decentralized applications (dapps).
- Open the Metamask extension in your web browser.
- If you already have a wallet in Metamask, make sure you are logged out. You can do this by clicking on the account icon on the top right corner and selecting “Log Out”.
- Click on the “Create a Wallet” button to generate a new wallet.
- Set a strong password for your wallet. Make sure to use a combination of letters, numbers, and special characters to ensure the security of your funds.
- After setting the password, click on “Create” to generate your new wallet.
- You will be prompted to save a backup phrase. This backup phrase is extremely important and should be kept in a secure place. It can be used to recover your wallet in case you lose access to it.
- Write down the backup phrase and click on “Next”.
- Metamask will ask you to confirm the backup phrase by selecting the words in the correct order. This is done to ensure that you have correctly saved your backup phrase.
- Once you have confirmed the backup phrase, your new wallet will be created and you will be logged in.
Congratulations! You have successfully generated a new wallet on Metamask. This wallet can now be used to securely store your cryptocurrency and interact with various dapps on the Ethereum blockchain.
Step 4: Connect Metamask to Coinbase
Now that you have both Coinbase and Metamask set up, it’s time to connect them so you can easily transfer funds between the two platforms. Follow the steps below to link your Coinbase account to Metamask:
| 1. | Open Metamask in your browser and click on the account drop-down in the top-right corner of the screen. |
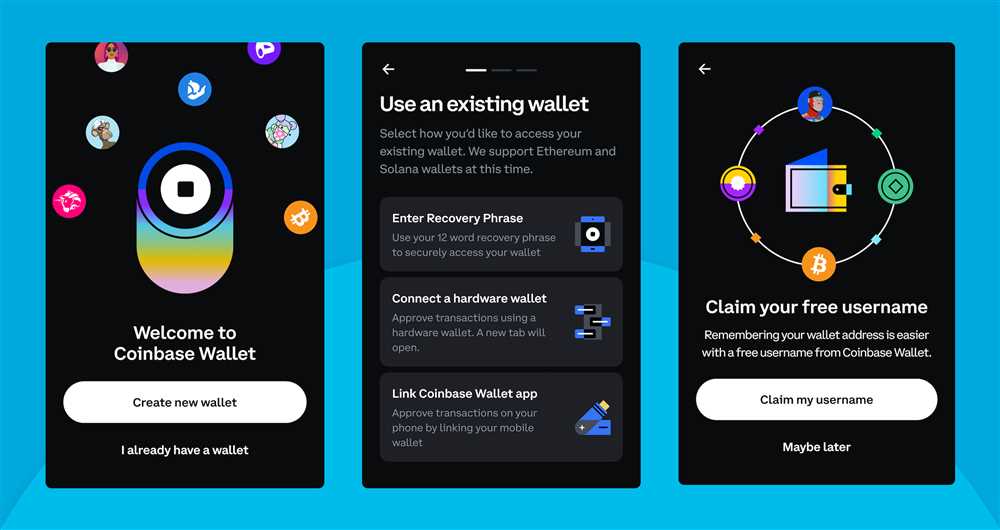
| 2. | Select “Connect Wallet” from the drop-down menu. |
| 3. | A list of wallet providers will appear. Click on “Coinbase Wallet” to proceed. |
| 4. | You will be redirected to Coinbase’s authorization page. Enter your Coinbase credentials and authorize the connection. |
| 5. | Once the connection is successful, you will see your Coinbase account linked to Metamask. |
By connecting Metamask to Coinbase, you can easily transfer funds from your Coinbase account to your Metamask wallet and vice versa. This allows you to conveniently manage your cryptocurrency holdings and seamlessly interact with decentralized applications (dApps) using Metamask.
Step 5: Transfer Funds from Coinbase to Metamask

Once you have connected your Coinbase account to Metamask, the next step is to transfer funds from Coinbase to your Metamask wallet. This will allow you to use your funds for decentralized applications (DApps) on the Ethereum network.
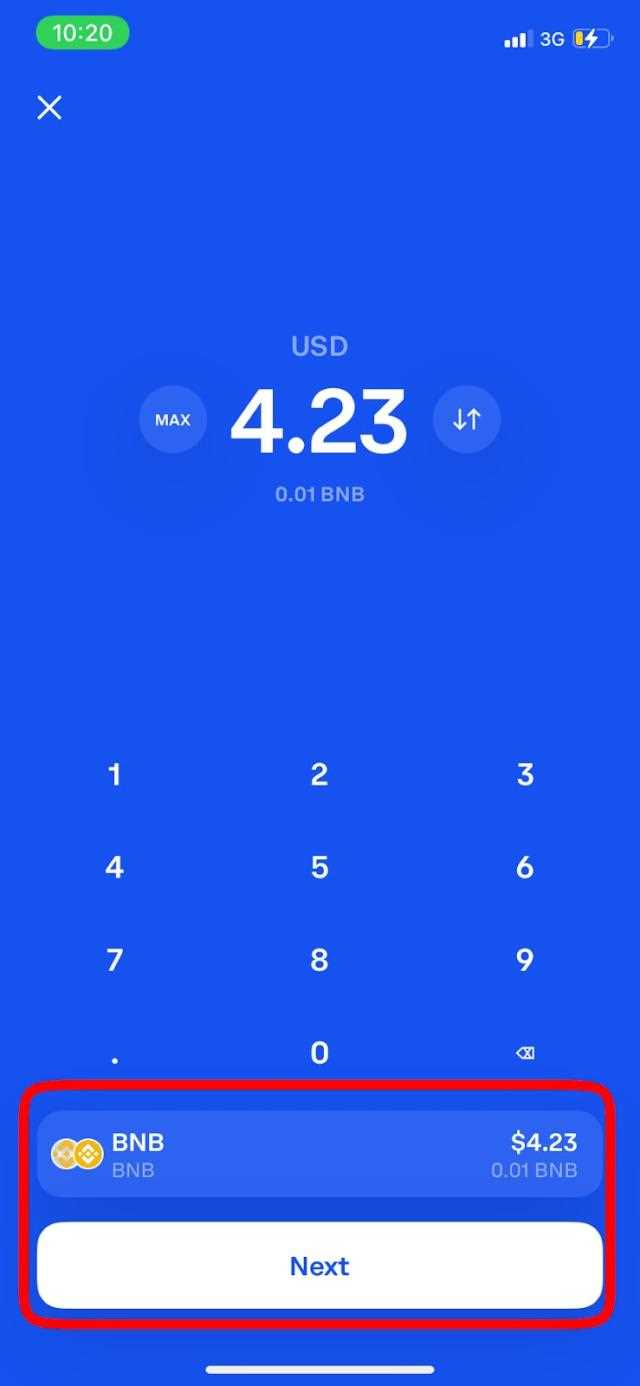
1. Open Coinbase and select your desired cryptocurrency
Log in to your Coinbase account and choose the cryptocurrency you want to transfer to Metamask. Ensure that you have sufficient funds in your Coinbase account for the transfer.
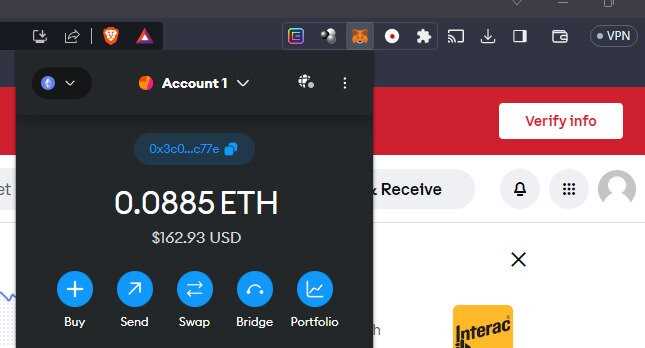
2. Generate a wallet address in Metamask
In the Metamask extension, click on the account icon and select “Copy address.” This will generate a unique wallet address for your Metamask wallet.
3. Paste the wallet address in Coinbase
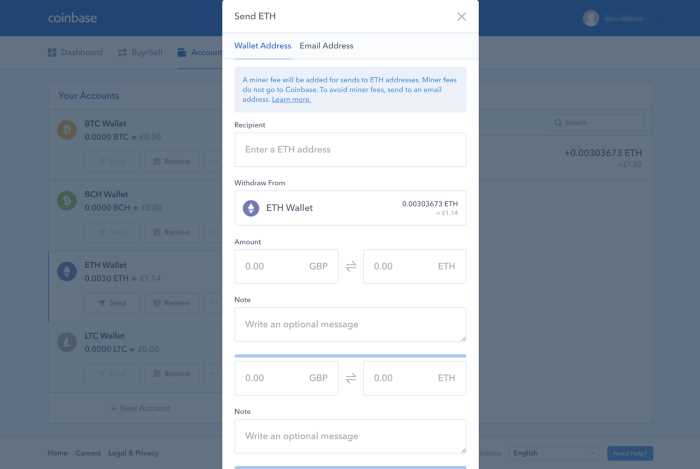
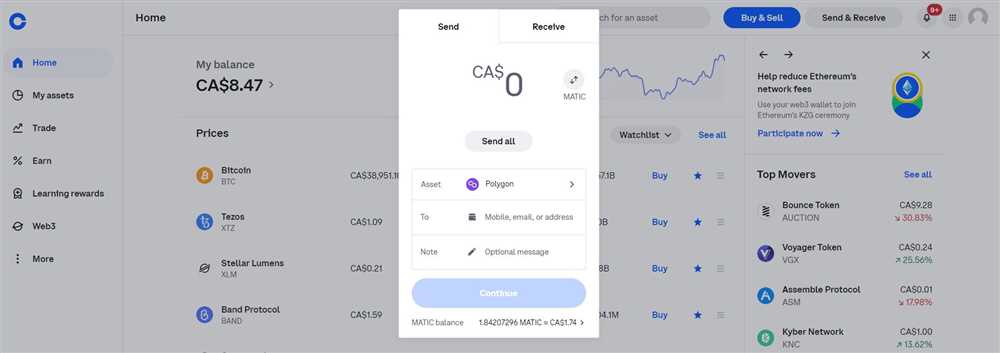
Go back to the Coinbase platform and navigate to the “Send” or “Withdraw” section. Paste the previously copied Metamask wallet address into the recipient field.
4. Enter the amount and review the transaction
Specify the amount you want to transfer from Coinbase to Metamask. Double-check that the address and amount are accurate to prevent any mistakes. Review the transaction details one more time before proceeding.
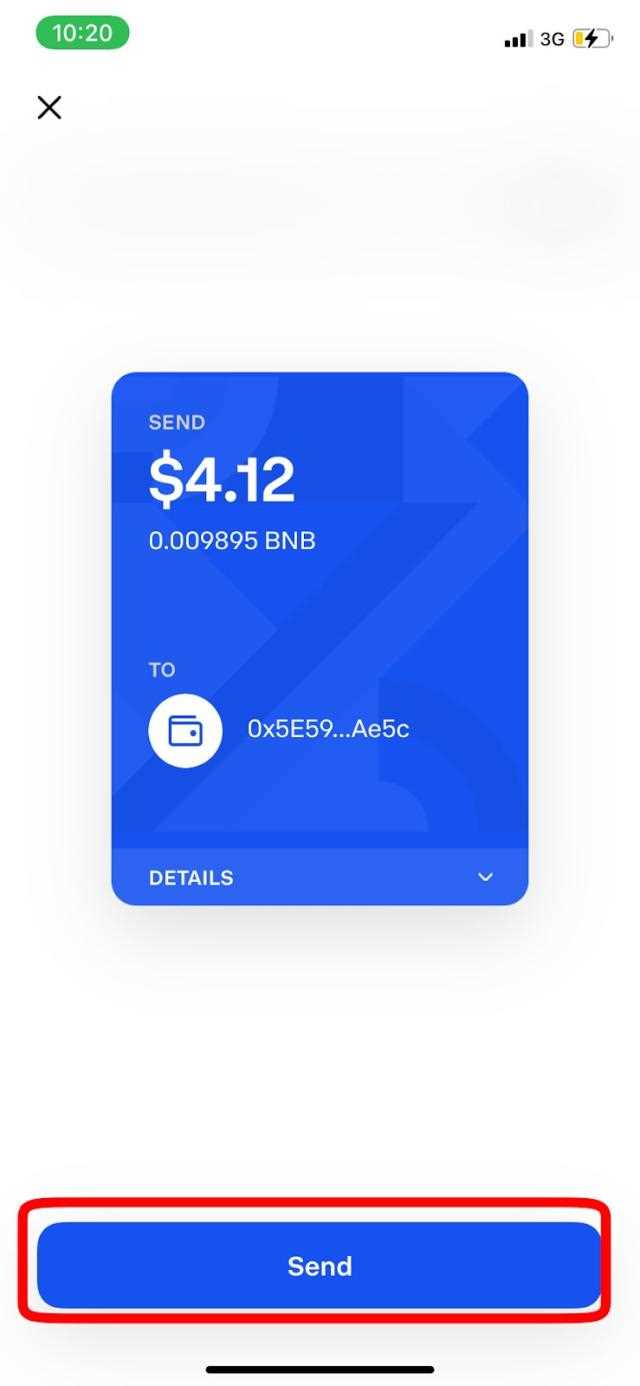
5. Confirm and complete the transaction
Click on the “Confirm” or “Send” button to initiate the transfer. Coinbase will verify the transaction and deduct the specified amount from your balance. The transfer process may take a few moments to complete.
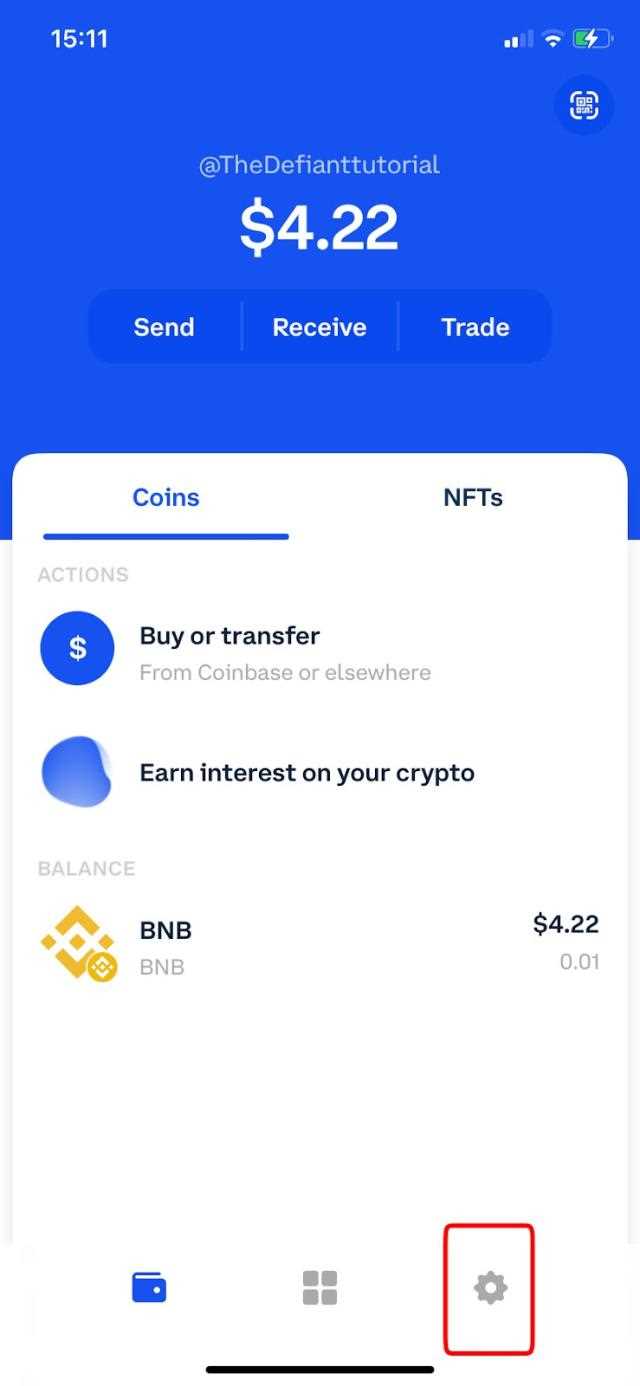
Once the transfer is successful, you can check your Metamask wallet to confirm that the funds have been received. You can now use these funds to interact with various DApps and services on the Ethereum network using Metamask.
| Tip: | It is essential to always double-check the wallet address when making a transfer to avoid sending funds to the wrong destination. |
|---|
What is Coinbase?
Coinbase is a popular cryptocurrency exchange platform that allows users to buy, sell, and store various cryptocurrencies, including Bitcoin, Ethereum, and Litecoin.
What is Metamask?
Metamask is an Ethereum wallet and browser extension that allows users to interact with decentralized applications (dApps) on the Ethereum blockchain. It also serves as a bridge between web browsers and the Ethereum network.
Why would I want to link Coinbase to Metamask?
Linking Coinbase to Metamask allows you to easily transfer funds from your Coinbase account to your Metamask wallet. It gives you more control over your cryptocurrency holdings and allows you to interact with decentralized applications, participate in token sales, and manage your assets more securely.