
MetaMask is a popular cryptocurrency wallet and decentralized application (dApp) browser that allows users to securely manage and interact with their digital assets. With the rise of NFTs (Non-Fungible Tokens), it has become increasingly important for MetaMask users to understand how to view and interact with these unique digital collectibles.
In this step-by-step guide, we will walk you through the process of easily viewing NFTs in MetaMask. Whether you are a seasoned crypto enthusiast or new to the world of NFTs, this guide will help you navigate through the process with ease.
Step 1: Install and Set Up MetaMask
The first step is to install and set up the MetaMask extension in your preferred web browser. Simply visit the official MetaMask website, download the extension, and follow the on-screen instructions to create a new wallet or import an existing one.
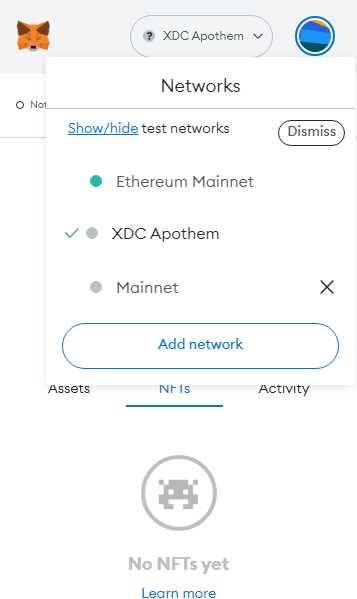
Step 2: Connect MetaMask to Your Preferred Blockchain Network
After setting up MetaMask, you will need to connect it to your preferred blockchain network. NFTs are typically minted on specific blockchain networks like Ethereum or Binance Smart Chain. Click on the network dropdown in the top-right corner of your MetaMask extension, and select the network that corresponds with the NFT you want to view.
Step 3: Visit an NFT Marketplace
Once connected to the appropriate blockchain network, you will need to visit an NFT marketplace to view and interact with NFTs. Some popular marketplaces include OpenSea, Rarible, and SuperRare. Browse through the available NFTs or search for a specific artist or collection that interests you.
Step 4: Connect MetaMask to the NFT Marketplace
Before you can view or purchase NFTs, you need to connect your MetaMask wallet to the NFT marketplace. Look for a “Connect Wallet” or similar button on the marketplace’s website and click on it. MetaMask will prompt you to authorize the connection. Once connected, you will be able to view, bid on, and purchase NFTs using your MetaMask funds.
Step 5: View and Interact with NFTs
Once connected to the NFT marketplace, you can explore the various NFTs available. Click on an NFT to view its details, including its image, description, and current price. You can also interact with the NFT by liking it, adding it to your collection, or making a bid if it is available for auction.
By following these steps, you can easily view NFTs in MetaMask and become a part of the exciting world of digital collectibles. Stay informed, stay secure, and enjoy exploring the vast and creative NFT ecosystem!
A beginner’s guide to viewing NFTs in MetaMask
MetaMask is a popular digital wallet and browser extension that allows users to interact with decentralized applications (dApps) on the Ethereum blockchain. In addition to managing cryptocurrencies, MetaMask also supports the display and interaction with non-fungible tokens (NFTs).
If you’re new to NFTs and want to learn how to view them in MetaMask, you’ve come to the right place. This step-by-step guide will walk you through the process:
Step 1: Install MetaMask
If you don’t already have MetaMask installed, head over to the official MetaMask website and download the extension for your browser. Once installed, create a new wallet or import an existing one.
Step 2: Connect MetaMask to a dApp
In order to view NFTs, you’ll need to connect your MetaMask wallet to a dApp or marketplace that supports NFTs. Popular options include OpenSea, Rarible, and SuperRare. Visit one of these platforms and connect your MetaMask wallet.
Step 3: Explore NFT Collections
Once connected, you can begin exploring NFT collections on the dApp. These collections may include artwork, collectibles, virtual real estate, and more. Browse through the different collections and click on individual NFTs to view more details.
Step 4: View NFT Details
When viewing an NFT, you’ll typically be able to see information such as the title, description, creator, and current owner. You may also be able to view the image or video associated with the NFT. Take your time to explore the various attributes and characteristics of each NFT.
Step 5: Interact with NFTs
Some NFTs may have additional functionality, such as the ability to buy, sell, or trade them. If you’re interested in purchasing an NFT, make sure you have enough cryptocurrency in your MetaMask wallet to complete the transaction. Follow the prompts provided by the dApp to complete the purchase.
That’s it! You’re now ready to view NFTs in MetaMask. Enjoy exploring the exciting world of digital collectibles and unique blockchain-based assets.
| Step | Description |
|---|---|
| Step 1 | Install MetaMask |
| Step 2 | Connect MetaMask to a dApp |
| Step 3 | Explore NFT Collections |
| Step 4 | View NFT Details |
| Step 5 | Interact with NFTs |
Step 1: Install MetaMask extension
Before you can view NFTs in MetaMask, you’ll need to install the MetaMask extension on your web browser. Here’s how you can do it:
For Google Chrome:
- Open the Google Chrome web browser and go to the Chrome Web Store.
- Search for “MetaMask” in the search bar.
- Click on the “Add to Chrome” button next to the MetaMask extension.
- A pop-up window will appear. Click on the “Add extension” button.
- The MetaMask extension will now be installed on your browser.
For Mozilla Firefox:
- Open the Mozilla Firefox web browser and go to the Add-ons page.
- Search for “MetaMask” in the search bar.
- Click on the “Add to Firefox” button next to the MetaMask extension.
- A pop-up window will appear. Click on the “Add” button.
- The MetaMask extension will now be installed on your browser.
Once you have successfully installed the MetaMask extension, you can proceed to the next step to set up your MetaMask wallet.
Step 2: Connect MetaMask to a wallet
The next step is to connect your MetaMask wallet to your preferred digital wallet. This will allow you to access and view your NFTs within the MetaMask interface.
Here’s a step-by-step guide on how to connect MetaMask to a wallet:
| Step | Instructions |
| 1 | Open the MetaMask browser extension and click on the account icon in the top right corner of the window. |
| 2 | Click on the “Connect” button located next to the wallet you wish to connect with MetaMask. |
| 3 | Follow the prompts on the screen to complete the connection process. This may include entering your wallet’s password or confirming the connection request. |
| 4 | Once the connection is established, you will see your wallet’s account address displayed in the MetaMask interface. |
After completing these steps, your MetaMask wallet will be successfully connected to your chosen digital wallet. You can now proceed to the next step to view your NFTs.
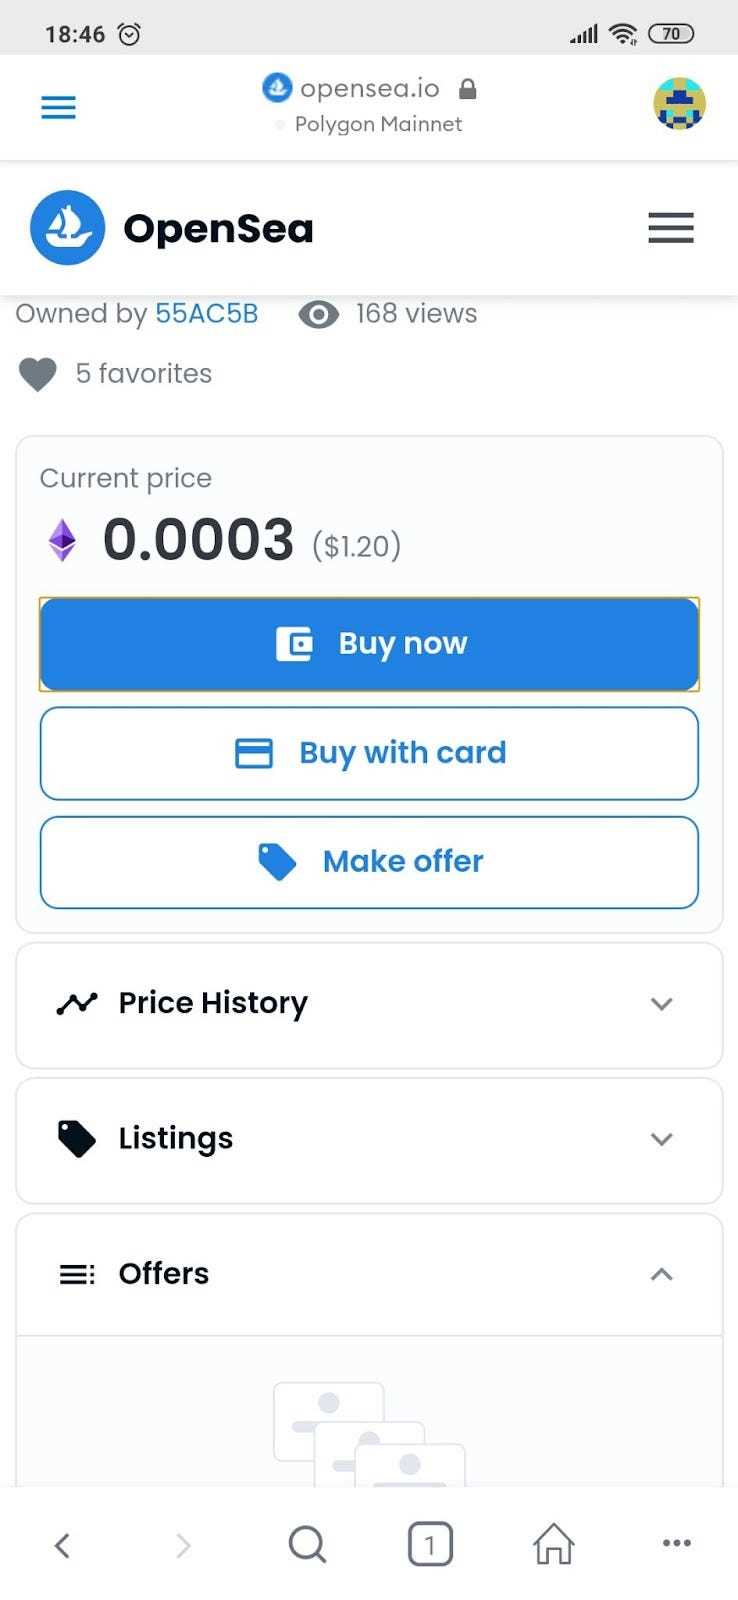
Step 3: Explore NFT marketplaces
Now that you have set up your MetaMask wallet and are ready to view NFTs, it’s time to explore different NFT marketplaces. These marketplaces act as a platform where you can buy, sell, and discover new NFTs.
Some popular NFT marketplaces include:
1. OpenSea: OpenSea is one of the largest NFT marketplaces and offers a wide range of NFTs across various categories such as art, music, collectibles, and more. You can browse through different collections and artists to find the NFTs that interest you.
2. Rarible: Rarible is another well-known marketplace that allows users to create, buy, and sell NFTs. It has a vibrant community of creators and collectors, and you can find a diverse range of NFTs on this platform.
3. SuperRare: SuperRare focuses on digital art and offers a curated selection of high-quality NFT artworks. Each artwork on SuperRare is unique and comes with a limited edition, increasing its value and collectibility.
These are just a few examples of NFT marketplaces, and there are many more out there. Take some time to explore different platforms, browse through NFT collections, and discover the amazing world of digital assets!
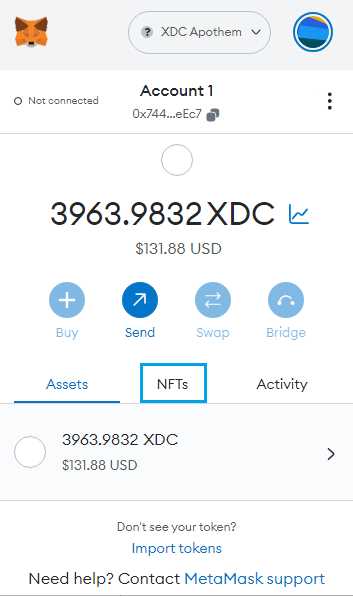
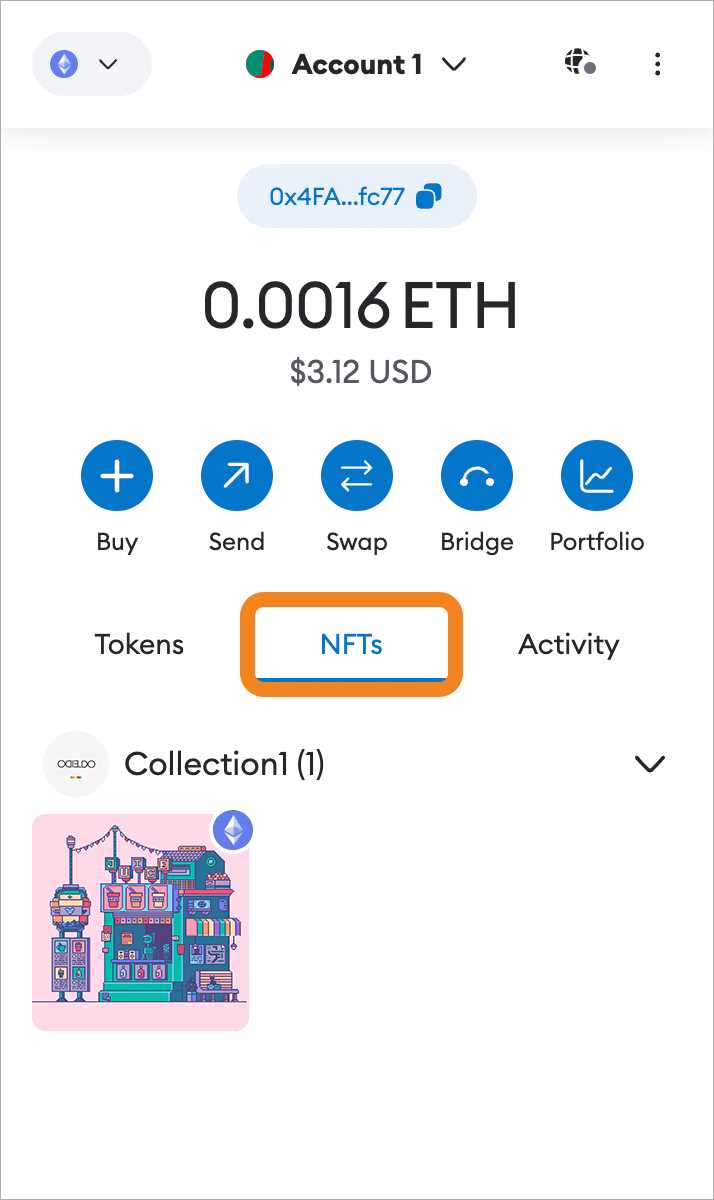
Step 4: View NFTs in MetaMask
Once you have successfully connected your MetaMask wallet to your NFT platform, it’s time to view your NFTs. Here’s how:
| Step | Action |
| 1 | Open MetaMask by clicking on the extension icon in your browser. |
| 2 | Click on the “Assets” tab at the top of the MetaMask pop-up window. |
| 3 | You should see a list of all your NFTs under the “Assets” tab. Scroll through the list to find the NFT you want to view. |
| 4 | To view the details of a specific NFT, click on its name or image. |
| 5 | A new window or pop-up will open, showing you the full details of the NFT, such as its name, creator, description, and any associated media. |
| 6 | You can also perform actions related to your NFT, such as transferring it to another address or listing it for sale. |
By following these steps, you can easily view and manage your NFTs within the MetaMask wallet. Enjoy exploring the world of digital art and collectibles!
What is MetaMask?
MetaMask is a cryptocurrency wallet and browser extension that allows users to manage their Ethereum-based assets and interact with decentralized applications (dApps) on the Ethereum blockchain.
Can I view NFTs from different blockchains in MetaMask?
No, MetaMask currently only supports the Ethereum blockchain. You can only view NFTs that are based on Ethereum’s ERC-721 and ERC-1155 standards. If you want to view NFTs from different blockchains, you will need to use a wallet that supports those specific blockchains.