
If you’ve been hearing about Non-Fungible Tokens (NFTs) and want to join the global craze of collecting digital artwork, you’ve come to the right place! Adding NFTs to your Metamask wallet is the first step towards exploring the exciting world of digital collectibles. In this step-by-step guide, we will walk you through the process, so you can start showcasing and trading your favorite NFTs in no time.
Step 1: Install Metamask
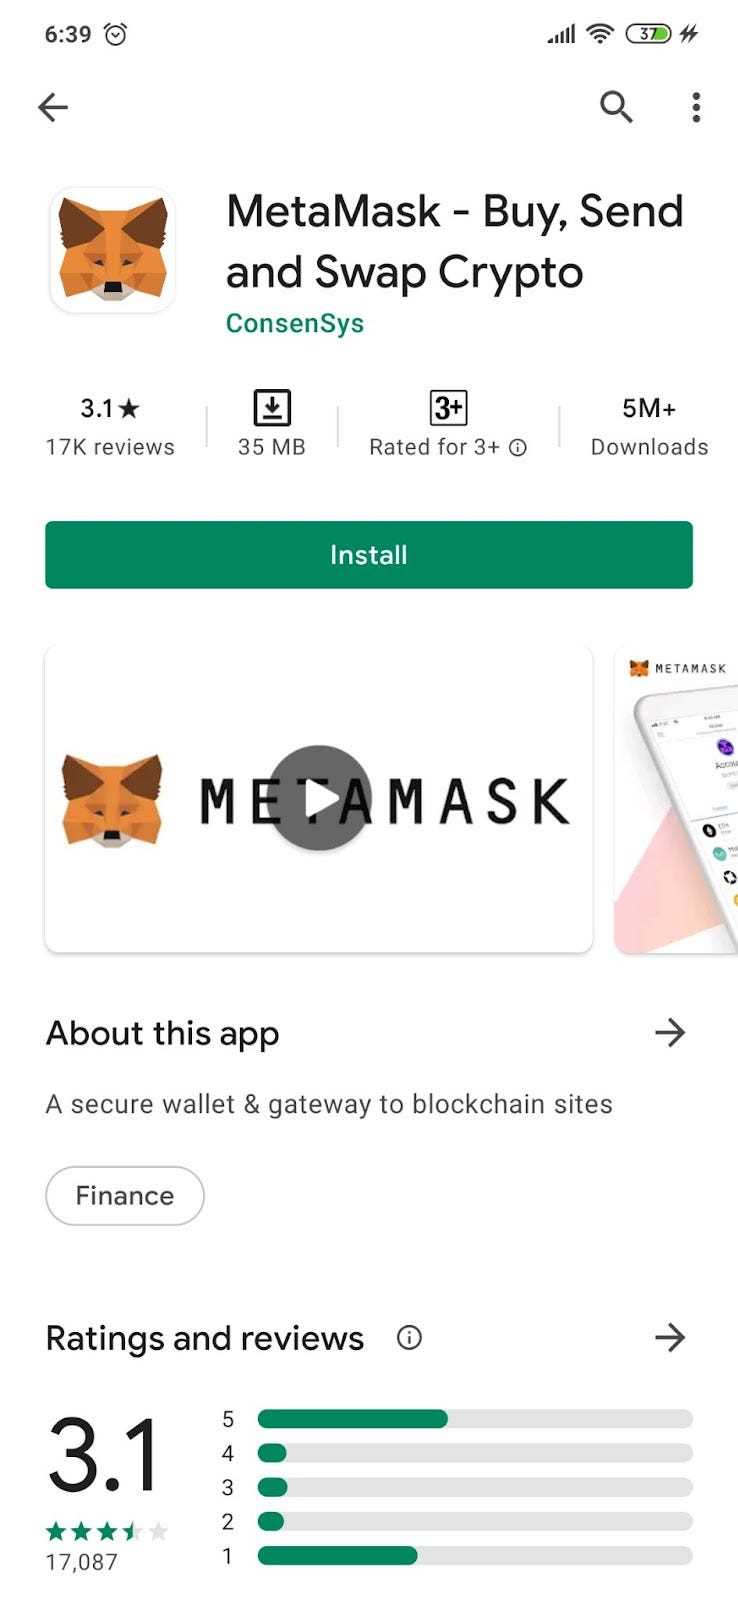
The first thing you need to do is install the Metamask extension for your preferred web browser. Metamask is a digital wallet that allows you to store, manage, and interact with your NFTs on the Ethereum blockchain. Simply visit the official Metamask website, choose your browser, and follow the installation instructions.
Step 2: Create a Metamask Wallet
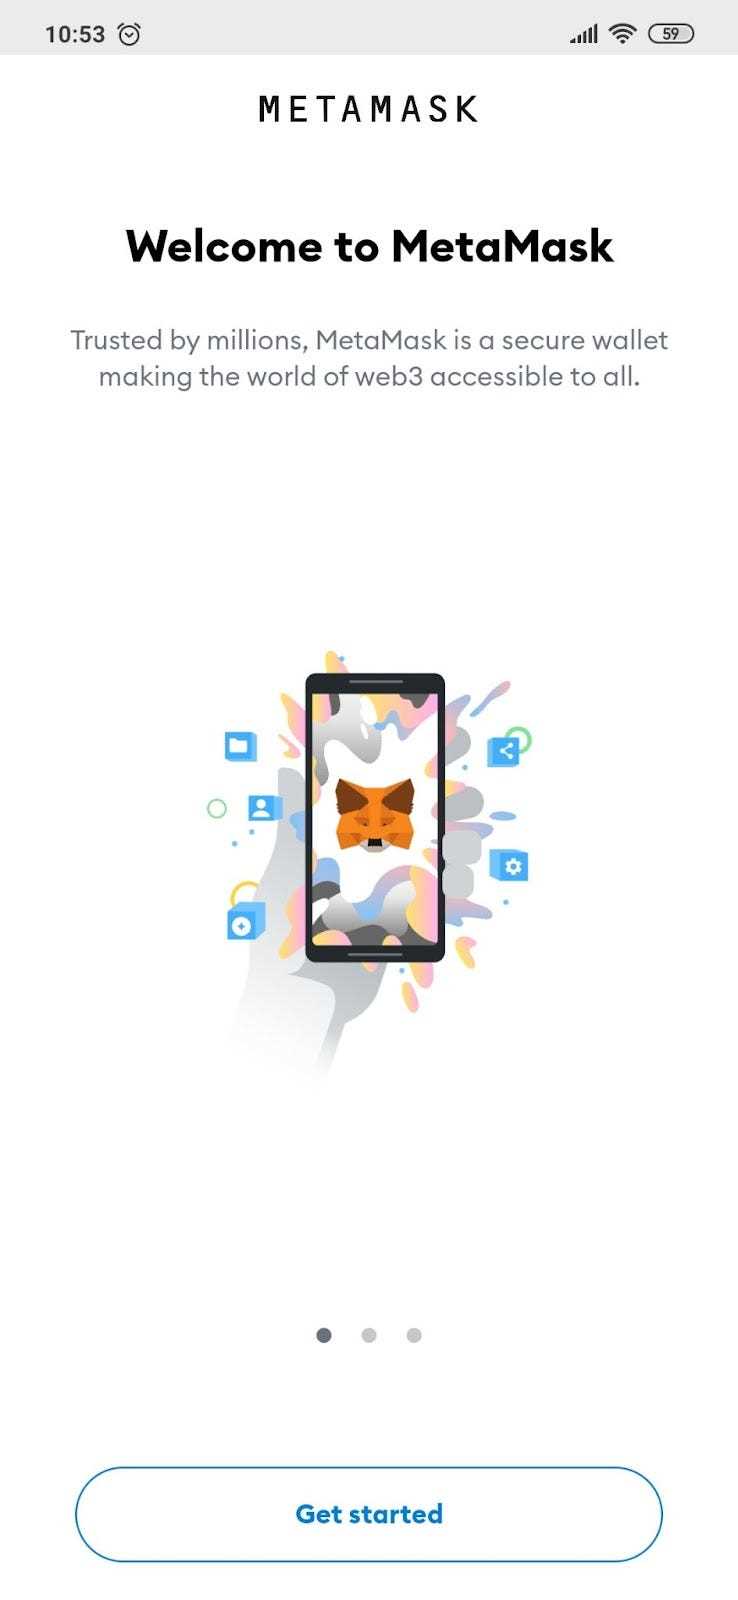
Once you have installed Metamask, open the extension and click on “Get Started”. Follow the prompts to create a new wallet. Remember to write down your secret backup phrase and keep it in a safe place. This phrase is crucial for recovering your wallet if you ever lose access to it.
Step 3: Fund Your Wallet
Before you can start adding NFTs to your collection, you need to fund your Metamask wallet with some Ether (ETH). Ether is the cryptocurrency used for transactions on the Ethereum blockchain. You can purchase ETH from a cryptocurrency exchange and then transfer it to your wallet address.
Step 4: Connect Metamask to NFT Marketplaces
Now that your wallet is funded, it’s time to connect Metamask to NFT marketplaces. There are several popular marketplaces to choose from, such as OpenSea, Rarible, and SuperRare. Visit the marketplace of your choice, sign up if necessary, and look for the option to connect your wallet. Metamask will prompt you to authorize the connection, allowing the marketplace to access your wallet’s NFT information.
Step 5: Discover and Add NFTs
With your wallet connected to a marketplace, you can now explore the vast world of NFTs. Browse through different collections and artists, and when you find an NFT you’d like to add to your Metamask wallet, simply click on the “Add to Wallet” or “Buy” button. Follow the prompts to complete the transaction, and voila! You now own a digital collectible.
By following these simple steps, you have unlocked the world of digital collectibles and added NFTs to your Metamask wallet. Take some time to dive into various NFT communities, interact with other collectors, and enjoy the beauty and creativity of digital art. Happy collecting!
Setting Up Metamask Wallet
Before you can start adding NFTs to your Metamask wallet, you need to set it up and make sure it is properly connected to your browser. Follow these step-by-step instructions to get started:
| Step | Instructions |
|---|---|
| 1 | Install the Metamask extension for your browser. It is available for Chrome, Firefox, Edge, and Brave. Visit the official Metamask website or search for it in your browser’s extension store. |
| 2 | Once the extension is installed, click on the Metamask icon in your browser toolbar to open the extension. |
| 3 | Click on the “Get Started” button to begin the wallet setup process. |
| 4 | Read and accept the terms of use and privacy policy. |
| 5 | Create a new wallet by choosing a strong password. Make sure to remember or securely store this password, as it will be needed to access your wallet in the future. |
| 6 | After creating your password, you will be presented with a unique 12-word seed phrase. Write down this seed phrase and store it in a safe place. It is extremely important as it can be used to recover your wallet if you ever lose access to it. |
| 7 | Confirm your seed phrase by selecting the 12 words in the correct order. |
| 8 | Your Metamask wallet is now set up and ready to use. You can fund your wallet by purchasing cryptocurrencies or receive them from others. |
Once your Metamask wallet is set up, you can proceed to add NFTs and explore the world of digital collectibles. Remember to always be cautious with your wallet and keep your seed phrase safe and secure.
Creating an Account on NFT Marketplace
If you want to start buying or selling NFTs, the first step is to create an account on an NFT marketplace. These marketplaces are platforms that facilitate the buying, selling, and trading of digital assets.
Here is a step-by-step guide on how to create an account:
Step 1: Visit the NFT marketplace website.
Step 2: Look for the “Sign Up” or “Create Account” button on the homepage. Click on it.
Step 3: Fill out the registration form. You will typically need to provide a username, email address, and password. Make sure to choose a strong password that is unique and not easily guessable.
Step 4: Agree to the terms and conditions of the marketplace. These terms outline the rules and regulations for using the platform.
Step 5: Complete the registration process by following the instructions provided by the marketplace. This may include verifying your email address or providing additional information.
Step 6: Once your account is set up, you can start exploring the marketplace and browsing the available NFTs. You can also connect your digital wallet, such as MetaMask, to your account to enable seamless transactions.
Note: Each NFT marketplace may have slightly different registration processes, so be sure to follow the specific instructions provided by the platform you choose.
By creating an account on an NFT marketplace, you gain access to a world of digital collectibles and opportunities to buy, sell, and trade unique assets. Happy exploring!
Connecting Metamask to the NFT Marketplace
Now that you have set up your Metamask wallet, you are ready to connect it to the NFT marketplace. Here are the steps to get started:
Step 1: Open your Metamask extension in your web browser and make sure you are logged in to your wallet.
Step 2: Visit the NFT marketplace’s website that you want to connect your Metamask wallet to. This could be platforms like OpenSea, Rarible, or any other NFT marketplace.
Step 3: Look for the “Connect Wallet” or “Connect Metamask” button on the marketplace’s website. Click on it to begin the connection process.
Step 4: A pop-up window should appear asking for your permission to connect your Metamask wallet to the marketplace. Review the permissions and click on the “Connect” or “Allow” button.
Step 5: Once connected, you should see a confirmation message indicating that your Metamask wallet is successfully linked to the NFT marketplace.
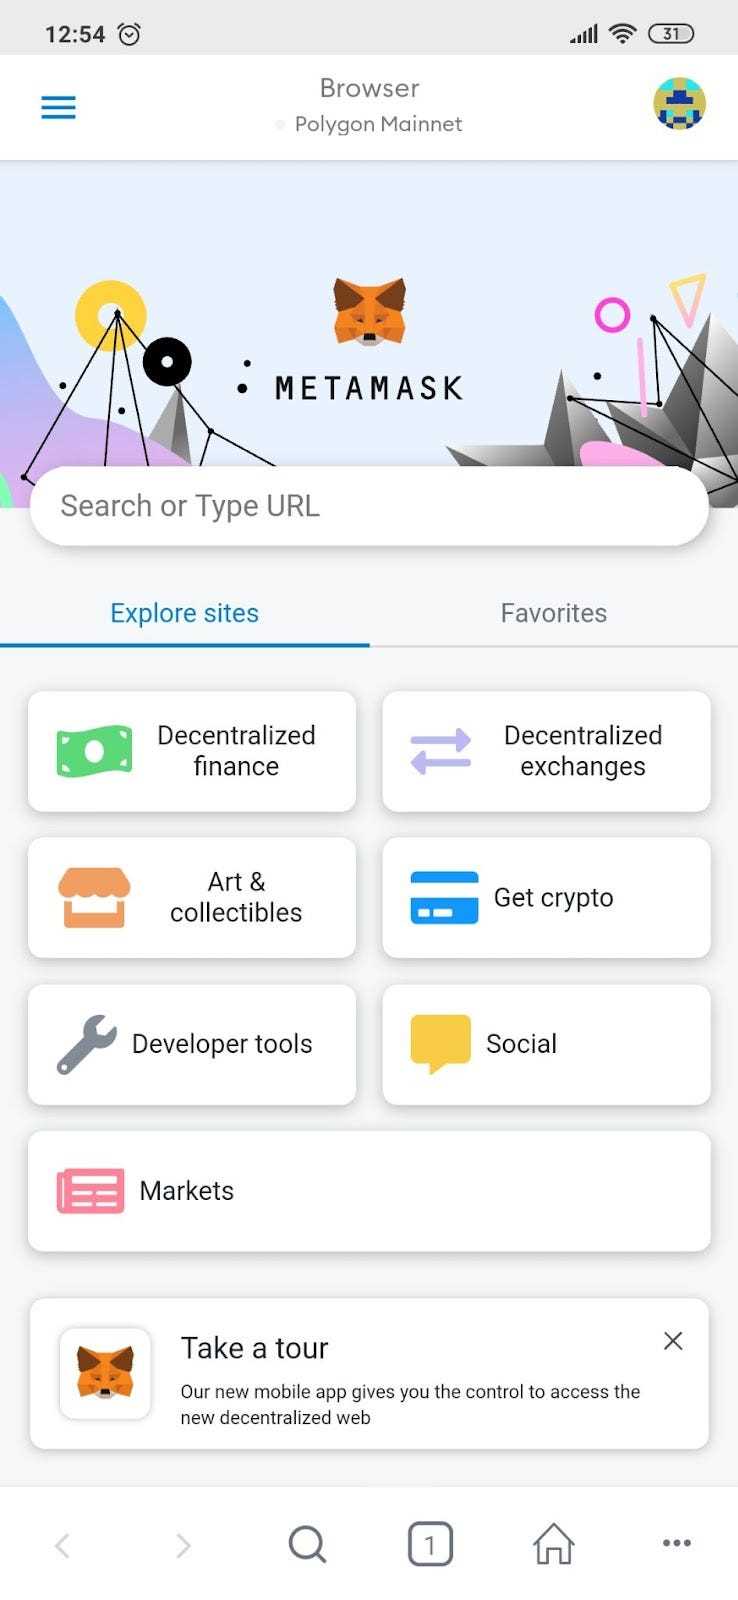
Step 6: You can now start exploring the NFT marketplace and browsing through the available digital collectibles. You will be able to see your wallet balance, browse NFT listings, place bids or make purchases using your Metamask wallet.
Note: Make sure to double-check the credibility and reputability of the NFT marketplace you are connecting to. It’s important to do your research and only interact with trusted platforms.
By connecting your Metamask wallet to the NFT marketplace, you gain the ability to participate in the exciting world of digital collectibles and start building your own NFT collection. Have fun exploring and collecting unique NFTs!
Adding NFTs to Your Metamask Wallet
Metamask is a popular cryptocurrency wallet extension for web browsers that allows users to securely store, manage, and interact with their digital assets. In addition to handling various cryptocurrencies, Metamask also supports non-fungible tokens (NFTs), which are unique digital collectibles stored on the blockchain.
If you’re interested in getting started with NFTs and want to add them to your Metamask wallet, follow these step-by-step instructions:
Step 1: Install Metamask
If you haven’t already, install the Metamask extension for your preferred web browser. You can find it in the browser’s extension store by searching for “Metamask”. Once installed, click on the Metamask icon and follow the setup instructions to create a new wallet or import an existing one.
Step 2: Connect Your Wallet to Supported NFT Marketplaces
After setting up your Metamask wallet, you’ll want to connect it to NFT marketplaces that support Metamask integration. Some popular marketplaces include OpenSea, Rarible, and SuperRare. Visit the marketplace’s website and look for a “Connect Wallet” or similar button. Click on it and select Metamask as your wallet provider. You may be prompted to authorize the connection by signing a transaction in Metamask.
Step 3: Browse and Choose NFTs
Now that your wallet is connected, you can start browsing various NFTs available on the marketplace. You can search for specific artists, categories, or collections to find the NFTs that interest you. Once you find an NFT you’d like to purchase or add to your wallet, click on it to view more details.
Pay attention to important information such as the NFT’s price, edition, and any additional details provided by the creator. If you’re satisfied with the NFT and its associated details, you can proceed to purchase it by clicking on the “Buy Now” or “Place a Bid” button, depending on the marketplace’s functionality.
Step 4: Confirm and Complete the Transaction
When you click the purchase or bidding button, Metamask will display a transaction window where you can review the details of the transaction. Take a moment to verify that everything is correct, including the price, gas fees, and recipient address. Once you’re satisfied, click “Confirm” to submit the transaction.
Depending on the blockchain network’s current congestion and the settings you’ve chosen in Metamask, the transaction may take a few seconds to a few minutes to confirm. You can check its status in Metamask’s transaction history.
Once the transaction is confirmed, the NFT will be added to your Metamask wallet, and you’ll be able to view and manage it within the wallet’s user interface. You can also transfer or sell the NFT on supported marketplaces or hold onto it as part of your digital collectibles collection.
Remember to exercise caution when interacting with NFTs and only transact with reputable marketplaces and creators. Do your own research, and if you have any doubts or concerns, seek guidance from the cryptocurrency community or professionals.
Enjoy exploring the world of NFTs and unlocking unique digital collectibles with your Metamask wallet!
What is Metamask?
Metamask is a digital wallet that allows users to manage and interact with decentralized applications (dApps) on the Ethereum blockchain. It serves as a browser extension and can be installed on Chrome, Firefox, and Brave browsers. Metamask enables users to securely store their cryptocurrencies and digital assets, as well as participate in various blockchain-based activities, such as buying, selling, and trading digital collectibles.
What are NFTs?
NFTs, or non-fungible tokens, are unique digital assets that are stored on a blockchain. Unlike cryptocurrencies like Bitcoin or Ethereum, which are interchangeable and have the same value, NFTs each have their own distinct characteristics and cannot be swapped on a one-to-one basis. NFTs can represent various types of digital assets, such as artwork, music, videos, virtual real estate, and more.