
If you are new to the world of cryptocurrency, you may have heard of Metamask. Metamask is a popular browser extension that allows you to interact with the Ethereum blockchain. One of the key features of Metamask is the ability to send and receive Ethereum (ETH) tokens. In this step-by-step guide, we will walk you through the process of sending ETH to your Metamask wallet.
Step 1: Install Metamask Extension
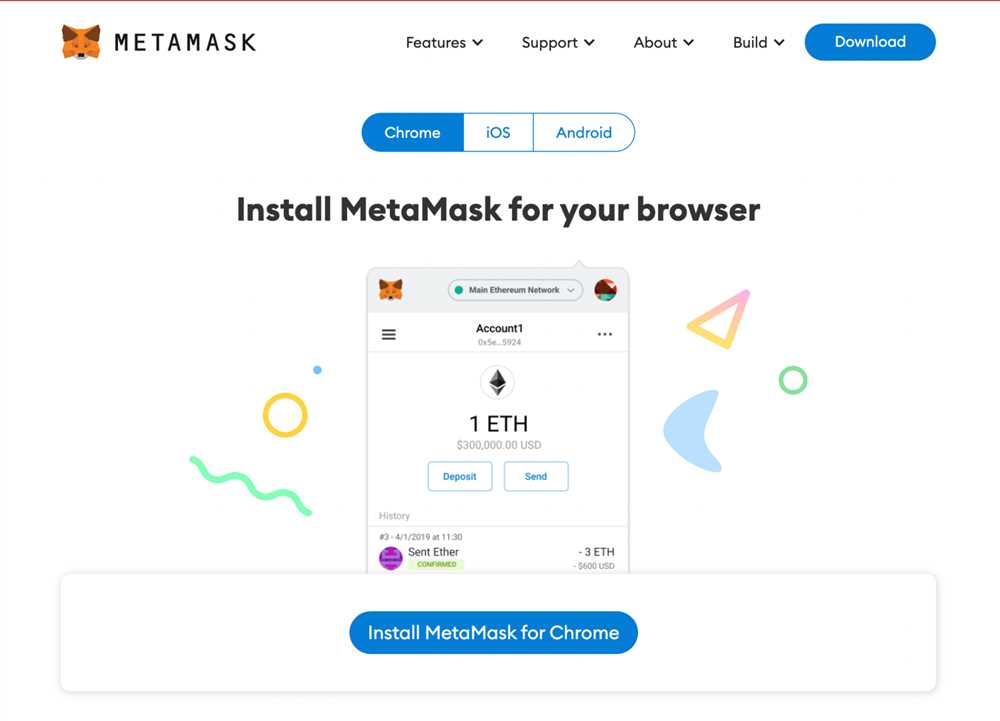
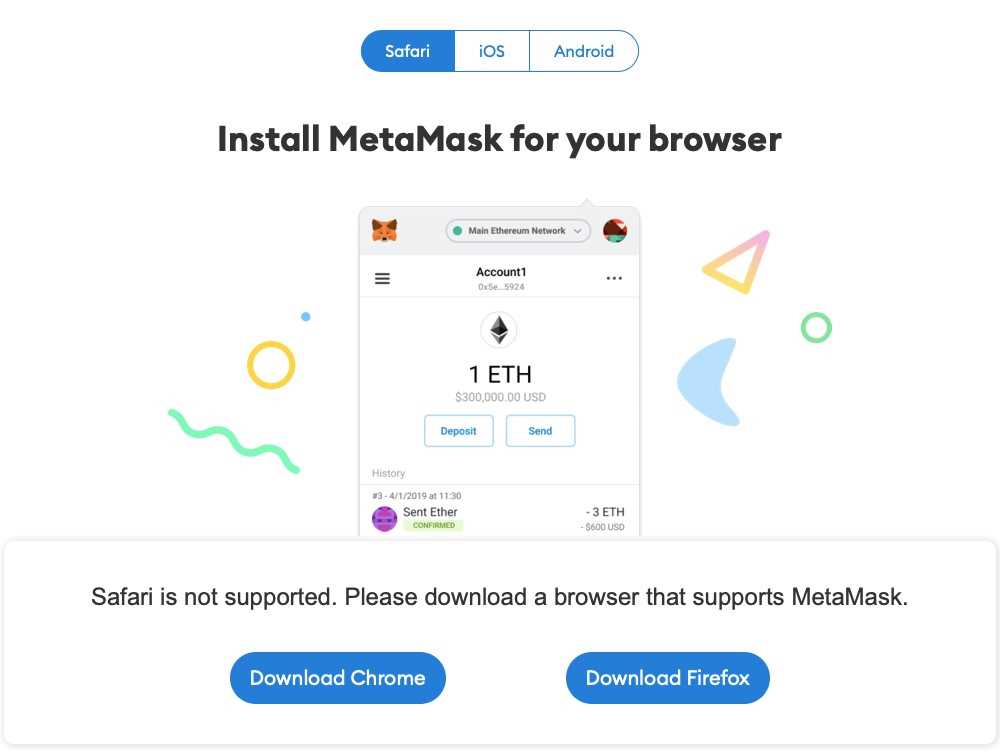
If you haven’t done so already, the first step is to install the Metamask browser extension. Metamask is available for Google Chrome, Mozilla Firefox, and Brave browsers. Simply search for “Metamask” in your browser’s extension store, install it, and follow the on-screen instructions to set up your Metamask wallet.
Step 2: Create or Import a Wallet
Once you have installed the Metamask extension, you will be prompted to create a new wallet or import an existing one. If you are new to Metamask, click on “Create a Wallet” and follow the instructions to set up a new wallet. If you already have an Ethereum wallet, you can click on “Import Wallet” and enter your private key or seed phrase to import your existing wallet into Metamask.
Step 3: Access your Metamask Wallet
After creating or importing your wallet, you will be able to access your Metamask wallet by clicking on the Metamask icon in your browser’s toolbar. This will open a small window where you can view your account balance, transaction history, and manage your Ethereum addresses.
Step 4: Get the Recipient’s Ethereum Address
In order to send ETH to someone, you will need to know their Ethereum address. This is a unique identifier that is used to receive Ethereum transactions. You can ask the recipient to provide you with their Ethereum address, which looks like a long string of alphanumeric characters, or you can use a QR code scanner to scan their QR code if they have one.
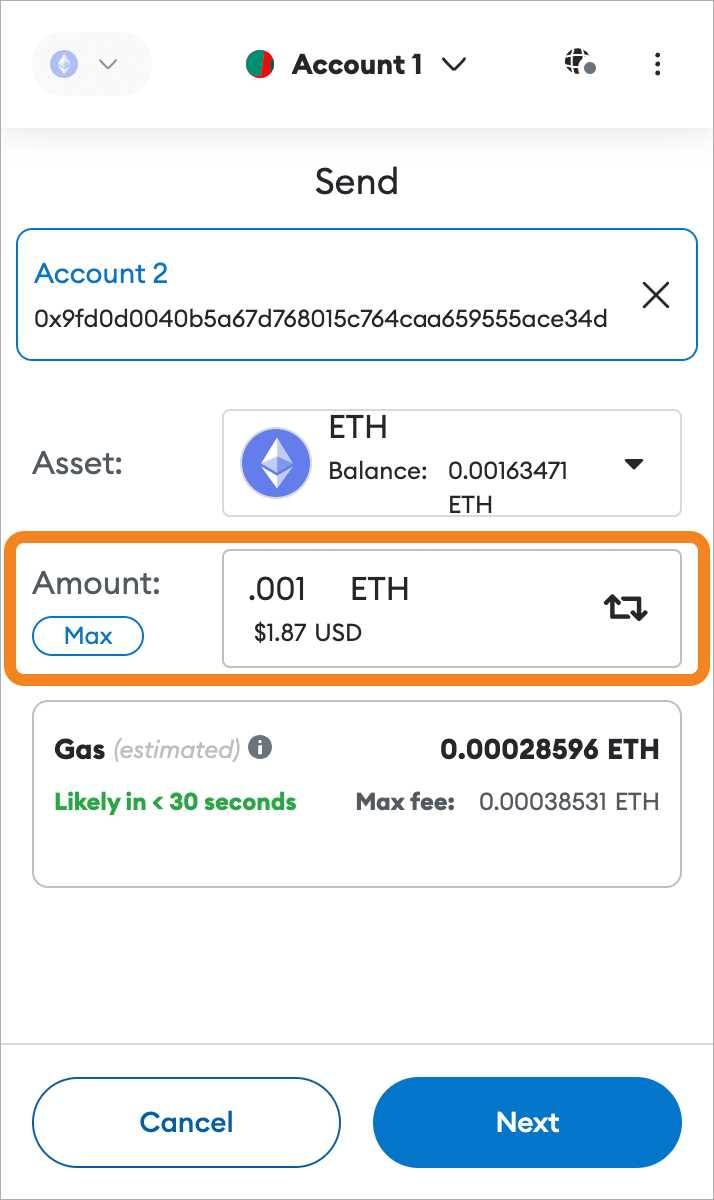
Step 5: Send ETH to the Recipient
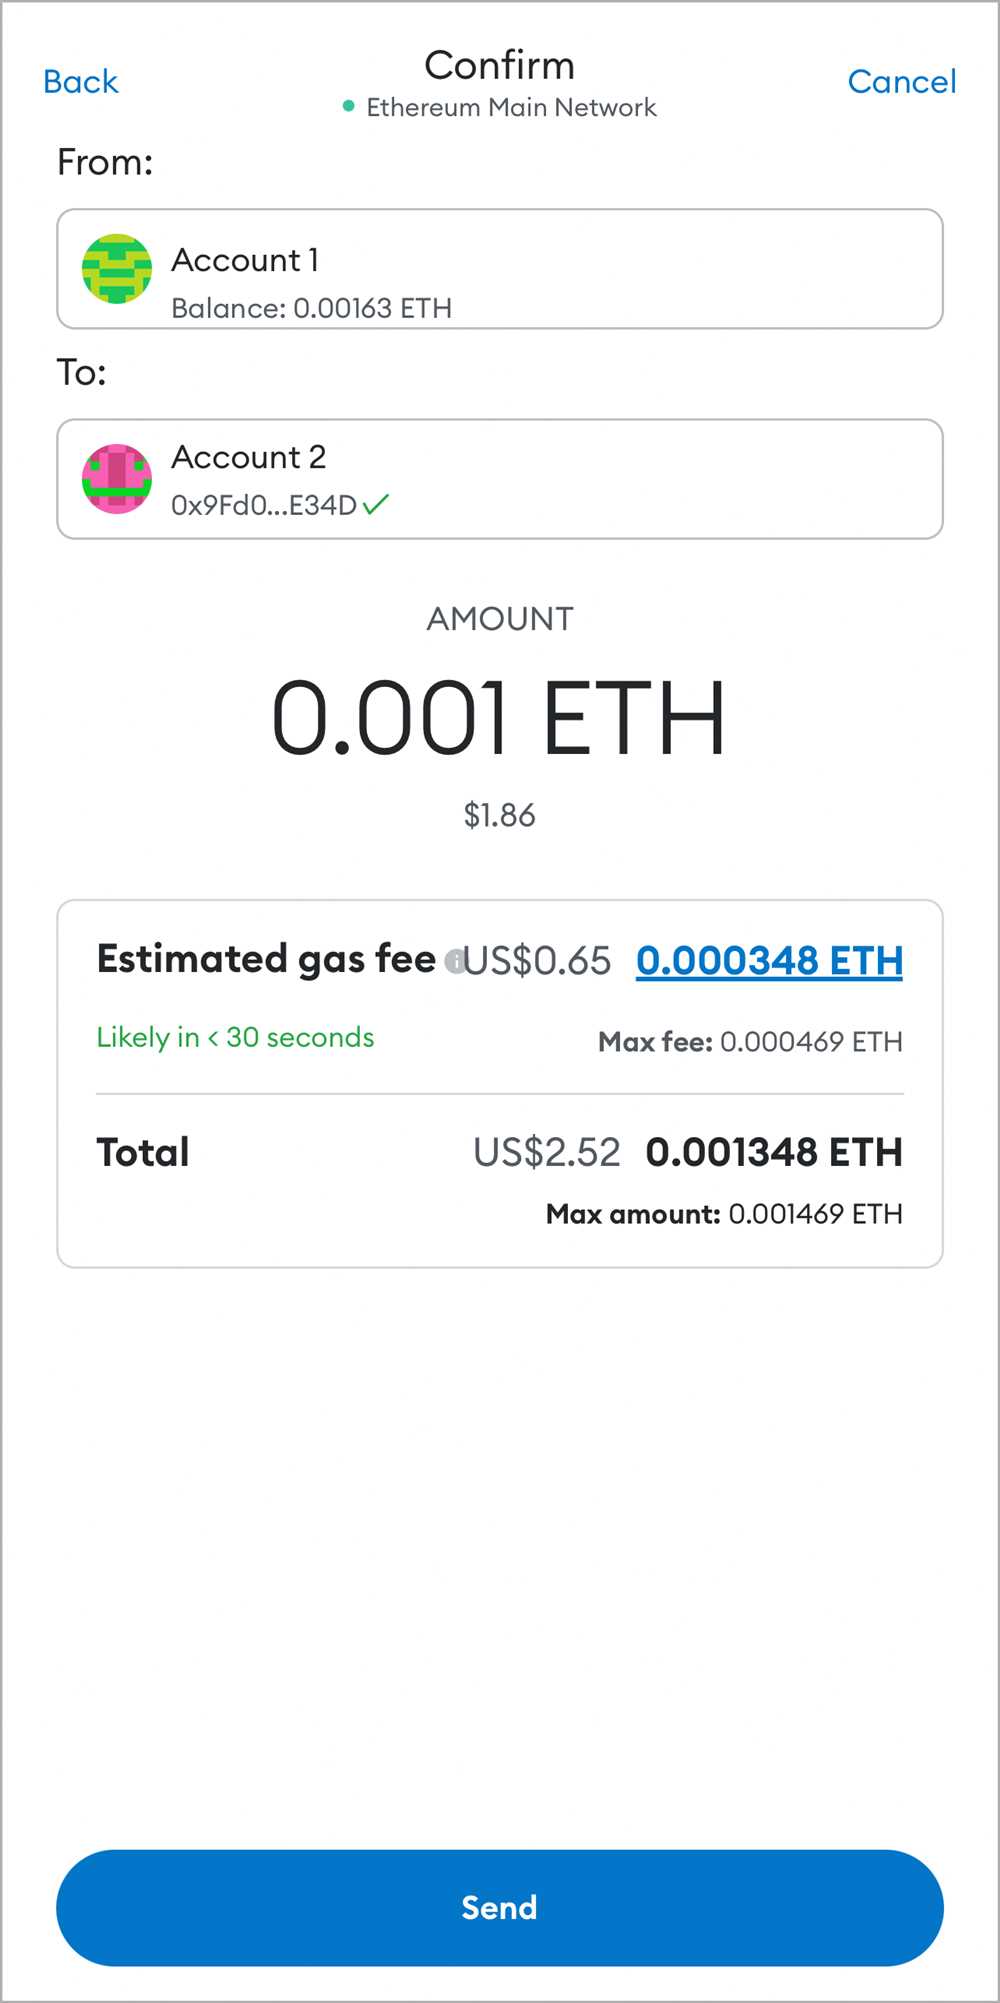
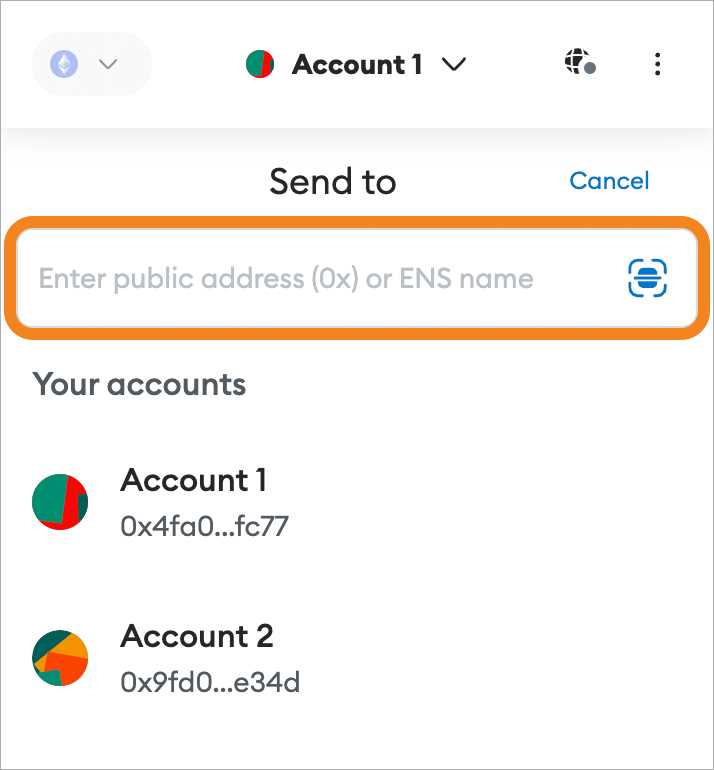
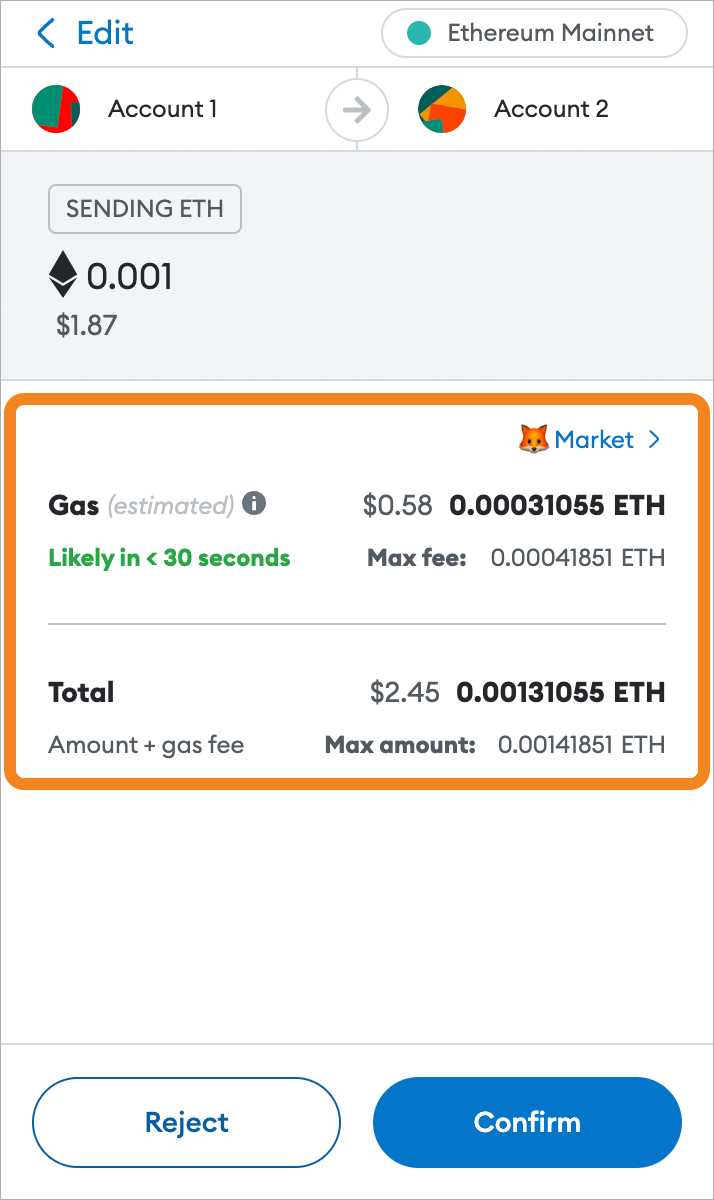
Now that you have the recipient’s Ethereum address, you can send ETH to them. Click on the “Send” button in your Metamask wallet. This will open a new window where you can enter the recipient’s Ethereum address, the amount of ETH you want to send, and any additional information like a message or a gas fee. Once you have filled in the required fields, double-check everything to make sure it’s correct, and then click on the “Confirm” button. Metamask will prompt you to review and confirm the transaction. Once you confirm the transaction, your ETH will be sent to the recipient’s Ethereum address.
Follow these step-by-step instructions, and you will be able to send ETH to your Metamask wallet with ease. Remember to always double-check the recipient’s Ethereum address and transaction details before confirming the transaction. Happy sending!
Create a Metamask Wallet

In order to send ETH to Metamask, you first need to create a Metamask wallet. Follow the step-by-step guide below to learn how.
Step 1: Install Metamask Extension
Before you can create a Metamask wallet, you will need to install the Metamask extension on your browser. Metamask can be installed on Chrome, Firefox, Brave, and Edge browsers. Simply go to the browser’s extension store and search for “Metamask”. Click on the “Install” button and wait for the installation process to complete.
Step 2: Create a New Wallet
Once the Metamask extension is installed, click on the Metamask icon in your browser’s toolbar to open the extension. If you don’t see the icon, you can usually find it by clicking on the puzzle piece icon (extensions) and pinning Metamask to your toolbar.
When the Metamask pop-up window opens, click on the “Get Started” button. This will take you to the Metamask wallet creation process.
On the first screen, you will be asked to agree to the terms of use. Read through the terms and check the box to confirm your agreement. Then click on the “Continue” button.
Next, you will need to create a strong password for your wallet. Make sure to choose a password that is unique and secure. Enter the password in the designated fields and click on “Create” when you are ready.
After creating your password, Metamask will generate a seed phrase for your wallet. This seed phrase is a series of 12 random words that can be used to recover your wallet if needed. It is crucial that you write down the seed phrase and store it in a safe place. Click on “Next” once you have securely saved your seed phrase.
Metamask will then ask you to verify your seed phrase in the correct order. Select the words from the drop-down menus in the correct order and click on “Confirm” when you are done.
Congratulations! You have successfully created your Metamask wallet. You can now start sending ETH to your wallet by following the instructions provided in this guide.
Note: It is important to keep your wallet’s password and seed phrase secure and never share it with anyone. Losing access to your password or seed phrase could result in permanent loss of your funds.
| Pros | Cons |
|
|
Get the Receiving Address
Before you can send Ethereum (ETH) to your Metamask wallet, you need to obtain the receiving address. This address is unique to your wallet and serves as the destination for the Ether that you want to send.
Step 1: Open Metamask
If you haven’t done so already, open your Metamask wallet in your browser or mobile device.
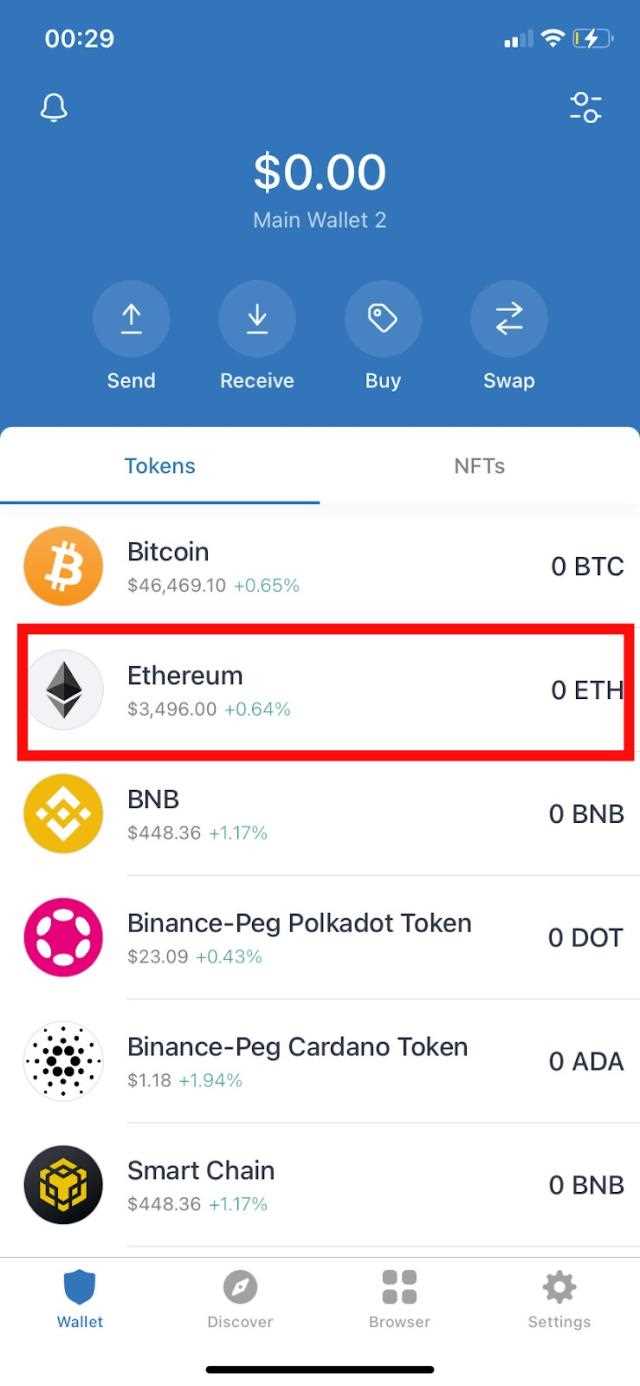
Step 2: Locate Your Wallet Address
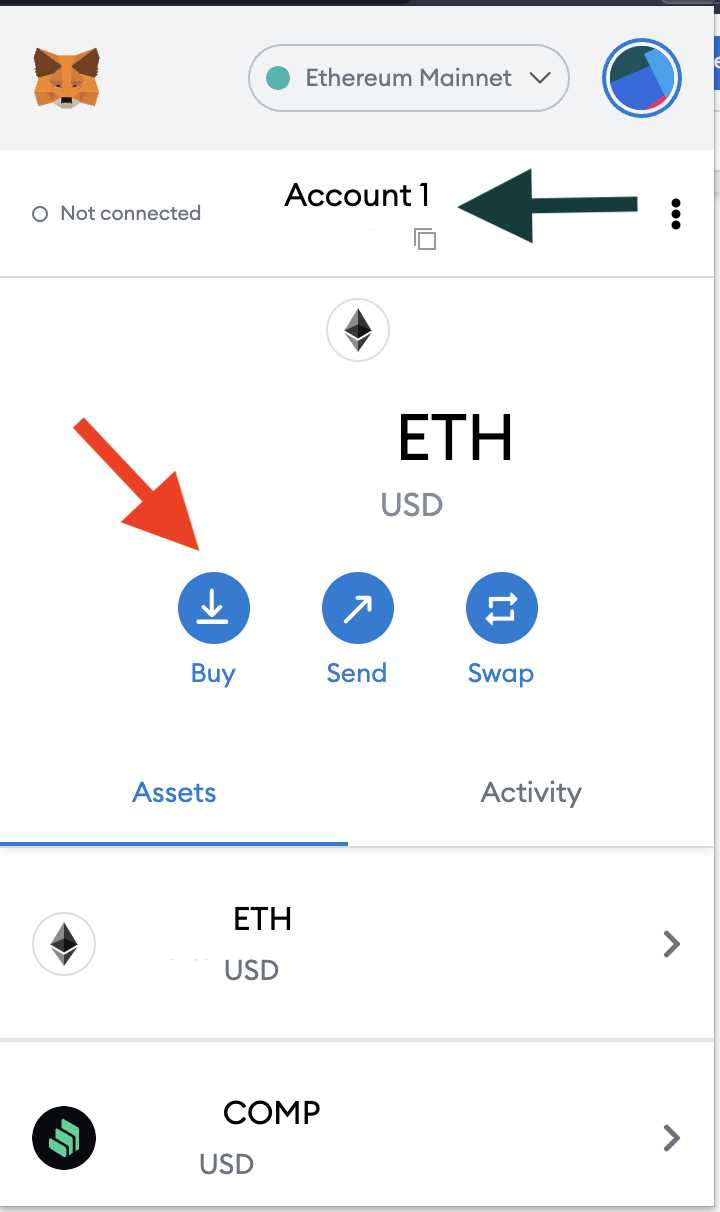
Once you have opened Metamask, click on the account icon at the top right corner of the screen. This will open a dropdown menu with your wallet accounts listed. Select the account you want to receive ETH to.
After selecting your desired account, click on the “…” button next to the account name. This will open a submenu with various options. Click on “Copy Address to Clipboard” to copy the account’s receiving address.
Step 3: Verify the Receiving Address
Before you proceed with sending ETH to your Metamask wallet, it is important to double-check the receiving address to ensure accuracy. Paste the copied address into a text document or use another method to verify that the address matches the one displayed in your wallet.
| Important Notice: |
|---|
| Receiving addresses for different cryptocurrencies (such as Bitcoin or Litecoin) will be different from your Ethereum receiving address. Always make sure you are using the correct address for the specific cryptocurrency you want to send. |
Buy ETH on a Cryptocurrency Exchange
If you don’t already have ETH, you’ll need to purchase some on a cryptocurrency exchange before you can send it to your Metamask wallet. Here’s a step-by-step guide on how to buy ETH:
1. Choose a Cryptocurrency Exchange
There are several cryptocurrency exchanges where you can buy ETH. Some popular options include Coinbase, Binance, and Kraken. Do some research and choose an exchange that suits your needs.
2. Sign up and Verify Your Account
Once you’ve chosen an exchange, you’ll need to sign up for an account. Provide the required information and follow the verification process to verify your identity. This step is necessary to comply with KYC (Know Your Customer) regulations.
3. Deposit Fiat Currency or Other Cryptocurrencies
After your account is verified, you can deposit funds into your exchange account. Most exchanges allow you to deposit fiat currency (such as USD or EUR) or other cryptocurrencies (such as Bitcoin) to buy ETH. Follow the instructions provided by the exchange to make a deposit.
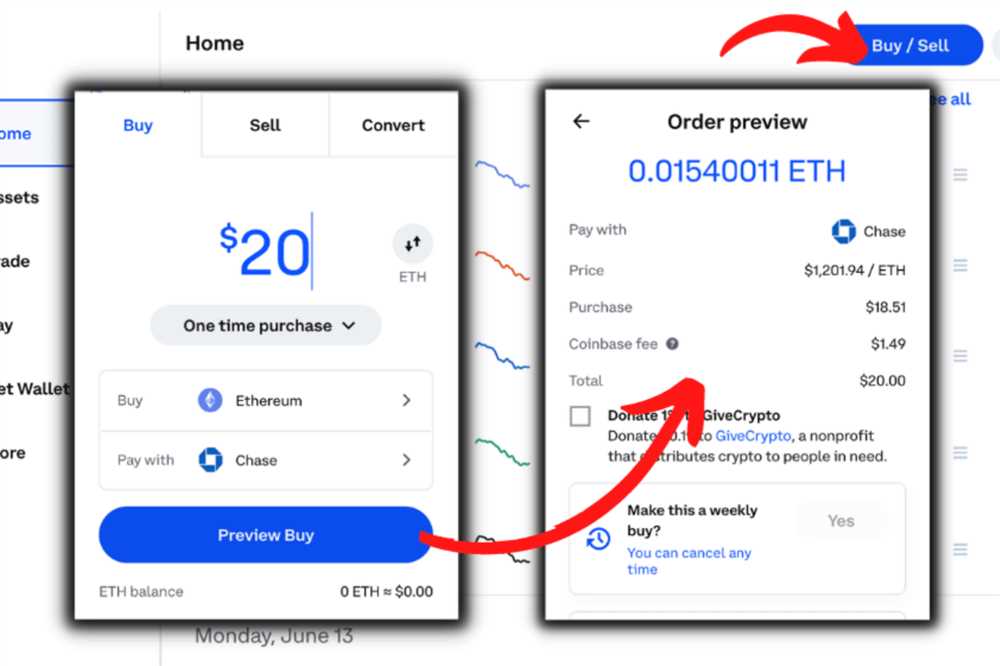
4. Place an Order to Buy ETH
Once your funds are deposited, you can place an order to buy ETH. On the exchange’s trading interface, locate the ETH trading pair and choose the amount of ETH you want to buy. Set the desired price or select a market order, and then confirm your order.
5. Withdraw ETH to Your Metamask Wallet
Once your order is executed and you have ETH in your exchange account, it’s time to withdraw it to your Metamask wallet. Find the withdrawal or transfer option on the exchange’s interface and enter your Metamask wallet address. Follow the instructions provided by the exchange to complete the withdrawal.
Now that you have ETH in your Metamask wallet, you can proceed to follow the step-by-step guide on how to send ETH to Metamask.
Send ETH to Metamask
Once you have set up your Metamask wallet, you will need to transfer some Ethereum (ETH) to it in order to use it for transactions and interactions with decentralized applications (dApps).
Step 1: Get your Metamask wallet address
To send ETH to your Metamask wallet, you first need to know your wallet address. You can find it by clicking on the extension’s icon in your browser’s toolbar and selecting “Copy Address to Clipboard” or by navigating to the “Account Details” section within the Metamask interface.
Step 2: Obtain Ethereum
In order to send ETH to your Metamask wallet, you need to have some Ethereum in another wallet or on a cryptocurrency exchange. If you don’t have any Ethereum yet, you can purchase it on various exchanges or through peer-to-peer trading platforms.
You will need to create an account on a cryptocurrency exchange or a P2P platform, complete the necessary verification steps, and deposit funds into your account. Once you have obtained Ethereum, you can proceed to the next step.
Step 3: Send ETH to Metamask
Now that you have both your Metamask wallet address and Ethereum in another wallet or exchange account, you can initiate the transfer.
1. Log in to your other wallet or cryptocurrency exchange account.
2. Locate the “Send” or “Withdraw” option.
3. Enter your Metamask wallet address as the destination address.
4. Specify the amount of Ethereum you want to send. Make sure to double-check the amount and take into account any transaction fees if applicable.
5. Confirm the transaction and follow any additional security steps required by your wallet or exchange.
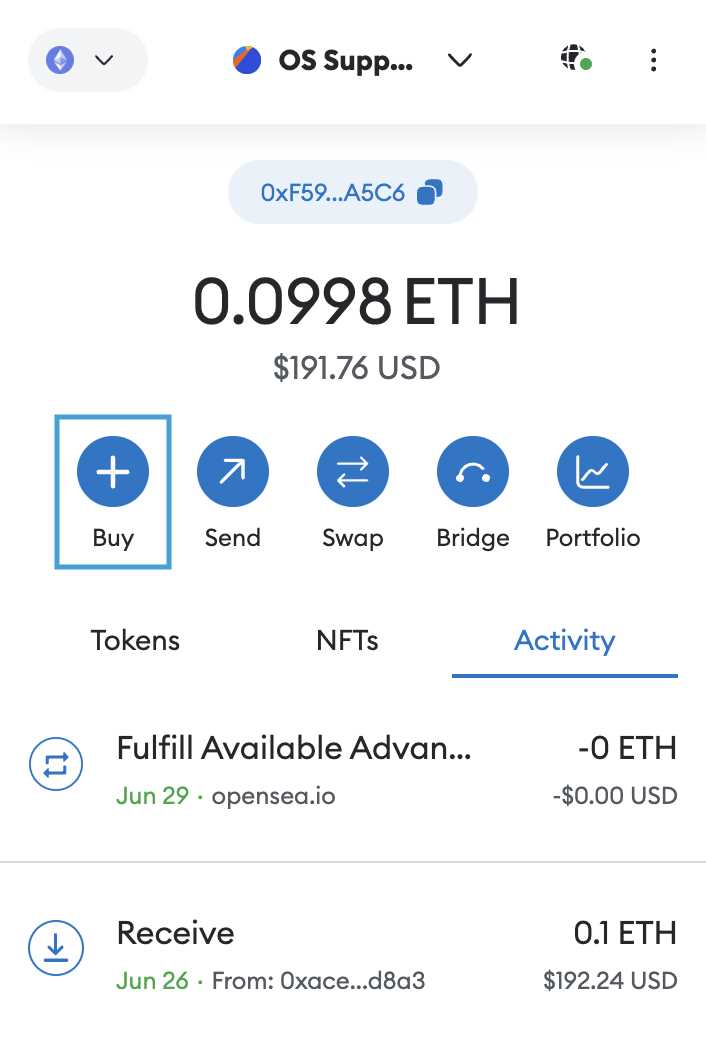
Once the transaction is complete, you should see the Ethereum balance in your Metamask wallet. It may take a few minutes for the transaction to be confirmed on the Ethereum network.
Note: When sending ETH to your Metamask wallet, always double-check the wallet address to ensure you are sending it to the correct address. Sending Ethereum to an incorrect address can result in permanent loss of funds.
What is Metamask?
Metamask is a cryptocurrency wallet that allows users to store, manage, and interact with Ethereum-based tokens and decentralized applications (dApps) directly in their web browser.
How can I download and install Metamask?
To download and install Metamask, you need to visit the official website (metamask.io) and follow the instructions provided. There are versions available for Google Chrome, Firefox, and Brave web browsers.
Is it necessary to have ETH in Metamask?
Yes, you need to have some Ether (ETH) in your Metamask wallet in order to interact with Ethereum-based applications and to pay for transaction fees on the Ethereum network. Without ETH, you won’t be able to send or use any Ethereum-based tokens or dApps.