
If you’re new to the world of cryptocurrency and Ethereum, you’ll quickly realize that having a reliable and secure wallet is crucial. That’s where Metamask comes in. Metamask is a popular browser extension wallet that allows you to store, manage, and interact with Ethereum and other ERC-20 tokens. In this essential guide, we’ll walk you through the basics of getting started with Metamask, so you can start exploring the exciting world of decentralized finance (DeFi) with confidence.
Why Choose Metamask?
Metamask has gained a strong reputation as one of the leading Ethereum wallets for several reasons. First and foremost, it’s incredibly easy to use and can be downloaded as a browser extension for Chrome, Firefox, and Brave. This means you can access your wallet from any device with an internet connection, making it convenient for both desktop and mobile users.
Not only is Metamask user-friendly, but it also puts security at the forefront. Your private keys are stored locally on your device and are never shared with Metamask or any third parties. This means you have full control and ownership of your funds, reducing the risk of hacks or theft. Additionally, Metamask integrates seamlessly with decentralized applications (dApps), allowing you to easily interact with various DeFi protocols and participate in activities such as lending, borrowing, and trading.
Setting Up Your Metamask Wallet
Now that you understand the advantages of using Metamask, let’s get started with setting up your wallet. First, visit the Metamask website or search for the extension in your browser’s extension store. Once installed, you’ll be prompted to create a new wallet or import an existing one. It’s important to follow the instructions carefully and securely store your seed phrase, as this is your backup in case you ever lose access to your wallet.
After creating your wallet, you’ll be able to customize your settings and add additional security measures if desired. It’s recommended to enable 2-factor authentication and a PIN code to further protect your funds. Once your wallet is set up, you can start depositing funds by purchasing Ethereum from a reputable exchange or receiving tokens from other users.
With your Metamask wallet fully configured, the possibilities are endless. You can explore the world of decentralized finance, participate in token sales, and even create your own dApps. Just remember to stay informed, do thorough research, and exercise caution when interacting with unfamiliar projects. Happy exploring!
The Basics of Metamask
Metamask is an essential tool for interacting with the Ethereum blockchain. It is a browser extension that acts as a wallet, allowing you to securely store and manage your Ethereum assets. In this section, we will cover the basic features and functionality of Metamask.
Installation and Setup
To start using Metamask, you need to install the extension in your browser. Metamask is available for Google Chrome, Firefox, and Brave browsers. Once installed, you will see the Metamask icon in your browser toolbar. Click on the icon to open the extension.
When you open Metamask for the first time, you will be prompted to create a new wallet. Follow the on-screen instructions to set up your wallet by creating a password and securely storing the backup phrase. The backup phrase is crucial as it can be used to recover your wallet if you lose access to your device.
Importing and Managing Accounts
If you already have an Ethereum wallet, you can import it into Metamask by selecting the “Import Wallet” option in the extension. You can import wallets using private keys, JSON files, or hardware wallets like Ledger or Trezor.
Metamask allows you to manage multiple Ethereum accounts within the same wallet. You can create new accounts by clicking on the account icon in the top right corner and selecting “Create Account”. Each account has a unique address, which is used to send and receive Ethereum and other ERC-20 tokens.
Connecting to dApps

Metamask enables you to interact with decentralized applications (dApps) on the Ethereum blockchain. When you visit a dApp that requires a web3-enabled browser, Metamask will automatically detect it and prompt you to connect. You can then confirm the connection and start using the dApp seamlessly.
Metamask also provides a built-in dApp browser, allowing you to explore and discover new dApps. You can access the dApp browser by clicking on the icon in the top left corner of the extension. From there, you can search for dApps or browse various categories to find interesting applications.
With the basics of Metamask covered, you are now ready to start your journey into the world of Ethereum and decentralized finance. Take the time to explore and familiarize yourself with the features and functionalities of Metamask to make the most out of this powerful tool.
Setting Up Metamask
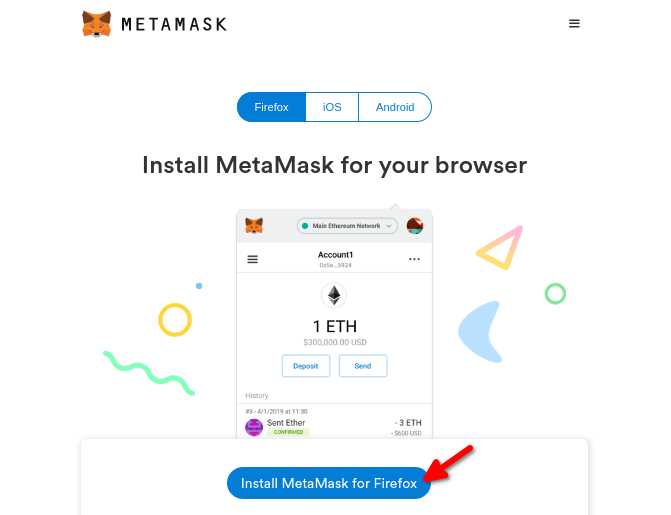
To get started with Metamask, you’ll first need to install the extension in your browser. Metamask is available for Google Chrome, Mozilla Firefox, and Brave browsers. Simply go to the extension store for your browser and search for “Metamask.” Once you find it, click on “Install” and follow the prompts to add it to your browser.
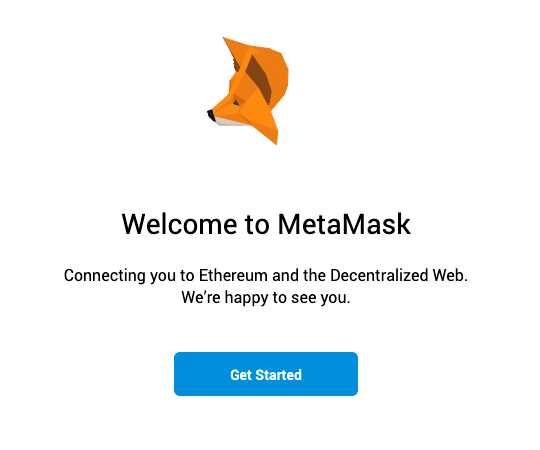
Once you have Metamask installed, you’ll see its icon in your browser toolbar. Click on the icon to open the Metamask extension. A welcome screen will appear where you can either create a new wallet or import an existing one. Most users will choose to create a new wallet, so let’s focus on that option.
Create a New Wallet
To create a new wallet, click on the “Create a Wallet” button on the welcome screen. Metamask will generate a unique set of 12 random words, known as a seed phrase. It’s crucial to write down this seed phrase and keep it in a secure place. Your seed phrase is the key to accessing your wallet and should never be shared with anyone.
After you’ve written down your seed phrase, Metamask will ask you to confirm it by selecting the words in the correct order. This step ensures that you’ve securely saved your seed phrase and can access your wallet in case of any issues.
Next, you’ll be prompted to set a password for your wallet. Make sure to choose a strong password that you’ll remember but is difficult for others to guess. Remember, protecting your password is essential to keeping your funds secure.
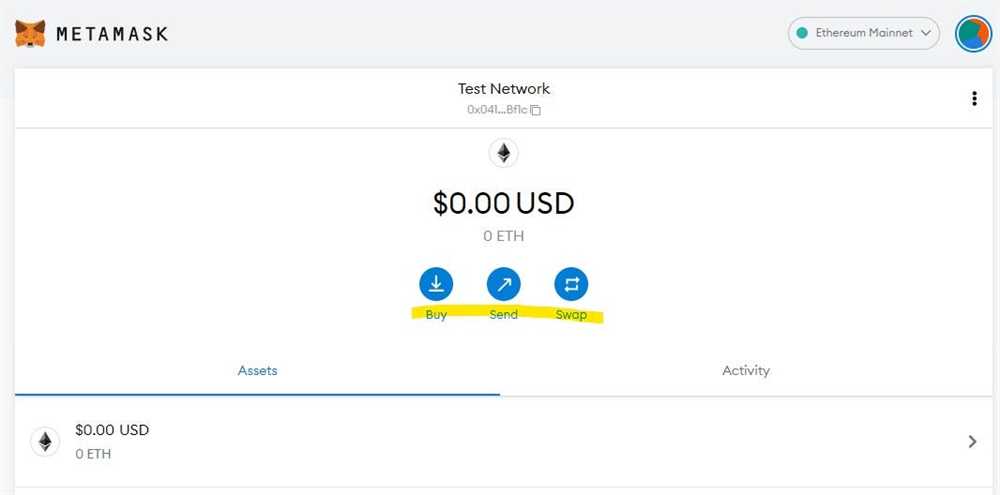
Once you’ve set your password, your wallet will be created, and you’ll be taken to the Metamask main interface. Here, you’ll see your account address, account balance, and options to send or receive Ethereum and other tokens. Congratulations, you’ve successfully set up Metamask!
Import an Existing Wallet
If you already have a Metamask wallet or an Ethereum wallet using a different wallet provider, you can import it into Metamask. To do this, click on the “Import Wallet” option on the welcome screen and follow the instructions to enter your seed phrase or private key.
Once you’ve imported your wallet, you’ll need to set a password for it, similar to creating a new wallet. After setting your password, you’ll have access to your existing wallet through Metamask, and you can manage your funds using the extension’s features.
With Metamask set up, you’re now ready to start using it to interact with the Ethereum ecosystem. You can connect to decentralized applications (dapps), trade tokens, and securely store your funds. Explore the various features of Metamask to make the most of your Ethereum experience. Happy exploring!
Step-by-Step Guide to Getting Started
Metamask is a leading Ethereum wallet that allows you to securely store, manage, and interact with your Ethereum assets. Here is a step-by-step guide to help you get started with Metamask:
Create a Metamask Account
To start using Metamask, you need to create an account. Visit the Metamask website and click on the “Get Chrome Extension” button to download and install the Metamask extension for your browser. Once installed, click on the Metamask logo in your browser toolbar and follow the prompts to create a new account.
Set up your Wallet
After creating your account, you will need to set up your wallet. Metamask will generate a unique 12-word seed phrase that you should write down and keep in a safe place. This seed phrase is essential for recovering your wallet if you ever lose access to it.
Next, you will need to set up a password for your wallet. Choose a strong password that you can remember, but make sure it’s secure to protect your funds.
Connect to the Ethereum Network
Once your wallet is set up, you need to connect it to the Ethereum network. Click on the Metamask logo in your browser toolbar and select the network you want to connect to. By default, Metamask will connect to the Ethereum mainnet, but there are other networks available, such as the Ropsten test network for development and testing purposes.
Add Ethereum Assets
With your wallet connected to the Ethereum network, you can now add Ethereum assets to your wallet. Click on the “Assets” tab in Metamask and select “Add Token”. You can then enter the contract address or search for the token you want to add. Once added, you will be able to see and manage your Ethereum assets.
Congratulations! You have successfully set up and connected your Metamask wallet. You can now start using it to securely store, manage and interact with your Ethereum assets.
Managing Your Ethereum Wallet
Once you have set up your Metamask wallet, you can easily manage your Ethereum assets and perform various actions. Here are some key features and functions you should be aware of:
| Balance | View the current balance of your Ethereum wallet. You can see the amount of ETH and any other ERC-20 tokens you have in your wallet. |
| Sending Transactions | Send Ethereum or ERC-20 tokens to another wallet address. Specify the recipient’s address, the amount you want to send, and the gas fee you are willing to pay. |
| Receiving Transactions | Get your wallet address so others can send Ethereum or ERC-20 tokens to you. |
| Transaction History | Review your past transactions, including the sender, recipient, amount transferred, and transaction status. |
| Asset Management | Add or remove tokens from your wallet, track their values, and view detailed information about each token. |
| Network Selection | Choose the Ethereum network you want to connect to, such as the mainnet or various testnets. |
| Security | Enable various security features, such as setting a strong password, enabling two-factor authentication, or backing up your wallet seed phrase. |
| Settings | Customize your wallet settings, including language preferences, default currency, and appearance. |
By understanding and utilizing these features, you can effectively manage and control your Ethereum wallet using Metamask.
Key Features and Functions

Metamask is the leading Ethereum wallet that offers a range of key features and functions to help you manage your digital assets and interact with decentralized applications (dApps).
Secure Wallet

Metamask provides a highly secure wallet for storing your Ethereum and ERC-20 tokens. It uses cryptographic algorithms to protect your private keys and ensures that only you have access to your funds.
One-Click Installation
Installing Metamask is easy and fast. With just one click, you can add Metamask as an extension to your web browser and start using it right away. No complicated setup or technical knowledge is required.
Once installed, Metamask seamlessly integrates into your browser, allowing you to access your wallet and interact with dApps without leaving your current tab.
Wallet Import/Export
Metamask allows you to import an existing wallet using your private key or seed phrase. This feature is useful if you already have an Ethereum wallet and want to manage it using Metamask.
Additionally, you can export your Metamask wallet, including your private keys and seed phrase, to securely store it as a backup or use it with another wallet software.
DApp Browser
Metamask includes a built-in dApp browser, which enables you to easily access and use decentralized applications. When you visit a dApp, Metamask automatically detects it and prompts you to connect your wallet.
This browser also enhances your dApp experience by providing seamless integration with transaction signing, allowing you to interact with smart contracts, send and receive tokens, and perform other actions effortlessly.
Network Customization
Metamask allows you to customize the Ethereum network you want to connect to. You can switch between the main Ethereum network, various test networks, and even set up your private network.
This feature is useful for developers who want to test and deploy their dApps on different networks or for users who want to explore and interact with dApps on alternative networks.
With its intuitive interface and powerful features, Metamask is an essential tool for anyone using Ethereum and decentralized applications. Get started with Metamask today and unlock the full potential of the Ethereum ecosystem.
Enhancing Your Metamask Experience
Metamask is a powerful tool that can greatly enhance your interaction with the Ethereum network. With a few simple steps, you can take full advantage of its features and optimize your experience.
1. Explore the Metamask Settings: Take some time to familiarize yourself with the different settings available in Metamask. From gas fees to network configuration, understanding these settings will allow you to customize and fine-tune your wallet to suit your needs.
2. Keep Your Recovery Phrase Secure: Your recovery phrase is the key to accessing your wallet and funds. Make sure you keep it safe and secure. Consider writing it down on paper and storing it in a secure location, away from prying eyes and potential hackers.
3. Use Strong Passwords and Enable 2FA: As with any online account, it’s crucial to use strong passwords and enable two-factor authentication (2FA). This adds an extra layer of security to your wallet and helps prevent unauthorized access.
4. Be Mindful of Phishing Attempts: Be wary of phishing attempts and always double-check the URL before entering your Metamask password or recovery phrase. Don’t click on suspicious links or download unknown files, as they may compromise the security of your wallet.
5. Keep Your Software Up to Date: Make sure you are using the latest version of the Metamask extension. Developers regularly release updates that not only introduce new features but also fix security vulnerabilities. Keeping your software up to date is crucial for maintaining the security of your wallet.
6. Explore DApps and Smart Contracts: Metamask allows you to interact with a wide range of decentralized applications (DApps) and smart contracts. Take the time to explore the vast ecosystem of Ethereum-based applications and discover new ways to use your wallet.
7. Join the Metamask Community: Engage with other Metamask users in the vibrant online community. Participate in forums, social media groups, and developer communities to learn from others, share your experiences, and stay up to date with the latest news and developments.
By following these tips, you can enhance your Metamask experience and make the most out of this powerful Ethereum wallet. Remember to always prioritize security and stay informed about the latest best practices to keep your funds safe.
What is Metamask?
Metamask is a browser extension that serves as an Ethereum wallet and allows users to interact with decentralized applications (dApps) on the Ethereum network. It acts as a bridge between your browser and the Ethereum blockchain.
How can I install Metamask?
To install Metamask, you need to go to the Metamask website and click on the “Get Chrome Extension” button. This will redirect you to the Chrome Web Store, where you can click on the “Add to Chrome” button to install the extension. Once installed, you can create a new wallet or import an existing one.
Is Metamask safe to use?
Metamask is generally regarded as safe to use. However, it’s important to take certain security precautions to protect your funds. Make sure to use a strong, unique password for your Metamask wallet and enable two-factor authentication (2FA) if possible. Additionally, be cautious when interacting with unknown dApps and always verify the authenticity of the websites you visit.
Can I use Metamask with other blockchains?
Metamask primarily supports the Ethereum network. However, it also has support for other blockchains through various networks. For example, you can use Metamask with the Binance Smart Chain (BSC) by switching the network in the Metamask settings. Additionally, there are other wallets available that are specifically designed for other blockchains.