
If you’re new to the world of digital art and non-fungible tokens (NFTs), you may be wondering how to transfer your NFTs from MetaMask to your Ledger hardware wallet. In this step-by-step guide, we’ll walk you through the process, ensuring that your precious pieces of digital art are securely stored and protected.
Step 1: Set Up Your Ledger Wallet
The first step is to set up your Ledger hardware wallet. Ensure that you have the latest firmware installed and that you have the necessary Ethereum app installed on your device. This will enable you to securely store your NFTs and sign transactions.
Step 2: Connect Your Ledger and Open MetaMask
Next, connect your Ledger hardware wallet to your computer and open the MetaMask extension or application. Make sure your MetaMask is connected to the Ethereum network.
Step 3: Access Your Account
Once MetaMask is open, click on the account icon at the top right corner of the screen. Select the account where your NFT is currently stored or the account you want to transfer it from.
Step 4: Transfer the NFT
After selecting the appropriate account, scroll down to the “Assets” section and find the NFT you wish to transfer. Click on the ellipsis (…) or the three dots next to the NFT and select “Send” or “Transfer”.
Step 5: Fill in the Transfer Details
A form will appear where you need to fill in the recipient’s address, which is your Ledger wallet’s Ethereum address. Double-check the address to ensure accuracy. Additionally, fill in the amount you want to transfer, gas fee, and any other required details.
Step 6: Confirm and Sign the Transaction on Your Ledger
Once you’ve filled in all the necessary details, click “Next” or “Send” to initiate the transfer. A pop-up window will appear on your Ledger device asking you to confirm the transaction. Verify all the details on your Ledger screen and press the right button to sign the transaction.
Step 7: Wait for Confirmation
After signing the transaction on your Ledger, wait for the transaction to be confirmed on the blockchain. This may take a few minutes, depending on the network congestion and the gas fee you set. Once the transaction is confirmed, you can view your NFT in your Ledger wallet.
By following these easy steps, you can securely transfer your NFTs from MetaMask to your Ledger hardware wallet. Take the necessary precautions to protect your valuable digital assets and enjoy the peace of mind that comes with knowing your NFTs are safe and sound.
Set up MetaMask Wallet
Before you can transfer your NFTs from MetaMask to your Ledger wallet, you need to set up the MetaMask wallet on your computer. Here are the steps to get started:
- Install MetaMask: Visit the official MetaMask website (https://metamask.io/) and download the MetaMask extension for your web browser. Follow the installation prompts to complete the setup.
- Create a Wallet: Once MetaMask is installed, click on the extension icon in your browser toolbar. Click on “Get Started” and then “Create a Wallet”. Set a strong password that you can remember and click on “Create”.
- Backup Your Seed Phrase: MetaMask will generate a unique 12-word seed phrase that can be used to restore your wallet in case of loss or theft. Write down the seed phrase and keep it in a safe place. Do not share it with anyone and do not store it electronically.
- Confirm Your Seed Phrase: MetaMask will then ask you to confirm your seed phrase by selecting the correct words in the correct order. This is an additional security measure to ensure that you have safely backed up your seed phrase. Select the words and click on “Confirm”.
- Connect to a Network: After confirming your seed phrase, click on the network dropdown at the top of the MetaMask window and select the desired network (e.g., Ethereum Mainnet). You can also add custom networks if needed.
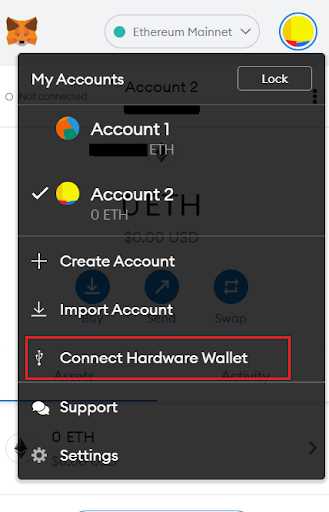
- Add Your Ledger Account: If you haven’t already done so, connect your Ledger device to your computer and unlock it. In MetaMask, click on the account icon at the top right, then click on “Connect Hardware Wallet”. Follow the on-screen instructions to connect your Ledger account to MetaMask.
Congratulations! You have successfully set up your MetaMask wallet and connected your Ledger account. Now you’re ready to transfer your NFTs from MetaMask to your Ledger wallet.
Connect Ledger to MetaMask

To connect your Ledger device to MetaMask, follow these steps:
- First, make sure you have installed the latest version of MetaMask and have it opened in your browser.
- Connect your Ledger device to your computer using the USB cable.
- Unlock your Ledger device by entering your PIN code.
- Launch the Ethereum app on your Ledger device.
- In MetaMask, click on the profile icon in the top right corner and select “Connect Hardware Wallet” from the dropdown menu.
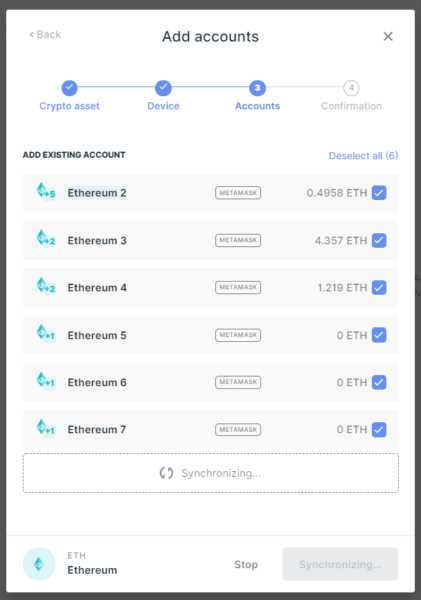
- A new window will appear. Select “Ledger” as your hardware wallet provider.
- Click on the “Connect” button.
- Follow the on-screen instructions to grant access to your Ledger device.
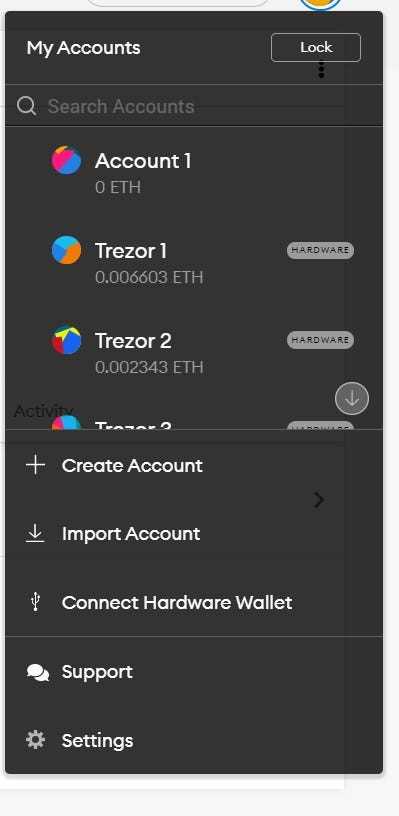
- Once the connection is successful, you will see your Ledger device listed in the “Connected Devices” section of MetaMask.
Congratulations! You have successfully connected your Ledger device to MetaMask. Now you can securely manage your NFTs and other Ethereum assets with the combined power of the two.
Export NFT from MetaMask
Once you have bought or received an NFT in your MetaMask wallet, you may want to export it to another wallet, such as a hardware wallet like Ledger. Exporting your NFT from MetaMask is a straightforward process that ensures your NFT is securely transferred.
Here is a step-by-step guide on how to export your NFT from MetaMask:
- Ensure that you have your Ledger hardware wallet set up and connected to your computer.
- Open the MetaMask extension on your web browser and ensure that it is connected to the appropriate Ethereum network.
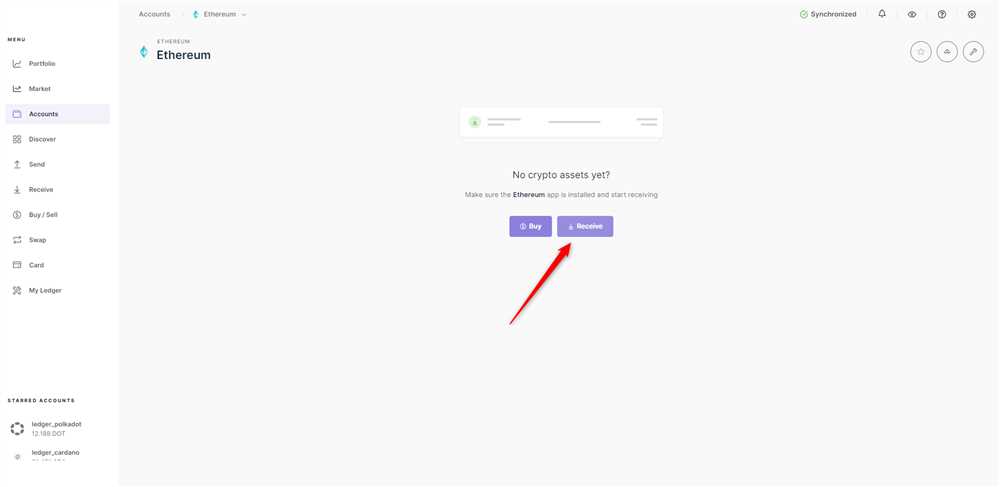
- In your MetaMask wallet, navigate to the “Assets” or “Portfolio” tab, where your NFTs are stored.
- Locate the NFT that you want to export and click on it to access more details.
- In the NFT details page, look for the “Transfer” or “Send” option. Click on it to initiate the transfer process.
- You will be prompted to enter the recipient’s wallet address. In this case, enter the wallet address associated with your Ledger hardware wallet.
- Double-check the recipient address to ensure accuracy, as any mistakes can result in the loss of your NFT.
- Once you have confirmed the recipient address, review the transaction details, including gas fees, and click on the “Confirm” or “Send” button.
- MetaMask will generate a transaction request that needs to be approved using your Ledger hardware wallet. Follow the prompts on your Ledger device to approve the transaction.
- After approving the transaction, wait for it to be confirmed on the Ethereum network. This can take a few minutes, so be patient.
- Once the transaction is confirmed, your NFT will be exported from MetaMask and transferred to your Ledger hardware wallet.
It is crucial to remember that exporting NFTs from MetaMask or any other wallet requires careful attention to detail to ensure a successful and secure transfer. Always double-check wallet addresses and transaction details before proceeding.
By following this step-by-step guide, you can easily export your NFT from MetaMask to your Ledger hardware wallet, ensuring the safety and security of your valuable digital assets.
Import NFT to Ledger

Once you have transferred your NFT from MetaMask to your Ledger, you will need to import it into your Ledger device. Follow these steps to import your NFT:
Step 1: Connect your Ledger
Connect your Ledger device to your computer using a USB cable. Make sure your Ledger is unlocked and open the Ethereum app on your device.
Step 2: Open Ledger Live

Open the Ledger Live application on your computer. If you don’t have Ledger Live installed, you can download and install it from the official Ledger website.
Step 3: Navigate to the Ethereum App
In Ledger Live, click on the Manager tab in the left sidebar. Search for “Ethereum” and click on the Ethereum app when it appears. If you don’t have the Ethereum app installed, click on the “Install” button.
Step 4: Enable Contract Data
In Ledger Live, go to Settings and click on the Experimental Features tab. Under the Ethereum section, enable the “Contract Data” option. This is required for importing your NFT.
Step 5: Import the NFT
Open the Ethereum app on your Ledger device and make sure it is connected to Ledger Live. In Ledger Live, go to the Portfolio tab. Click on “Add account” and select “Ledger Nano S” or “Ledger Nano X” as the account type. Follow the on-screen instructions to import your NFT account.
Step 6: Verify and Confirm

Once your NFT account is imported, you will see your NFT balance in the Portfolio tab. Double-check that the NFT is listed correctly and matches the NFT you transferred from MetaMask. Confirm the import by following the on-screen instructions.
| Additional Tips: |
|---|
| Make sure your Ledger device firmware is up to date. |
| Always verify the contract address of the NFT before transferring it. |
| Keep your Ledger device and recovery phrase safe and secure. |
Why should I transfer my NFT from MetaMask to Ledger?
Transferring your NFT from MetaMask to Ledger provides an extra layer of security. By storing your NFT on a hardware wallet like Ledger, you reduce the risk of your NFT being compromised or stolen.
Do I need to have a Ledger hardware wallet to transfer my NFT?
Yes, you will need a Ledger hardware wallet in order to transfer your NFT from MetaMask. The Ledger hardware wallet provides a secure storage solution for your NFTs and private keys.
Are there any fees associated with transferring my NFT from MetaMask to Ledger?
Yes, there may be fees associated with transferring your NFT from MetaMask to Ledger. These fees are typically network fees, which are paid to the blockchain network for confirming and processing your transaction. The amount of fees can vary depending on network congestion and the size of your transaction.