
Are you excited about exploring the Cronos Network and all the exciting opportunities it offers? If so, you’ll need to add Cronos Network to your Metamask wallet to get started. Metamask is a popular browser extension wallet that allows you to interact with decentralized applications (dApps) and manage your cryptocurrencies securely.
In this step-by-step guide, we’ll walk you through the process of adding Cronos Network to Metamask, so you can seamlessly connect to the Cronos ecosystem. We’ll assume that you already have the Metamask extension installed in your browser. If not, you can easily download and install it from the official Metamask website.
Before we begin, it’s essential to understand that Cronos Network is a Layer 2 solution built on the Ethereum network. It provides scalability and low transaction fees, making it an excellent option for developers and users looking for a fast and cost-effective blockchain solution. By adding Cronos Network to Metamask, you’ll be able to interact with Cronos dApps and handle Cronos (CRON) tokens within your wallet.
Now, let’s dive into the step-by-step process of adding Cronos Network to Metamask:
How to Add Cronos Network to Metamask
In this step-by-step guide, we will walk you through the process of adding Cronos Network to your Metamask wallet. Cronos Network is a layer 2 solution for the Ethereum blockchain, designed to provide faster and more cost-effective transactions.
Step 1: Install Metamask Extension

If you don’t have the Metamask extension installed in your browser, you need to download and install it first. Metamask is available for Chrome, Firefox, and Brave browsers. Visit the official Metamask website to download and install the extension.
Step 2: Open Metamask and Create or Import a Wallet
Once you have the Metamask extension installed, open it from your browser’s toolbar. If you already have a Metamask wallet, you can simply import it using your seed phrase. Otherwise, you can create a new wallet by following the guided steps provided by Metamask.
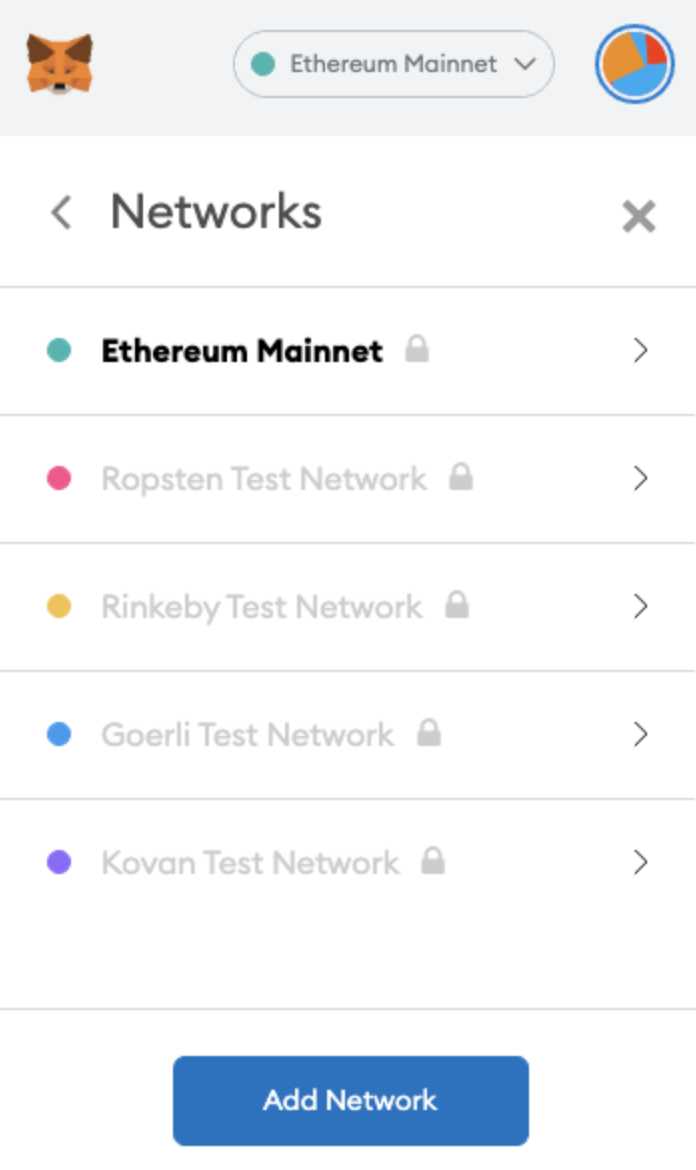
Step 3: Access Network Settings

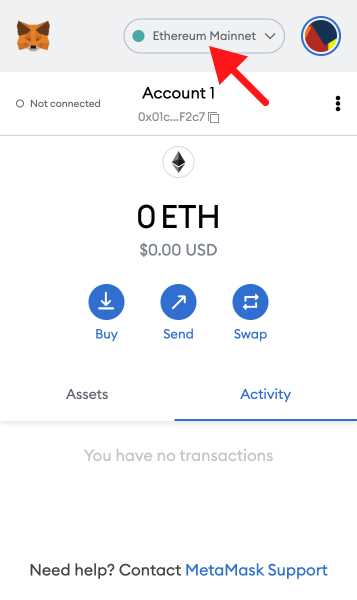
After setting up your wallet, click on the network name (e.g., Ethereum Mainnet) at the top of the Metamask extension. This will open a dropdown menu with various options. Select the “Custom RPC” option.
Step 4: Add Cronos Network Details
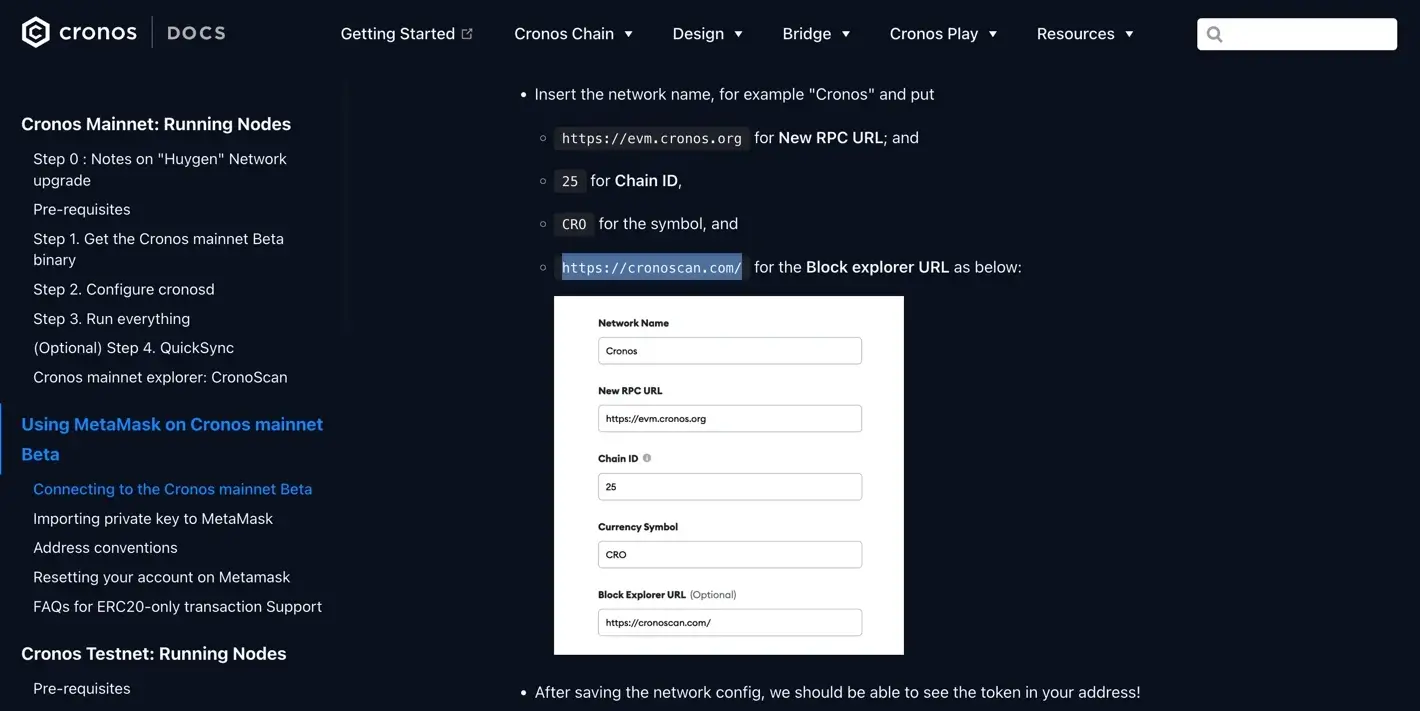
In the Custom RPC settings, you will need to add the details for the Cronos Network. Fill in the following information:
- Network Name: Cronos Network
- New RPC URL: https://cronos-testnet.bitkubchain.io/rpc
- Chain ID: 338
- Symbol: CRO
- Block Explorer URL: https://cronos-explorer.crypto.org/
Once you have filled in the details, click on the “Save” button to save the Cronos Network settings.
Step 5: Switch to Cronos Network
To switch to the Cronos Network, click on the network name at the top of the Metamask extension again. This time, you will see the Cronos Network option in the dropdown menu. Click on it to switch to the Cronos Network.
That’s it! You have successfully added the Cronos Network to your Metamask wallet. Now you can use your Metamask wallet to interact with the Cronos Network and enjoy the benefits of faster and more cost-effective transactions.
Note: Cronos Network is currently in the testnet phase, so it is important to exercise caution when using it. Make sure to double-check transaction details and only use Cronos for testing purposes until it is fully released and audited.
Step 1: Install and Set Up Metamask
To add Cronos Network to Metamask, you first need to have Metamask installed and set up in your browser. Follow the steps below:
1. Install Metamask
Go to the Metamask website and download the wallet extension for your preferred browser (Google Chrome, Firefox, or Brave).
Once the extension is downloaded, follow the installation instructions provided by your browser to add the extension.
2. Set Up Metamask
After installing Metamask, click on the extension icon in your browser’s toolbar to open the wallet.
A new tab will open where you can create a new wallet or import an existing one. If you don’t have a wallet, click on “Create a Wallet” and follow the prompts to set up a new wallet.
If you already have a wallet seed phrase, click on “Import Wallet” and enter your seed phrase to import your existing wallet.
Once your wallet is created or imported, you will be prompted to set a password for your wallet. Choose a strong password and remember it, as you will need it to access your wallet in the future.
After setting up your password, your Metamask wallet is now ready to use.
| Key Points |
|---|
| 1. Install the Metamask wallet extension from the official website. |
| 2. Follow the installation instructions provided by your browser. |
| 3. Open Metamask and create a new wallet or import an existing one. |
| 4. Set a strong password for your wallet and remember it. |
Step 2: Access Networks Settings in Metamask
Once you have successfully installed and set up Metamask on your browser, you will need to access the networks settings in order to add Cronos Network.
To access the networks settings, follow these steps:
- Open your browser and click on the Metamask extension icon located at the top-right corner of your browser window. This will open the Metamask popup.
- In the Metamask popup, click on the three-dot menu icon located at the top-right corner of the popup.
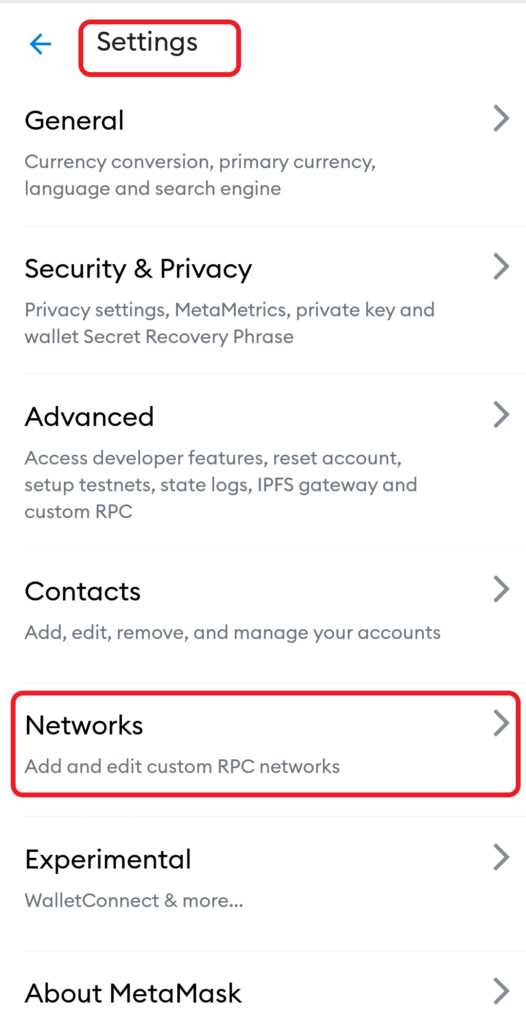
- From the dropdown menu, select “Settings”.
- This will open the Metamask settings page. Scroll down and locate the “Networks” section.
Once you have accessed the networks settings, you are ready to proceed to the next step of adding Cronos Network to Metamask.
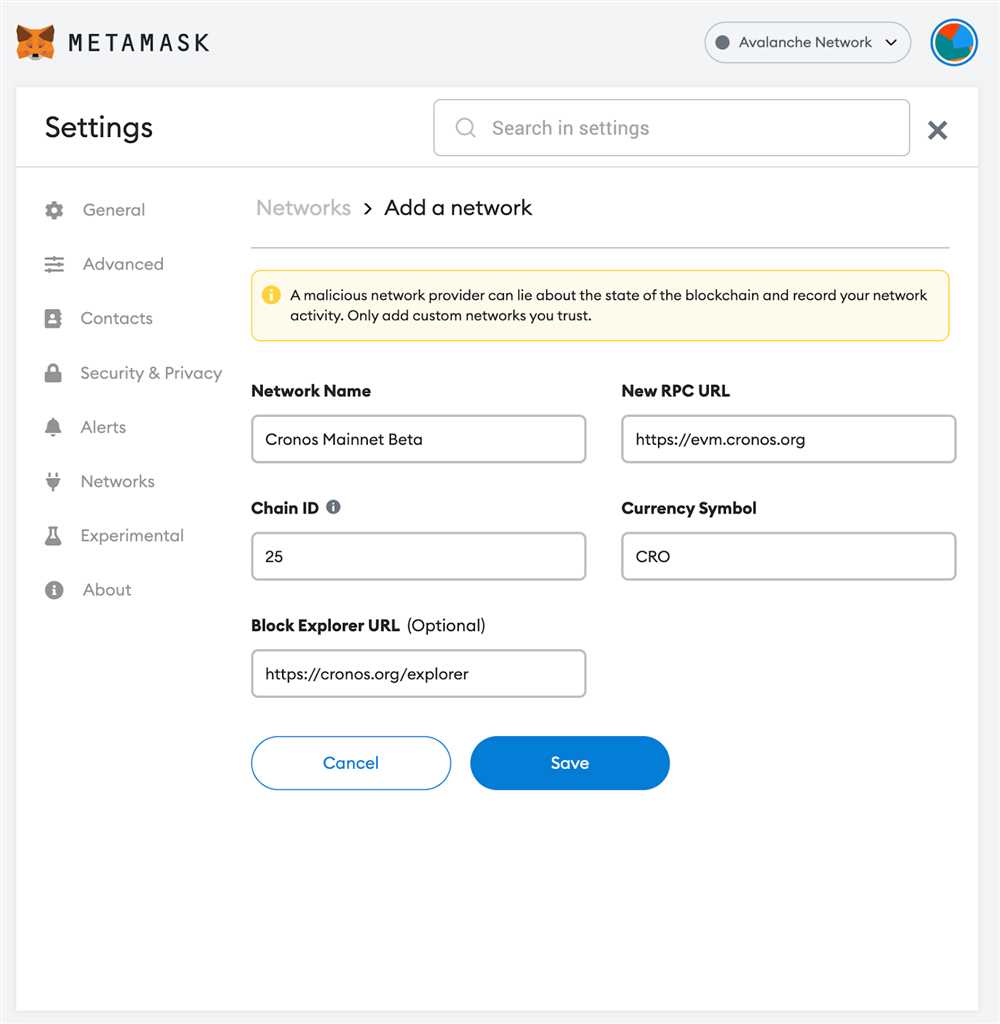
Step 3: Add Custom Network
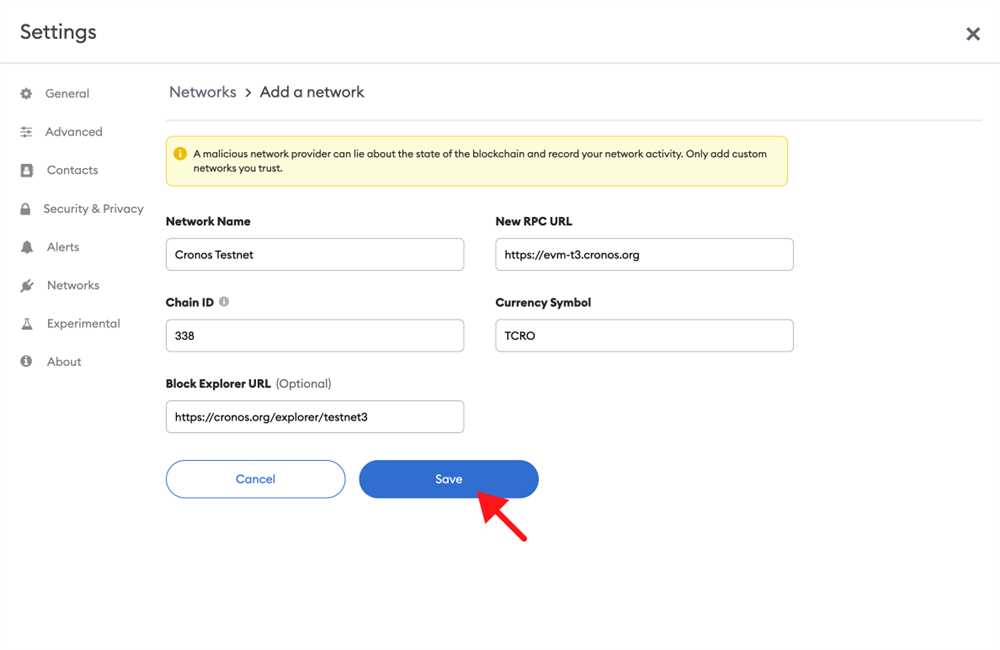
Now that you have the Cronos network added to your Metamask wallet, the next step is to add a custom network for Cronos.
- Open Metamask: Open your Metamask wallet by clicking on the extension in your browser.
- Click on the network selection dropdown: In the top right corner of the Metamask popup, click on the network selection dropdown. It will display the network you are currently connected to.
- Select “Custom RPC”: Scroll down and select “Custom RPC” at the bottom of the network selection dropdown.
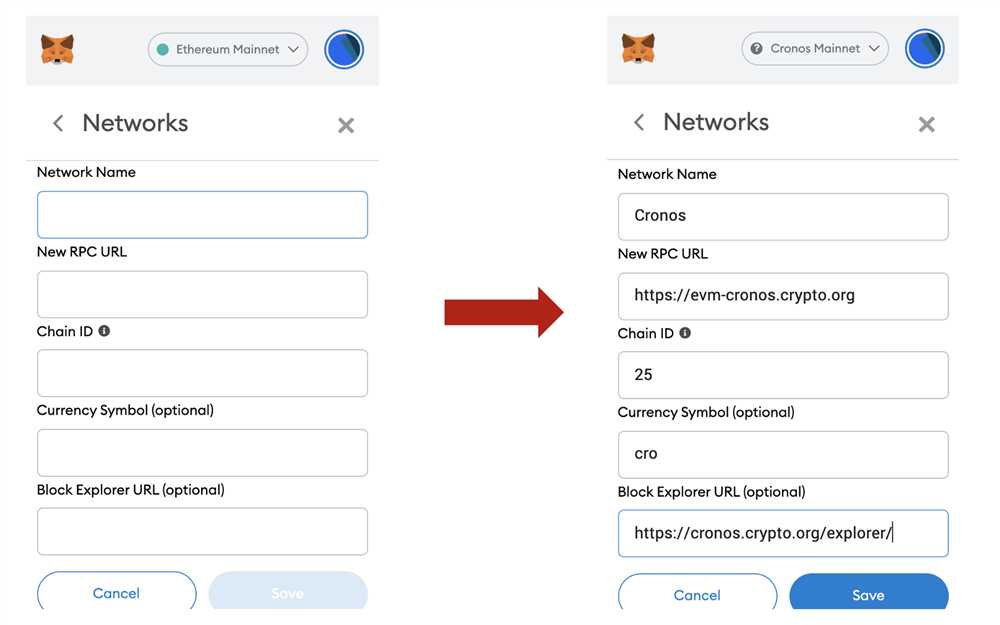
- Fill in the network details: In the “New Network” form, fill in the following details:
Network Name: Enter a name for this network, such as “Cronos Testnet.”
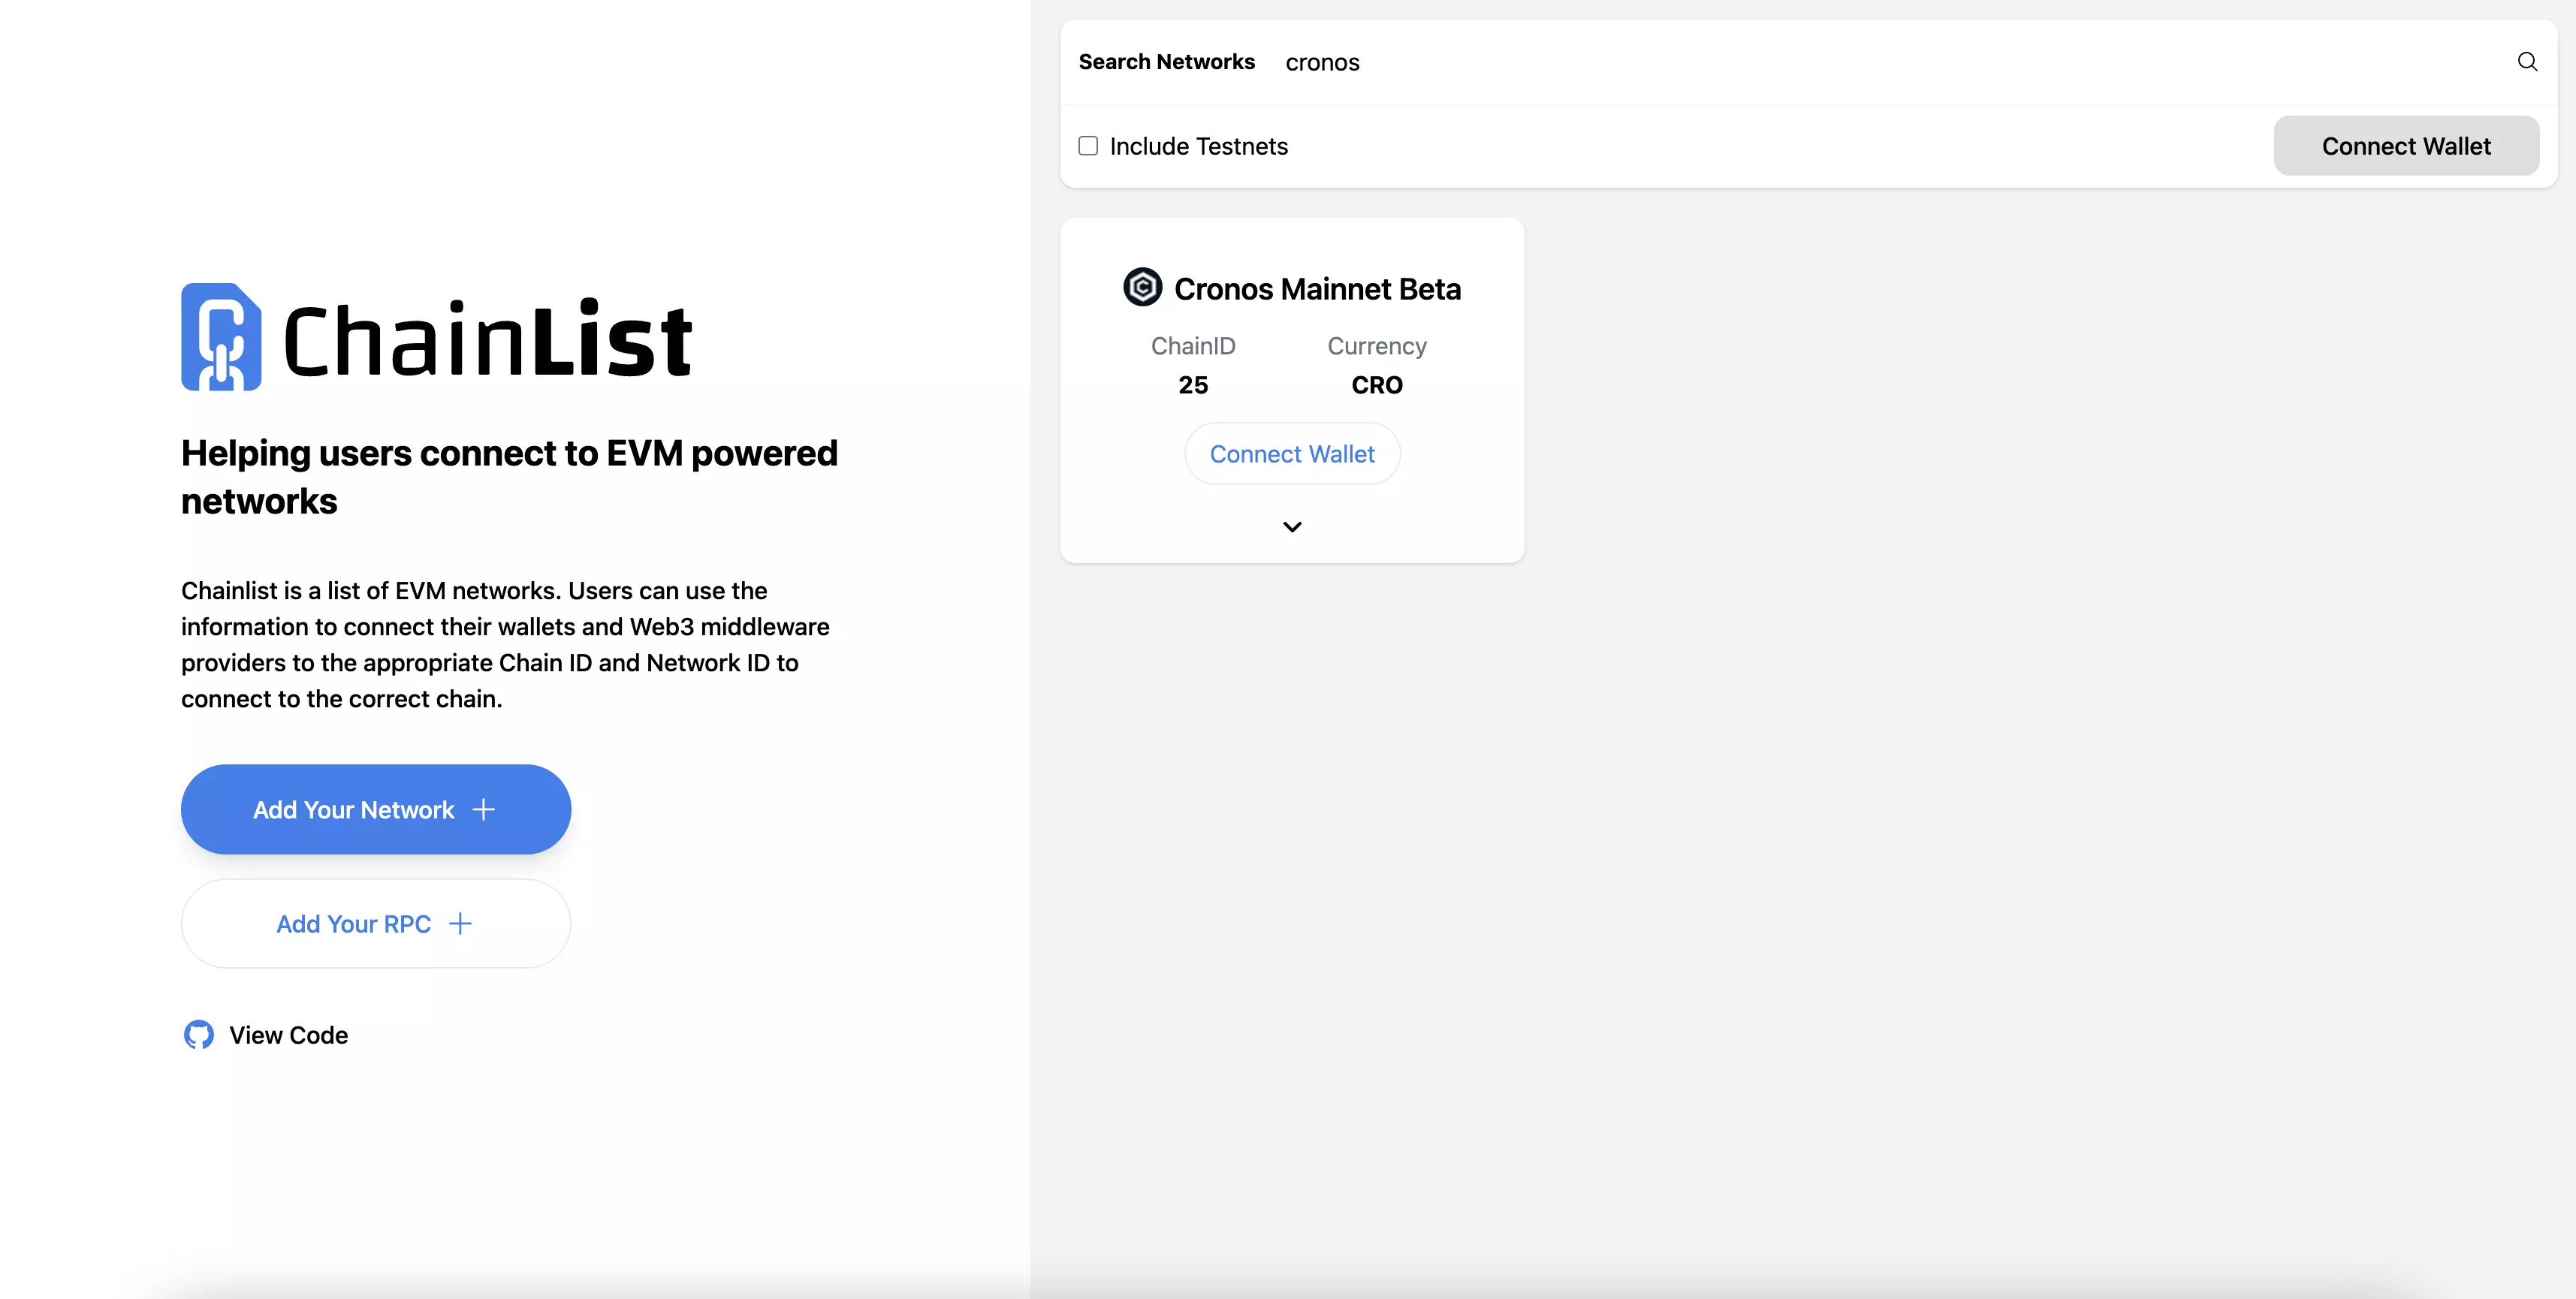
New RPC URL: Enter the RPC URL for the Cronos Testnet. This can usually be found on the Cronos documentation or developer resources.
ChainID: Enter the ChainID for the Cronos Testnet. This is a unique identifier for the network.
Symbol (optional): Enter the symbol for the native currency of the Cronos Testnet, if applicable.
Block Explorer URL (optional): Enter the URL for the Cronos Testnet block explorer, if available.
Click “Save”: After filling in the network details, click on the “Save” button to add the custom network to Metamask.
That’s it! You have successfully added a custom network for Cronos to your Metamask wallet. You can now switch to the Cronos Testnet and interact with Cronos DApps and smart contracts.
Note: Make sure to double-check the RPC URL and ChainID to ensure they are accurate for the Cronos Testnet you are connecting to.
Step 4: Connect to Cronos Network
Once you have installed MetaMask and added the Cronos Network to your list of networks, you can now connect your MetaMask wallet to the Cronos Network.
Connecting MetaMask Wallet to Cronos Network

To connect your MetaMask wallet to the Cronos Network, follow these steps:
- Click on the MetaMask extension icon in your browser toolbar to open the MetaMask pop-up.
- Click on the network dropdown at the top of the pop-up window.
- You should see the Cronos Network listed as one of the available networks. Click on it to select it.
- After selecting the Cronos Network, you may need to wait a few seconds for MetaMask to connect to the network.
- Once the connection is successful, you will see the Cronos Network logo and its name in the top center of the MetaMask pop-up window.
Note: If you don’t see the Cronos Network listed, make sure you have added it to MetaMask by following the steps mentioned in the previous section.
Verifying the Connection
To verify that you have successfully connected to the Cronos Network, you can check if the network details are displayed correctly in your MetaMask wallet.
- Click on the MetaMask extension icon in your browser toolbar to open the MetaMask pop-up.
- Look at the network dropdown at the top of the pop-up window.
- You should see the Cronos Network selected in the dropdown, along with its logo and name.
- Additionally, you can click on the network name to view more details about the network, such as the network ID and RPC URL.
Congratulations! You have successfully connected your MetaMask wallet to the Cronos Network. You are now ready to start using Cronos and exploring decentralized applications (dApps) on the network.
What is Cronos Network?
Cronos Network is a layer 2 scaling solution for Ethereum that aims to provide faster and cheaper transactions.
Can I transfer my Ethereum assets to Cronos Network?
Yes, you can transfer your Ethereum assets to Cronos Network. To do so, you need to use a bridge to move your assets from the Ethereum mainnet to Cronos Network. One such bridge is the Gravity Bridge, which enables the transfer of assets between Ethereum and Cronos Network.