
Metamask Safari Extension is a powerful tool that allows you to seamlessly interact with the Ethereum blockchain right from your browser. Whether you are a seasoned cryptocurrency enthusiast or a beginner just getting started, this complete guide will walk you through the ins and outs of using Metamask Safari Extension for effortless Ethereum transactions.
With Metamask Safari Extension, you can securely manage your Ethereum wallet, access decentralized applications (dApps), and send and receive Ether and ERC-20 tokens with ease. This browser extension provides a user-friendly interface and integrates seamlessly with Safari, allowing you to stay connected to the Ethereum network wherever you go.
One of the key features of Metamask Safari Extension is its ability to securely store your private keys and seed phrases. This ensures that your funds and personal information are safe from hackers and other malicious actors. By encrypting and storing your keys locally, Metamask Safari Extension puts you in control of your own digital assets.
Whether you want to buy, sell, or trade Ethereum, or participate in decentralized finance (DeFi) applications, Metamask Safari Extension has got you covered. Its intuitive interface makes it easy to connect to various dApps and manage your transactions seamlessly. Say goodbye to manual transaction signing and hello to effortless Ethereum transactions!
Getting Started with Metamask
If you are new to Metamask, here’s a step-by-step guide to help you get started:
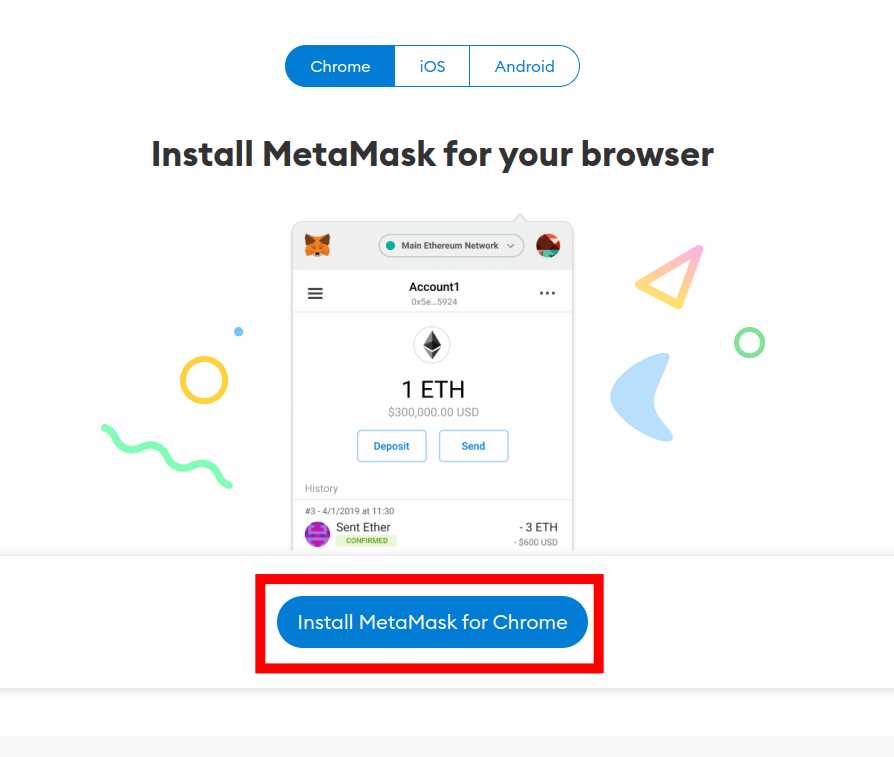
Step 1: Install Metamask Extension
Start by installing the Metamask extension on your Safari browser. You can download it from the official Metamask website or from the Safari extension store.
Step 2: Create a New Wallet
Once the extension is installed, click on the Metamask icon in your browser toolbar. A welcome screen will appear, click on “Get Started” to create a new wallet.
Step 3: Read and Accept Terms
Make sure to read and accept the terms and conditions presented by Metamask. It’s important to be aware of the risks and responsibilities associated with using the wallet.
Step 4: Set Up a Password
Choose a strong and unique password for your wallet. This will be used to encrypt your private keys and protect your funds. Make sure to save the password in a secure place.
Step 5: Backup Your Seed Phrase
Metamask will generate a unique 12-word seed phrase that can be used to restore your wallet. It’s crucial to write down this seed phrase and keep it in a safe and offline location. The seed phrase is your ultimate backup in case you lose access to your wallet.
Step 6: Connect to a Network
After setting up your wallet, you need to connect it to a network. Metamask supports various Ethereum networks like Mainnet, Ropsten, Rinkeby, and others. Choose the desired network from the drop-down menu. If you are new to Ethereum, start with the “Ropsten” test network.
Step 7: Add Funds to Your Wallet
In order to make transactions, you need to have some funds in your wallet. You can purchase Ethereum from supported exchanges and send it to your Metamask wallet address. Alternatively, you can receive Ethereum from other wallets or participate in token sales.
Congratulations! You have successfully set up Metamask and are ready to start using it for effortless Ethereum transactions.
Connecting Metamask to Safari Browser
To get started with using Metamask on Safari browser, follow these simple steps:
Step 1: Install Metamask Extension
First, make sure you have Safari browser installed on your device. Then, go to the App Store and search for “Metamask”. Click on the “Get” button to install the Metamask extension.
Step 2: Open Metamask
Once the installation is complete, open Safari browser and click on the Metamask extension icon located in the top right corner of the browser window. This will open the Metamask pop-up window.
Note: If you do not see the Metamask extension icon, click on “Safari” in the top menu bar, select “Preferences”, go to the “Extensions” tab, and enable the Metamask extension.
Step 3: Create or Import Wallet
Next, you need to create a new wallet or import an existing one. If you don’t have a wallet, click on the “Create a Wallet” button and follow the instructions to set up a new wallet. If you already have a wallet, click on the “Import Wallet” button and enter your seed phrase or private key to import it into Metamask.
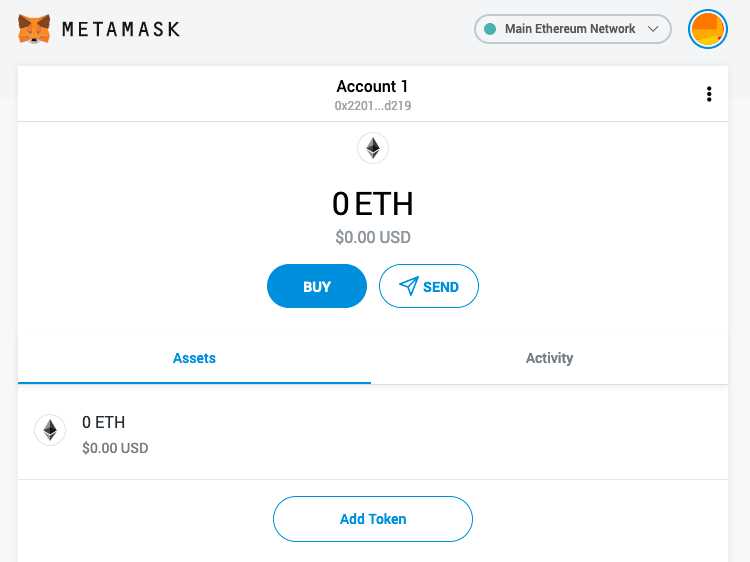
Step 4: Connect to Ethereum Network

After setting up your wallet, you will be prompted to choose a network. Ensure that the “Main Ethereum Network” is selected for interacting with the Ethereum blockchain. If you want to connect to a test network, such as Ropsten or Kovan, you can select it from the dropdown menu.
Note: It is highly recommended to use the “Main Ethereum Network” for real transactions to avoid potential scams on test networks.
Step 5: Start Using Metamask
Once you have connected to the Ethereum network, you are ready to start using Metamask on Safari browser. You can now access decentralized applications (DApps) and perform Ethereum transactions securely and effortlessly.
Remember to always keep your wallet seed phrase and private keys safe and never share them with anyone.
Sending Ethereum Transactions with Metamask
Metamask is a powerful browser extension that allows users to interact with Ethereum applications directly from their web browsers. One of the key features of Metamask is the ability to send and receive Ethereum transactions seamlessly and effortlessly.
To send an Ethereum transaction with Metamask, follow these simple steps:
- Make sure you have the Metamask extension installed and set up in your preferred web browser.
- Open up the Metamask extension and make sure you are connected to the desired Ethereum network (such as the mainnet, testnet, or a custom network).
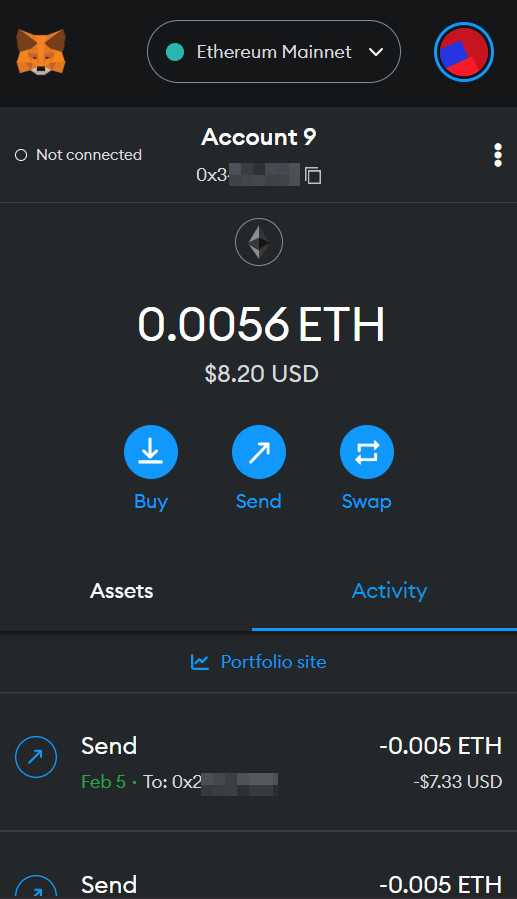
- Click on the “Send” button in the Metamask user interface.
- Enter the recipient’s Ethereum address and the amount of Ethereum you want to send.
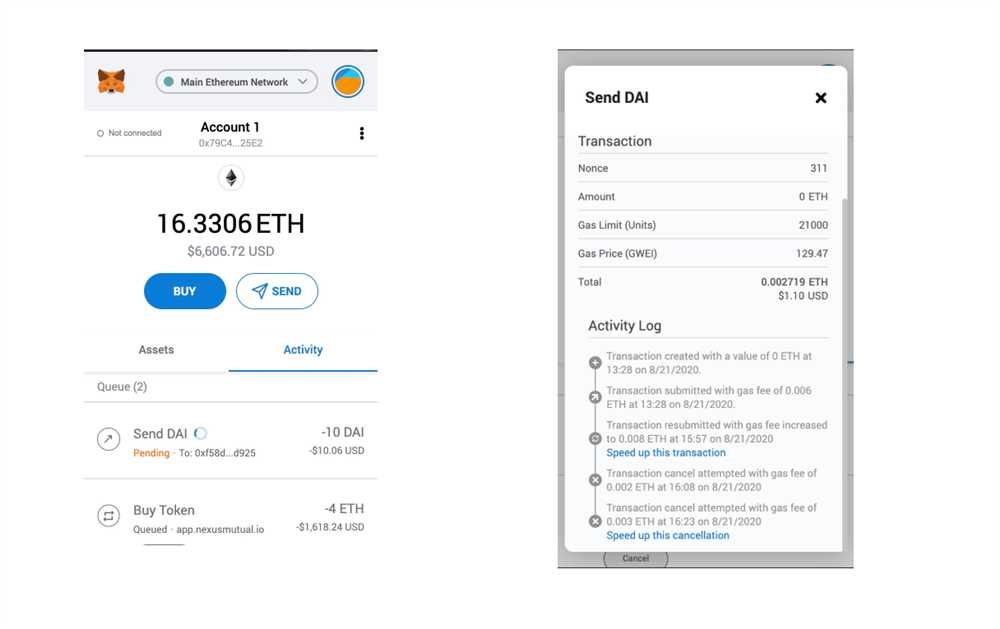
- Review the transaction details, including the gas fee, before confirming the transaction.
- Click the “Confirm” button to send the transaction.
- Wait for the transaction to be confirmed and included in a block on the Ethereum network.
- You can check the status of your transaction by clicking on the transaction history tab in the Metamask interface.
It is important to note that sending Ethereum transactions with Metamask requires you to have sufficient Ether in your account to cover the transaction fee, also known as gas. Gas is a unit used to calculate the computational resources required to execute a transaction on the Ethereum network.
By using Metamask, you can easily send Ethereum transactions without the need for complex command-line interfaces or manually constructing and signing transactions. Metamask takes care of the transaction process, making it simple and user-friendly for everyone.
Additional Features and Tips for Optimizing Metamask Usage
In addition to its core functionality as an Ethereum wallet, Metamask offers a range of additional features and tips that can help optimize your usage and enhance your overall experience. Here are some key features to take advantage of:
1. Custom Networks
Metamask allows you to add custom networks to easily connect with various Ethereum-compatible blockchains. This feature is especially useful if you frequently transact on different networks or participate in platform-specific projects.
2. Token Management

With Metamask, you can seamlessly manage your Ethereum tokens. You have the ability to add and remove tokens, review your token balances, and even import tokens from other wallets. This simplifies the process of interacting with decentralized applications (dApps) that often require specific ERC-20 tokens.
3. Transaction History
Metamask provides a detailed transaction history that allows you to track and review all your Ethereum transactions. This feature enables you to easily verify your transaction status, track your spending, and monitor any pending or failed transactions.
4. Contact List
Managing a contact list within Metamask can be incredibly helpful to streamline your transactions. By adding addresses to your contact list, you can easily send funds to friends, family, or frequently transacted businesses without the need to manually enter their wallet addresses every time.
5. Gas Fee Customization
Customizing the gas fee for your Ethereum transactions can save you money, especially during times of network congestion. Metamask allows you to manually adjust the gas price and gas limits for your transactions, offering greater control over the speed and cost of your transactions.
6. Security Features
Metamask offers robust security features to protect your assets and ensure a secure browsing experience. Enabling features such as phishing detection and privacy mode can help prevent potential scams and unauthorized access to your wallet.
In addition to these features, here are some tips for optimizing your Metamask usage:
1. Keep Your Software Updated
Regularly update your Metamask extension to ensure you have the latest security patches and bug fixes. This helps protect your funds and ensures compatibility with the latest Ethereum network upgrades.
2. Use Hardware Wallet Integration
If you own a hardware wallet, consider integrating it with Metamask for enhanced security. Hardware wallets provide an extra layer of protection by keeping your private keys offline.
3. Regularly Backup Your Seed Phrase
Your seed phrase is crucial for recovering your wallet and should be securely stored offline. Backing up your seed phrase in multiple physical locations ensures that you can always regain access to your funds if your device is lost or damaged.
4. Be Cautious of Scams and Phishing Attempts
Always double-check the URL of the website you are interacting with to avoid phishing attempts. Metamask provides a phishing detection feature but remaining vigilant is essential to protect your funds.
By utilizing these additional features and following the provided tips, you can optimize your Metamask usage and have a seamless and secure experience while transacting on the Ethereum network.
What is Metamask Safari Extension?
Metamask Safari Extension is a browser extension that allows users to interact with Ethereum decentralized applications (dApps) directly from their Safari browser.
How can I install Metamask Safari Extension?
To install Metamask Safari Extension, you need to open the Safari browser, go to the official Metamask website, and download the extension from there. Once downloaded, you can follow the installation instructions to add it to your browser.
Can I use Metamask Safari Extension on my mobile device?
No, Metamask Safari Extension is only available for the Safari browser on desktop computers and laptops. However, you can use the Metamask mobile app on your mobile device to interact with Ethereum dApps.
What are the benefits of using Metamask Safari Extension?
Using Metamask Safari Extension brings several benefits, including easy access to Ethereum dApps without leaving the browser, secure storage of your private keys, and seamless integration with other Ethereum wallets.
Can I send and receive Ethereum transactions using Metamask Safari Extension?
Yes, with Metamask Safari Extension, you can easily send and receive Ethereum transactions. You can connect your Metamask wallet to various dApps and perform transactions directly from your browser.