
If you’re new to the world of cryptocurrency and the concept of NFTs (non-fungible tokens), you may be wondering how to view and interact with these unique digital assets. One popular wallet for managing and accessing NFTs is Metamask. In this step-by-step guide, we’ll walk you through the process of setting up Metamask, connecting it to a marketplace, and viewing your NFT collection.
First, it’s important to understand that Metamask is a browser extension that serves as both a cryptocurrency wallet and a gateway to the Ethereum blockchain. It allows you to securely store your digital assets and interact with decentralized applications (DApps). To get started, you’ll need to install the Metamask extension for your preferred browser.
Once you have Metamask installed, open the extension and click on the “Create a Wallet” option. Follow the prompts to set up a password and write down your secret backup phrase – this phrase is crucial for recovering your wallet if you ever lose access to it. Make sure to store it in a safe place. With your wallet created, you can now proceed to the next step.
Next, you’ll want to connect your Metamask wallet to a marketplace that supports NFTs. There are several options available, such as OpenSea, Rarible, and SuperRare. Select the marketplace of your choice and either create an account or log in using your existing credentials. Once you’re logged in, navigate to your account settings or profile section to find the option to connect your wallet. Select Metamask as your wallet provider, and authorize the connection when prompted.
Now that your wallet is connected to the NFT marketplace, you can start viewing your NFT collection. Browse through the available NFTs, which may include digital art, virtual real estate, or even collectible items. Each NFT will typically have an image, a description, and information about the creator. You can click on an individual NFT to view more details and see its transaction history on the blockchain.
Depending on the marketplace, you may also have the option to buy, sell, or trade NFTs directly within Metamask. If you find an NFT you’d like to purchase, click on the “Buy” button and follow the prompts to complete the transaction. Remember to review the gas fees and make sure you have sufficient funds in your wallet to cover the cost.
In conclusion, Metamask provides a user-friendly interface for viewing and managing NFTs. By following this step-by-step guide, you can set up Metamask, connect it to an NFT marketplace, and explore the world of digital assets with ease.
Step 1: Install and Set Up Metamask

Metamask is a browser extension that allows you to interact with the world of blockchain and NFTs. Follow these steps to install and set up Metamask:
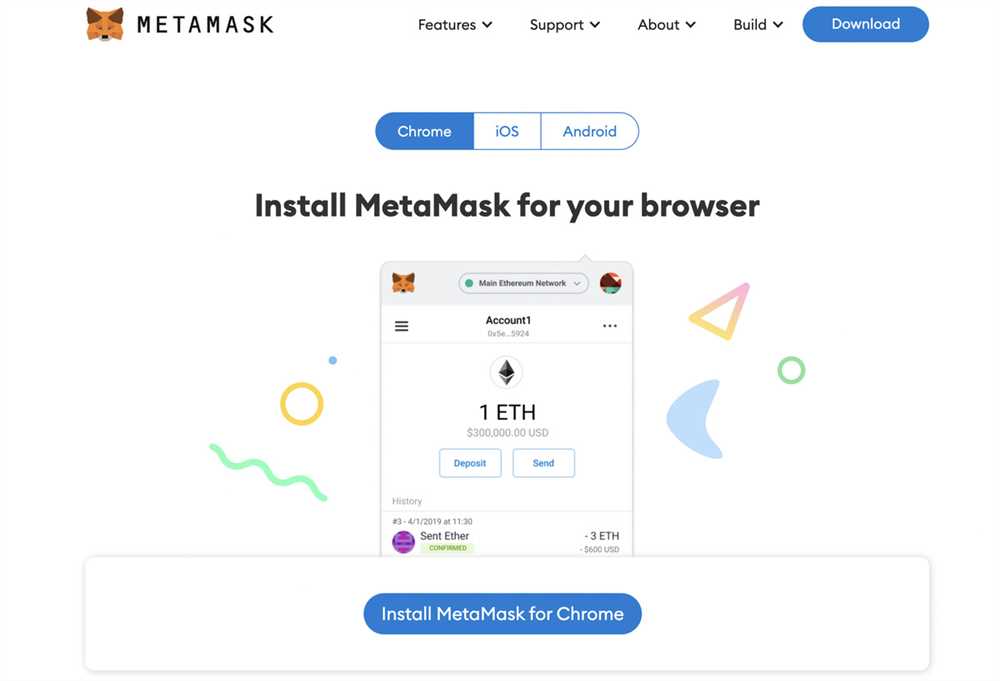
1. Install Metamask
Go to the Metamask website or the extension store of your preferred browser and download the Metamask extension. It is available for popular browsers like Chrome, Firefox, and Brave.
2. Add Metamask to Your Browser
After the download is complete, click on the extension icon in your browser toolbar to open Metamask. Click “Add Extension” or “Get Started” to begin the setup process.
3. Create a New Wallet
In the Metamask setup wizard, you will be asked to create a new wallet. Choose “Create a Wallet” and then click “Continue”.
Follow the instructions to set up a strong password for your wallet. Remember to keep this password safe and secure as it will be required to access your wallet and funds.
4. Backup Your Wallet
After setting up your password, you will be presented with a secret backup phrase. This phrase is crucial for recovering your wallet in case you forget your password or lose access to your device.
Write down the backup phrase and keep it in a safe and secure place. Do not store it digitally or share it with anyone.
5. Confirm Your Backup Phrase

In the next step, you will be asked to confirm your backup phrase by selecting the words in the correct order. This is to ensure that you have properly recorded the backup phrase.
Select the words in the correct order and click “Confirm” to proceed.
6. Connect to a Network
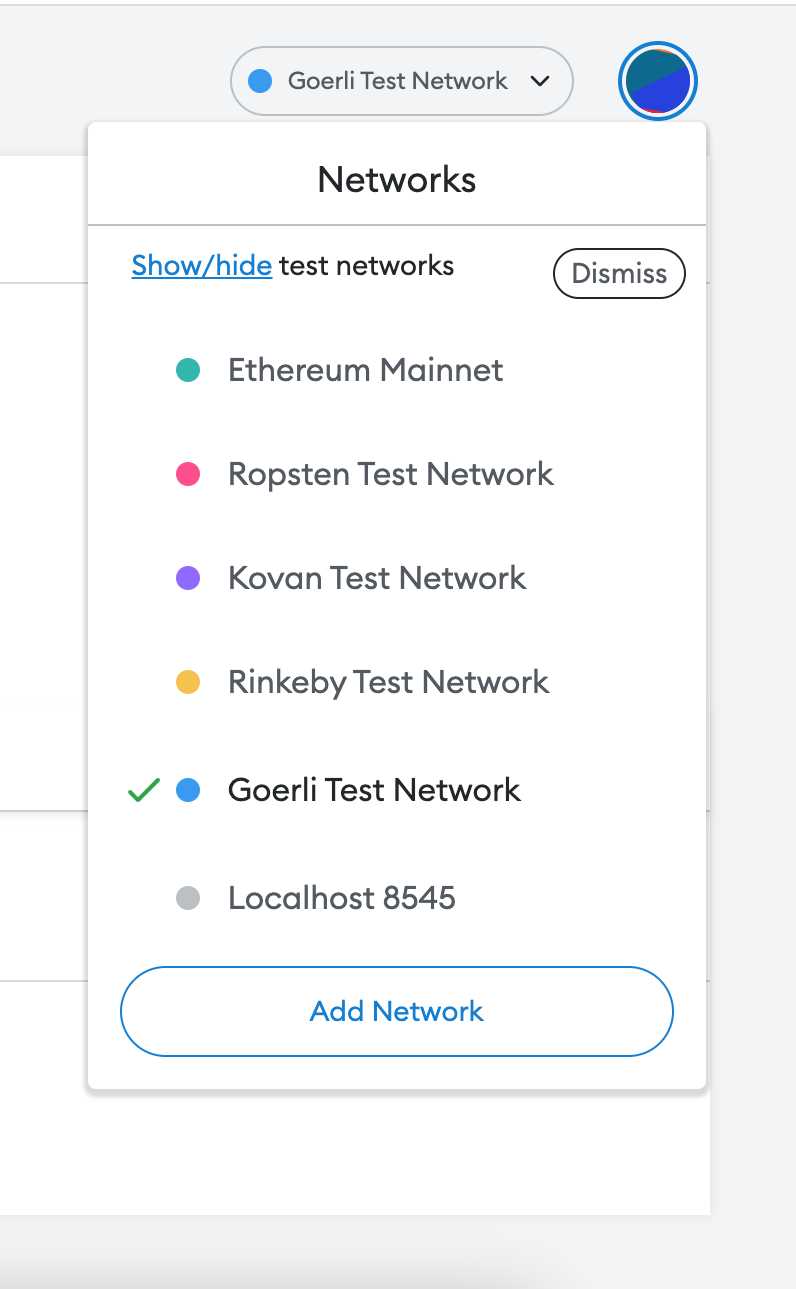
After confirming your backup phrase, you will be prompted to connect to a blockchain network. Choose the network you want to use for your NFT transactions, typically Ethereum Mainnet.
Click “Next” and wait for Metamask to connect to the selected network.
7. Start Using Metamask

Congratulations! You have successfully installed and set up Metamask. Now you can start using it to view, buy, and sell NFTs.
Make sure to periodically check for updates and keep your Metamask extension up to date for the latest features and security improvements.
Remember to always exercise caution when interacting with NFTs and to only transact with reputable and trusted sources.
Step 2: Connect Metamask to an NFT Marketplace
To start viewing NFTs in Metamask, you need to connect your wallet to an NFT marketplace. This will allow you to browse, buy, and sell NFTs using your Metamask wallet.
Here are the steps to connect Metamask to an NFT marketplace:
- Open your Metamask wallet by clicking on the extension icon in your browser’s toolbar.
- Click on the account name at the top-right corner of the Metamask popup window, and select “Settings” from the dropdown menu.
- In the Settings menu, click on the “Networks” tab.
- Click on the “Add Network” button to add a new network.
- Enter the details of the NFT marketplace’s network you want to connect to. This includes the network name, RPC URL, chain ID, symbol, and block explorer URL. This information is usually provided by the NFT marketplace or can be found in their documentation.
- Click on the “Save” button to save the network settings.
- Your Metamask wallet is now connected to the NFT marketplace. You can navigate to the marketplace’s website and start exploring NFTs.
When you browse or interact with NFTs on the marketplace, Metamask will prompt you to confirm transactions, such as buying or selling NFTs, using your connected wallet.
Remember to exercise caution when using your wallet on NFT marketplaces. Ensure that you are using reputable marketplaces and verify the authenticity of the NFTs you are interested in before making any transactions.
Step 3: Browse and View NFTs in Metamask
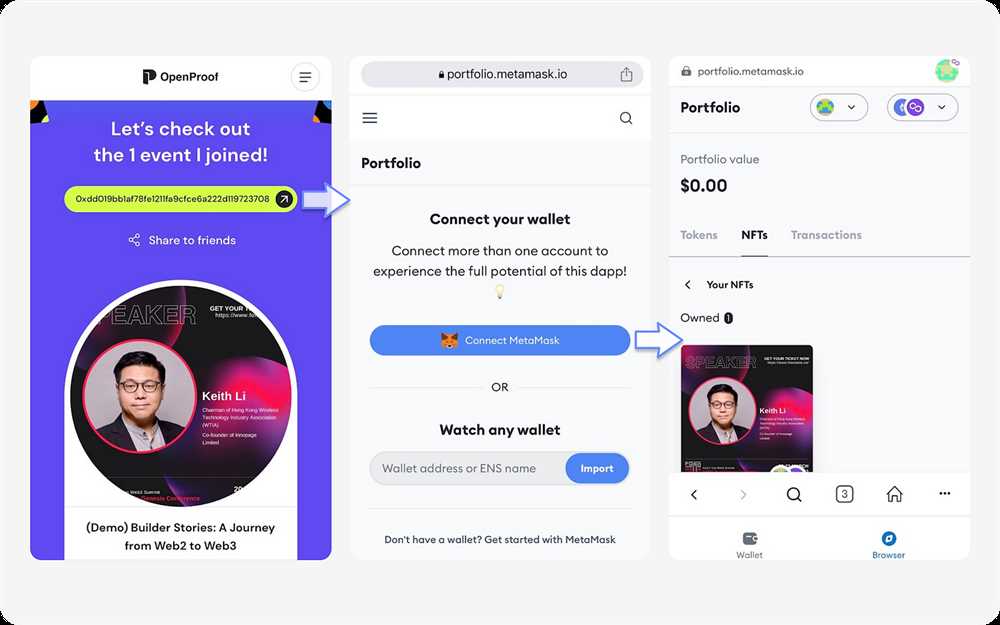
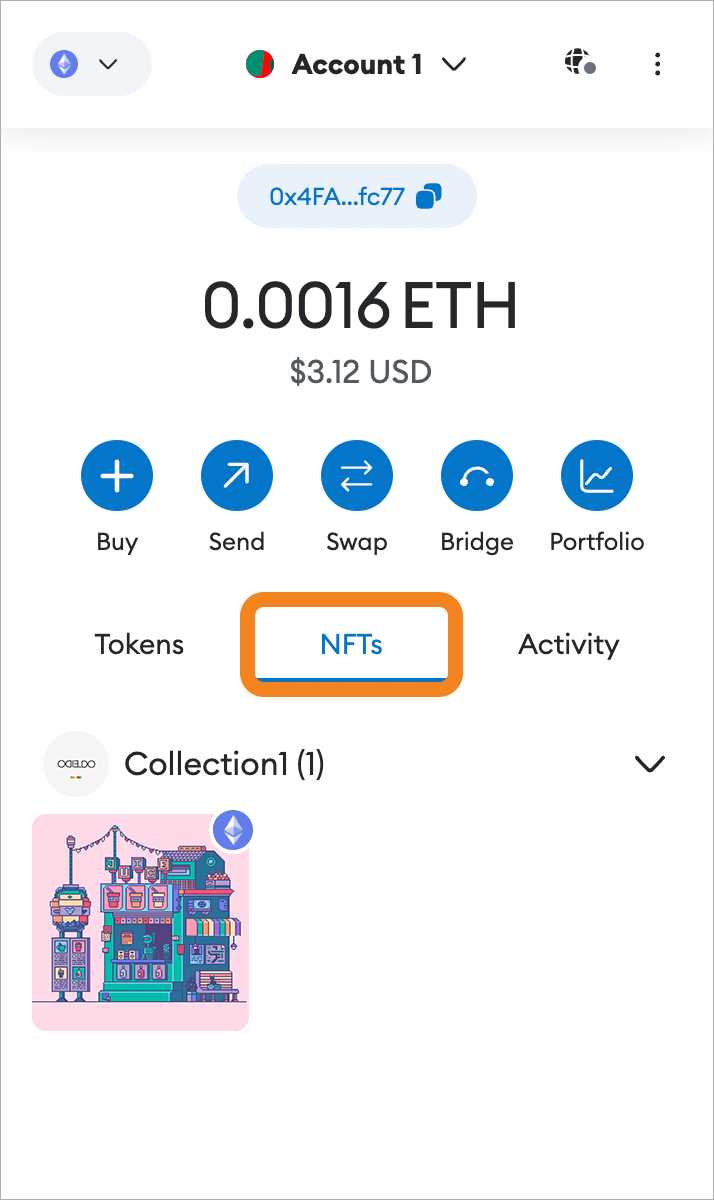
Once you have set up your Metamask wallet and connected it to a compatible NFT marketplace, you can start browsing and viewing NFTs directly in the Metamask interface. Here’s how:
- Open your Metamask wallet extension or app and navigate to the NFT marketplace section.
- Click or tap on the marketplace you want to explore.
- Use the search bar or browse the available NFT collections and tokens.
- Click or tap on an NFT to view its details, such as the artwork, title, creator, and any additional information.
- If you’re interested in purchasing the NFT, you can usually find a “Buy” or “Bid” button that will redirect you to the marketplace’s website or provide a prompt to authorize the transaction within Metamask.
- To view your owned NFTs, go to the “My Items” or “My NFTs” section. Here, you’ll find a list of the NFTs you have collected or purchased.
- From the “My Items” or “My NFTs” section, you can also manage your NFTs, such as transferring them to other wallets, listing them for sale, or canceling active listings.
Browsing and viewing NFTs in Metamask provides a convenient and seamless experience, allowing you to explore different collections, discover new artists, and manage your NFT portfolio all in one place.
What is Metamask?
Metamask is a cryptocurrency wallet and browser extension that allows users to interact with blockchain applications, such as viewing and exchanging NFTs.
How can I install Metamask?
To install Metamask, you can visit the official website and download the browser extension for Chrome, Firefox, or Edge. Once installed, you can set up your wallet and start using it to interact with NFTs.
What are NFTs?
NFTs, or Non-Fungible Tokens, are unique digital assets that are stored on a blockchain. They can represent various forms of digital media, such as art, music, videos, and more.
How do I view NFTs in Metamask?
To view NFTs in Metamask, you need to connect your wallet to a marketplace or platform that supports NFTs, such as OpenSea or Rarible. Once connected, you can browse and view the NFTs in your wallet and even participate in auctions or purchase them.
Can I view NFTs on my mobile device using Metamask?
Yes, you can view NFTs on your mobile device using the Metamask mobile app, available for both iOS and Android. Simply download the app, set up your wallet, and connect it to a compatible NFT marketplace or platform.