
If you’re new to the world of cryptocurrencies, you’ve probably already heard of Ethereum (ETH) and the popular wallet called Metamask. Metamask is a browser extension that allows you to interact with decentralized applications (DApps) on the Ethereum network. However, in order to fully utilize Metamask and start using DApps, you need to have some ETH in your wallet.
In this step-by-step guide, we will walk you through the process of adding ETH to your Metamask wallet. By the end of this guide, you will be able to fund your Metamask wallet and start exploring the exciting world of Ethereum DApps.
Step 1: Install Metamask
If you haven’t installed Metamask yet, head over to the official website and install the extension for your preferred browser. Once installed, create a new wallet or import an existing one. Make sure to securely store your seed phrase, as it is the only way to restore your wallet if you lose access to it.
Step 2: Get Some ETH
In order to add ETH to your Metamask wallet, you need to acquire some first. You can purchase ETH on popular cryptocurrency exchanges such as Coinbase, Binance, or Kraken. Alternatively, you can also earn ETH by participating in decentralized finance (DeFi) protocols or by receiving ETH from other users.
Step 3: Send ETH to your Metamask Wallet
Once you have acquired some ETH, you need to send it to your Metamask wallet. Open your Metamask extension and click on the “Deposit” or “Receive” button to get your wallet address. Copy the address and use it as the recipient address when sending ETH from your exchange or another wallet. Make sure to double-check the address to avoid any mistakes.
Step 4: Verify the Transaction
After sending the ETH, it may take some time for the transaction to be confirmed on the Ethereum network. You can track the status of your transaction by using a blockchain explorer like Etherscan. Once the transaction is confirmed, you will see the ETH balance in your Metamask wallet.
Step 5: Start Exploring DApps
Now that you have successfully added ETH to your Metamask wallet, you can start exploring the world of Ethereum DApps. Visit popular DApps like Uniswap, Aave, or Compound, and experience decentralized finance, decentralized exchanges, and other innovative applications powered by the Ethereum blockchain.
Adding ETH to your Metamask wallet is a simple process that opens up a world of possibilities in the Ethereum ecosystem. By following these steps, you will be able to fund your wallet and start interacting with DApps in no time. Happy exploring!
What is Metamask?
Metamask is a browser extension that allows users to interact with the Ethereum blockchain. It provides a secure and convenient way to manage digital assets, such as Ethereum (ETH) and other ERC-20 tokens, directly from a web browser.
Metamask acts as a digital wallet, enabling users to store, send, and receive Ethereum and tokens. It also serves as a bridge between web applications and the blockchain, allowing users to seamlessly interact with decentralized applications (dapps).
One of the key features of Metamask is its ability to store private keys securely. Private keys are encrypted and stored locally on the user’s device, eliminating the need to trust a centralized third-party with the security of funds.
Metamask also provides a user-friendly interface for easily navigating the Ethereum ecosystem. Users can view their account balances, transaction history, and manage their digital assets with just a few clicks.
Additionally, Metamask includes a built-in Ethereum wallet, which allows users to connect to various decentralized exchanges (DEXs) and swap tokens directly within the application.
Overall, Metamask offers a convenient and secure way for users to interact with the Ethereum blockchain and participate in the rapidly growing world of decentralized finance (DeFi).
Why Add ETH to Metamask?
Metamask is a popular browser extension wallet that allows users to manage their Ethereum-based assets and interact with decentralized applications (dapps) on the Ethereum network. By adding ETH to Metamask, users gain the ability to:
1. Access and Manage Ethereum-based Assets
Adding ETH to Metamask enables users to store, send, and receive Ethereum, along with other Ethereum-based tokens. It provides a convenient and secure way to manage these digital assets within one account.
2. Interact with Decentralized Applications (dapps)
Metamask acts as a bridge between users and dapps on the Ethereum network. By adding ETH to Metamask, users can seamlessly interact with a wide range of dapps, including decentralized exchanges, lending platforms, collectible marketplaces, and more.
With ETH in their Metamask wallet, users can participate in token sales, stake tokens on various platforms, and engage in any other activity that requires Ethereum as the native currency of the Ethereum network.
Adding ETH to Metamask provides users with the flexibility and convenience to manage their Ethereum-based assets and participate in the growing ecosystem of decentralized applications on the Ethereum network.
The Benefits of Having Ethereum in Your Wallet

Having Ethereum in your wallet can bring you a range of benefits that can enhance your financial opportunities and provide you with greater security and flexibility. Here are some of the main benefits of having Ethereum in your wallet:
1. Investment Potential
Ethereum is not just a digital currency, it is also a platform that allows for the creation of decentralized applications and smart contracts. This means that by holding Ethereum, you have the potential to participate in a wide range of projects and investments within the Ethereum ecosystem. From decentralized finance (DeFi) to non-fungible tokens (NFTs), the possibilities are vast.
2. Diversification
Holding Ethereum in your wallet allows you to diversify your cryptocurrency portfolio. While Bitcoin may be the most well-known cryptocurrency, Ethereum has its own unique features and use cases. By holding both Bitcoin and Ethereum, you can spread your risk and take advantage of the different opportunities each cryptocurrency offers.
Furthermore, Ethereum itself is a diverse ecosystem with numerous tokens and projects built on top of its blockchain. By having Ethereum in your wallet, you can easily join various projects and participate in different token sales and airdrops.
3. Access to Decentralized Finance (DeFi)
Ethereum is the foundation of the rapidly growing decentralized finance (DeFi) space. By having Ethereum in your wallet, you can easily participate in various DeFi applications, such as lending, borrowing, yield farming, and decentralized exchanges. These applications offer opportunities for earning passive income, accessing loans without traditional intermediaries, and gaining exposure to alternative investment strategies.
4. Security and Control
Having Ethereum in your wallet gives you full control over your funds. Unlike holding funds on centralized exchanges or custodial wallets, where you rely on third parties to secure your assets, having Ethereum in your own wallet ensures that you have sole access to your private keys. This provides you with a higher level of security and protection against hacks and theft.
Additionally, by using decentralized wallets like Metamask, you can interact with the Ethereum blockchain directly, without relying on intermediaries. This decentralized nature ensures that your transactions are resistant to censorship and provides you with greater privacy.
In summary, having Ethereum in your wallet opens up a world of possibilities in the cryptocurrency and blockchain space. With investment potential, diversification, access to DeFi, and increased security and control, Ethereum can be a valuable asset in your digital wallet.
How to Add ETH to Metamask

Metamask is a popular cryptocurrency wallet that allows users to securely store and manage their Ethereum assets. If you want to add ETH to your Metamask wallet, follow the step-by-step guide below:
Step 1: Install and Set Up Metamask
If you haven’t done so already, start by installing the Metamask extension on your preferred web browser. Once installed, create a new wallet or import an existing one by following the on-screen instructions. Make sure to securely store your wallet’s seed phrase as it is the key to accessing your funds.
Step 2: Get the Ethereum Address
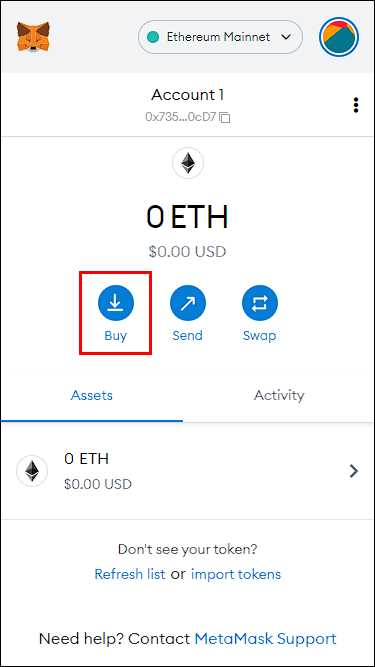
After setting up your Metamask wallet, you will be assigned a unique Ethereum address. This address is like your digital wallet’s public key, and it is where you will receive ETH. To find your Ethereum address, click on the Metamask extension icon in your browser’s toolbar, then click on your account name and select “Copy Address to Clipboard.”
Step 3: Purchase ETH
Now that you have your Ethereum address, you can purchase ETH from a reputable exchange or platform. Ensure that the exchange or platform supports withdrawals to external wallets like Metamask. Follow their instructions to complete the purchase and withdrawal process.
Step 4: Add ETH to Metamask
Once you have purchased ETH, you need to send it to your Metamask wallet. Go to the wallet or exchange platform where you bought the ETH, and initiate a withdrawal. Paste your Metamask Ethereum address into the withdrawal form and enter the amount of ETH you want to transfer. Double-check that the address is correct to avoid any potential loss of funds.
Approve the withdrawal on the exchange or wallet platform, and wait for the transaction to be confirmed on the Ethereum network. The transaction confirmation time may vary depending on network congestion.
Step 5: Verify the ETH Balance
Once the transaction is confirmed, you can check your Metamask wallet to verify that the ETH has been successfully added. Click on the Metamask extension icon, then click on your account name to view your wallet balance. Ensure that the correct amount of ETH is displayed.
Congratulations! You have successfully added ETH to your Metamask wallet. You can now use your ETH for various purposes, such as sending or receiving funds, participating in decentralized finance (DeFi) projects, or trading on decentralized exchanges.
A Step-by-Step Guide on Adding Ethereum to Your Wallet
Adding cryptocurrency to your wallet is an essential step in participating in the Ethereum ecosystem. This guide will walk you through the process of adding Ethereum (ETH) to your wallet using the Metamask browser extension.
Step 1: Install the Metamask Extension
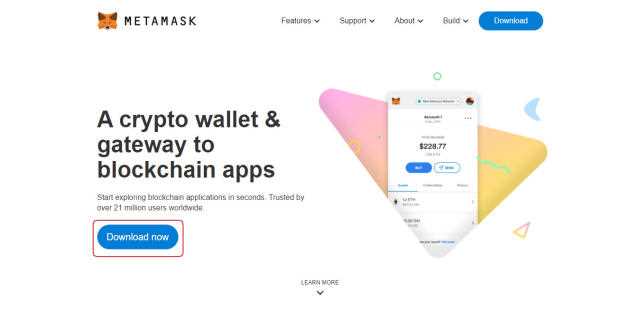
First, you need to install the Metamask browser extension. Go to the Metamask website (https://metamask.io/) and follow the instructions to download and install the extension for your preferred browser.
Step 2: Create or Import Your Wallet
Once you have the Metamask extension installed, open it and click on the “Get Started” button. You will be prompted to create a new wallet or import an existing one. Choose the option that suits you best and follow the instructions to set up your wallet.
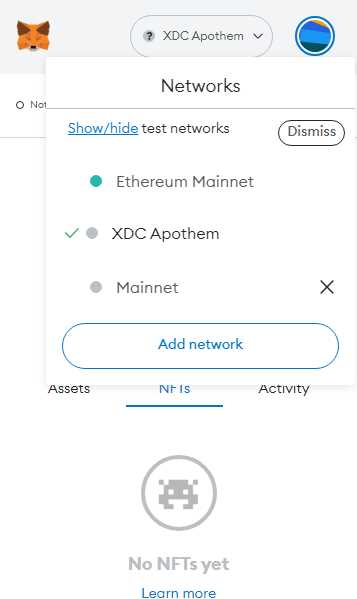
Step 3: Connect to the Ethereum Network
After setting up your wallet, click on the Metamask extension icon in your browser and login to your wallet. Once logged in, ensure that you are connected to the Ethereum network. You can do this by selecting the appropriate network from the network dropdown menu in Metamask.
Step 4: Add Ethereum to Your Wallet
Now that your wallet is set up and connected to the Ethereum network, it’s time to add Ethereum to your wallet. There are a few ways you can do this:
| Method | Description |
|---|---|
| Method 1: Purchase ETH | Visit a reputable cryptocurrency exchange and purchase Ethereum using your preferred payment method. Once you have purchased ETH, withdraw it to your wallet address provided by Metamask. |
| Method 2: Receive ETH from Another Wallet | If you already have Ethereum in another wallet, you can send it to your Metamask wallet. Obtain your Metamask wallet address and initiate a transfer from your existing wallet to your Metamask wallet address. |
| Method 3: Earn ETH through Mining or Faucets | If you have the necessary hardware and technical knowledge, you can mine Ethereum or participate in faucet programs to earn ETH directly into your Metamask wallet. |
Regardless of the method you choose, ensure that you carefully follow the instructions and double-check the receiving wallet address to avoid any errors or loss of funds.
Congratulations! You have successfully added Ethereum to your wallet using the Metamask browser extension. You can now use your Ethereum to participate in decentralized applications, trade, or store it as an investment.
What is Metamask?
Metamask is a cryptocurrency wallet that allows users to interact with the Ethereum blockchain. It is a browser extension available for Google Chrome, Mozilla Firefox, and Brave browsers.
How do I add ETH to Metamask?
To add ETH to your Metamask wallet, you need to first have some ETH in your exchange or another wallet. Then, within Metamask, click on the account icon and choose “Add account.” From there, select “Import with seed phrase,” enter your seed phrase, and follow the prompts to complete the process.
Can I add multiple ETH accounts to Metamask?
Yes, you can add multiple ETH accounts to Metamask. To do this, click on the account icon in the top right corner of the Metamask extension and choose “Add account.” From there, you can either create a new account or import an existing one.
How can I send ETH from Metamask to another wallet?
To send ETH from Metamask to another wallet, click on the “Send” button in the Metamask extension. Enter the recipient’s address, the amount of ETH you want to send, and click “Next.” Review the transaction details and click “Confirm” to complete the transaction.
What is the gas fee when sending ETH with Metamask?
The gas fee when sending ETH with Metamask varies depending on network congestion and the desired transaction speed. Metamask provides an estimation of the gas fee before confirming the transaction, so you can adjust it according to your preferences.