
Welcome to the world of decentralized finance! If you’re ready to take your crypto journey to the next level and explore the exciting opportunities offered by the Avalanche (Avax) network, you’ve come to the right place. In this step-by-step guide, we’ll walk you through the process of using Metamask to unleash the full potential of Avax.
Metamask is a popular browser extension that acts as a digital wallet and gateway to the decentralized web. It allows you to securely store and manage your Avax and other cryptocurrencies, as well as interact with decentralized applications (dApps) built on the Avax network. By using Metamask, you’ll have the power to participate in token swaps, yield farming, and other DeFi activities seamlessly.
Before we dive into the details, make sure you have Metamask installed and set up in your preferred web browser. Once you’re ready, let’s get started on our journey to unlock the power of Avax!
Getting Started with MetaMask
MetaMask is a popular browser extension that allows you to access decentralized applications (dApps) on the Ethereum network and other supported blockchains. It serves as a cryptocurrency wallet to securely store and manage your digital assets.
To get started with MetaMask, follow these steps:
- Install MetaMask: Go to the MetaMask website and download the extension for your preferred browser, such as Chrome, Firefox, or Brave.
- Create a Wallet: Once installed, open MetaMask and click “Create a Wallet” to set up a new wallet. Follow the instructions to create a strong password and back up your seed phrase in a safe place.
- Connect to a Network: After creating your wallet, you need to connect to a blockchain network. For the purposes of using Avax, select the Avalanche network from the dropdown menu in MetaMask.
- Import an Existing Wallet (Optional): If you already have an existing wallet, you can import it into MetaMask. Click on the MetaMask icon in your browser, click “Import Wallet,” and follow the prompts to import your wallet using the seed phrase or private key.
- Add Funds to Your Wallet: To use Avax or any other cryptocurrency, you need to have funds in your MetaMask wallet. You can purchase cryptocurrency on an exchange or receive it from someone else by providing them with your wallet address.
- Access Avax dApps: With MetaMask set up and funds in your wallet, you can now access Avax dApps and unlock the power of the Avalanche network. Simply navigate to the desired dApp in your browser, and MetaMask will automatically detect it and prompt you to connect.
Remember to always exercise caution when using MetaMask and interacting with dApps. Ensure you are on the correct website or platform and do not give out your seed phrase or private key to anyone.
By following these steps, you can get started with MetaMask and explore the exciting world of Avax and decentralized finance (DeFi) applications.
How to Install Metamask and Set Up Your Account
Metamask is a browser extension that allows you to interact with the Avalanche network and access its decentralized applications (dapps). Follow the step-by-step guide below to install Metamask and set up your account.
Step 1: Install Metamask
To install Metamask, open your preferred web browser and go to the official website at https://metamask.io/. Click on the “Get Chrome Extension” button if you are using Google Chrome, or the respective button for your browser. Once the extension is installed, you will see the Metamask fox icon added to your browser’s toolbar.
Step 2: Create a New Wallet
After installing Metamask, click on the fox icon in your browser’s toolbar. A new tab will open, and you will see the Metamask logo in the center of the page. Click on the “Get Started” button to create a new wallet.
Read and accept the terms of use, then click on the “Create a Wallet” button. Set a strong password for your wallet and click “Create”. Metamask will generate a unique 12-word recovery phrase to secure your account. Make sure to write it down and keep it in a safe place. Click on “Next” once you have securely stored your recovery phrase.
Confirm your recovery phrase by selecting the words in the order they were shown to you. Once done, click on “Confirm” to proceed.
Step 3: Connect to Avalanche Network
After confirming your recovery phrase, you will be prompted to choose a network. Click on the dropdown menu at the top of the Metamask extension and select “Custom RPC”.
In the “New RPC URL” field, enter the Avalanche network’s RPC URL. For the Avalanche Mainnet, enter https://api.avax.network/ext/bc/C/rpc. For the Avalanche Fuji Testnet, enter https://api.avax-test.network/ext/bc/C/rpc. Once done, click on “Save” to connect to the Avalanche network.
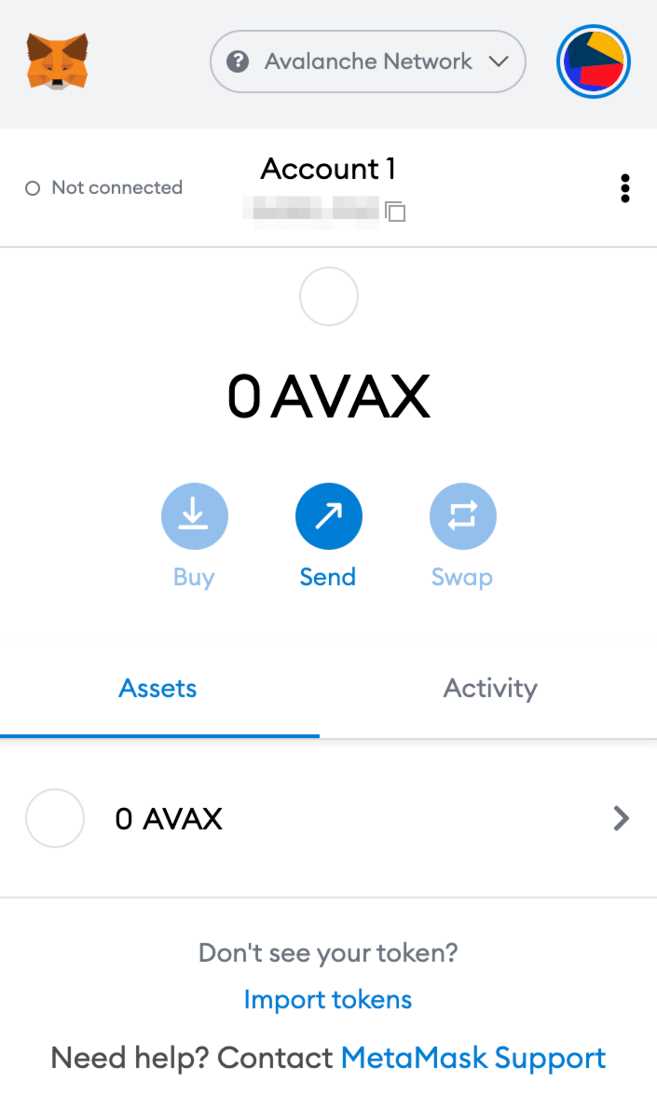
After connecting to the Avalanche network, you will see your wallet’s address and balance on the Metamask extension. Congratulations! You have successfully installed Metamask and set up your account.
Connecting to the Avalanche Network
To start using Metamask with the Avalanche Network, you will need to follow these steps:
Step 1: Install the Metamask extension
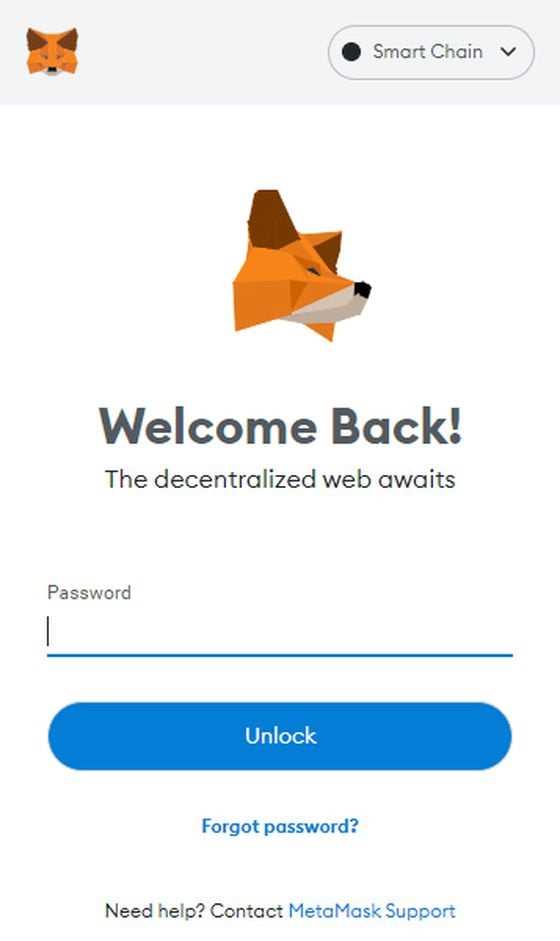
Before you can connect to the Avalanche Network, you need to have the Metamask extension installed on your web browser. Go to the Metamask website, download the extension, and install it on your browser. Once installed, click on the Metamask icon in your browser toolbar to open it.
Step 2: Create or import a wallet
If you already have a wallet set up on Metamask, you can skip this step. Otherwise, click on the “Get Started” button and follow the instructions to create a new wallet. Make sure to save your seed phrase in a safe place, as this will be used to restore your wallet if needed.
Note: If you already have an existing wallet that you would like to use with Metamask, you can import it by clicking on “Import Wallet” and entering your seed phrase.
Step 3: Connect to the Avalanche Network
In the Metamask extension, click on the network selection dropdown, and then click on “Custom RPC” at the bottom. In the “New RPC URL” field, enter the Avalanche Network’s RPC endpoint: https://api.avax.network/ext/bc/C/rpc
In the “Chain ID” field, enter 43114. Set the currency to “AVAX” and click on “Save” to save your changes.
Step 4: Connect your wallet to Avalanche-supported applications
Now that you are connected to the Avalanche Network, you can start using your wallet with Avalanche-supported applications. When prompted by a dApp, make sure to connect your wallet by clicking on the “Connect Wallet” button and selecting the Metamask option.
With Metamask and the Avalanche Network, you can now unlock the power of AVAX and participate in the exciting world of decentralized finance on Avalanche.
How to Add the Avalanche Network to Metamask

In order to use the Avalanche network with Metamask, you’ll need to add it as a custom network. Follow the steps below to get started:
- Open the Metamask extension in your browser.
- Click on the network dropdown located at the top of the extension. By default, it may be set to Ethereum Mainnet.
- Scroll down and click on “Custom RPC”.
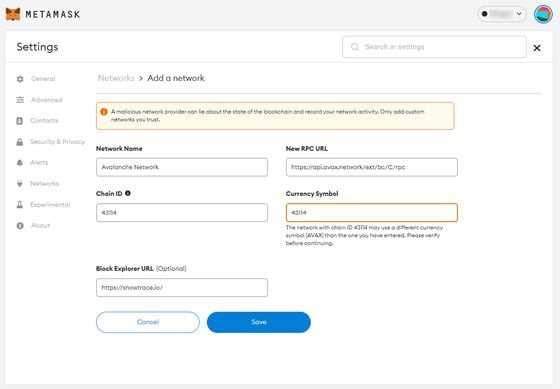
- In the “Network Name” field, enter a name for the network, such as “Avalanche”.
- In the “New RPC URL” field, enter the Avalanche network’s RPC URL. For the Avalanche Mainnet, you can use “https://api.avax.network/ext/bc/C/rpc”.
- In the “Chain ID” field, enter the Avalanche network’s Chain ID. For the Avalanche Mainnet, the Chain ID is 43114.
- For the “Currency Symbol” field, you can enter “AVAX” to have the Avalanche network displayed with its currency symbol.
- Click on “Save” to add the Avalanche network to Metamask.
Once you’ve added the Avalanche network to Metamask, you can select it from the network dropdown to access and transact on the Avalanche network.
Unlocking the Power of Avax
If you want to truly unleash the potential of the Avalanche network, utilizing Avax is a crucial step. Avax is the native cryptocurrency of the Avalanche platform and serves as the fuel for transactions and interactions within the network. By understanding how to use Metamask to manage your Avax holdings, you can tap into the power and possibilities that Avax offers.
Step 1: Install Metamask
The first step in unlocking the power of Avax is to install Metamask, a popular and user-friendly crypto wallet. Download and install the Metamask extension for your preferred web browser and create a new wallet if you don’t have one already.
Step 2: Add the Avalanche Network to Metamask
Once you have Metamask installed, you need to add the Avalanche network to your wallet. Open Metamask and click on the network selection dropdown. Choose “Custom RPC” and enter the Avalanche network details, including the Network Name, RPC URL, Chain ID, Symbol, and Block Explorer URL. Save the changes and switch to the Avalanche network.
Step 3: Transfer Avax Tokens to your Metamask Wallet

Now that you are on the Avalanche network, it’s time to transfer Avax tokens to your Metamask wallet. Obtain Avax tokens from a reputable exchange or from another wallet. Open Metamask and click on the “Assets” tab, then select “Add Token.” Choose “Custom Token” and enter the Avax token contract address. Confirm the addition of Avax tokens to your Metamask wallet.
Step 4: Use Avax to Explore the Avalanche Ecosystem
With Avax tokens in your Metamask wallet, you can now unlock the power of Avax across the Avalanche ecosystem. Avax can be used to participate in decentralized finance (DeFi) protocols, trade on decentralized exchanges (DEXs), provide liquidity to liquidity pools, and more. Explore the decentralized applications (dApps) and opportunities available on Avalanche and leverage the power of Avax to maximize your potential.
- Participate in yield farming and earn passive income by staking Avax in liquidity pools.
- Trade Avax for other tokens on decentralized exchanges like Pangolin or Trader Joe.
- Access a wide range of decentralized finance protocols, such as lending and borrowing platforms.
- Investigate and support innovative projects and ideas within the Avalanche ecosystem through decentralized funding and governance mechanisms.
- Engage in peer-to-peer transactions and interact with other users within the Avalanche network using Avax as the medium of exchange.
By unlocking the power of Avax through Metamask, you can take advantage of the numerous opportunities and possibilities that the Avalanche network offers. Explore, experiment, and discover the potential of Avax and the decentralized future it represents.
How to Transfer and Receive Avax Tokens
Once you have set up your Metamask wallet and acquired Avax tokens, you can easily transfer and receive them using the following steps:
- Open your Metamask wallet and ensure that you are connected to the Avalanche network.
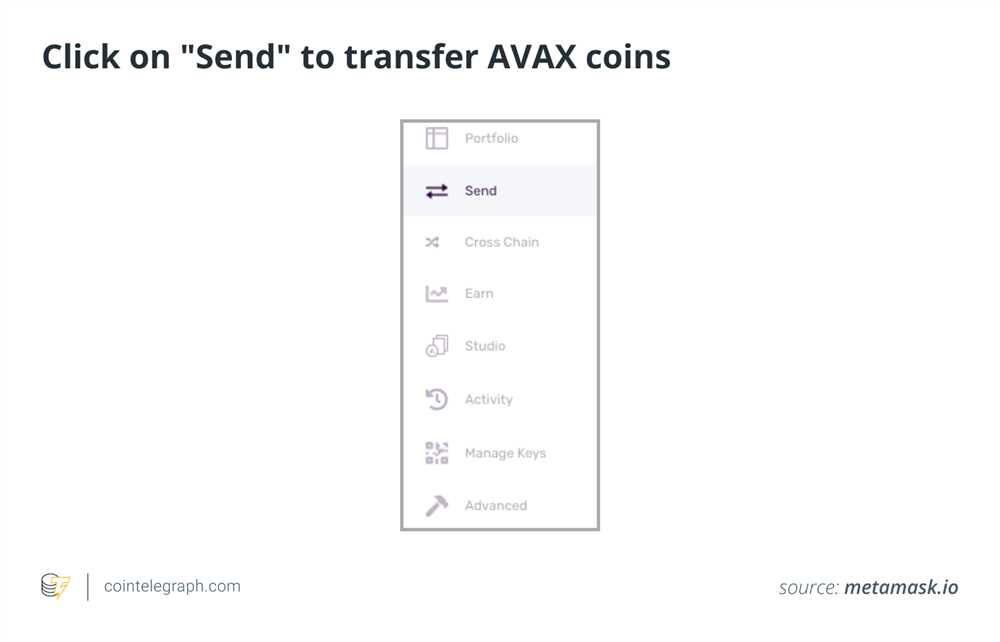
- On the Metamask dashboard, click on the “Send” button.
- Enter the recipient’s address in the “Recipient Address” field. Make sure to double-check the address to avoid any mistakes.
- Specify the amount of Avax tokens you want to transfer in the “Amount” field. You can also choose the denomination (AVAX, nAVAX, etc.) from the dropdown menu.
- If desired, you can add a description or memo in the “Description” field to provide additional information about the transaction.
- Review the transaction details and fees provided by Metamask.
- Click on the “Next” button.
- Confirm the transaction by clicking on the “Confirm” button. Metamask may prompt you to sign the transaction using your wallet password or biometric authentication.
- Wait for the transaction to be processed. You can track its progress on Avalanche block explorers like Avascan or Blockchair.
- Once the transaction is confirmed, the Avax tokens will be transferred to the recipient’s address.
To receive Avax tokens from someone else, you need to provide them with your wallet address. Here’s how to find it:
- Open your Metamask wallet.
- On the Metamask dashboard, click on your wallet address located at the top of the screen. It should look like a string of alphanumeric characters.
- Click on the “Copy” button to copy your wallet address to the clipboard.
- Share your wallet address with the person who wants to send you Avax tokens.
Remember to always double-check wallet addresses before initiating a transaction to avoid sending tokens to the wrong recipient. Additionally, be aware of the transaction fees associated with transferring Avax tokens, as they can vary depending on network congestion and other factors.
What is Metamask and how does it work?
Metamask is a digital wallet that allows users to manage their cryptocurrency assets and interact with decentralized applications (dApps) on the Ethereum network. It functions as a browser extension and connects users to the Ethereum blockchain, enabling them to send, receive, and store tokens securely.
Can I use Metamask with Avalanche (Avax)?
Yes, you can use Metamask with Avalanche (Avax) by simply adding the Avalanche network to your Metamask wallet. This allows you to interact with Avax dApps and manage your Avax tokens directly from Metamask.