
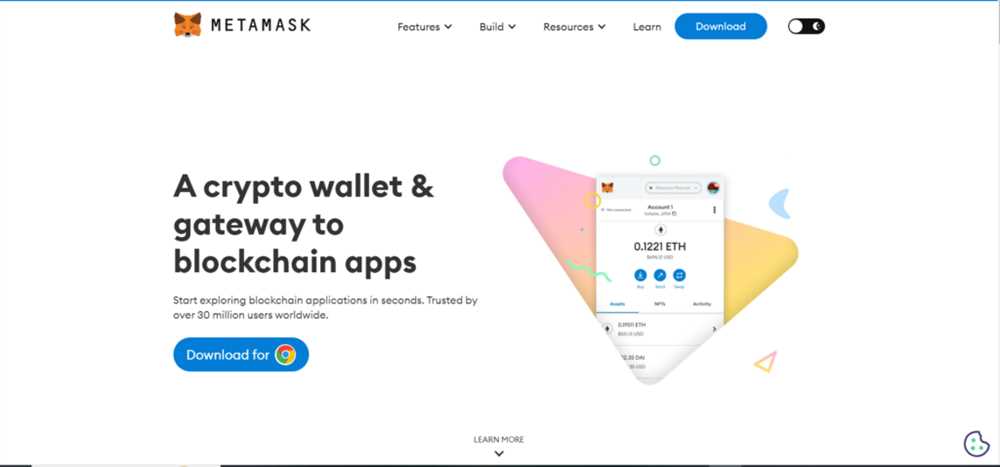
Welcome to the complete guide to Metamask, the popular cryptocurrency wallet that provides a secure and convenient way to manage your digital assets. Whether you are new to the world of cryptocurrencies or an experienced user, this guide will walk you through all the essential steps of using and securing your Metamask wallet.
Metamask is a browser extension that allows users to interact with Ethereum-based decentralized applications (dApps) directly from their web browsers. With Metamask, you can securely store, send, and receive Ether (ETH) and ERC-20 tokens. It also acts as a bridge between the traditional internet and the Ethereum blockchain, making it easier for users to navigate the decentralized ecosystem.
In this guide, we will cover everything from setting up your Metamask wallet to managing your assets, connecting with dApps, and implementing security best practices. Whether you are using Metamask for online shopping, participating in decentralized finance (DeFi) protocols, or simply holding your digital assets, this guide will provide you with the knowledge and tools to make the most out of your Metamask experience.
So, let’s dive in and explore the world of Metamask, and learn how to harness the power of decentralized finance while keeping your assets safe and secure. Whether you want to explore the vast array of Ethereum dApps or simply store your crypto assets in a reliable wallet, Metamask has got you covered!
What is Metamask?
Metamask is a popular cryptocurrency wallet and browser extension that allows users to interact with the Ethereum blockchain. It is a digital wallet that enables users to manage their Ethereum funds, view their account balances, send and receive cryptocurrencies, and interact with decentralized applications (DApps) built on Ethereum.
Metamask acts as a bridge between your web browser and the Ethereum blockchain, providing a convenient way to access blockchain-based services and applications without the need to run a full Ethereum node. It simplifies the user experience and allows anyone with a web browser to easily participate in the decentralized web.
When you install Metamask, it adds a secure wallet to your browser, which allows you to store and manage your digital assets. It also provides you with a unique Ethereum address, which is used to send and receive Ether (ETH) and tokens. This decentralized wallet gives you full control over your funds and eliminates the need to trust a centralized authority.
Main features of Metamask:
- Wallet Management: Metamask allows you to create multiple wallets, import existing wallets, and securely store private keys.
- Account Balances: You can view your account balances for Ether and tokens directly within the extension.
- Transaction Management: Metamask lets you send and receive Ether and tokens, as well as track the status of your transactions.
- Smart Contract Interaction: It enables you to interact with smart contracts and decentralized applications (DApps) directly from your browser.
- Network Management: You can switch between different Ethereum networks, such as the Mainnet, Testnet, and custom networks.
- Security and Privacy: Metamask implements strong security measures, including encryption of private keys and password protection, to ensure the safety of your funds.
Metamask has gained popularity among cryptocurrency enthusiasts and developers due to its user-friendly interface, wide range of features, and seamless integration with various Ethereum-based services and applications. Whether you are a beginner or an experienced user, Metamask provides a simple and secure way to navigate the world of decentralized finance and blockchain technology.
How does Metamask work?
Metamask is a browser extension that allows users to interact with the Ethereum blockchain. It works as a wallet, enabling users to securely store and manage their digital assets.
When you install Metamask, it generates a private key for you. This private key is encrypted and stored locally on your device. It is protected by a password that you choose during the setup process.
When you want to interact with a decentralized application (dApp) on the Ethereum network, Metamask acts as the bridge between your browser and the blockchain. It injects a JavaScript library called “web3” into the dApp’s code, allowing you to interact seamlessly with the blockchain.
When you initiate a transaction using Metamask, it signs the transaction with your private key locally on your device. The signed transaction is then broadcasted to the Ethereum network, where it gets validated and included in a block.
Metamask also allows you to switch between different Ethereum networks, like the mainnet, testnets, and custom networks. This flexibility allows developers to test and deploy their dApps on different networks without the need for additional wallets or accounts.
In summary, Metamask works by providing a secure wallet and acting as a bridge between your browser and the Ethereum blockchain. It enables users to interact with dApps and manage their digital assets seamlessly.
Benefits of using Metamask
Metamask offers several advantages that make it a popular choice among cryptocurrency users. Here are some of the benefits of using Metamask:
1. Convenient and user-friendly
Metamask provides a simple and intuitive user interface, making it easy for both beginners and advanced users to manage their digital assets. With Metamask, you can easily access your wallet and interact with decentralized applications (dApps) directly from your web browser, without the need for additional software or hardware wallets.
2. Enhanced security
Securing your cryptocurrencies is essential, and Metamask offers advanced security features to protect your funds. It stores your private keys locally on your device, ensuring that only you have control over your assets. Additionally, Metamask enables you to set up a password and require a confirmation for each transaction, adding an extra layer of security to your wallet.
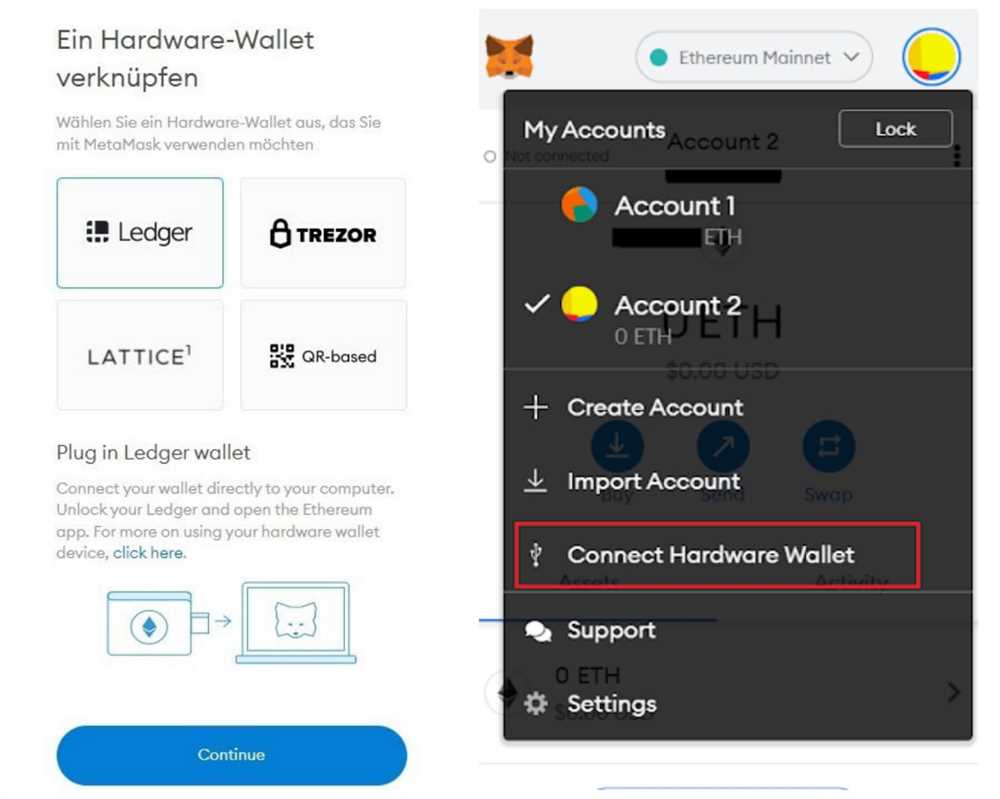
Furthermore, Metamask integrates with hardware wallets like Trezor and Ledger, providing even greater security for your digital assets.
3. Access to a vast ecosystem of dApps
Metamask allows you to seamlessly connect with decentralized applications built on blockchain networks like Ethereum. By using Metamask, you can explore and use various decentralized exchanges, lending platforms, NFT marketplaces, and more. This opens up a world of possibilities for interacting with the decentralized finance (DeFi) ecosystem and participating in the emerging blockchain economy.
You can easily swap tokens, participate in token sales, or lend your assets directly from the Metamask wallet, without the need for additional accounts or platforms.
In conclusion, Metamask provides a user-friendly interface, enhanced security measures, and access to a wide range of decentralized applications. It is a powerful tool that allows you to manage your crypto assets and participate in the growing blockchain ecosystem with ease. Whether you are a beginner or an experienced cryptocurrency user, Metamask offers numerous benefits and is a valuable addition to your digital wallet toolkit.
Setting Up Metamask for the First Time
Metamask is a popular cryptocurrency wallet that allows users to securely manage their digital assets. If you’re new to Metamask and want to get started, follow these steps to set up your wallet for the first time:
Step 1: Installing the Metamask Extension
First, open your preferred web browser and search for the Metamask extension. Click on the official Metamask website and follow the instructions to install the extension. Once installed, you’ll see the Metamask fox icon in your browser toolbar.
Step 2: Creating a New Wallet
After installing the extension, click on the Metamask fox icon in your browser toolbar. A new window will pop up, click on the “Get Started” button to begin creating your wallet. Follow the prompts to set a strong password and read and accept the terms of use.
Step 3: Backing Up Your Wallet
Once your wallet is created, Metamask will display a secret backup phrase consisting of 12 random words. It is extremely important to write down this backup phrase and keep it safe. This backup phrase can be used to restore access to your wallet in case you forget your password or lose access to your device.
Step 4: Confirming Your Backup Phrase
To ensure you have saved your backup phrase correctly, Metamask will ask you to confirm certain words from your backup phrase. Select the correct words in the right order and click on the “Confirm” button to proceed.
Step 5: Setting Up a Password and Security
Next, you’ll be prompted to set up a password to secure your wallet. It is important to choose a strong and unique password that is not easy to guess. You can also enable additional security features such as biometric authentication if your device supports it.
Step 6: Connecting to a Network
Once your wallet is set up, you’ll need to connect it to a blockchain network. Metamask supports various networks, including Ethereum mainnet and test networks like Ropsten and Rinkeby. Choose the network you want to connect to from the dropdown menu in the top left corner of the Metamask window.
By following these steps, you can easily set up Metamask for the first time and start managing your cryptocurrency securely.
Installing the Metamask Browser Extension
The Metamask browser extension is an essential tool for accessing and managing your cryptocurrency wallet. In order to begin using Metamask, you will need to install the extension on your preferred web browser. Follow these steps to install Metamask:
Step 1: Choose Your Web Browser
Metamask is compatible with several popular web browsers, including Google Chrome, Mozilla Firefox, Brave, and Microsoft Edge. Choose the web browser you prefer and open the browser’s extension store or marketplace.
Step 2: Search for Metamask
In the extension store or marketplace, search for “Metamask” using the search bar. Click on the Metamask extension from the search results.
Step 3: Add to Browser
Once you have selected the Metamask extension, click on the “Add to [Browser Name]” button to initiate the installation process.
Some browsers may require you to confirm the installation by clicking on an additional prompt or pop-up. Follow the on-screen instructions to continue with the installation.
Step 4: Create a New Account or Import an Existing One

After the installation is complete, a new tab or window will open with the Metamask welcome screen. Here, you will have the option to create a new wallet or import an existing one using a seed phrase or private key.
If you are new to Metamask, click on the “Create a Wallet” option and follow the prompts to set up a new account. If you already have a Metamask account and want to import it, click on the “Import Wallet” option and enter your seed phrase or private key.
Step 5: Set Password and Backup Wallet
Once your wallet is set up or imported, you will be prompted to set a password to secure your account. Choose a strong password and confirm it when prompted. Additionally, it is highly recommended to back up your wallet by writing down the seed phrase provided by Metamask. Store this backup phrase in a safe place that is not accessible online.
Congratulations! You have successfully installed the Metamask browser extension and set up your cryptocurrency wallet. You can now use Metamask to send and receive cryptocurrencies, interact with decentralized applications (dApps), and manage your digital assets securely.
Creating a New Wallet
Before you can start using MetaMask, you’ll first need to create a new wallet. Follow these steps to get started:
Step 1: Install MetaMask Extension
The first step is to install the MetaMask extension in your preferred web browser. MetaMask is available for Chrome, Firefox, Brave, and Edge. Simply search for “MetaMask” in your browser’s extension marketplace and click on the installation button.
Step 2: Launch MetaMask and Set Up a New Wallet
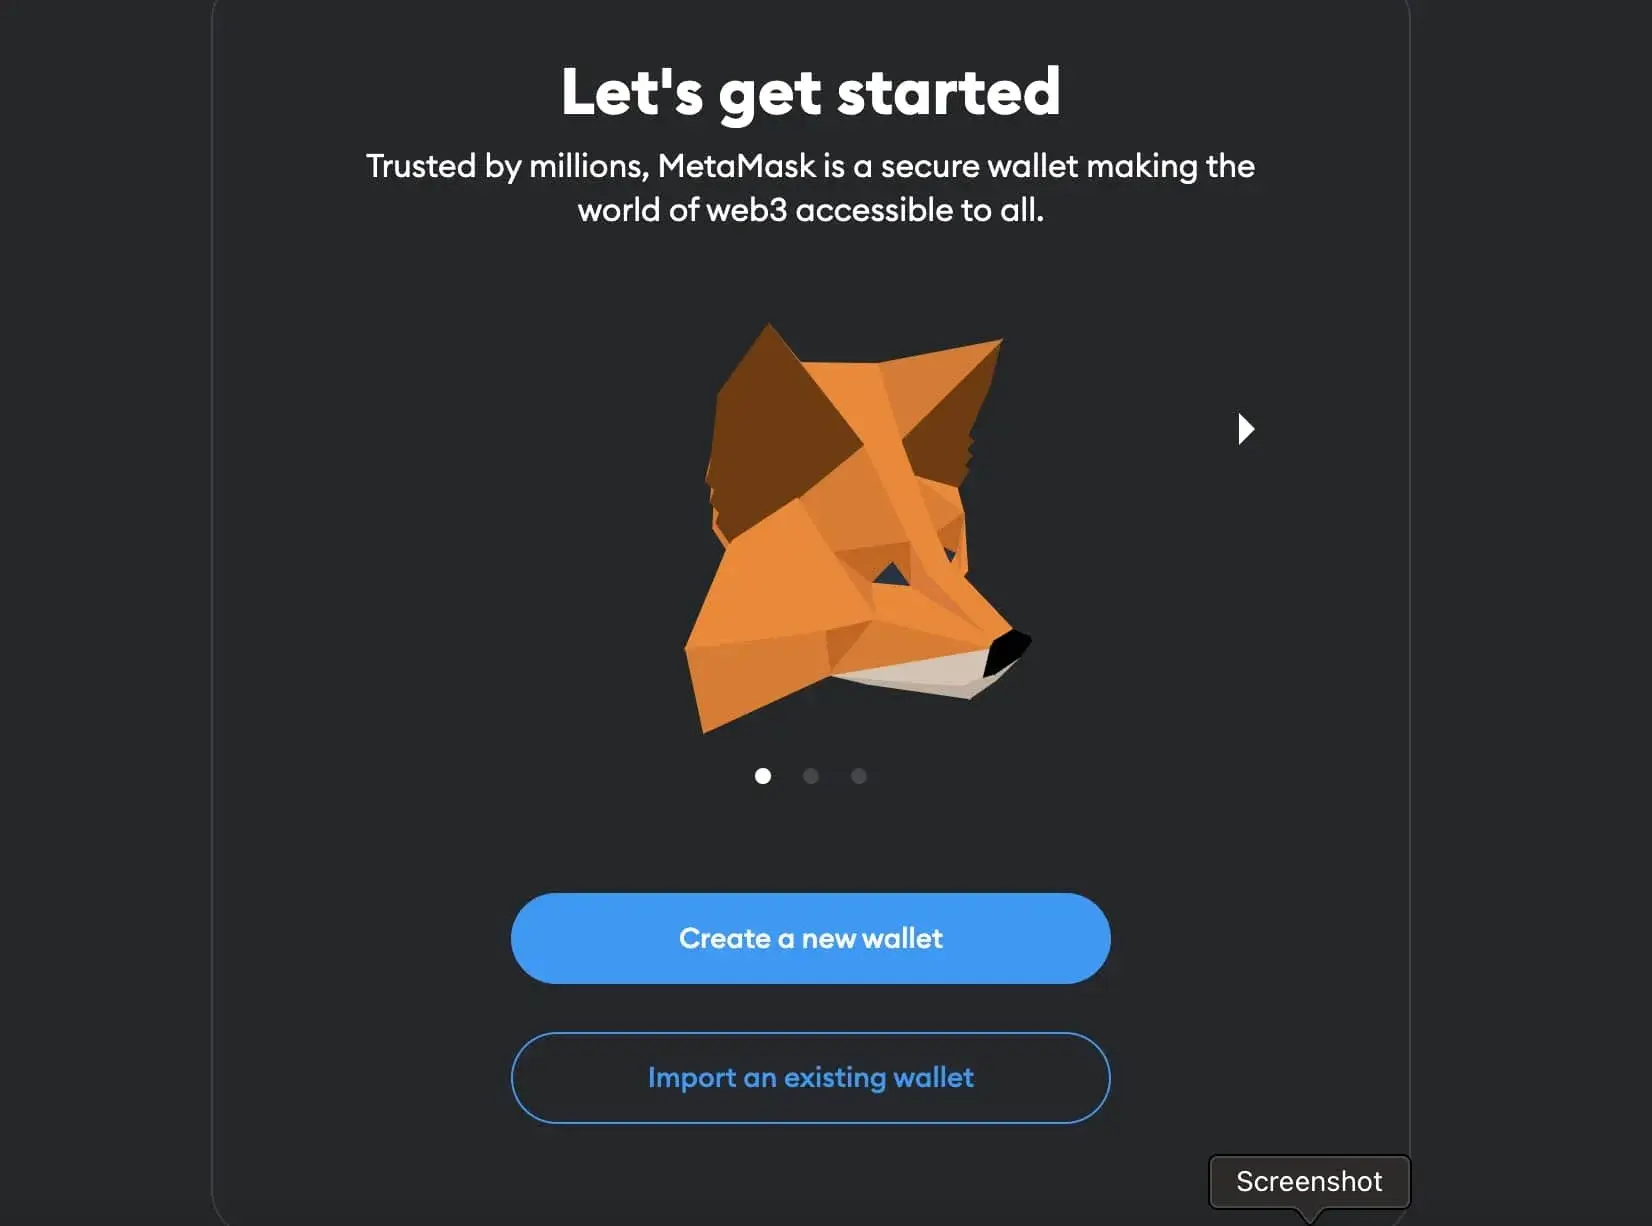
Once the extension is installed, you can launch MetaMask by clicking on the MetaMask icon in your browser toolbar. A welcome screen will appear, prompting you to get started.
Click on the “Create a Wallet” button to begin the setup process. You will be asked to set a password for your wallet. Make sure to choose a strong and secure password that you can remember. Once you’ve set your password, click on the “Create” button.
Step 3: Backup Your Seed Phrase
After creating your wallet, MetaMask will display a unique seed phrase consisting of 12 or 24 words. This phrase is used to back up and restore your wallet. It’s crucial that you securely store this seed phrase in a safe place, preferably offline or in hardware form. Do not share this seed phrase with anyone, as it can be used to access your funds.
Write down the seed phrase in the order presented and store it in a secure location. MetaMask allows you to verify the words in the correct order as an additional security measure.
Step 4: Access Your New Wallet
Congratulations! You have successfully created a new MetaMask wallet. To access your wallet in the future, click on the MetaMask icon in your browser toolbar, enter your password, and you’ll be able to manage your wallet and interact with decentralized applications.
Note: If you ever lose access to your wallet, you can restore it using the seed phrase you saved during the setup process. This is why it’s crucial to keep your seed phrase secure and backed up.
| Tips: |
|---|
| Make sure to use a strong password that includes a combination of uppercase and lowercase letters, numbers, and special characters. |
| Consider using a password manager to securely store your MetaMask password. |
| Never share your seed phrase with anyone, and avoid storing it digitally or in an easily accessible location. |
| Regularly update your MetaMask extension to ensure you have the latest security features and bug fixes. |
Importing an Existing Wallet
If you already have a cryptocurrency wallet and would like to import it into MetaMask, you can easily do so by following these steps:
- Open the MetaMask extension in your browser.
- Click on the menu icon (three horizontal lines) in the top-right corner of the extension and select “Import Account”.
- In the import window, select the type of wallet you want to import (e.g., MetaMask JSON File, Seed Phrase, or Private Key).
- If you choose to import using a MetaMask JSON File, click on the “Choose File” button and select the file from your computer.
- If you choose to import using a Seed Phrase or Private Key, enter the required information in the input field provided.
- Click “Import” to complete the process.
Once you have successfully imported your existing wallet, you can access your balances and transaction history within MetaMask. Remember to keep your wallet secure by enabling two-factor authentication and regularly updating your password. It is also advisable to keep a backup of your wallet’s private key or seed phrase in a safe and secure location.
What is Metamask?
Metamask is a cryptocurrency wallet that allows users to interact with decentralized applications (DApps) on the Ethereum blockchain. It also serves as a secure wallet for storing and managing Ether and ERC-20 tokens.
How do I install Metamask?
To install Metamask, you need to go to the official website and download the extension for your preferred web browser (Chrome, Firefox, or Brave). Once installed, you can create a new wallet or import an existing one using a recovery phrase.