
Welcome to our comprehensive guide on using the Rinkeby network with Metamask! If you’re new to the world of blockchain and Ethereum, you may have heard about the Rinkeby network as a test network for developers to experiment and test their smart contracts and decentralized applications (dApps) before deploying them on the main Ethereum network. In this guide, we’ll walk you through the steps to connect and interact with the Rinkeby network using Metamask, a popular Ethereum wallet and browser extension.
Before we dive into the details, let’s briefly talk about what the Rinkeby network is and why it’s important. The Rinkeby network is one of the test networks in the Ethereum ecosystem, specifically designed for developers to test and debug their smart contracts and dApps in a simulated environment. It closely resembles the main Ethereum network but without the real value of Ether. This makes it a perfect playground for developers to experiment without the risk of losing real funds.
Metamask, on the other hand, is a widely-used Ethereum wallet and browser extension that allows users to interact with decentralized applications (dApps) directly from their web browsers. It acts as a bridge between your web browser and the Ethereum blockchain, enabling you to securely manage your Ethereum accounts and execute transactions on various networks, including the Rinkeby network. With Metamask, you can easily switch between different Ethereum networks, create and import accounts, and interact with dApps seamlessly.
In this guide, we’ll cover the following topics:
- Installing and Setting up Metamask
- Creating or Importing an Ethereum Account
- Switching to the Rinkeby Network
- Obtaining Rinkeby Ether (testnet Ether)
- Interacting with the Rinkeby Network
- Resetting Metamask Settings (if needed)
By the end of this guide, you’ll have a solid understanding of how to use the Rinkeby network with Metamask and be ready to explore and test your own smart contracts and dApps in a safe and controlled environment. Let’s get started!
Understanding the Rinkeby Network

The Rinkeby network is a public Ethereum test network that is used for testing and development purposes. It is one of several test networks available, along with the Ropsten and Kovan networks. The Rinkeby network allows developers to deploy and test their smart contracts and DApps without using real Ether (ETH) or risking real funds.
Unlike the main Ethereum network, which uses real ETH for transactions and mining, the Rinkeby network uses test Ether, which is freely available from faucets. This test Ether has no value and can be freely obtained to conduct transactions and test applications on the network.
Why Use the Rinkeby Network?

Using the Rinkeby network is essential for developers who want to ensure that their smart contracts and DApps work correctly before deploying them on the mainnet. It allows developers to test and debug their code in a realistic environment without the risk of losing real funds.
Rinkeby is also widely used for testing DApps with a user interface. It allows developers to simulate real-world interactions and user experiences, which is crucial for identifying bugs and usability issues.
Connecting to the Rinkeby Network with MetaMask
To connect to the Rinkeby network using MetaMask, you first need to install the MetaMask browser extension and create a MetaMask wallet. Once you have configured your wallet, you can switch to the Rinkeby network by following these steps:
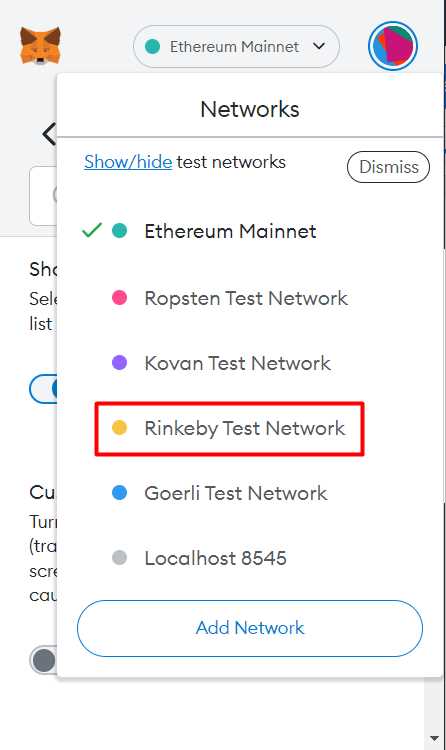
- Click on the MetaMask extension icon in your browser.
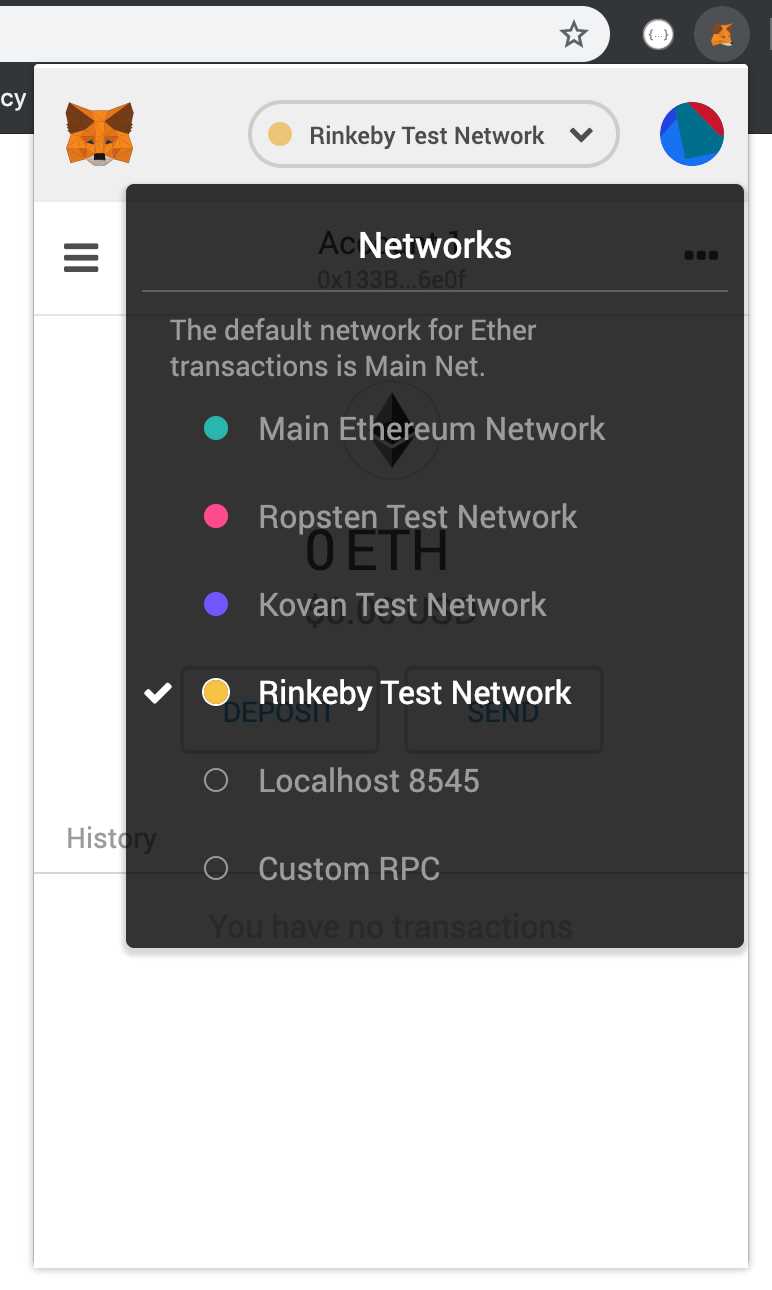
- Click on the network dropdown at the top of the MetaMask popup.
- Select “Rinkeby Test Network” from the list of available networks.
After selecting the Rinkeby network, MetaMask will automatically connect to it, and you will be able to interact with DApps and smart contracts on the Rinkeby network using your MetaMask wallet.
Remember to switch back to the main Ethereum network when you are done testing on Rinkeby to avoid any potential confusion or accidental transactions on the wrong network.
Important: The Rinkeby network is a test network, and its purpose is solely for testing and development. Any Ether or tokens obtained on the Rinkeby network have no real value and cannot be exchanged for real cryptocurrency.
It is important to exercise caution when using the Rinkeby network and ensure that you are using it for testing purposes only.
Setting Up Metamask for the Rinkeby Network
In order to interact with the Rinkeby network using Metamask, you will need to follow these steps:
| Step 1: | Install the Metamask extension in your web browser. |
| Step 2: | Once installed, click on the Metamask icon in your browser’s toolbar to open the extension. |
| Step 3: | If you already have a Metamask account, click on the account icon in the top-right corner of the Metamask pop-up and select “Import Account”. Enter your account’s seed phrase or private key to import it into Metamask. |
| Step 4: | If you don’t have a Metamask account, click on the account icon in the top-right corner of the Metamask pop-up and select “Create Account”. Follow the prompts to create a new account and set a password. |
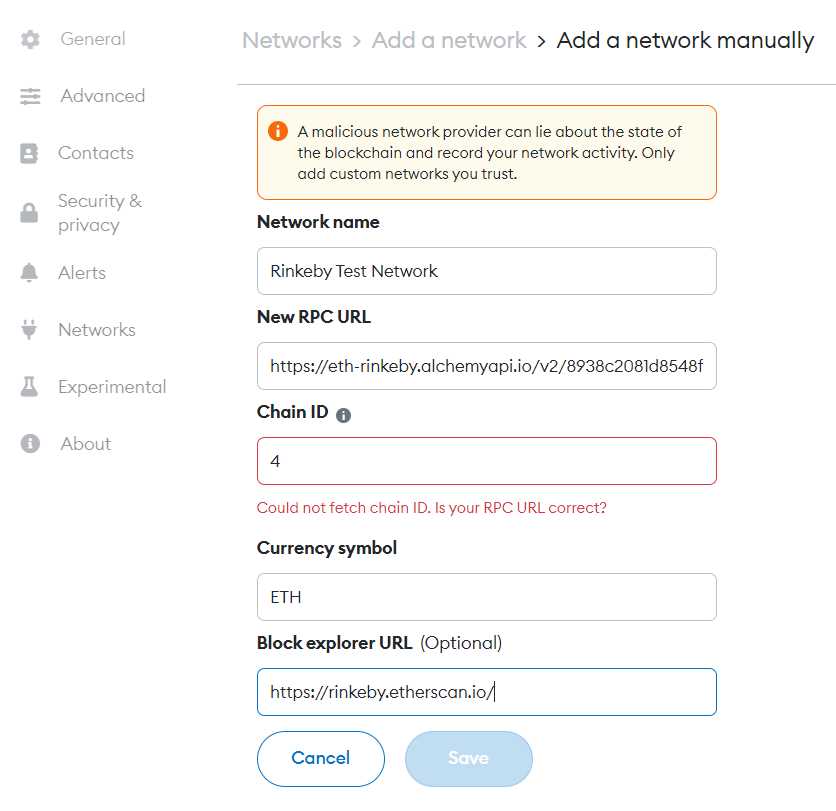
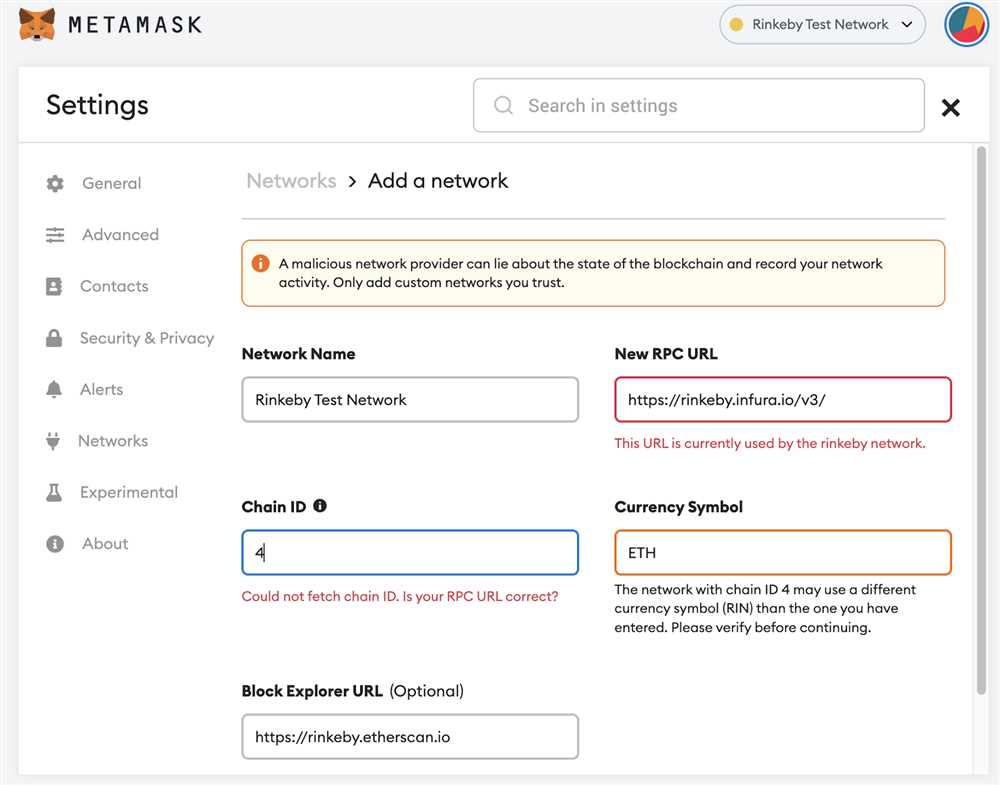
| Step 5: | Once you have an account in Metamask, click on the network dropdown at the top of the Metamask pop-up and select “Custom RPC”. |
| Step 6: | In the “New RPC URL” field, enter the Rinkeby network’s URL: https://rinkeby.infura.io/v3/YOUR_INFURA_API_KEY. Replace YOUR_INFURA_API_KEY with your own Infura API key, or use the sample key provided by Infura. |
| Step 7: | Click “Save” to save the network settings. |
| Step 8: | Your Metamask is now set up for the Rinkeby network. You can verify this by looking at the network dropdown, which should show “Rinkeby” as the active network. |
With Metamask configured for the Rinkeby network, you can now use it to send transactions, interact with smart contracts, and test your applications on the Rinkeby testnet.
Interacting with the Rinkeby Network through Metamask
Metamask is a popular browser extension that allows users to interact with the Ethereum blockchain. It provides a user-friendly interface for managing Ethereum accounts, sending transactions, and interacting with decentralized applications (dApps). In this guide, we will walk through the process of interacting with the Rinkeby test network using Metamask.
Step 1: Install and Set up Metamask
To get started, you will need to install the Metamask browser extension. It is available for Chrome, Firefox, and Brave browsers. Once installed, create a new Ethereum account or import an existing one.
Step 2: Switch to the Rinkeby Network
By default, Metamask is set to the Ethereum main network. To switch to the Rinkeby test network, click on the network selection dropdown at the top of the extension and select “Rinkeby Test Network”. This will update your Metamask interface to display information and transactions specific to the Rinkeby network.
Step 3: Obtain Rinkeby Ether
In order to interact with the Rinkeby network, you will need Rinkeby Ether (Rinkeby ETH). Rinkeby ETH is a test version of Ethereum’s native cryptocurrency, and it is used on the Rinkeby test network. To obtain Rinkeby ETH, you can use a faucet service like the Rinkeby Authenticated Faucet, where you will need to share a link to a social media post and then request test ETH. Once you have received Rinkeby ETH, it will be added to your Metamask account balance on the Rinkeby network.
Step 4: Interact with Rinkeby dApps
With Metamask set up and connected to the Rinkeby network, you can now start interacting with Rinkeby dApps. Simply navigate to a dApp that supports the Rinkeby network, and you will be able to connect your Metamask account to the dApp. This will allow you to perform various actions, such as making test transactions, interacting with smart contracts, and participating in decentralized finance (DeFi) protocols.
It’s important to note that any transactions or interactions you make on the Rinkeby network are not real Ethereum transactions and do not involve real funds. The Rinkeby network is used for testing and development purposes only. Always exercise caution and do not share any sensitive information or real financial assets on the Rinkeby network.
By following these steps, you can easily switch to and interact with the Rinkeby test network using Metamask. This allows you to test your dApps and interact with the Ethereum ecosystem in a safe and controlled environment.
How do I connect Metamask to the Rinkeby network?
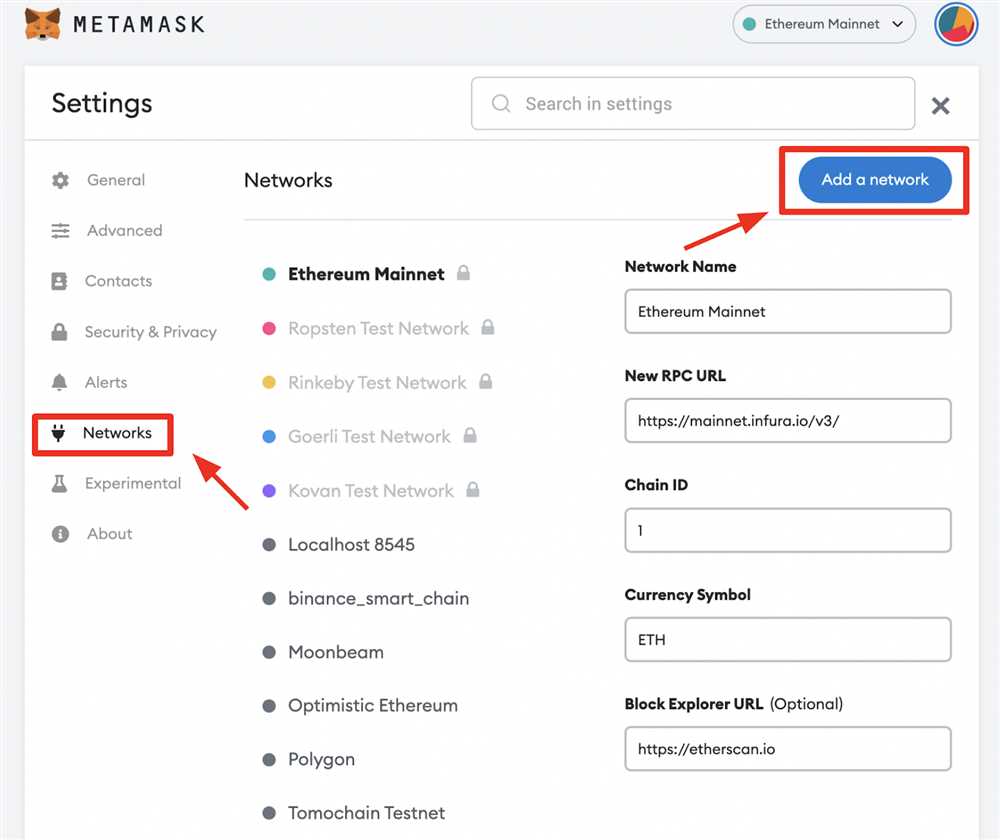
To connect Metamask to the Rinkeby network, you need to open the Metamask extension, click on the network dropdown, and select “Custom RPC”. Then, enter the Rinkeby network details such as the network name, RPC URL, Chain ID, and Symbol.
What is the purpose of the Rinkeby testnet?
The Rinkeby testnet is a Ethereum test network that allows developers to test and deploy their smart contracts and dapps without using real Ether. It provides a sandbox environment where developers can experiment and identify any issues before deploying to the mainnet.
How can I get test Ether on the Rinkeby network?
You can obtain test Ether on the Rinkeby network by using a faucet. There are several Rinkeby Faucets available online where you can request test Ether by providing your Rinkeby address. Once you receive the test Ether, you can use it for testing purposes on the Rinkeby network.