
Welcome to our comprehensive tutorial on transferring ETH to MetaMask! MetaMask is a popular Ethereum wallet and browser extension that allows users to interact with decentralized applications (DApps) and manage their Ethereum assets. In this tutorial, we will guide you through the step-by-step process of transferring ETH to your MetaMask wallet, ensuring that you have a smooth and secure experience.
Step 1: Set Up MetaMask
If you haven’t already, the first step is to install MetaMask on your browser and set up a new wallet. MetaMask is available as a browser extension for Chrome, Firefox, and Brave. Once installed, create a new wallet and securely store your seed phrase in a safe place. This seed phrase is your key to restoring your wallet if you ever lose access to your device.
Step 2: Obtain ETH
In order to transfer ETH to your MetaMask wallet, you need to have some ETH in your possession. You can purchase ETH from various exchanges or swap platforms, or you can receive ETH from someone else. Make sure you have enough ETH to cover any transaction fees as well.
Step 3: Connect MetaMask to an ETH Source
With your MetaMask wallet set up and ETH in hand, it’s time to connect MetaMask to an ETH source. This could be an exchange, a DApp, or another wallet. To do this, simply click on the MetaMask extension in your browser, enter your password, and navigate to the “Assets” or “Wallet Connect” section. Here, you will find an option to connect MetaMask to an external source.
Step 4: Initiate the Transfer
Once MetaMask is connected to an external ETH source, you can initiate the transfer. Select the “Send” or “Transfer” option in MetaMask, enter the recipient’s wallet address, specify the amount you want to transfer, and review the transaction details carefully. Double-check the wallet address to ensure it is correct, as transactions on the Ethereum network are irreversible.
Step 5: Confirm and Wait
After reviewing the transaction details, confirm the transfer in MetaMask. Depending on network congestion, the transfer may take some time to complete. Be patient and do not close the browser or interrupt the process. You can track the progress of the transfer on a block explorer like Etherscan.
Congratulations! You have successfully transferred ETH to your MetaMask wallet. Now you can use your ETH to participate in DApps, decentralized exchanges, or simply hold it as an investment. Remember to always double-check transaction details and keep your wallet seed phrase in a secure place. Happy exploring!
Mastering the Art of Transferring ETH to MetaMask
MetaMask is an essential tool for interacting with decentralized applications (DApps) on the Ethereum blockchain. However, before you can start using MetaMask, you need to transfer Ethereum (ETH) to your MetaMask wallet. In this comprehensive tutorial, we will guide you through the process of transferring ETH to MetaMask with ease.
Step 1: Install MetaMask
If you haven’t already, install the MetaMask extension on your web browser. Once installed, create a new wallet or import an existing one using your seed phrase.
Step 2: Get Your MetaMask Address
After setting up your MetaMask wallet, you will be assigned a unique Ethereum address. To find your address, click on the MetaMask extension icon and select “Account Details.” Copy your address to the clipboard.
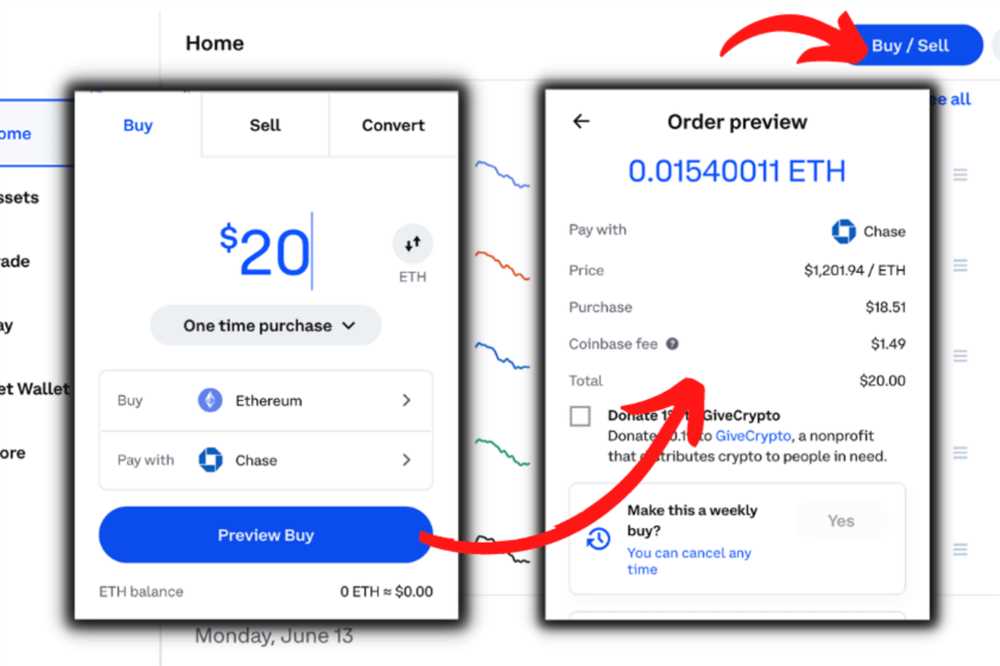
Step 3: Obtain ETH
Before you can transfer ETH to MetaMask, you need to acquire some. You can purchase ETH from an exchange platform or receive it from another Ethereum address.
Step 4: Initiate the Transfer
Go to the platform or wallet from where you want to send ETH. Look for the option to send or withdraw funds. Paste your MetaMask address as the recipient address and specify the amount of ETH you want to transfer.
Step 5: Confirm the Transfer
Double-check that the recipient address is correct. Confirm the transaction and wait for it to be included in a block on the Ethereum network. This may take some time depending on network congestion.
Step 6: Verify the Transfer
Once the transfer is confirmed, you can verify it by checking your MetaMask wallet. Click on the MetaMask extension icon and select “Account Details” to view your transaction history. You should see the transferred ETH in your wallet.
Final Thoughts
Transferring ETH to MetaMask is an essential step in fully utilizing the power of decentralized applications on the Ethereum blockchain. By following this comprehensive tutorial, you can confidently and securely transfer ETH to your MetaMask wallet.
A Comprehensive Tutorial
Welcome to our comprehensive tutorial on how to transfer ETH to MetaMask! In this tutorial, we will guide you step by step on how to successfully transfer your Ethereum to your MetaMask wallet.
Step 1: Install MetaMask
The first step is to install the MetaMask browser extension. You can find the MetaMask extension on the official website of MetaMask or directly through your browser’s extension store. Install the extension, create a MetaMask account, and securely store your recovery seed phrase.
Step 2: Fund Your MetaMask Wallet
After installing MetaMask, you need to fund your wallet with Ethereum. To do this, you can either purchase ETH from a reputable cryptocurrency exchange or transfer ETH from another wallet. If you choose to transfer ETH, ensure that you have the correct address of your MetaMask wallet.
Step 3: Connect MetaMask to Your Ethereum Wallet
Once your MetaMask wallet is funded with ETH, you need to connect it to your Ethereum wallet. Open the MetaMask extension, click on the account icon, and select the “Import Account” option. Paste your Ethereum wallet’s private key or JSON file. Confirm the import and your MetaMask wallet will be connected to your Ethereum wallet.
Step 4: Transfer ETH to MetaMask
You are now ready to transfer ETH to your MetaMask wallet. Open your Ethereum wallet, navigate to the transaction page, and select the option to send ETH. Enter the recipient address, which should be your MetaMask wallet address. Confirm the transaction details and initiate the transfer. Wait for the transaction to be confirmed on the Ethereum network.
Step 5: Verify the Transfer
After the transfer is confirmed, open your MetaMask wallet to verify the received ETH. The transferred amount should be reflected in your MetaMask balance. You can also check the transaction history to ensure that the transfer was successful.
Note: Make sure to double-check the recipient address before initiating the transfer. Crypto transactions are irreversible, and sending funds to the wrong address can result in permanent loss of your ETH.
Congratulations! You have now successfully transferred ETH to your MetaMask wallet. By following this comprehensive tutorial, you have mastered the art of transferring ETH to MetaMask!
Understanding MetaMask: A Must-Have Tool for Ethereum Users
MetaMask has quickly become an essential tool for users looking to interact with the Ethereum network. It is a browser extension that allows users to manage and interact with their Ethereum accounts, making it easier to send, receive, and store ETH and other ERC-20 tokens.
One of the key benefits of MetaMask is its user-friendly interface, which simplifies the process of accessing decentralized applications (dApps) and interacting with smart contracts. With MetaMask, users can seamlessly connect their Ethereum accounts to dApps, eliminating the need for separate wallets and accounts for each application.
Installing MetaMask
To start using MetaMask, you’ll first need to install the browser extension. MetaMask is compatible with popular browsers like Google Chrome, Firefox, and Brave. Simply search for MetaMask in your browser’s extension store and click “Install” to get started.
Once installed, you’ll need to set up a new MetaMask account or import an existing Ethereum account. You’ll be prompted to create a password and save a backup seed phrase, which is crucial for recovering your account in case you lose access to it.
Using MetaMask
Once your MetaMask account is set up, you can start using it to manage your Ethereum assets. MetaMask provides a secure environment for interacting with the Ethereum network and ensures that your private keys are never exposed.
To send or receive ETH or ERC-20 tokens, simply navigate to the “Send” or “Receive” tab in the MetaMask extension. Here, you can enter the recipient’s address, specify the amount, and confirm the transaction.
MetaMask also acts as a gateway to decentralized finance (DeFi) applications. By connecting your MetaMask account to DeFi platforms, you can take advantage of various financial services, such as lending, borrowing, and yield farming.
It’s important to note that while MetaMask provides a convenient way to interact with the Ethereum network, users must remain vigilant in protecting their accounts. Keep your password and seed phrase securely stored, enable two-factor authentication, and be cautious when interacting with unfamiliar dApps or entering your account details.
Overall, MetaMask is a must-have tool for anyone looking to navigate the world of Ethereum. Its user-friendly interface, security features, and seamless integration with dApps make it a valuable asset for Ethereum users.
Step-by-Step Guide: How to Transfer ETH to MetaMask Wallet
Transferring Ethereum (ETH) to your MetaMask wallet is a simple process that allows you to securely store, manage, and use your ETH tokens. Follow these step-by-step instructions to transfer ETH to your MetaMask wallet:
Step 1: Install MetaMask Extension
The first step is to install the MetaMask extension on your web browser. Visit the MetaMask website and follow the instructions to add the extension to your browser.
Step 2: Create a MetaMask Wallet
Once the extension is installed, launch MetaMask and create a new wallet. Follow the prompts to set up a secure password and back up your seed phrase.
Step 3: Connect MetaMask to Ethereum Network
After creating your MetaMask wallet, connect it to the Ethereum network. Choose the network you wish to use (Ethereum Mainnet, Test Networks, or Custom RPC), and make sure your wallet is connected to the correct network.
Step 4: Obtain the Receiving Address
To transfer ETH to your MetaMask wallet, you need to obtain the receiving address. Click on the account icon in the top right corner of the MetaMask browser extension, and copy the address displayed.
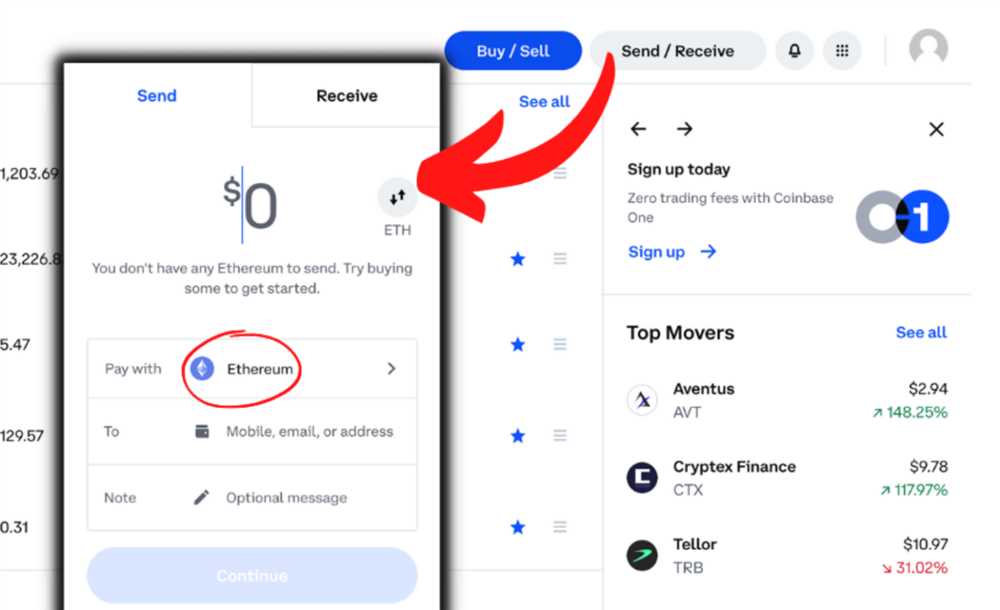
Step 5: Send ETH from Exchange or Wallet
If you already have ETH in an exchange or another wallet, initiate a transfer to your MetaMask wallet using the receiving address. Follow the instructions provided by your exchange or wallet provider to complete the transfer.
Step 6: Verify the Transfer Status
Once the transfer is initiated, you can verify its status on the Ethereum blockchain. Use a blockchain explorer like Etherscan to search for your transaction using the TX hash or the receiving address.
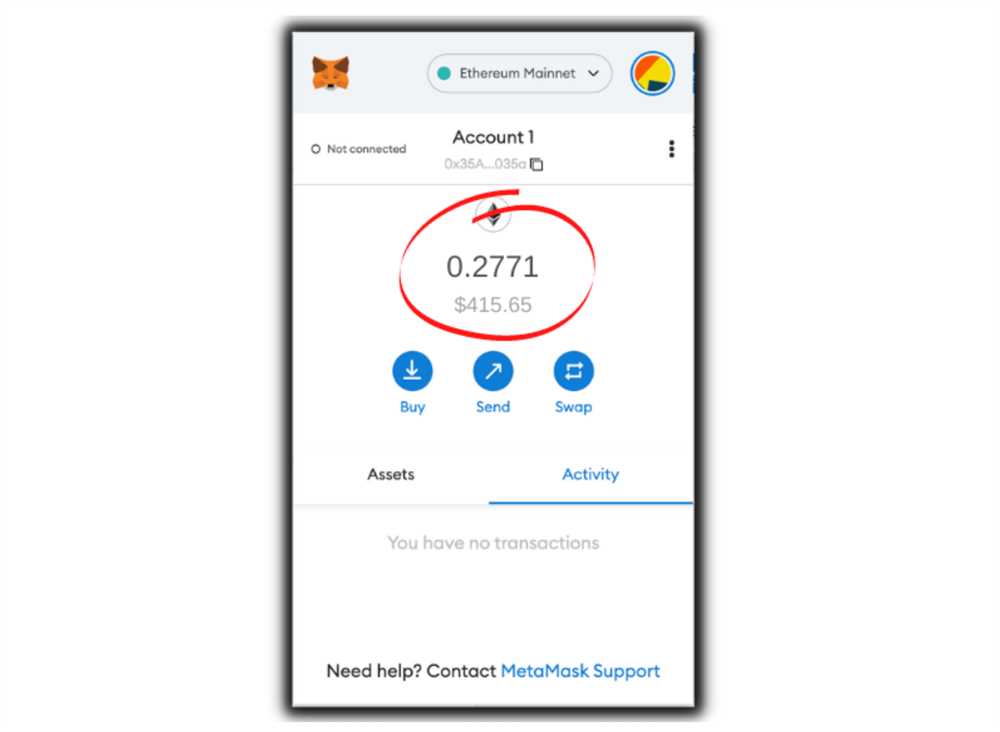
Step 7: Check ETH Balance in MetaMask
After the transfer is confirmed on the blockchain, check your MetaMask wallet to ensure that the ETH has been successfully deposited. Your ETH balance should reflect the transferred amount.
That’s it! You have successfully transferred ETH to your MetaMask wallet. You can now use your ETH tokens for various purposes, such as interacting with decentralized applications (DApps) or participating in token sales.
Creating a MetaMask Wallet
To start using MetaMask, you will first need to create a MetaMask wallet. Follow the steps below to set up your wallet:
Step 1: Install the MetaMask Extension
Open your preferred web browser and search for the MetaMask extension. Once you find the official MetaMask website, click on the “Add to Chrome” or “Add to Firefox” button to install the extension.
Step 2: Create a New Wallet
After installing the MetaMask extension, a small fox icon should appear in the top right corner of your browser. Click on the icon to open MetaMask.
Click on the “Get Started” button to begin creating your new wallet. You will be prompted to accept the terms of use and create a strong password for your wallet. Make sure to store your password securely as it will be necessary to access your wallet in the future.
Step 3: Save Your Secret Backup Phrase
Once you have created a password, MetaMask will generate a secret backup phrase consisting of 12 random words. These words act as a backup for your wallet and can be used to recover your funds in case you lose access to your wallet.
It is crucial to write down the secret backup phrase and store it in a safe place. Never share this phrase with anyone as it can give them full access to your funds.
Step 4: Confirm Your Backup Phrase
After saving your secret backup phrase, MetaMask will ask you to confirm it by selecting the words in the correct order. This step ensures that you have properly saved your backup phrase and can recover your wallet if needed.
Select the words in the correct order and click “Confirm” to proceed.
Step 5: Secure Your MetaMask Wallet
Now that you have created your MetaMask wallet, it is essential to take additional security measures to protect your funds.
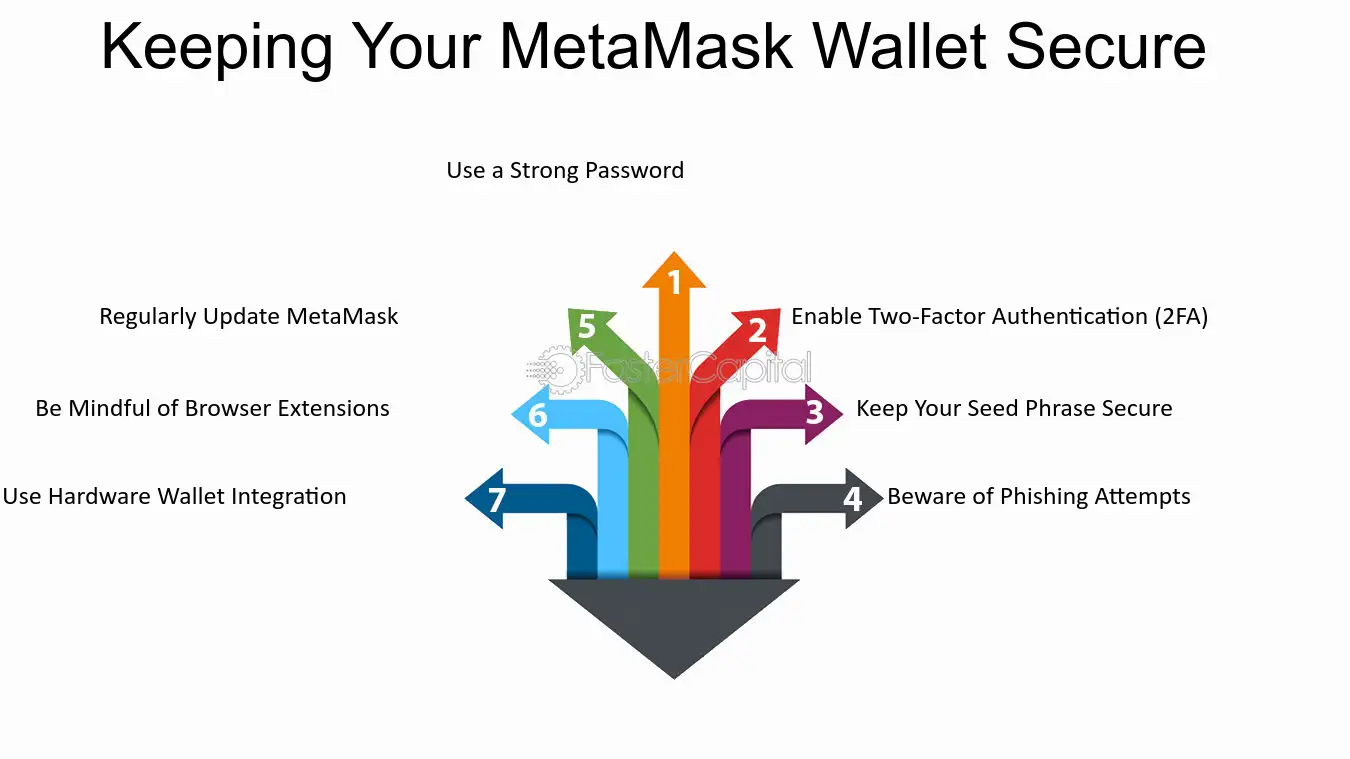
Enable two-factor authentication: In the MetaMask settings, you can enable two-factor authentication for additional security. This adds an extra layer of protection by requiring a code from your mobile device when accessing your wallet.
Keep your wallet up to date: Regularly check for updates to the MetaMask extension and install them. Updates often include security enhancements, bug fixes, and new features.
Be cautious of phishing attempts: Always be wary of suspicious emails or websites that claim to be MetaMask. MetaMask will never ask you to provide your secret backup phrase or send funds to anyone.
By following these steps, you have successfully created a MetaMask wallet and taken the necessary precautions to secure your funds. You are now ready to transfer ETH to your wallet and start using MetaMask for various Ethereum-based applications and transactions.
Obtaining your Ethereum Address

To transfer ETH to MetaMask, you will need to obtain your Ethereum address. Your Ethereum address is a unique identifier that is used to send and receive ETH and other tokens on the Ethereum network.
To obtain your Ethereum address, follow these steps:
Step 1: Open your MetaMask extension or mobile app.
Step 2: If you are using the extension, click on the MetaMask browser extension icon at the top-right corner of your browser. If you are using the mobile app, open the app on your smartphone or tablet.
Step 3: Once in MetaMask, you will see your Ethereum address displayed at the top of the application. It will be a long string of alphanumeric characters starting with “0x”. This is your public Ethereum address.
Step 4: You can also copy your Ethereum address by clicking on the “Copy” button next to it. This will allow you to easily paste your address when needed.
Step 5: It is important to keep your Ethereum address safe and secure. Treat it as you would treat your bank account number or any other sensitive information. Do not share your Ethereum address publicly or with anyone you do not trust.
Step 6: Once you have obtained your Ethereum address, you can provide it to others who want to send you ETH or other tokens. They can use this address to initiate a transfer to your MetaMask wallet.
By following these steps, you should now have your Ethereum address ready to receive ETH and other tokens into your MetaMask wallet.
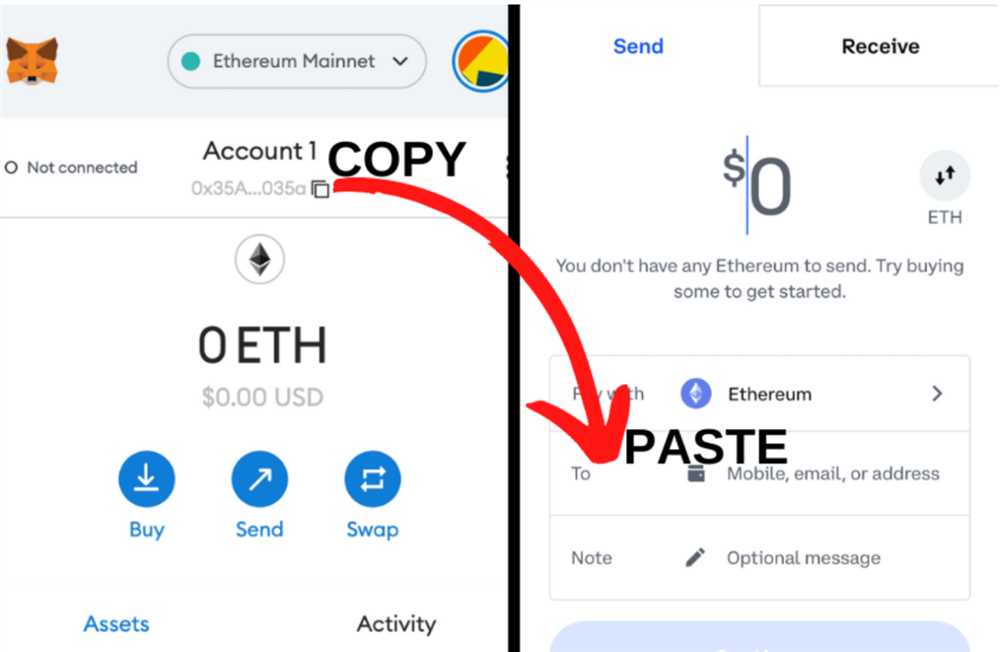
How do I transfer ETH to MetaMask?
To transfer ETH to MetaMask, you need to follow a few simple steps. First, open your MetaMask wallet and copy your Ethereum address. Then, go to your current wallet or exchange where you hold ETH and find the withdrawal or transfer option. Paste your MetaMask address as the recipient and specify the amount of ETH you want to transfer. Finally, confirm the transaction and wait for it to be processed.
Can I transfer other cryptocurrencies to MetaMask?
No, MetaMask supports only Ethereum and Ethereum-based tokens. You can transfer other cryptocurrencies by converting them into ETH using a cryptocurrency exchange before sending them to your MetaMask wallet.
Is it possible to transfer ETH from one MetaMask wallet to another?
Yes, you can transfer ETH from one MetaMask wallet to another by following the same steps as transferring to MetaMask from an external wallet or exchange. Simply copy the recipient’s MetaMask address and specify the amount of ETH you want to send. Make sure to double-check the address to avoid any mistakes.
What is the gas fee for transferring ETH to MetaMask?
The gas fee for transferring ETH to MetaMask depends on the current network congestion and the gas price you set. You can choose a higher gas price to prioritize faster transaction confirmation or a lower gas price to save costs. MetaMask will provide an estimate of the gas fee before you confirm the transaction.
Are there any limitations on the amount of ETH I can transfer to MetaMask?
There are no specific limitations on the amount of ETH you can transfer to MetaMask. However, you should consider the gas fee required for the transaction. Transferring a large amount of ETH may require a higher gas fee, especially during periods of high network congestion, which can increase transaction costs.