
Are you new to the world of Non-Fungible Tokens (NFTs) and interested in exploring this exciting form of digital art? Look no further! In this beginner’s guide, we will walk you through the process of viewing NFTs in Metamask, one of the most popular digital wallets for Ethereum-based assets.
But first, let’s start with the basics. What exactly are NFTs? NFTs are unique tokens that represent ownership or proof of authenticity of a digital asset, such as artwork, music, or virtual real estate. Unlike cryptocurrencies like Bitcoin or Ethereum, which are interchangeable and have equal value, each NFT is distinct and cannot be replicated.
Metamask, a browser extension and mobile app, allows users to interact with decentralized applications (DApps) on the Ethereum blockchain. By connecting your wallet to Metamask, you gain access to a whole new world of digital assets, including NFTs. So, let’s dive in and learn how to view these captivating digital collectibles!
Understanding Metamask
Metamask is a popular wallet for managing and interacting with cryptocurrencies and digital assets on the Ethereum blockchain. It acts as a browser extension that allows you to securely store your cryptographic keys and access decentralized applications (DApps) directly from your browser.
When you install Metamask, it creates a wallet for you with a unique address that can send, receive, and store Ethereum and ERC-20 tokens. This address is linked to your private key, which is crucial for securely managing your funds. It is important to keep your private key safe and secure, as anyone with access to it can control your wallet and assets.
Metamask also acts as a web3 provider, which means it allows websites and DApps to interact with the Ethereum blockchain using your wallet. It injects the web3.js library into the browser, providing developers with an easy way to integrate blockchain functionality into their applications. This allows you to seamlessly connect your wallet and interact with NFTs and other blockchain-based assets.
One of the main features of Metamask is its ability to connect to different Ethereum networks. By default, it connects to the Ethereum mainnet, but you can also switch to test networks like Ropsten, Kovan, and Rinkeby for development and testing purposes. This flexibility allows developers and users to experiment with different DApps and tokens without using real Ethereum.
In summary, Metamask is a powerful tool that provides a user-friendly interface for managing Ethereum assets and interacting with the blockchain. It combines the security of a digital wallet with the convenience of a browser extension, making it easy for beginners to get started with NFTs and other blockchain-based technologies.
Setting up Metamask for NFTs
If you’re new to the world of NFTs and want to start buying, selling, and trading these unique digital assets, you’ll need to set up Metamask, a popular cryptocurrency wallet and browser extension. Metamask allows you to use Ethereum to interact with decentralized applications (dApps) and manage your NFT collection.
Here’s how you can set up Metamask:
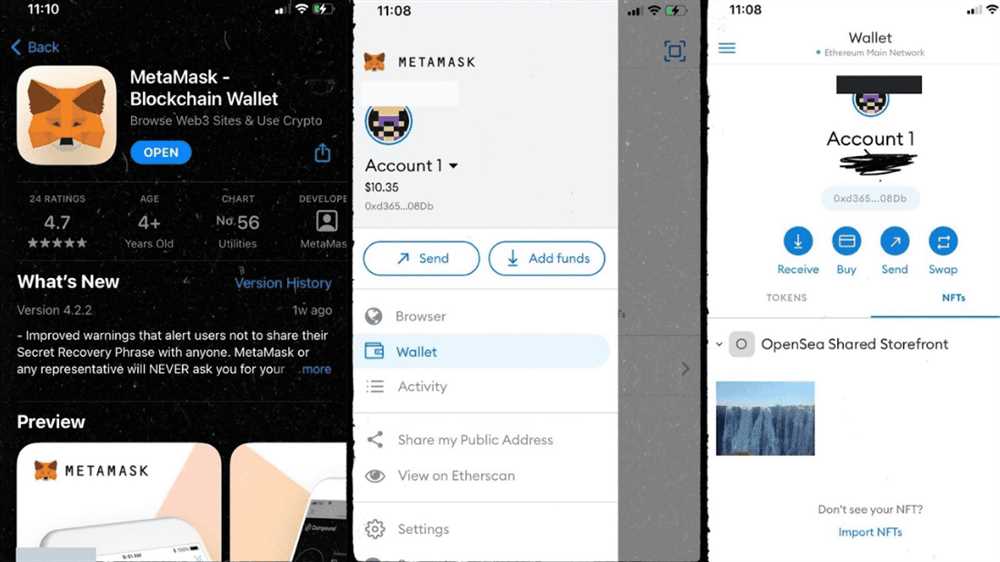
- Install Metamask: Visit the Metamask website and install the browser extension for your preferred web browser. Follow the instructions provided to add it to your browser.
- Create a Wallet: Once Metamask is installed, click on the extension icon in your browser and select “Create a Wallet.” Follow the prompts to set up a password and create your new Ethereum wallet.
- Backup Your Seed Phrase: Metamask will provide you with a unique set of words known as your seed phrase. This seed phrase is crucial for recovering your wallet if you ever forget your password or lose access to your device. Write down the seed phrase and keep it in a safe place.
- Connect to Ethereum Network: After creating your wallet, Metamask will default to the Ethereum Mainnet. If you’re planning to interact with NFTs on other networks like Rinkeby or Kovan, click on the network dropdown and select the desired network.
- Add Funds to Your Wallet: To buy NFTs, you’ll need to have some Ethereum in your Metamask wallet. You can purchase Ethereum from a cryptocurrency exchange like Coinbase, Binance, or Kraken, and then transfer it to your wallet address.
- Explore NFT Marketplaces: Once you have Ethereum in your wallet, you can start exploring NFT marketplaces like OpenSea, Rarible, or SuperRare. Connect your Metamask wallet to these platforms by clicking on the wallet icon and selecting “Connect Wallet.”
- Buying and Collecting NFTs: With your Metamask wallet connected to a marketplace, you can browse and purchase NFTs using your Ethereum. Each NFT will have its own unique listing, including its name, creator, price, and description. When you find an NFT you want to buy, click on it for more details and follow the prompts to make the purchase.
Setting up Metamask is a crucial step in getting started with NFTs. It ensures that you have a secure and convenient way to manage your digital assets and participate in the exciting world of non-fungible tokens.
Exploring NFT Marketplaces
NFT marketplaces have become the go-to platforms for buying, selling, and trading non-fungible tokens. These marketplaces provide a space where collectors and investors can browse, discover, and purchase unique digital assets created by artists and creators across the world.
Here are some popular NFT marketplaces that you can explore:
1. OpenSea
OpenSea is one of the largest and most well-known NFT marketplaces. It offers a wide range of digital collectibles, artwork, domain names, and virtual real estate. Users can browse through various categories or search for specific assets. OpenSea supports a variety of blockchains, including Ethereum and Polygon.
2. Rarible
Rarible is a decentralized NFT marketplace that allows users to create, buy, and sell digital assets. It provides a platform for artists and creators to monetize their work and engage with their audience. Rarible also allows users to participate in the governance of the platform through RARI tokens.
3. SuperRare
SuperRare focuses on high-quality digital artwork and collectibles. It curates a collection of unique and limited-edition pieces from renowned artists. Each artwork on SuperRare is tokenized and can be bought, sold, or traded on the platform. It aims to provide a platform for artists to showcase and sell their work directly to collectors.
These are just a few examples of NFT marketplaces, but there are many others available. Each marketplace has its own unique features, curation process, and community. Exploring different platforms can help you discover new artists, collectibles, and investment opportunities in the world of NFTs.
Viewing and Managing NFTs in Metamask
Metamask is a popular wallet for storing and managing NFTs. In this guide, we will explore how to view and manage your NFTs using Metamask.
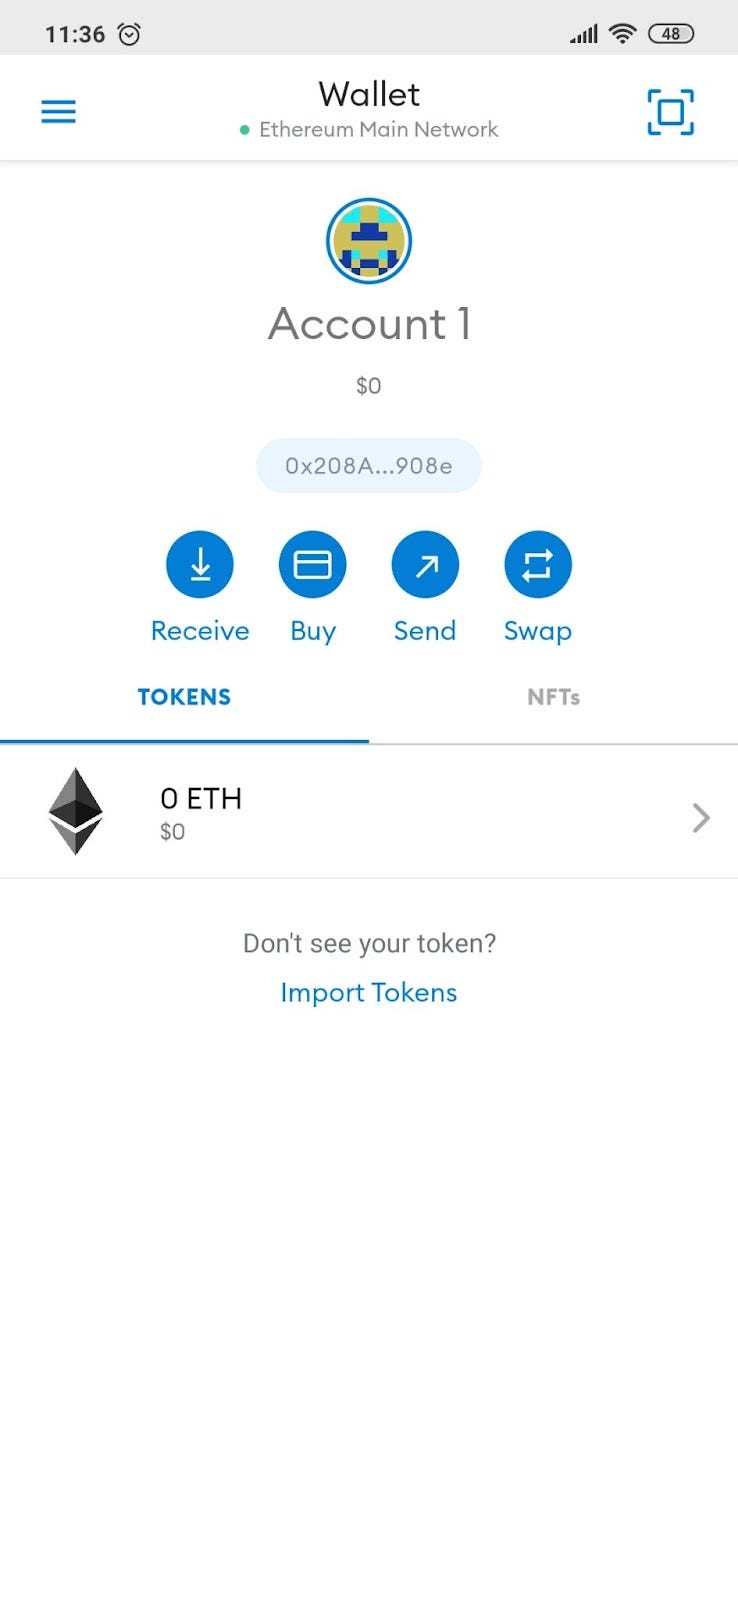
1. Open Metamask: Open the Metamask extension on your browser and make sure you are connected to the Ethereum network.
2. Access your NFTs: Click on the Metamask icon in your browser toolbar and select “Open Metamask” from the dropdown menu. This will open the Metamask wallet interface.
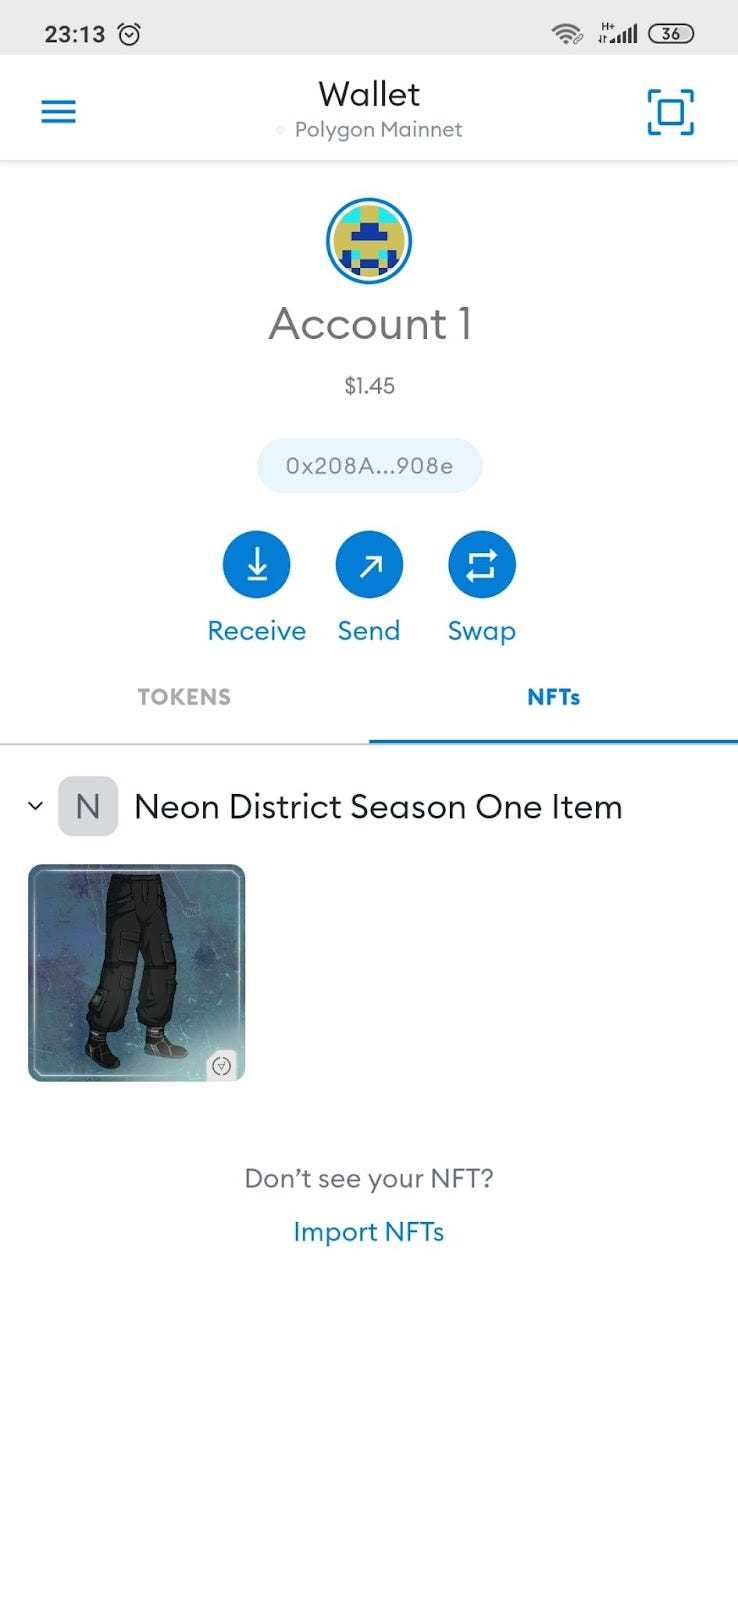
3. View your NFTs: Once you are in the Metamask wallet interface, click on the “Assets” tab. Here, you will be able to view all the NFTs you own.
4. Manage your NFTs: To manage your NFTs, you can click on each NFT to view more details about it. You can also perform various actions like transferring, selling, or storing your NFTs. Make sure to follow the appropriate steps for each action.
5. Add custom NFTs: If you have NFTs that are not automatically displayed in your Metamask wallet, you can add them manually. To do this, click on the “Add Token” button and enter the contract address of the NFT. Metamask will then fetch the NFT’s details and add it to your wallet.
6. Explore NFT marketplaces: Metamask also allows you to easily explore and interact with NFT marketplaces. You can browse different collections, place bids, or make purchases directly through the wallet interface.
7. Stay informed and secure: As always, it is important to stay informed about the NFTs you own and the marketplaces you interact with. Make sure to keep your Metamask wallet and browser extension up to date to ensure the security of your NFT assets.
By following these steps, you can easily view and manage your NFTs in Metamask. Enjoy exploring the world of digital collectibles!
What is Metamask?
Metamask is a popular cryptocurrency wallet and browser extension that allows users to interact with decentralized applications (DApps) on the Ethereum blockchain. It allows users to securely store and manage their Ethereum and other ERC-20 tokens, as well as interact with various blockchain-based applications.
How do I install Metamask?
To install Metamask, you need to go to the official website and download the extension for your preferred browser. Once the extension is installed, you will be prompted to create a new wallet or import an existing one. Follow the instructions to set up your wallet and secure it with a strong password.
Why is viewing NFTs in Metamask important?
Viewing NFTs in Metamask is important because it allows you to see and manage your NFT collection directly from your wallet. It provides a convenient way to view the details of each NFT, such as the artwork, the owner, and any associated metadata. Additionally, you can use Metamask to buy, sell, or transfer NFTs, as well as interact with NFT marketplaces and decentralized applications.
Can I view NFTs from different blockchains in Metamask?
As of now, Metamask primarily supports NFTs on the Ethereum blockchain. However, there are plans to add support for NFTs on other blockchains in the future. In the meantime, if you have NFTs on other blockchains, you may need to use different wallets or platforms to view and manage them.