
Welcome to our guide on how to perform simple Dai transfers and transactions using Metamask! Metamask is a popular Ethereum wallet that allows users to securely store, send, and receive digital assets. In this guide, we will walk you through the steps of sending and receiving Dai, a stablecoin built on the Ethereum blockchain.
Step 1: Install and Set up Metamask
If you haven’t already, start by installing the Metamask extension in your browser. Once installed, create a new wallet or import an existing one by following the on-screen instructions. Make sure to securely back up your seed phrase as it is the key to accessing your funds.
Step 2: Connect to the Ethereum Network
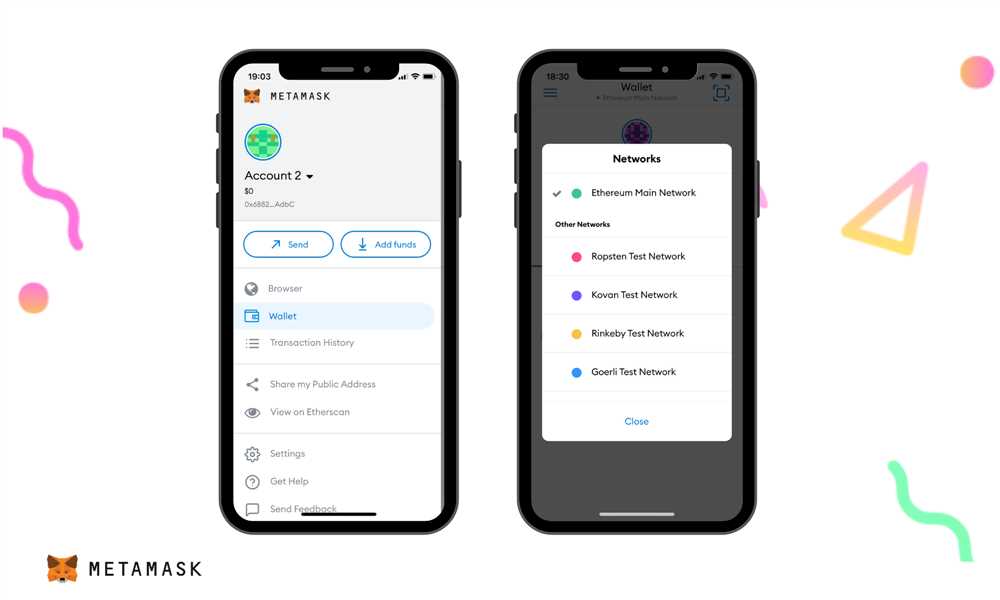
After setting up your wallet, click on the Metamask extension icon in your browser and log in. In the top right corner, make sure you are connected to the Ethereum mainnet or the network of your choice. If you need to switch networks, click on the network name and select the desired network from the dropdown menu.
Step 3: Add Dai Token
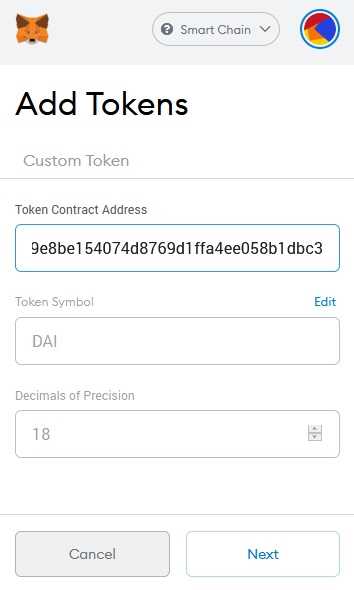
Next, we need to add the Dai token to your Metamask wallet. Click on the “Menu” icon in the top left corner of the extension and select “Add Token”. In the search bar, enter “Dai” and select the Dai token (DAI) with the correct contract address. Click on “Next” and then “Add Tokens” to add Dai to your wallet.
Step 4: Send and Receive Dai
Now that you have access to Dai in your Metamask wallet, you can easily send and receive it. To send Dai, click on the “Send” button, enter the recipient’s address, specify the amount, and click “Next” to confirm the transaction. To receive Dai, simply provide the sender with your wallet address and wait for the funds to arrive.
Step 5: Transaction Confirmation
Whenever you initiate a transaction, Metamask will prompt you to confirm the details and pay the gas fees associated with the transaction. These fees are necessary for processing and validating the transaction on the Ethereum network. Make sure to review the transaction details before confirming and paying the fees.
Note: Gas fees can vary depending on network congestion. To check the current gas price, you can visit websites like gasnow.org or ethgasstation.info.
That’s it! You now know how to perform simple Dai transfers and transactions using Metamask. Remember to always double-check the recipient’s address before sending any funds and be mindful of the gas fees associated with your transactions. Happy transacting!
What is Dai?

Dai is a stablecoin that is built on the Ethereum blockchain. It is pegged to the value of the US dollar, meaning that 1 Dai is equal to 1 US dollar. This stability is achieved through a system of smart contracts and algorithms that ensures the price of Dai stays as close to $1 as possible.
Unlike traditional cryptocurrencies like Bitcoin or Ethereum, which can be highly volatile, Dai offers stability and reliability for users. It provides a decentralized, transparent, and secure means of exchanging value, as well as a medium of exchange that can be used for everyday transactions.
One of the key features of Dai is that it is backed by collateral in the form of other cryptocurrencies, such as Ether (the native currency of the Ethereum blockchain). This collateral is held in smart contracts known as Collateralized Debt Positions (CDPs), which act as a guarantee for the value of Dai.
Overall, Dai provides a stable and convenient alternative to traditional fiat currencies, with the added benefits of decentralization and transparency offered by blockchain technology.
Why it’s the best stablecoin for decentralized finance
Dai is the leading stablecoin in the world of decentralized finance (DeFi), and for good reason. With its unique features and benefits, it has become the go-to choice for many users and projects.
Decentralization: Dai is a decentralized stablecoin, meaning it is not controlled by any central authority or government. This makes it resistant to censorship and provides users with the ability to transact and hold their funds without relying on a third party.
Stability: Unlike other cryptocurrencies, Dai is designed to maintain a stable value. Its price is pegged to the US Dollar, which means that 1 Dai will always be worth approximately $1. This stability makes it an ideal medium of exchange and a reliable store of value.
Transparency: The Dai system is built on the Ethereum blockchain, which is known for its transparency and auditability. Every transaction and operation within the Dai ecosystem can be traced back to its source, providing users with confidence and visibility.
Accessibility: Dai can be easily accessed and used by anyone with an internet connection. There are no barriers to entry, and users from all over the world can participate in the Dai ecosystem without needing to meet any specific requirements.
Integration: Dai has gained widespread adoption and integration within the DeFi ecosystem. It is accepted by a wide range of applications, platforms, and services, allowing users to seamlessly transfer, trade, and lend their Dai tokens.
Smart contract functionality: Dai is built on the Ethereum blockchain, enabling it to take advantage of the smart contract capabilities of the platform. This allows for programmable money, opening up a whole new world of possibilities for decentralized applications and financial products.
Community-driven: Dai is backed by a strong and active community of users and developers. This ensures its ongoing development, improvement, and support. The community plays a vital role in governing the protocol and making decisions that shape the future of Dai.
Overall, Dai stands out as the best stablecoin for decentralized finance due to its decentralization, stability, transparency, accessibility, integration with DeFi, smart contract functionality, and community-driven nature. It has proven to be a reliable and trustworthy asset that enables users to participate in the exciting world of decentralized finance.
How to set up and use Metamask for decentralized transactions
If you are looking to engage in decentralized transactions using Dai, Metamask is a user-friendly and secure wallet option that can be easily synced with your browser. This guide will walk you through the steps to set up and use Metamask for seamless and secure decentralized transactions.
Step 1: Install and Set Up Metamask
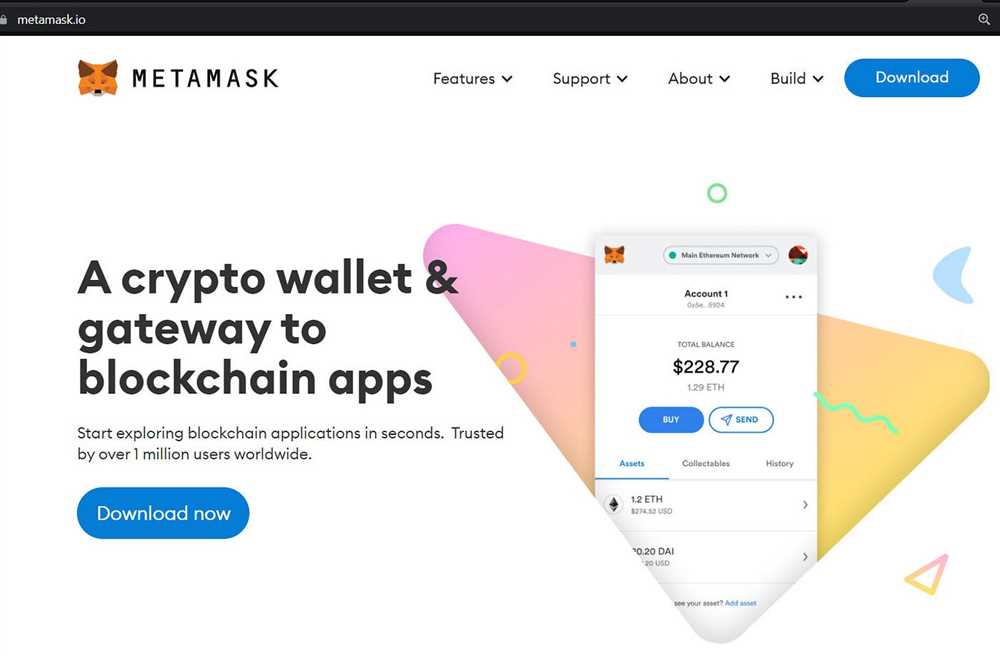
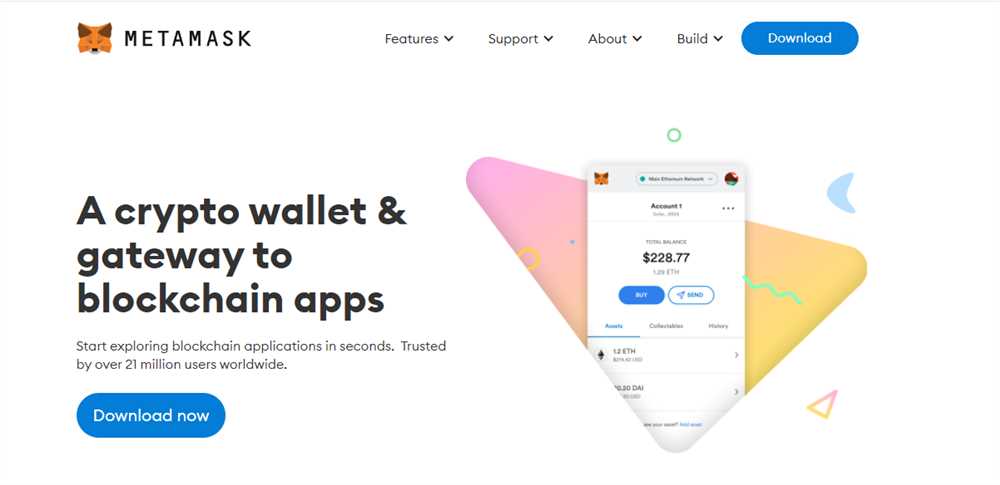
To begin, you need to install Metamask as a browser extension. Start by visiting the Metamask website and downloading the extension for your respective browser, whether it’s Chrome, Firefox, or Brave. Once installed, click on the Metamask icon that appears in your browser toolbar to set up your wallet.
During the setup, you will be guided through creating a new wallet, setting a secure password, and backing up your secret recovery phrase. Make sure to store this recovery phrase in a safe place, as it will be crucial for accessing your wallet in case of any mishaps or device changes.
Step 2: Connect Metamask to the Ethereum Network
After setting up your wallet, it’s time to connect Metamask to the Ethereum network. Click on the network dropdown menu in the top right corner of your Metamask extension and select the “Main Ethereum Network.” This will ensure that you are connected to the main network and can perform transactions using Dai.
Step 3: Import or Purchase Dai
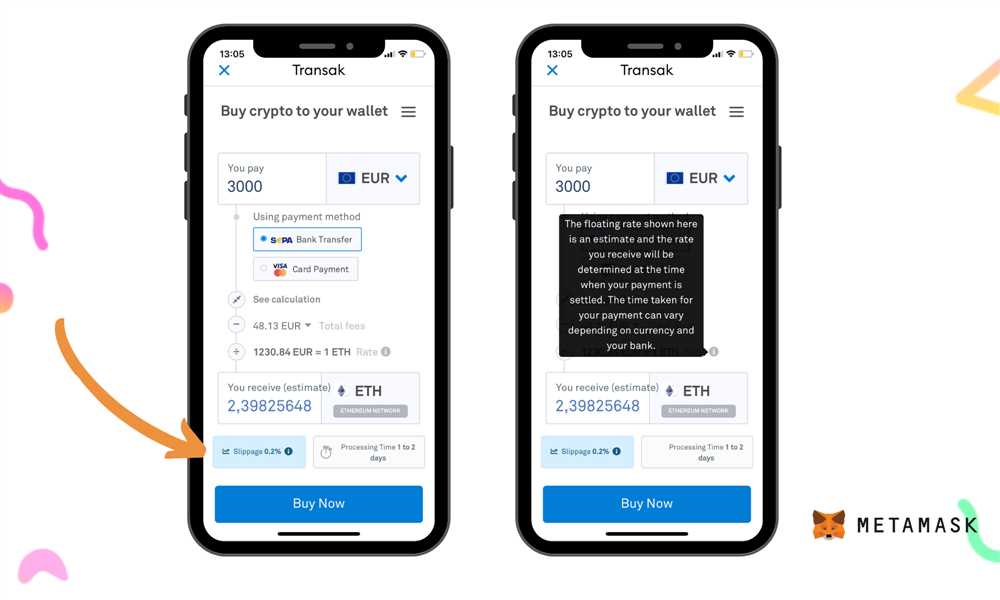
Before you can engage in decentralized transactions using Dai, you need to have some Dai in your wallet. There are two ways to acquire Dai: import it from an existing wallet or purchase it from a cryptocurrency exchange. If you already have Dai in another wallet, you can import it into Metamask by clicking on the asset tab and selecting “Import Tokens.” Alternatively, you can purchase Dai from a supported exchange and transfer it to your Metamask wallet.
Keep in mind that you will need some Ether (ETH) in your wallet to cover transaction fees on the Ethereum network. If you don’t have any Ether, you can easily purchase it on various cryptocurrency exchanges.
Step 4: Perform Decentralized Transactions
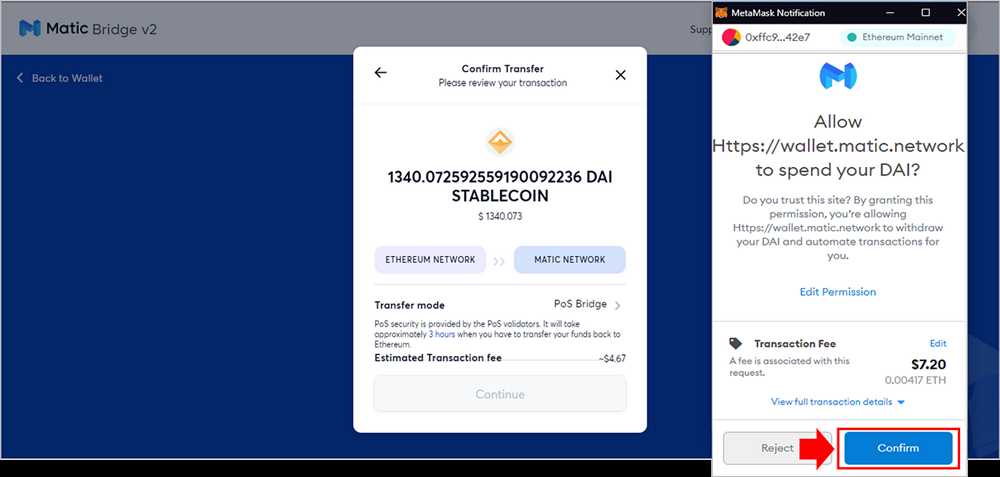
Once you have Dai in your Metamask wallet, you are ready to perform decentralized transactions. Visit a decentralized application (DApp) or website that supports Dai transactions, such as a decentralized exchange or lending platform. Connect your Metamask wallet to the DApp by clicking on the wallet icon or following the provided instructions.
When making a transaction, your Metamask wallet will prompt you to review and confirm the details before submitting it to the Ethereum network. Make sure to double-check the recipient address, transaction amount, and any associated fees. Once you are satisfied with the details, click “Confirm” to finalize the transaction.
Congratulations! You have successfully set up and used Metamask for decentralized transactions with Dai. With Metamask, you can enjoy the benefits of decentralized finance while maintaining control over your funds in a secure and user-friendly manner.
How to transfer Dai with Metamask
Transferring Dai with Metamask is a simple and secure process that allows you to send and receive Dai tokens on the Ethereum blockchain. Here’s a step-by-step guide on how to do it:
Step 1: Install and Set Up Metamask
If you haven’t already, install the Metamask wallet browser extension and create a new account. Follow the prompts to set up your password and securely store your secret seed phrase.
Step 2: Connect Metamask to the Ethereum Network
Once you have set up Metamask, click on the extension in your browser’s toolbar and select the network you want to use (usually the Ethereum Mainnet). Confirm the connection to the network.
Step 3: Add Dai Token to Metamask
To send and receive Dai, you need to add the Dai token to your Metamask wallet. Click on the “Assets” tab, then click “Add Token”. In the search bar, enter “Dai” and select the Dai token with the correct contract address (0x6b175474e89094c44da98b954eedeac495271d0f). Click “Next” and then “Add Tokens” to add Dai to your wallet.
Step 4: Send Dai
To send Dai, go to the “Send” tab in Metamask. Enter the recipient’s Ethereum address in the “To” field and the amount of Dai you want to send in the “Amount” field. Double-check the address and the amount to avoid any mistakes. Click “Next” and then “Confirm” to initiate the transaction.
Metamask will prompt you to confirm the transaction by paying the gas fees. Review the details of the transaction, including the gas fees, and click “Confirm” to send the Dai.
Once the transaction is confirmed on the Ethereum blockchain, the recipient will receive the Dai tokens in their wallet.
Note: Make sure you have enough Ether (ETH) in your Metamask wallet to cover the gas fees for the transaction.
Step-by-step guide on sending Dai to another address

In this guide, we will walk you through the step-by-step process of sending Dai to another Ethereum address using the Metamask wallet.
Prerequisites
Before you begin, make sure you have the following:
- Metamask: Install the Metamask extension for your preferred browser and set up your wallet.
- Dai balance: Ensure that you have enough Dai in your Metamask wallet to send to the other address.
- Recipient address: Obtain the Ethereum address of the recipient to whom you want to send the Dai.
Step 1: Access your Metamask wallet
Click on the Metamask extension in your browser’s toolbar. Enter your wallet password and click “Unlock” to access your wallet.
Make sure your Metamask wallet is connected to the Ethereum mainnet or the network on which your Dai tokens reside.
Step 2: Navigate to the “Send” function
In the Metamask wallet interface, click on the “Send” button. This will open the send transaction form.
Step 3: Enter recipient address and amount of Dai to send
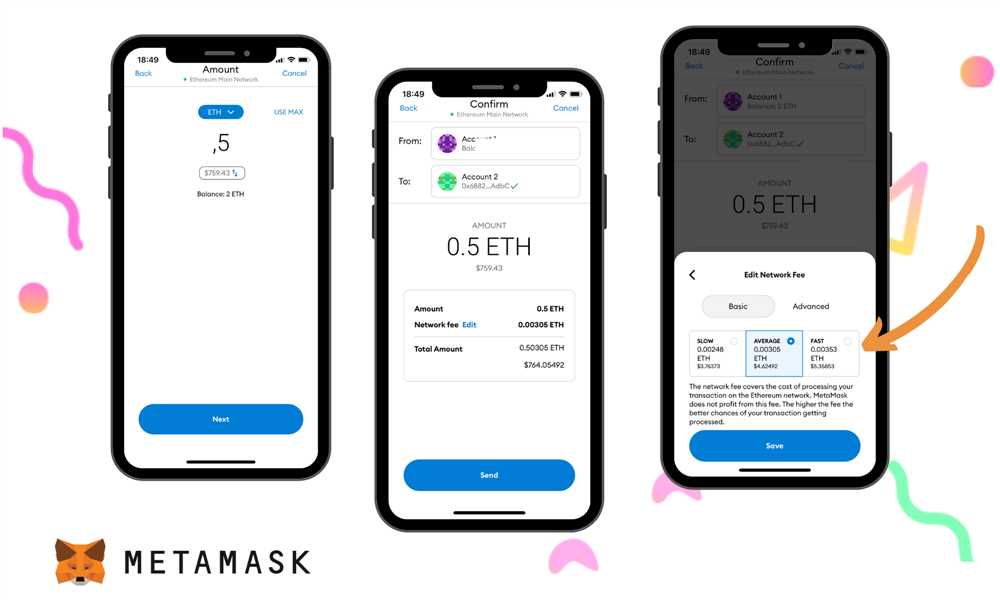
In the send transaction form, enter the recipient’s Ethereum address in the “To” field. Make sure to double-check the address to avoid any errors.
Enter the amount of Dai you want to send in the “Amount” field. You can either manually enter the value or use the slider to adjust the amount.
Step 4: Set gas fee and customize transaction settings (optional)
By default, Metamask will automatically calculate the gas fee for your transaction. If you want to customize the gas fee manually, you can click on “Edit” in the “Gas Fee” section.
Additionally, you can set advanced transaction settings like the gas limit and data field by clicking on “Advanced Options”. These settings are optional and usually not required for a simple Dai transfer.
Step 5: Review and confirm the transaction
Double-check all the details of your transaction, including the recipient address, amount of Dai, and gas fee. Once you are satisfied, click on the “Next” or “Confirm” button to proceed.
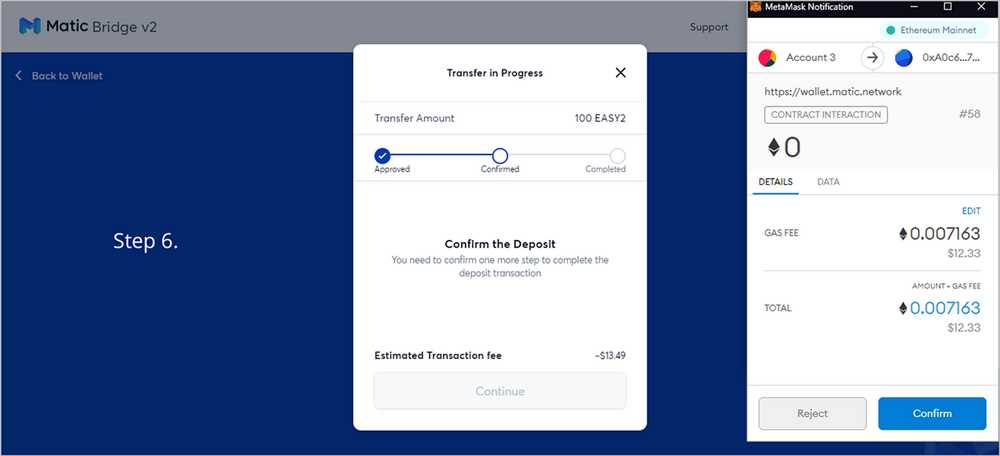
A Metamask confirmation prompt will appear. Review the transaction details once again and click “Confirm” to initiate the transfer.
Step 6: Wait for the transaction to be confirmed
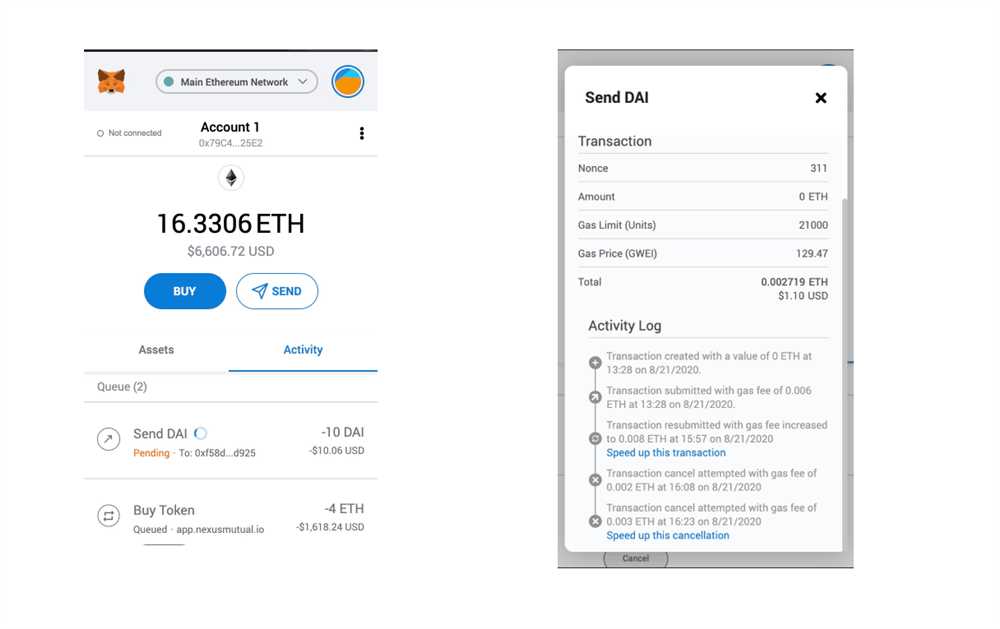
After confirming the transaction, you will be redirected to the Metamask transaction history. Here, you can monitor the progress of your transaction.
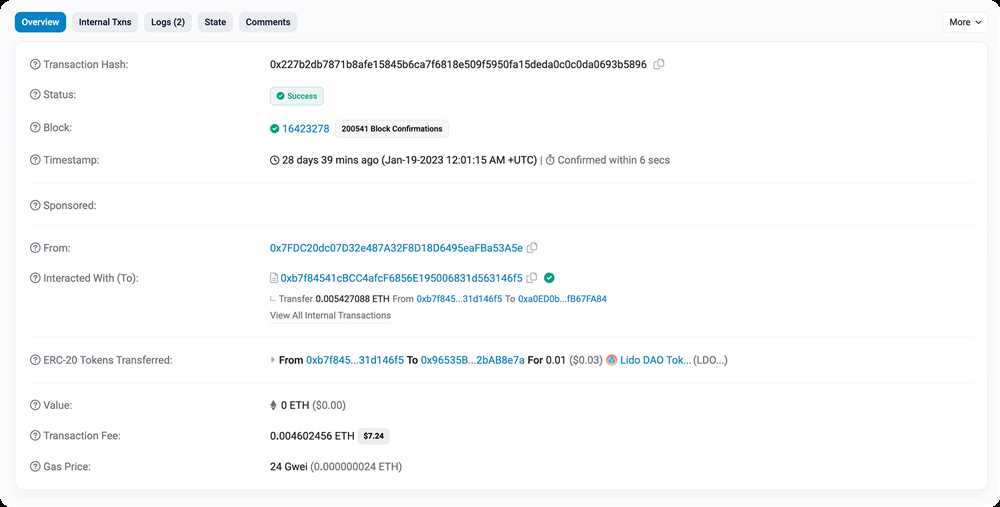
Depending on network congestion, it may take some time for your transaction to be confirmed. You can also track the transaction using a blockchain explorer by copying the transaction hash.
Once the transaction is confirmed, your Dai tokens will be sent to the recipient’s address.
Congratulations! You have successfully sent Dai to another Ethereum address using Metamask.
| Troubleshooting: |
|---|
| If you encounter any issues during the transaction, make sure: |
| – Your wallet is connected to the correct network |
| – You have sufficient gas fees to cover the transaction |
| – The recipient address is correct |
Making transactions with Dai
Once you have set up your Metamask wallet and acquired Dai, you can start making transactions with it. Here are the steps to follow:
- Open your Metamask wallet and make sure you are connected to the Ethereum mainnet.
- Click on the “Send” button.
- Enter the recipient’s Ethereum address in the “Recipient” field.
- Specify the amount of Dai you want to send in the “Amount” field.
- Review the transaction details and make sure everything is correct.
- Click on the “Next” button.
- Confirm the transaction by clicking on the “Confirm” button.
- Wait for the transaction to be processed, which may take a few minutes.
- Once the transaction is confirmed, the specified amount of Dai will be transferred to the recipient’s Ethereum address.
It’s important to double-check the recipient’s Ethereum address before confirming the transaction to ensure that the Dai is sent to the correct address. Once a transaction is confirmed, it cannot be cancelled or reversed.
Using Dai for decentralized payments and smart contracts
Dai is a stablecoin that is built on the Ethereum blockchain. It is designed to maintain a stable value of 1 Dai equal to 1 USD. This stability makes Dai a great option for decentralized payments and smart contracts.
When it comes to payments, Dai provides a reliable and transparent way to send and receive funds without relying on intermediaries. With Dai, you can transfer value globally, instantly, and with minimal fees. Whether you are sending money to a friend or paying for goods and services, using Dai allows you to bypass the traditional financial system and enjoy the benefits of decentralized transactions.
In addition to payments, Dai is also widely used in smart contracts. Smart contracts are self-executing contracts with the terms of the agreement written directly into code. These contracts can automatically trigger actions once certain conditions are met. By using Dai in smart contracts, you can create decentralized applications that can handle complex financial transactions and operations.
One popular use case for Dai in smart contracts is decentralized finance (DeFi). DeFi applications leverage the transparency and security of the blockchain to offer financial services like lending, borrowing, and trading. With Dai as the stablecoin of choice, DeFi protocols can ensure that the value of assets does not fluctuate during transactions, providing stability and predictability to users.
Overall, Dai offers a reliable and versatile option for decentralized payments and smart contracts. Its stable value and compatibility with the Ethereum blockchain make it a valuable asset for anyone looking to engage in decentralized finance or create innovative applications.