
Metamask is a popular browser extension that allows users to interact with decentralized applications (DApps) on the BNB network. It provides a user-friendly interface for managing your BNB wallets and conducting transactions securely. In this step-by-step guide, we will walk you through the process of using Metamask for BNB network transactions.
Step 1: Install Metamask Extension
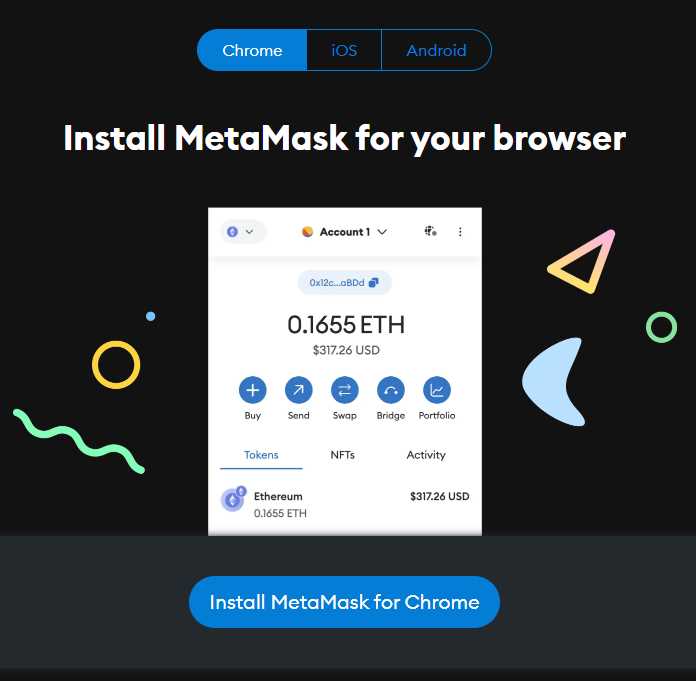
To get started, you need to install the Metamask extension on your preferred browser. Visit the official Metamask website and download the extension for your browser. Once installed, you will see the Metamask icon at the top right corner of your browser.
Step 2: Create or Import Wallet
If you don’t have a BNB wallet yet, click on the Metamask icon and select “Create a Wallet” to create a new wallet. Follow the prompts to set a strong password and back up your seed phrase. If you already have a BNB wallet, you can import it into Metamask by selecting “Import Wallet” and entering your seed phrase or private key.
Step 3: Connect to BNB Network
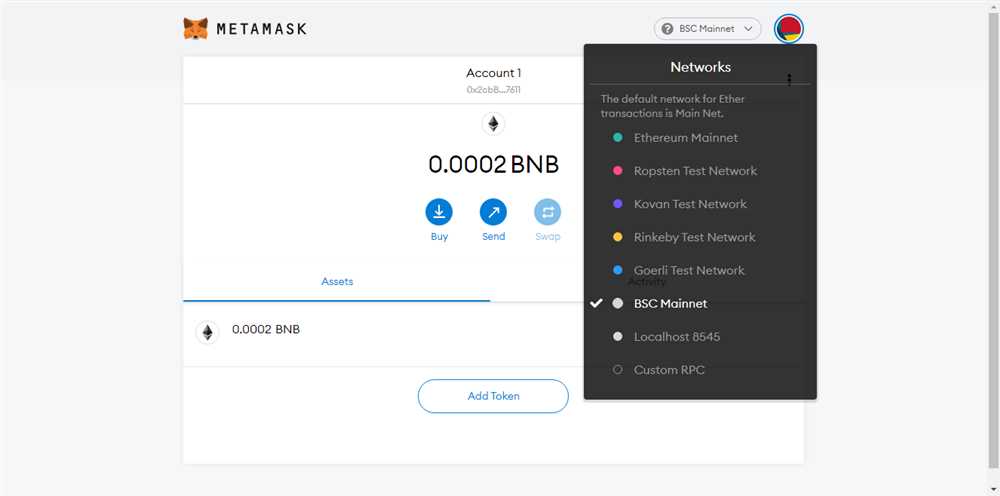
Once you have a wallet set up or imported, click on the Metamask icon and select “Networks” from the drop-down menu. Then, click on “Custom RPC” and enter the BNB network details. Fill in the network name as “BNB” and the RPC URL as “https://bsc-dataseed.binance.org/”.
Step 4: Add BNB Tokens
To conduct BNB network transactions, you need to add BNB tokens to your Metamask wallet. Click on the Metamask icon and select “Add Token” from the drop-down menu. Enter the BNB contract address, which is “0xbb4cdb9cbd36b01bd1cbaebf2de08d9173bc095c”, and click on “Next”. Metamask will then display the token symbol and decimals for BNB. Click on “Add Tokens” to complete the process.
Step 5: Conduct BNB Network Transactions
With your Metamask wallet connected to the BNB network and BNB tokens added, you are now ready to conduct BNB network transactions. Simply click on the Metamask icon, enter the recipient’s address, the amount you want to send, and click on “Next”. Confirm the transaction details and click on “Confirm” to complete the transaction. You can view your transaction history and check for confirmations on the Metamask interface.
Using Metamask for BNB network transactions provides a seamless and secure way to interact with DApps and manage your BNB assets. By following this step-by-step guide, you can confidently navigate the process and enjoy the benefits of decentralized finance on the BNB network.
Getting Started with Metamask
Metamask is a browser extension that allows you to interact with the BNB network and manage your digital assets securely. Follow the step-by-step guide below to get started with Metamask:
- Install the Metamask extension on your preferred web browser by visiting the official Metamask website and clicking on the “Get Started” button.
- Once the extension is installed, click on the Metamask icon that appears in your browser’s toolbar.
- A welcome screen will appear. Click on the “Get Started” button to begin the setup process.
- Choose whether you want to import an existing wallet or create a new one. If you already have a wallet, select the import option and enter your seed phrase. Otherwise, select the create option and follow the instructions to set up a new wallet.
- Set a strong password for your wallet. Make sure to choose a password that is unique and difficult to guess.
- Once your wallet is set up, you will be given a secret backup phrase. It is extremely important to write down this phrase and keep it in a safe place. This backup phrase can be used to restore your wallet in case you lose access to your device.
- Confirm your backup phrase by entering the words in the correct order.
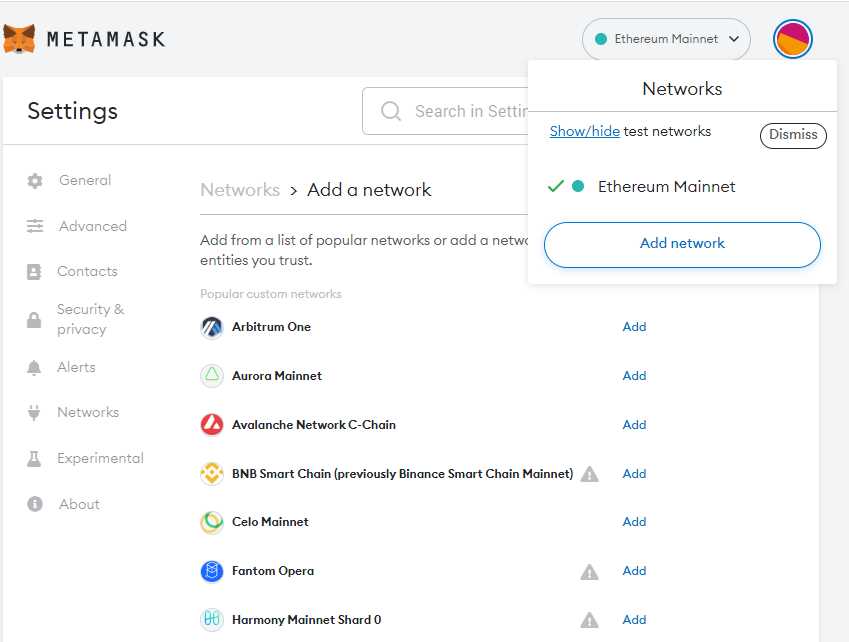
- Connect Metamask to the BNB network by selecting the “Custom RPC” option in the network dropdown menu. Enter the BNB network URL and click “Save”.
- Congratulations! You have successfully set up Metamask and connected it to the BNB network. You can now use Metamask to send, receive, and manage your BNB tokens.
Remember to keep your Metamask password and backup phrase secure at all times. Do not share this information with anyone and be cautious of phishing attempts.
Connecting Metamask to BNB Network
Metamask is a powerful wallet that allows you to interact with the BNB network and execute transactions seamlessly. To connect Metamask to the BNB network, follow the steps below:
Step 1: Install Metamask
If you haven’t already, install the Metamask extension for your web browser. You can find it easily by searching for “Metamask” in the extension store of your browser.
Step 2: Set Up Your Metamask Account
- Launch Metamask from your browser’s extension toolbar.
- Create a new account or import an existing one using your seed phrase or private key.
- Set a password to secure your account.
- Agree to the terms and conditions.
Step 3: Connect Metamask to the BNB Network
Once your Metamask account is set up, you need to connect it to the BNB network:
- Click on the Metamask extension icon and open the Metamask interface.
- In the top right corner, click on the network selection dropdown.
- Scroll down and click on “Custom RPC”.
- In the “New RPC URL” field, enter the BNB network RPC URL.
- Click on the “Save” button to connect Metamask to the BNB network.
After following these steps, you should see that Metamask is now connected to the BNB network. You can now use Metamask to send and receive BNB tokens, interact with dApps on the BNB network, and execute transactions with ease.
Performing Transactions on BNB Network
Once you have set up your MetaMask wallet for use on the BNB network, you are ready to start performing transactions. Follow the steps below:
Step 1: Connect your Wallet
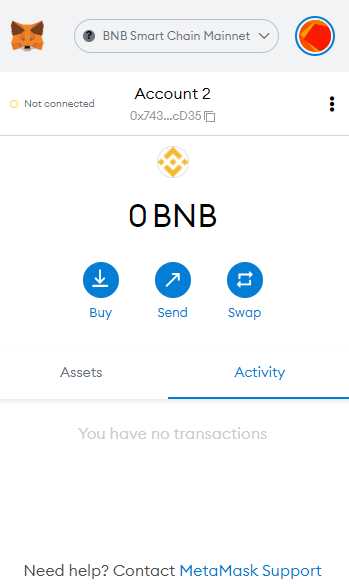
Open your MetaMask extension and make sure it’s set to the BNB network. If not, click on the network name at the top of the extension and select “BNB.” Your wallet should now be connected to the BNB network.
Step 2: Choose the Transaction Type
Decide whether you want to send BNB or perform a contract interaction. For sending BNB, you’ll need the recipient’s address. For a contract interaction, you’ll need the contract address and the specific function you want to call.
Step 3: Fill in the Transaction Details
If you’re sending BNB, enter the recipient’s address in the “To” field. Specify the amount of BNB you want to send in the “Amount” field. You can also add a gas limit, but it’s usually not necessary as MetaMask automatically sets a suitable limit. Finally, click “Next” to proceed.
Step 4: Confirm the Transaction
Review the details of your transaction, including the recipient’s address, the amount of BNB, and the gas limit. Make sure everything is correct, then click “Confirm” to initiate the transaction.
Step 5: Wait for Confirmation
After confirming the transaction, you will need to wait for a few moments for it to be included in a block on the BNB network. You can check the status of your transaction by clicking on the transaction history or by using a blockchain explorer.
Note: Gas fees will be deducted from your wallet balance when performing transactions on the BNB network.
With the steps above, you can easily perform transactions on the BNB network using MetaMask. Make sure to double-check all the details before confirming any transaction, as transactions on a blockchain network are irreversible.
What is Metamask?
Metamask is a cryptocurrency wallet that allows users to securely store, manage, and interact with their digital assets on the Ethereum blockchain. It also supports the Binance Smart Chain (BSC), which is a blockchain that runs in parallel with the Ethereum network.