
If you’re an avid cryptocurrency trader or investor, chances are you’re familiar with Binance. Binance is one of the leading cryptocurrency exchanges, offering a wide range of trading pairs and services. One of their popular offerings is Binance-Peg BUSD, a stablecoin pegged to the value of the US dollar. In this article, we’ll show you how to set up and use Binance-Peg BUSD address in MetaMask, a popular Ethereum wallet.
MetaMask is a browser extension that allows users to manage their Ethereum accounts and interact with decentralized applications (dapps) on the Ethereum network. By setting up a Binance-Peg BUSD address in MetaMask, you’ll be able to send, receive, and store BUSD tokens directly in your MetaMask wallet.
To get started, make sure you have MetaMask installed on your browser and set up with an Ethereum account. If you don’t have MetaMask installed, you can easily download and install it from the official MetaMask website. Once you have MetaMask installed, follow these steps to set up and use a Binance-Peg BUSD address:
Step 1: Add the Binance-Peg BUSD Token to MetaMask
Before you can use a Binance-Peg BUSD address in MetaMask, you need to add the BUSD token to your wallet. To do this, open your MetaMask wallet and click on the “Assets” tab. Then, click on the “Add Token” button and select the “Custom Token” tab. In the “Token Contract Address” field, enter the following Binance-Peg BUSD contract address: 0x4Fabb145d64652a948d72533023f6E7A623C7C53. Once you’ve entered the contract address, MetaMask will automatically fill in the token details for you. Click on the “Next” button, review the token details, and click on the “Add Tokens” button to add the Binance-Peg BUSD token to your MetaMask wallet.
Step 2: Get a Binance-Peg BUSD Address
Now that you have the Binance-Peg BUSD token added to your MetaMask wallet, you need to get a Binance-Peg BUSD address to use for sending and receiving BUSD tokens. To get a Binance-Peg BUSD address, you’ll need to create a Binance account if you don’t have one already. Once you have a Binance account, navigate to the BUSD deposit page on Binance and generate a Binance-Peg BUSD address. Copy the generated address.
Step 3: Add the Binance-Peg BUSD Address to MetaMask
With the Binance-Peg BUSD address copied, go back to your MetaMask wallet and click on the account icon to open the account menu. Select the account you want to add the Binance-Peg BUSD address to, and then click on the “Edit” button next to the account name. In the “Account Name” field, enter a name for the account (e.g., “Binance-Peg BUSD”) and in the “Account Address” field, paste the copied Binance-Peg BUSD address. Click on the “Save” button to add the Binance-Peg BUSD address to your MetaMask account.
That’s it! You have now set up and added a Binance-Peg BUSD address in MetaMask. You can now easily send, receive, and store Binance-Peg BUSD tokens directly in your MetaMask wallet. Remember to double-check the address before making any transactions to ensure you’re sending the tokens to the correct address.
How to Set Up Your MetaMask Wallet
MetaMask is a cryptocurrency wallet that allows you to store, manage, and interact with various cryptocurrencies and decentralized applications (dApps) on the Ethereum blockchain. Setting up your MetaMask wallet is easy and only takes a few simple steps.
Step 1: Install the MetaMask extension
To get started, you’ll need to install the MetaMask browser extension. It is available for Google Chrome, Mozilla Firefox, and Brave browsers. Simply search for “MetaMask” in your browser’s extension store and follow the instructions to install it.
Step 2: Create a new wallet
Once you have installed the MetaMask extension, click on the MetaMask icon in your browser’s toolbar to open the extension. On the welcome screen, click “Get Started” and then “Create a Wallet” to generate a new wallet. Follow the instructions to choose a strong password and write down your secret backup phrase.
Step 3: Import an existing wallet (optional)
If you already have a MetaMask wallet or an Ethereum wallet, you can choose to import it instead of creating a new wallet. Click on the MetaMask icon, select “Import Wallet”, and follow the instructions to import your wallet using your secret backup phrase or private key.
Step 4: Connect to a network
Once you have created or imported a wallet, you need to connect it to the Ethereum network. In the MetaMask extension, click on the network dropdown menu and select “Main Ethereum Network” to connect to the main Ethereum network. You can also choose other networks such as the Ropsten or Rinkeby test networks.
Step 5: Secure your wallet
It is important to keep your MetaMask wallet secure. Make sure to enable password protection for your extension and never share your secret backup phrase or private key with anyone. Additionally, consider enabling two-factor authentication (2FA) for added security.
Step 6: Customize your wallet
MetaMask allows you to customize your wallet by adding different accounts, setting up multiple networks, and importing tokens from other blockchains. Explore the settings and features of MetaMask to make your wallet personalized and tailored to your needs.
Now that you’ve set up your MetaMask wallet, you’re ready to start using it to manage your cryptocurrencies and interact with dApps. Remember to always do your own research and exercise caution when engaging with the crypto space.
Adding Binance-Peg BUSD Address to MetaMask
To add the Binance-Peg BUSD address to your MetaMask wallet, please follow the steps below:
Step 1: Open MetaMask
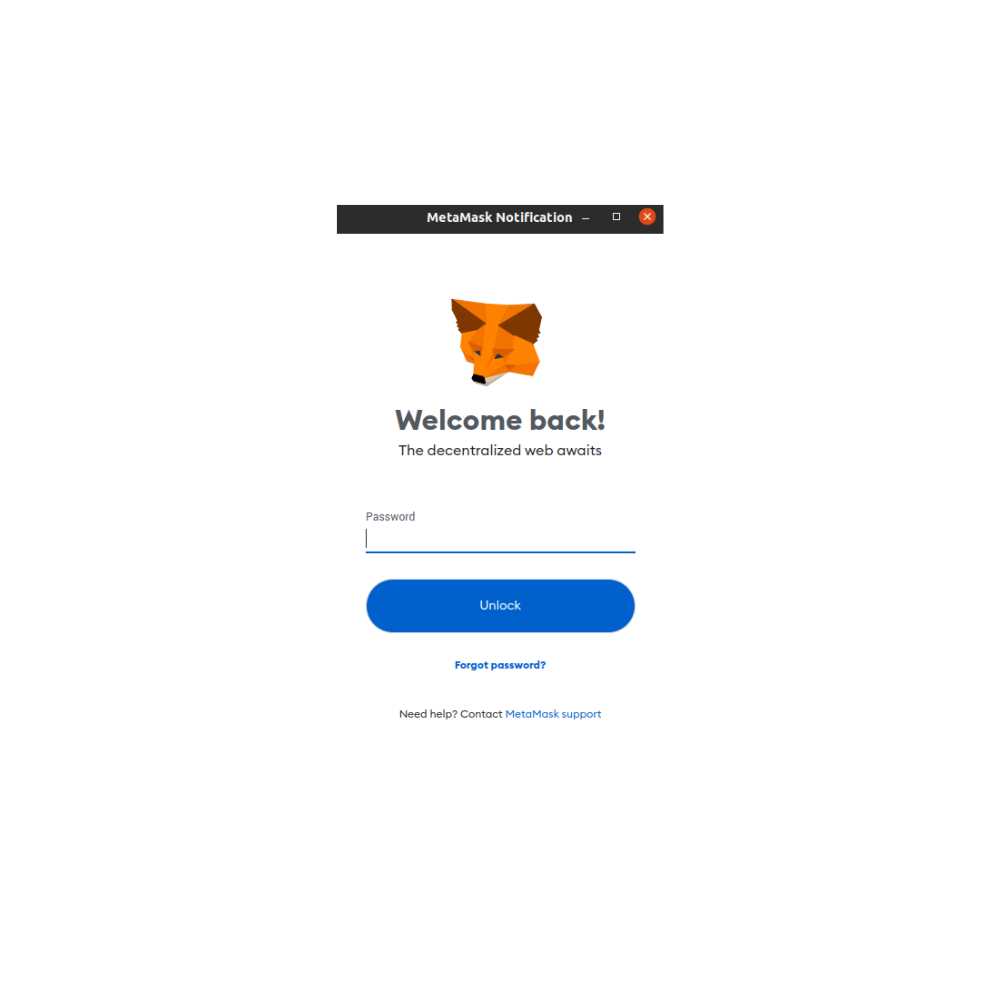
Open the MetaMask extension or app on your device.
Step 2: Select the Network
Make sure you have selected the correct network on MetaMask. Click on the network dropdown menu and choose “Binance Smart Chain” if it’s not already selected.
Step 3: Add Custom Token
Click on the “Assets” tab in MetaMask, then click on “Add Token”.
Step 4: Enter Token Details
In the “Token Contract Address” field, enter the Binance-Peg BUSD token contract address: [Binance-Peg BUSD Token Contract Address].
The token symbol and decimals will be automatically filled in. Click on “Next” to continue.
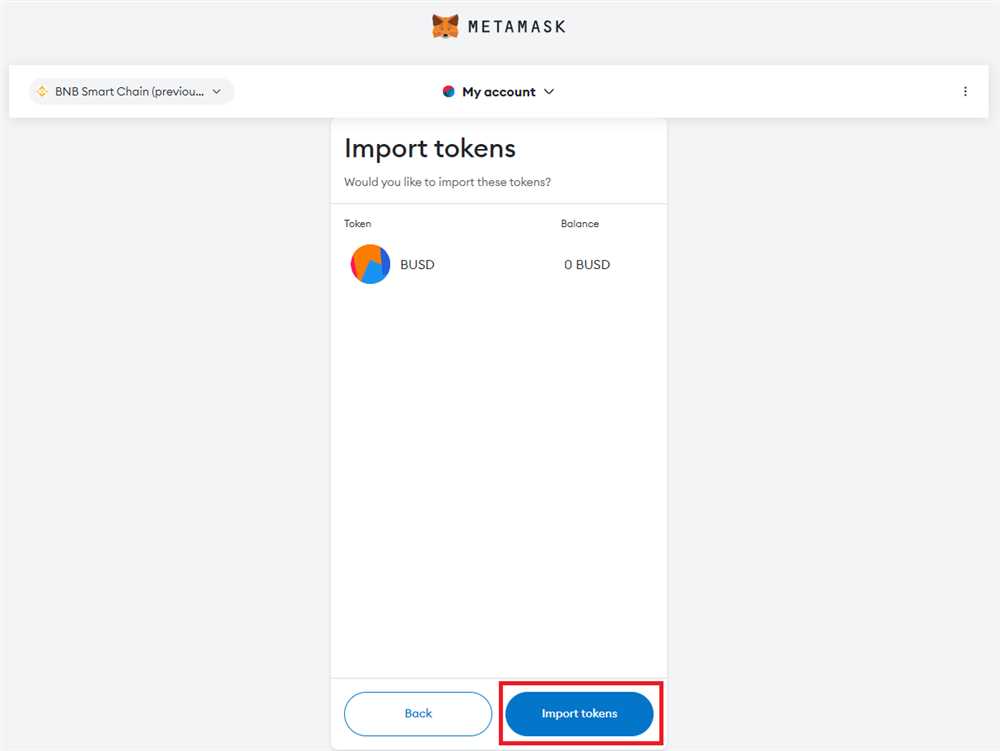
Step 5: Confirm and Add Token
Review the token details and click on “Add Tokens” to add the Binance-Peg BUSD token to your MetaMask wallet.
You will now be able to see and use the Binance-Peg BUSD token in your MetaMask wallet.
Configuring Binance-Peg BUSD Address in MetaMask
Binance-Peg BUSD Address is a feature that allows you to use your MetaMask wallet with the Binance Smart Chain and interact with Binance-Peg BUSD tokens. To set up and use a Binance-Peg BUSD address in MetaMask, follow the steps below:
- Install MetaMask: If you haven’t already, install the MetaMask browser extension and create a new wallet or import an existing one.
- Connect to the Binance Smart Chain: Open the MetaMask extension, click on the network dropdown, and select “Custom RPC”. Enter the following details for the Binance Smart Chain network:
- Network Name: Binance Smart Chain
- RPC URL: https://bsc-dataseed.binance.org/
- Chain ID: 56
- Symbol: BNB
- Block Explorer URL: https://bscscan.com
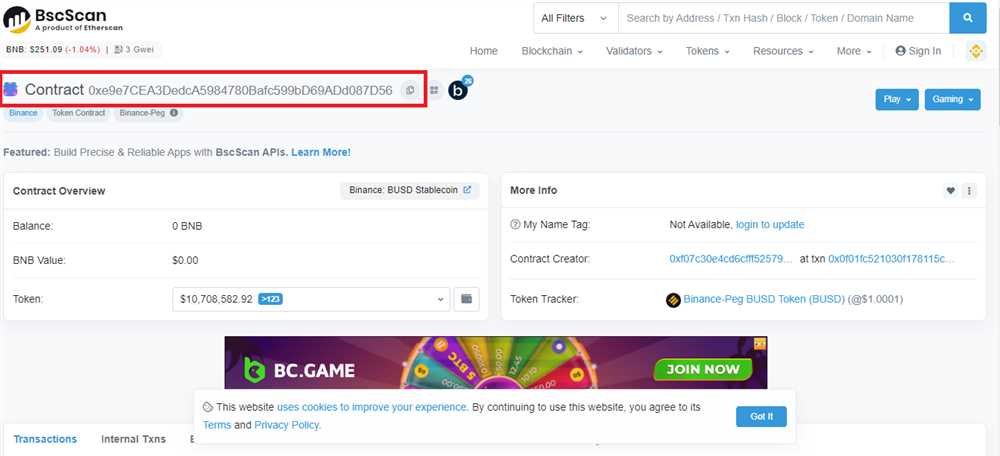
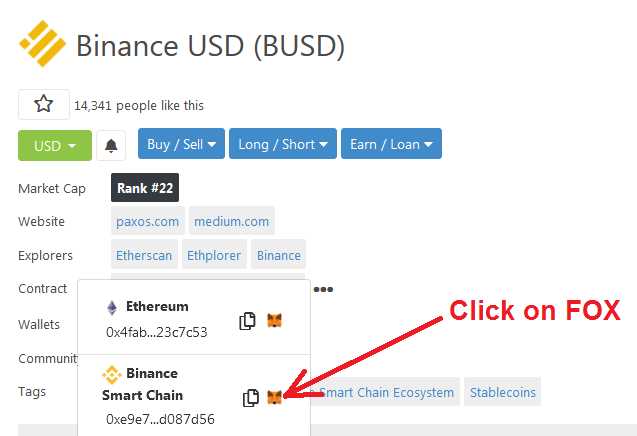
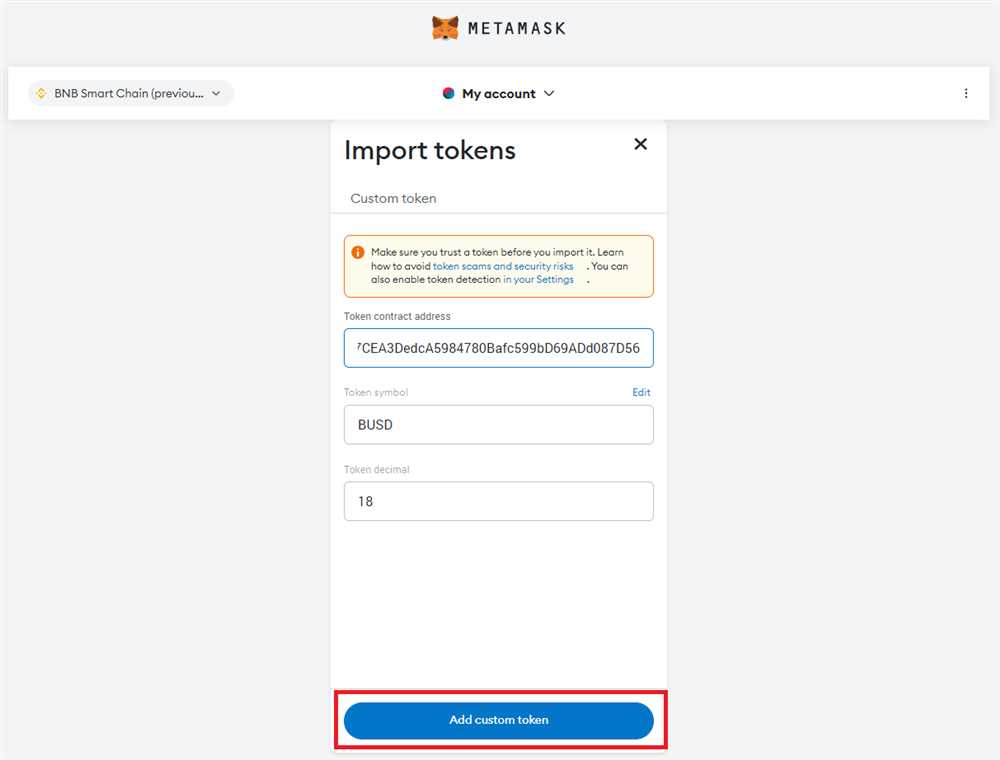
- Add Binance-Peg BUSD Token: In your MetaMask wallet, click on “Add Token” and select “Custom Token”. Enter the following details for the Binance-Peg BUSD token:
- Token Contract Address: 0xe9e7CEA3DedcA5984780Bafc599bD69ADd087D56
- Token Symbol: BUSD
- Decimals of Precision: 18
- Switch to Binance-Peg BUSD Address: To switch to your Binance-Peg BUSD address, click on the account dropdown in MetaMask and select your Binance-Peg BUSD address. You can now use your MetaMask wallet to send and receive Binance-Peg BUSD tokens on the Binance Smart Chain.
Note: It is important to be cautious and ensure that you are interacting with the correct Binance-Peg BUSD token address. Verify the token contract address before making any transactions.
By following these steps, you can easily configure and use a Binance-Peg BUSD address in MetaMask, allowing you to take advantage of the benefits of the Binance Smart Chain.
Using Binance-Peg BUSD Address in MetaMask
MetaMask is a popular cryptocurrency wallet and browser extension that allows users to manage, store, and interact with blockchain-based assets. By integrating Binance-Peg BUSD address in MetaMask, users can easily transact BUSD tokens on the Binance Smart Chain.
To set up and use Binance-Peg BUSD address in MetaMask, follow the steps below:
- Install MetaMask extension in your browser if you haven’t done so.
- Open MetaMask and create a new wallet or import an existing one using your 12-word seed phrase.
- Click on the network selection dropdown, usually located at the top of MetaMask, and choose “Custom RPC”.
- Fill in the following information for the custom RPC:
- Network Name: Binance Smart Chain
- New RPC URL: https://bsc-dataseed.binance.org/
- Chain ID: 56
- Symbol: BUSD
- Block Explorer URL: https://bscscan.com/
- Click “Save” to save the custom RPC settings.
- Now, go to the MetaMask “Assets” tab and click on “Add Token”.
- In the “Token Contract Address” field, enter the Binance-Peg BUSD address: 0xe9e7CEA3DedcA5984780Bafc599bD69ADd087D56
- MetaMask will automatically fill in the Token Symbol and Decimals of Precision fields. Click “Next”.
- Click “Add Tokens” to add Binance-Peg BUSD to your MetaMask wallet.
Now, you can use the Binance-Peg BUSD address in MetaMask to send, receive, and manage BUSD tokens on the Binance Smart Chain. Make sure you have sufficient BNB for transaction fees on the Binance Smart Chain network.
Remember to always double-check the Binance-Peg BUSD address before making any transactions to ensure the accuracy of the recipient address.
Using Binance-Peg BUSD address in MetaMask opens up opportunities for users to participate in various decentralized finance (DeFi) applications and trade BUSD tokens on the Binance Smart Chain ecosystem.
Troubleshooting and Additional Tips
If you encounter any issues while setting up or using the Binance-Peg BUSD address in MetaMask, here are some troubleshooting tips to help you resolve them:
- Make sure you have the latest version of MetaMask installed on your browser.
- Double-check that you have copied the correct Binance-Peg BUSD address from Binance.
- Verify that you have enough funds in your Binance-Peg BUSD address to perform the desired transactions.
- Restart your browser and try setting up the Binance-Peg BUSD address again.
- Ensure that you have followed all the necessary steps correctly, as outlined in the setup guide.
Additionally, here are some general tips to help you make the most out of using Binance-Peg BUSD address in MetaMask:
- Keep your MetaMask and Binance accounts secure by enabling two-factor authentication.
- Regularly check for updates to both MetaMask and Binance to ensure you’re using the latest versions.
- Consider using a hardware wallet for added security when managing your Binance-Peg BUSD address.
- Be cautious when sharing your Binance-Peg BUSD address and other account information, as there are phishing attacks targeting cryptocurrency users.
- Keep track of your transactions and monitor your Binance-Peg BUSD address regularly to ensure all transactions are accurate.
By following these troubleshooting tips and additional tips, you should be able to successfully set up and use the Binance-Peg BUSD address in MetaMask while ensuring the security of your funds.
What is Binance-Peg BUSD?
Binance-Peg BUSD is a stablecoin issued by Binance on the Binance Smart Chain (BSC). It is pegged to the US Dollar and can be used for various purposes within the Binance ecosystem.