
Sending Non-Fungible Tokens (NFTs) with Metamask can be an exciting and rewarding experience. Whether you’re a collector, artist, or simply someone interested in the world of digital assets, Metamask provides an easy and secure way to send NFTs to others.
Metamask is a popular cryptocurrency wallet and browser extension that allows users to interact with decentralized applications (dApps) on the Ethereum blockchain. It supports various tokens, including NFTs, which are unique digital items stored on the blockchain.
In this step-by-step guide, we will walk you through the process of sending NFTs with Metamask, from setting up your wallet to completing the transaction. By the end, you’ll have the knowledge and confidence to send NFTs to anyone around the world.
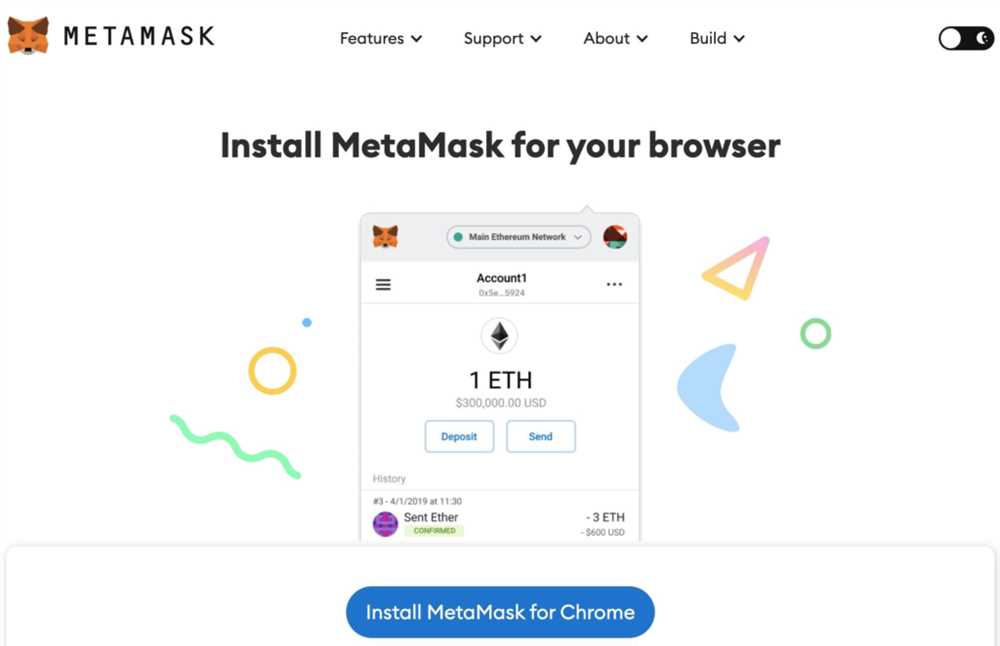
Note: Before you begin, make sure you have Metamask installed and set up on your browser. If you haven’t done so already, visit the Metamask website to download and install the extension. Once installed, create a new wallet or import an existing one.
Step 1: Connect your Metamask wallet to a compatible NFT marketplace
To send NFTs, you’ll need to connect your Metamask wallet to a marketplace that supports NFT transactions. Some popular options include OpenSea, Rarible, and SuperRare. Visit the desired marketplace and sign in or create an account.
How to Send NFTs with Metamask
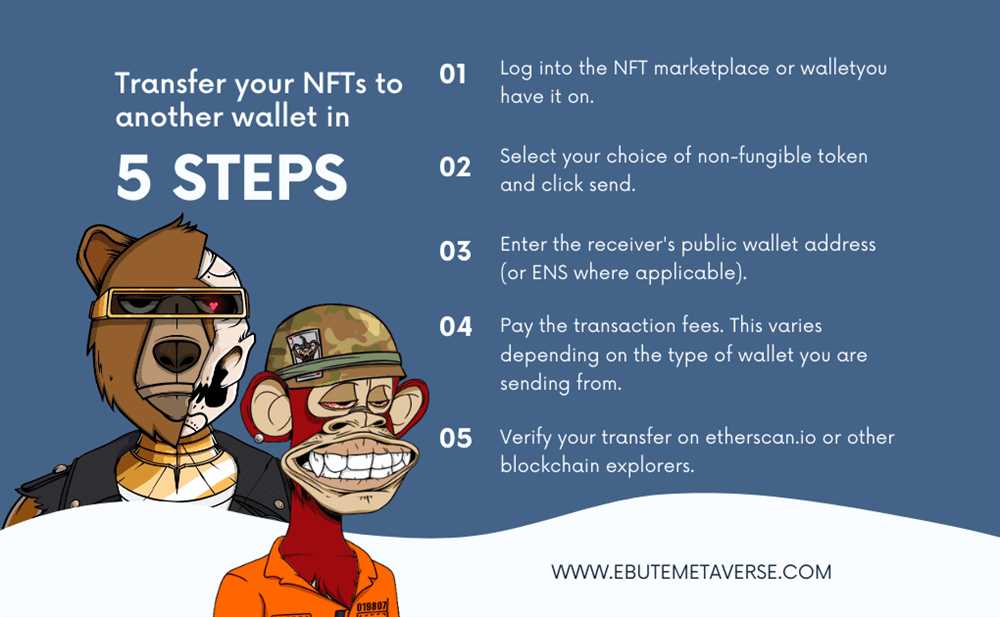
Sending NFTs with Metamask is a straightforward process that requires a few simple steps. This guide will walk you through the process, ensuring that you can confidently send your NFTs to other wallets or addresses.
Step 1: Open Metamask and Connect your Wallet
First, open your Metamask extension or app and ensure that your wallet is connected. Make sure you have the necessary funds and the NFT you want to send in your wallet.
Step 2: Select the NFT you want to Send
Navigate to your NFT collection within the Metamask interface. Locate the specific NFT you want to send and click on it to select it.
Step 3: Click on the Send Button
Once you have selected the NFT, find the “Send” or “Transfer” button, usually located next to the NFT’s details. Click on this button to initiate the sending process.
Step 4: Enter the Recipient’s Address
A new window or prompt will appear, asking you to enter the recipient’s wallet address. Make sure you accurately enter the address to avoid any errors or lost transfers. You can also choose to scan a QR code if the option is available.
Step 5: Confirm the Transaction
After entering the recipient’s address, review the details of the transaction. Ensure that everything is correct, including the fee and gas limit. Once you are satisfied, click on the “Confirm” or “Send” button to proceed with the transaction.
Step 6: Wait for Confirmation
The transaction will be submitted to the blockchain network, and you will need to wait for confirmation. The time it takes for confirmation can vary depending on network congestion and gas fees.
Step 7: Verify the Transaction
Once the transaction is confirmed, you can verify its completion by checking the blockchain explorer or the recipient’s wallet. The NFT should now be successfully sent to the recipient’s address.
Note: It’s always a good idea to double-check the recipient’s address before sending any NFTs to avoid irreversible mistakes.
Congratulations! You have successfully sent an NFT with Metamask. Repeat these steps whenever you want to send NFTs to others or different addresses. Enjoy trading and exchanging your unique digital assets!
Step 1: Install and Set Up Metamask
To send NFTs using Metamask, you first need to install and set up the Metamask wallet on your computer or mobile device. Follow these steps to get started:
- Visit the Metamask website at https://metamask.io/ and click on the “Get Chrome Extension” button if you are using Google Chrome, or download the mobile app if you are using a mobile device.
- Once the installation is complete, you will see the Metamask icon in your browser toolbar or app drawer.
- Click on the Metamask icon to open the wallet.
- If you are using Metamask for the first time, click on the “Create a Wallet” button to set up a new wallet. Follow the instructions to create a password and backup your recovery seed phrase. Make sure to store your recovery phrase in a safe place, as it can be used to restore your wallet if you lose access to it.
- If you already have a Metamask wallet, click on the “Import Wallet” button instead and enter your recovery seed phrase to restore your wallet.
- Once your wallet is set up or imported, you will be prompted to choose a network. Select the Ethereum Mainnet to work with NFTs on the Ethereum blockchain.
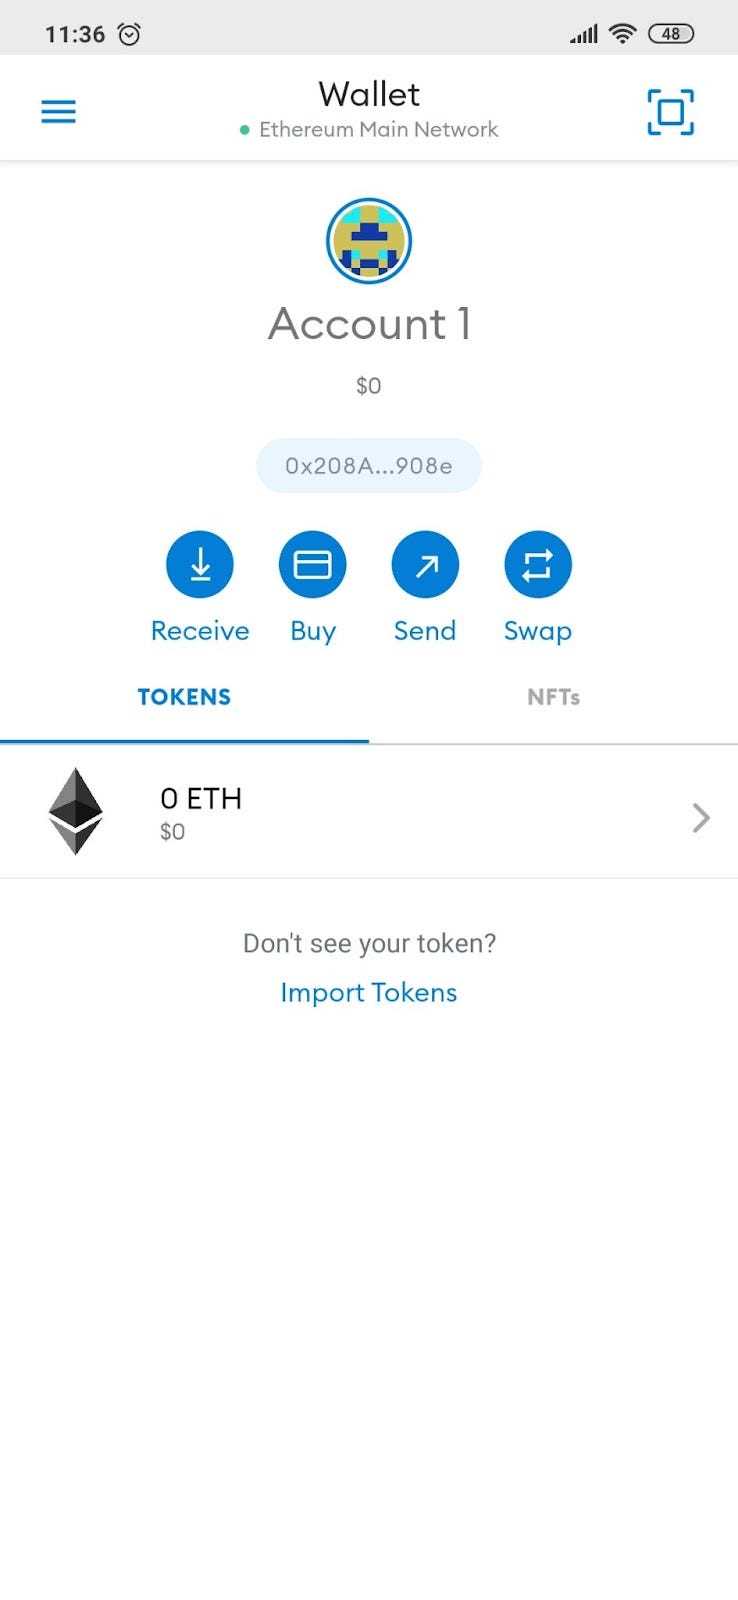
- Your Metamask wallet is now installed and set up. You can see your account address, balance, and transaction history in the wallet interface.
Now that you have installed and set up Metamask, you are ready to proceed to the next step and start sending NFTs.
Step 2: Connect Metamask to a Wallet
To send NFTs using Metamask, you need to connect it to a compatible wallet. Here’s how:
1. Install Metamask: If you don’t already have it, download and install the Metamask extension for your preferred browser like Chrome or Firefox.
2. Create or Import a Wallet: Open Metamask and either create a new wallet or import an existing one using the seed phrase or private key.
3. Connect Metamask to Your Wallet: Once your wallet is set up, connect Metamask to it by clicking on the profile icon in the top right corner and selecting “Connect to a Wallet.”
4. Choose a Wallet Provider: Metamask will display a list of compatible wallet providers. Select your desired wallet from the list. If your wallet is not listed, choose the “Other Wallet” option.
5. Grant Access: Follow the prompts to grant Metamask access to your wallet. This usually involves signing a transaction to authorize the connection.
6. Verify Connection: Once the connection is established, Metamask will display a confirmation message and your wallet balance should appear in the top right corner.
Now that you have connected Metamask to your wallet, you are ready to send NFTs using the platform.
Step 3: Send NFTs with Metamask
Once you have acquired an NFT through a marketplace or created one yourself, you may want to send it to another wallet address. Sending NFTs with Metamask is a straightforward process. Here’s how:
1. Open Metamask and select the wallet that contains the NFT you want to send.
Make sure you have the correct wallet selected in Metamask that holds the NFT you wish to send. You can switch between wallets by clicking on the account icon at the top right corner of the Metamask extension or app.
2. Find the NFT you want to send in your wallet.
Navigate to the “Assets” or “Collectibles” section in your Metamask wallet. Look for the specific NFT you want to send. It may be listed with its name or associated metadata.
3. Click on the NFT to access the detailed information.
Once you’ve located the NFT you want to send, click on it to view its detailed information and options. This will usually include the NFT’s image, owner details, and actions you can perform.
4. Look for the “Send” or “Transfer” option.
In the detailed information section, you should see an option to send or transfer the NFT. It may be labeled as “Send,” “Transfer,” or represented by an icon. Click on this option to proceed with the sending process.
5. Fill in the recipient’s wallet address.
Metamask will prompt you to enter the wallet address of the recipient. Make sure you have the correct address, as sending NFTs to the wrong address may result in permanent loss.
6. Confirm the transaction.
Review the details of the transaction, including the recipient’s address and any associated fees. Once you’re satisfied with the information, click on the “Confirm” or “Send” button to initiate the transfer.
7. Wait for the transaction to be confirmed.
After confirming the transfer, you’ll need to wait for the transaction to be validated and included in a block on the blockchain. The time it takes for confirmation depends on network congestion and gas fees.
8. Verify the successful transfer.
Once the transaction is confirmed, you can verify the successful transfer by checking the recipient’s wallet address. The NFT should now appear in their wallet’s assets or collectibles section.
That’s it! You have successfully sent an NFT with Metamask. Remember to double-check all the details before sending, and always be cautious when interacting with blockchain transactions.
What is Metamask?
Metamask is a cryptocurrency wallet and browser extension that allows users to interact with decentralized applications (DApps) on the Ethereum blockchain.
What is a wallet address?
A wallet address, also known as a public key, is a unique identifier that represents the location where cryptocurrency or NFTs are stored. It is a long string of alphanumeric characters that usually starts with “0x”.
Is it possible to send multiple NFTs at once using Metamask?
No, Metamask does not currently support sending multiple NFTs in a single transaction. Each NFT needs to be sent individually by following the steps mentioned in the guide.
Can I send NFTs to someone who doesn’t have a Metamask wallet?
Yes, you can send NFTs to someone who doesn’t have a Metamask wallet. You just need to enter their wallet address as the recipient when sending the NFT. They can then access the NFT using the wallet they prefer or by creating a Metamask wallet later on.