
Welcome to our step-by-step guide on how to send BTC to MetaMask! MetaMask is a popular cryptocurrency wallet that allows users to store and manage their digital assets securely. By sending BTC to MetaMask, you can easily access and manage your Bitcoin funds using the MetaMask interface.
Step 1: Set Up MetaMask Wallet
If you haven’t already, you’ll need to set up a MetaMask wallet. Visit the MetaMask website and download the extension for your browser. Follow the installation instructions and create a new wallet. Make sure to securely backup your seed phrase, as this will be crucial for accessing your wallet in the future.
Step 2: Copy Your MetaMask BTC Address
Once you have your MetaMask wallet set up, click on the account icon at the top right corner of the MetaMask extension and select “Copy Address” to copy your BTC address. This address is unique to your wallet and should be used for receiving BTC.
Step 3: Go to Your Bitcoin Wallet
Open your Bitcoin wallet from which you want to send BTC to MetaMask. Navigate to the “Send” or “Withdraw” section, depending on the wallet you are using. Paste your MetaMask BTC address in the recipient field.
Step 4: Enter the Amount and Confirm
Specify the amount of BTC you want to send to MetaMask. Double-check the address to ensure it matches your MetaMask BTC address. Review the transaction fee and confirm the transaction. Depending on the Bitcoin network congestion, the transaction may take some time to be processed.
Step 5: Check Your MetaMask Wallet
After the transaction is confirmed, go back to your MetaMask wallet and click on the “Assets” tab. You should see your newly received BTC balance. Your BTC is now safely stored and accessible through your MetaMask wallet.
That’s it! You have successfully sent BTC to your MetaMask wallet. Remember to always double-check the recipient address and be cautious when sending cryptocurrency.
Note: MetaMask is an Ethereum-based wallet, so it converts BTC to an ERC-20 token called Wrapped Bitcoin (WBTC) when you send BTC to MetaMask. This allows you to use your BTC within the Ethereum ecosystem. You can easily convert WBTC back to BTC when needed.
How to Send BTC to MetaMask
Sending Bitcoin (BTC) to your MetaMask wallet is a simple and straightforward process. By following the steps below, you’ll be able to transfer BTC to your MetaMask wallet in no time.
Step 1: Set up MetaMask
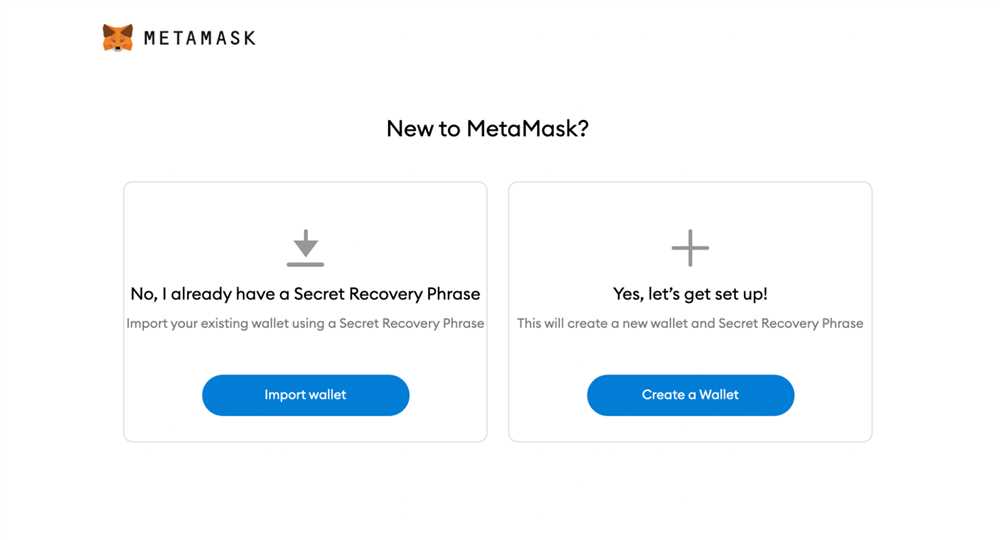
If you haven’t already, download and install the MetaMask extension for your preferred web browser. Create a new wallet or import an existing one by following the on-screen instructions.
Step 2: Obtain your MetaMask BTC address
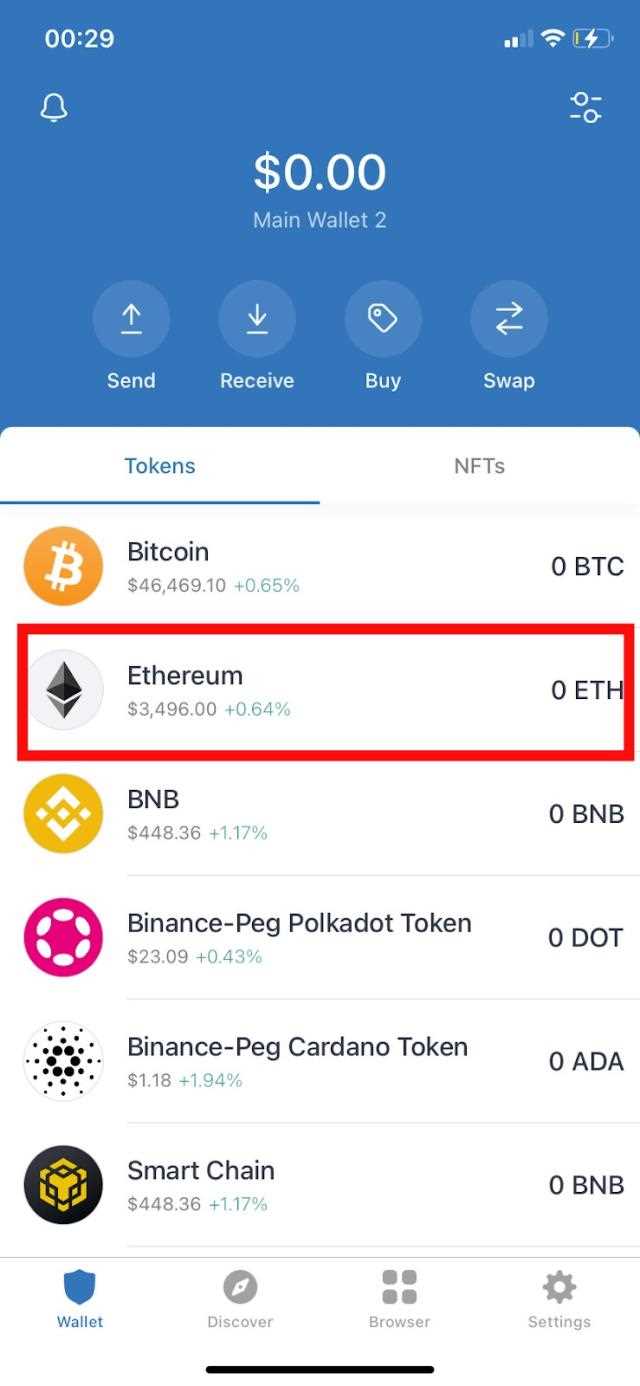
Once your MetaMask wallet is set up, navigate to the “Assets” tab and select “Bitcoin”. Click on the “Receive” button to obtain your MetaMask BTC address. Copy this address to your clipboard.
Step 3: Use a cryptocurrency exchange
In order to send BTC to your MetaMask wallet, you’ll need to have BTC in your possession. If you don’t already have BTC, you can purchase some from a cryptocurrency exchange of your choice. Follow the instructions provided by the exchange to buy BTC.
Step 4: Withdraw BTC to your MetaMask wallet
Once you have BTC in your exchange account, navigate to the withdrawal or “send” section of the exchange. Paste your MetaMask BTC address that you copied earlier into the recipient address field. Double-check the address to ensure its accuracy.
Specify the amount of BTC you wish to send to your MetaMask wallet. Take note of any transaction fees that may apply. Confirm the withdrawal and wait for the transaction to be processed by the exchange.
Step 5: Confirm the transaction in MetaMask
After the withdrawal transaction is confirmed on the blockchain, you’ll need to check your MetaMask wallet to confirm the BTC has been successfully received.
Open your MetaMask extension and navigate to the “Assets” tab. You should see the BTC balance in your wallet. If the balance has been updated, congratulations! You have successfully sent BTC to your MetaMask wallet.
Remember to keep your MetaMask seed phrase and private keys safe and secure. These are important for accessing your wallet in the future and should not be shared with anyone.
That’s it! You now know how to send BTC to your MetaMask wallet. Enjoy using your Bitcoin within the MetaMask ecosystem.
Step 1: Install and Set Up MetaMask
To send BTC to MetaMask, you first need to install and set up the MetaMask extension on your web browser.
- Open your web browser and go to the MetaMask website.
- Click on the “Get Started” button to begin the installation process.
- Choose your browser from the list of options and click “Install MetaMask”.
- Follow the on-screen instructions to complete the installation.
- Once installed, click on the MetaMask icon in your browser’s extension toolbar.
- Click on the “Get Started” button to create a new MetaMask wallet.
- Read and accept the terms of use, privacy notice, and the end-user license agreement.
- Create a strong password for your wallet and click “Create”.
- Write down the secret backup phrase provided by MetaMask and keep it in a safe place.
- Confirm your backup phrase by selecting the correct words in the correct order.
- Your MetaMask wallet is now set up and ready to use.
Remember to always keep your password and backup phrase secure. Losing them can result in permanent loss of access to your funds.
Step 2: Generate a BTC Wallet Address in MetaMask
Once you have the MetaMask extension installed and set up in your browser, follow these steps to create your BTC wallet address:
Step 2.1: Open MetaMask
Click on the MetaMask extension in your browser toolbar to open the MetaMask interface.
Step 2.2: Choose the Bitcoin Network
In the MetaMask interface, locate the network selector at the top of the window and make sure you have selected the Bitcoin network.
Step 2.3: Access the Wallet
Click on the three dots (…) in the top-right corner of the MetaMask interface, and then select “View Account.” This will take you to the main wallet screen.
Step 2.4: Generate Bitcoin Wallet Address
On the main wallet screen, you will see a “Receive” button. Click on it to generate a new Bitcoin wallet address.
Your BTC wallet address will be displayed on the screen. You can copy it by clicking on the copy icon or manually write it down.
It is essential to note that each cryptocurrency has its unique wallet address, so make sure you are generating a Bitcoin (BTC) wallet address in MetaMask.
With your BTC wallet address generated in MetaMask, you are now ready to receive Bitcoin to your MetaMask wallet.
Step 3: Transfer BTC to MetaMask
Now that you have set up your MetaMask wallet and connected it to your browser, it’s time to transfer your Bitcoin (BTC) to your MetaMask wallet. Follow these steps to complete the transfer:
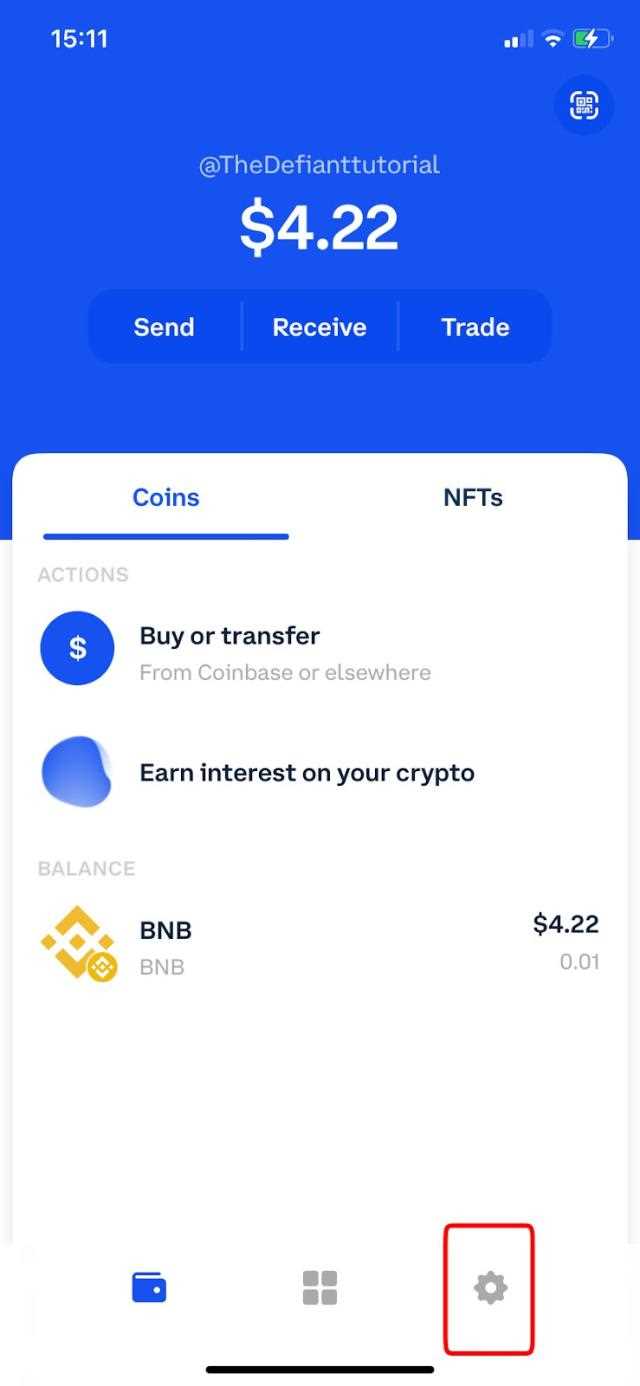
- Open your Bitcoin wallet, such as Coinbase or Binance, and navigate to the “Send” or “Withdraw” section.
- Enter your MetaMask wallet address as the recipient’s address. You can find this address by clicking on the MetaMask extension in your browser and copying the address from the wallet interface.
- Double-check the address to ensure it is correct. The address typically starts with “0x” followed by a series of letters and numbers.
- Specify the amount of Bitcoin you want to transfer to your MetaMask wallet. Make sure you have enough Bitcoin in your wallet to cover the transaction fees.
- Review the transaction details and confirm the transfer. Take note of any transaction fees that will be deducted from your Bitcoin balance.
- Wait for the transaction to be confirmed on the Bitcoin network. This process can take some time, depending on network congestion and the fee you paid.
- Once the transfer is confirmed, you can verify the BTC balance in your MetaMask wallet by clicking on the extension and checking the wallet interface.
Congratulations! You have successfully transferred your Bitcoin (BTC) to your MetaMask wallet. Now you can use your BTC to interact with decentralized applications (dApps) on the Ethereum network.
What is MetaMask?
MetaMask is a cryptocurrency wallet that allows users to store, manage, and interact with Ethereum-based tokens and decentralized applications (DApps) directly from their web browser.
Why would I want to send BTC to MetaMask?
While MetaMask is primarily designed for Ethereum-based tokens, it is possible to send BTC to MetaMask using a process called token wrapping. This allows you to access your BTC within the MetaMask wallet and use it for various Ethereum-based applications.
How do I send BTC to MetaMask?
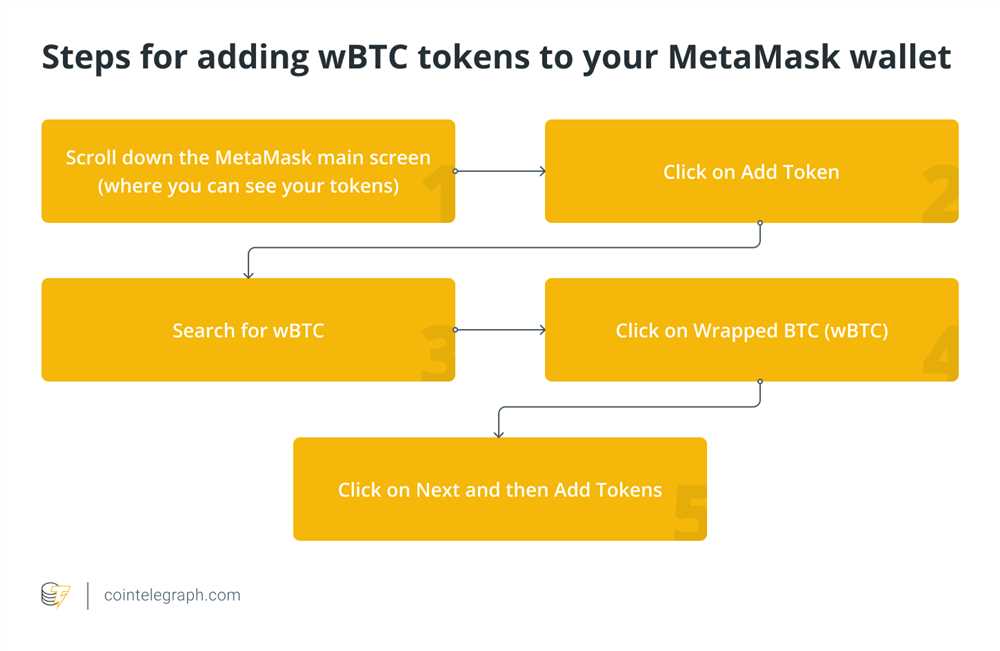
To send BTC to MetaMask, you will first need to convert your BTC into an Ethereum-compatible token. This can be done using a token wrapping service like Wrapped Bitcoin (WBTC). Once you have the wrapped BTC tokens, you can send them to your MetaMask wallet by using the wallet’s address as the recipient.
Can I send BTC directly to MetaMask without converting it into a token?
No, you cannot send BTC directly to MetaMask without converting it into a token. MetaMask is specifically designed for Ethereum-based tokens, so you will need to wrap your BTC into an Ethereum-compatible token before sending it to your MetaMask wallet.