
Metamask is a popular cryptocurrency wallet that allows users to store, manage, and interact with their digital assets. One of the key features of Metamask is the ability to import a private key, which allows users to access their funds from a different wallet or service.
If you have recently created a new wallet or want to transfer your funds from another service to Metamask, importing your private key is a simple and straightforward process. In this step-by-step guide, we will show you how to import your private key into Metamask so you can securely manage your digital assets.
Step 1: Install the Metamask extension
Before you can import your private key, you need to have the Metamask extension installed on your web browser. Visit the Metamask website and follow the instructions to install the extension for your browser.
Step 2: Open the Metamask extension
Once the extension is installed, click on the Metamask icon in your browser’s toolbar to open the extension. If this is your first time opening Metamask, you will be prompted to create a new wallet or import an existing one. Select the “Import Wallet” option.
Step 3: Enter your private key
In the import wallet screen, you will be asked to enter your private key. Copy and paste your private key into the provided field. Make sure to double-check that you have entered the correct private key, as entering an incorrect key can result in the loss of your funds.
Step 4: Set a password
To secure your wallet, you will need to set a password. Choose a strong password that is unique and not used for any other accounts. Enter your password in the provided field and confirm it.
Step 5: Import your wallet
After entering your private key and setting a password, click on the “Import” button. Metamask will verify your private key and import your wallet. Once the import process is complete, you will be able to access and manage your digital assets using Metamask.
By following these simple steps, you can easily import your private key into Metamask and gain access to your digital assets. Remember to always keep your private key and password secure and never share them with anyone.
Step 1: Access Metamask Settings
To import a private key into Metamask, you need to first access the settings of the Metamask extension in your web browser. Here’s how you can do it:
- Open your web browser and click on the Metamask extension icon. The extension icon is usually located in the upper right corner of your browser window.
- A small popup window will appear. Click on the profile avatar or the account icon in the popup window. This will open the Metamask menu.
- In the Metamask menu, click on the “Settings” option. This will navigate you to the settings page.
Once you’ve successfully accessed the Metamask settings, you can proceed to the next step of importing your private key. Note that the exact location and appearance of the Metamask extension may vary depending on the web browser you are using.
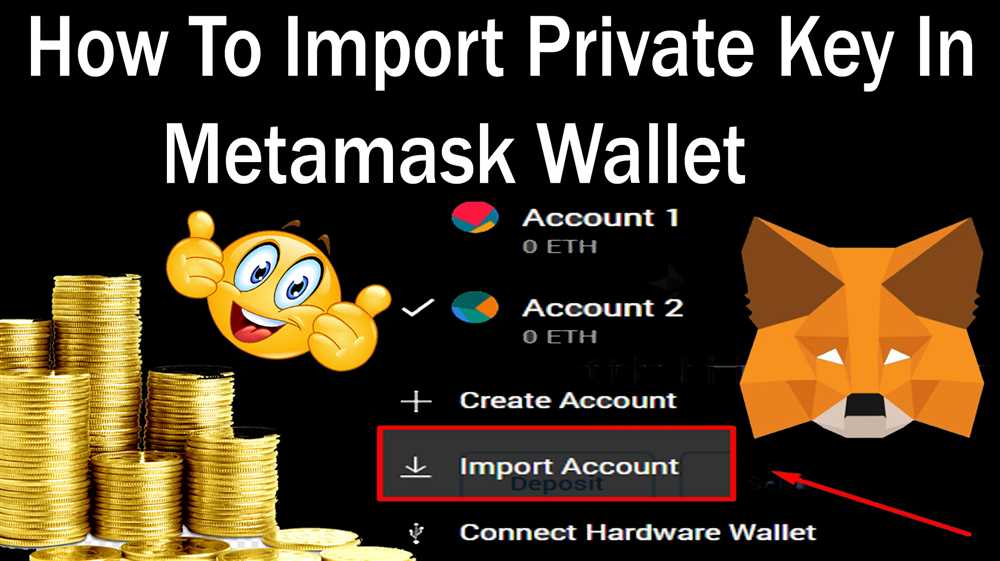
Step 2: Click on “Import Account”
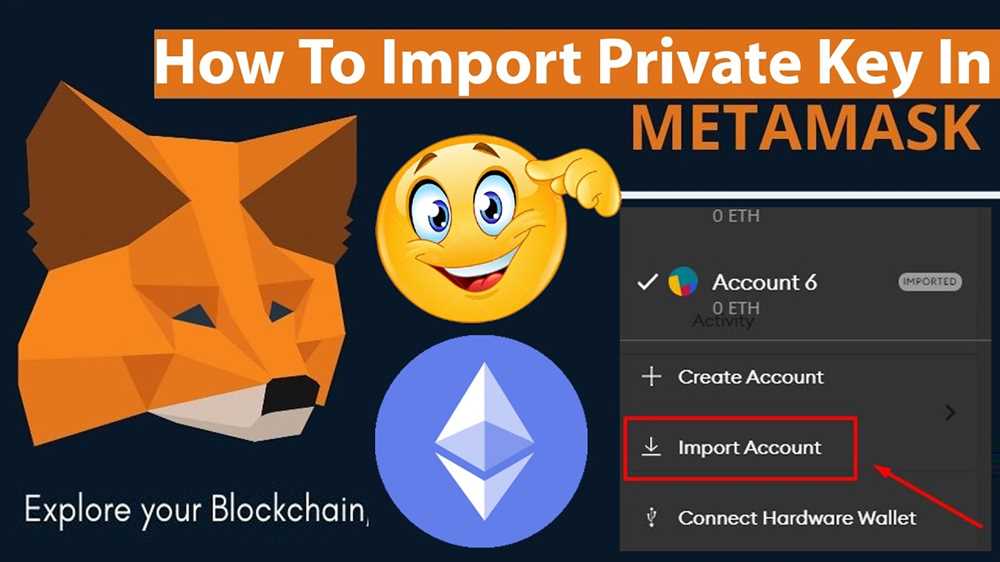
Once you have opened your Metamask extension in your browser, you will see the Metamask icon in the top right corner of your browser window. Click on the icon to open the extension.
After the extension opens, a popup window will appear. In the popup window, you will see a button that says “Import Account”. Click on this button to start the account import process.
A form will appear where you will be asked to enter your private key. This is the key that you obtained when creating your wallet or receiving it from another source. Carefully enter your private key into the form.
After entering your private key, click on the “Import” button to proceed with the import process. Metamask will then verify the validity of the private key and import the account into your Metamask wallet.
Once the import is complete, you will see the newly imported account listed in your Metamask wallet. You can now use this account to manage your Ethereum assets and interact with decentralized applications on the Ethereum network.
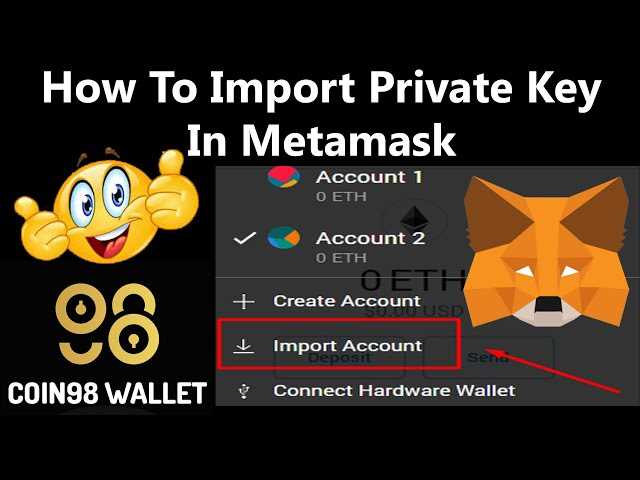
Step 3: Enter Your Private Key

Now that you have generated your private key, the next step is to enter it into the Metamask application.
Open the Metamask extension in your browser and click on the account icon located on the top-right corner of the screen. From the dropdown menu, select “Import Account”.
A new window will appear asking you to enter your private key. This is where you will copy and paste the private key that you generated in the previous step.
Make sure to double-check the private key for any typos or mistakes before proceeding. Your private key is a sensitive piece of information, so it is important to keep it secure and avoid sharing it with anyone.
Once you have entered your private key correctly, click on the “Import” button. Metamask will now import the account associated with the private key.
After importing your account, you will be able to access and manage your funds using Metamask. Remember to always keep your private key safe and secure to protect your assets.
Step 4: Provide Account Details
Now that you have imported your private key into MetaMask, it’s time to provide some account details.
Account Name: Choose a name for your Ethereum account. This is the name that will be displayed in MetaMask and can be used to identify your account.
Account Icon: Select an icon that represents your account. This icon will also be displayed in MetaMask and can help you visually differentiate between multiple accounts.
Account Password: Set a secure password for your Ethereum account. Make sure to choose a password that is strong and unique to protect your funds and personal information.
Backup Phrase: Write down the backup phrase provided by MetaMask. This phrase is extremely important as it is used to recover your account in case you lose access to your device. Store it in a safe and secure place.
Why is Backup Phrase important?
The backup phrase is a mnemonic phrase consisting of 12 or 24 words. It is generated by MetaMask and serves as a backup for your private key. If you lose access to your device or your private key gets compromised, you can use the backup phrase to restore your account and access your funds.
Remember: Anyone with access to your backup phrase can access your Ethereum account and steal your funds, so make sure to keep it safe and never share it with anyone.
Step 5: Complete the Import Process
After successfully importing your private key into MetaMask, you will need to complete the final steps to ensure that the import process is fully completed.
1. Check for Account Balance: Once the import process is complete, you should check if the imported account has the correct balance. You can do this by clicking on the account name in the MetaMask extension and selecting the appropriate account.
2. Verify Account Details: Double-check that the imported account details match the original account details. This includes checking the account name, address, and any other relevant information.
3. Test Sending Transactions: To ensure that the imported account is functioning correctly, try sending a small transaction to another wallet or address. This will help you verify that the private key import was successful and that you can use the imported account for transactions.
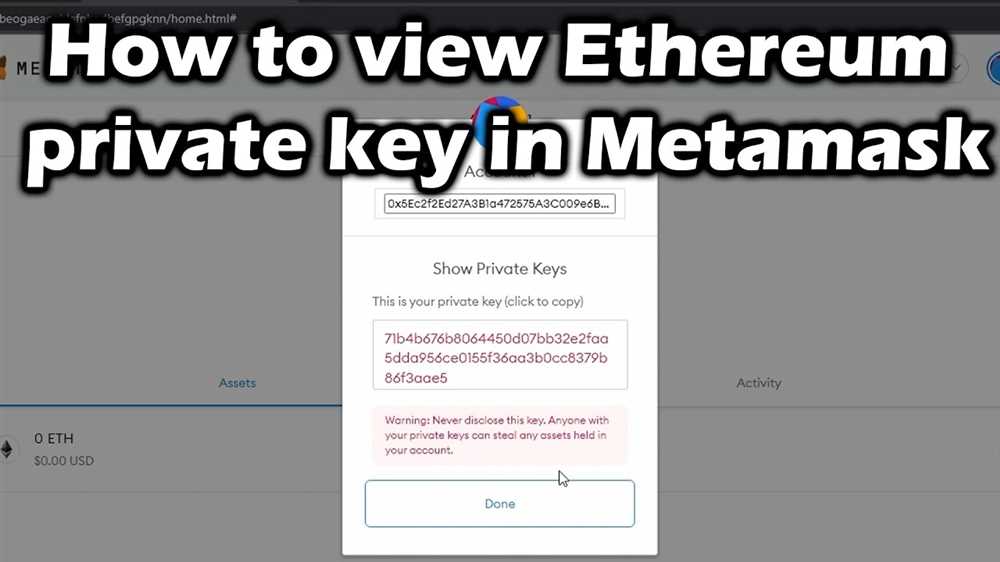
4. Backup the Imported Account: After completing the import process, it is crucial to create a backup of the imported account. You can do this by clicking on the account name in MetaMask, selecting “Account Details,” and using the “Export Private Key” or “Export JSON File” option. Store the backup securely in a location separate from your computer.
By following these steps, you can ensure that the import process of a private key into MetaMask is completed successfully and securely.
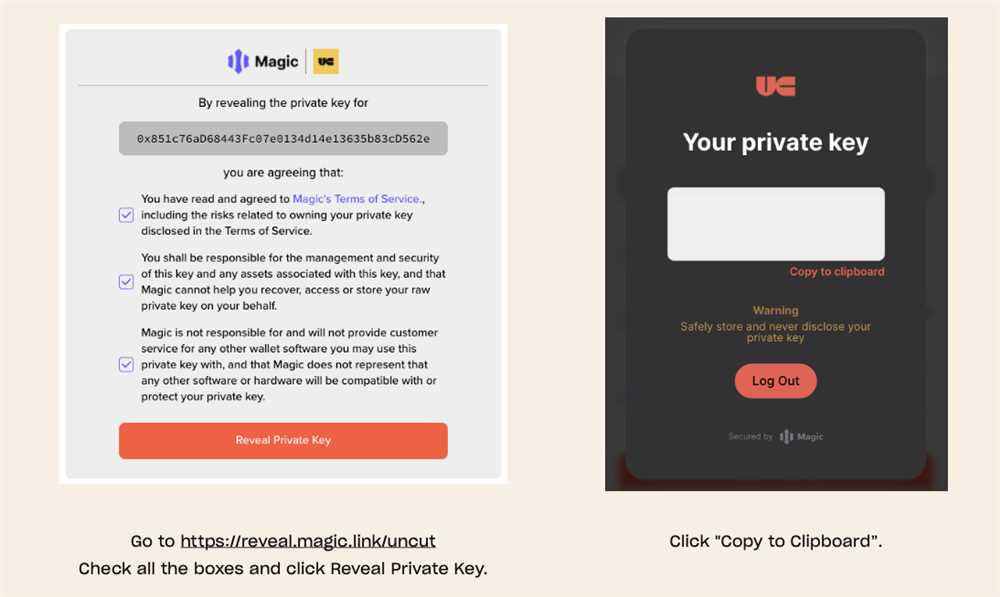
What is a private key?
A private key is a long string of numbers and letters that is used to access and control a cryptocurrency wallet. It is essentially a password that allows the owner to send, receive, and manage their digital assets.
Why would I need to import a private key into Metamask?
You might need to import a private key into Metamask if you have previously used a different wallet and want to transfer your funds to Metamask. By importing your private key, you can gain access to your wallet and manage your assets within the Metamask interface.