
Are you a cryptocurrency enthusiast looking to expand your wallet options? Connecting your Coinbase wallet to Metamask can offer you additional security, flexibility, and access to a wider range of decentralized applications (dapps).
Metamask is a popular wallet extension for web browsers, providing a user-friendly interface for interacting with Ethereum-based dapps. By integrating your Coinbase wallet with Metamask, you can seamlessly transfer funds between the two wallets, enabling you to take advantage of the features offered by both platforms.
Connecting your Coinbase wallet to Metamask is a simple process that can be completed in just a few steps. In this guide, we will walk you through each step, ensuring that you can successfully link these two wallets and explore the world of decentralized finance.
Disclaimer: Before proceeding, make sure you have your Coinbase wallet and Metamask extension installed on your web browser. This guide assumes you have basic knowledge of using both wallets. If you encounter any issues or have questions, consult the official support channels of Coinbase and Metamask.
Please note that connecting your Coinbase wallet to Metamask is currently only available for certain regions. Ensure that both wallets are accessible in your location before proceeding with the steps outlined in this guide.
How to Connect Your Coinbase Wallet to Metamask
If you are using Coinbase Wallet and want to connect it to Metamask, follow the step-by-step guide below:
| Step 1: | Open your Coinbase Wallet and click on the settings icon in the bottom right corner of the screen. |
| Step 2: | Select “Connected Apps” from the settings menu. |
| Step 3: | Scroll down to find “Metamask” in the list of connected apps. |
| Step 4: | Click on “Metamask” and then click on “Connect” to authorize the connection. |
| Step 5: | You will be redirected to the Metamask app. If you don’t have it installed, you will need to install it first. |
| Step 6: | Once you are on the Metamask app, click on “Next” and then on “Connect” to complete the connection. |
| Step 7: | After the connection is successful, you will see a notification in both the Coinbase Wallet and Metamask. |
Now your Coinbase Wallet is connected to Metamask, and you can easily switch between the two to manage your cryptocurrencies. Remember to always keep your wallets secure and never share your private keys with anyone.
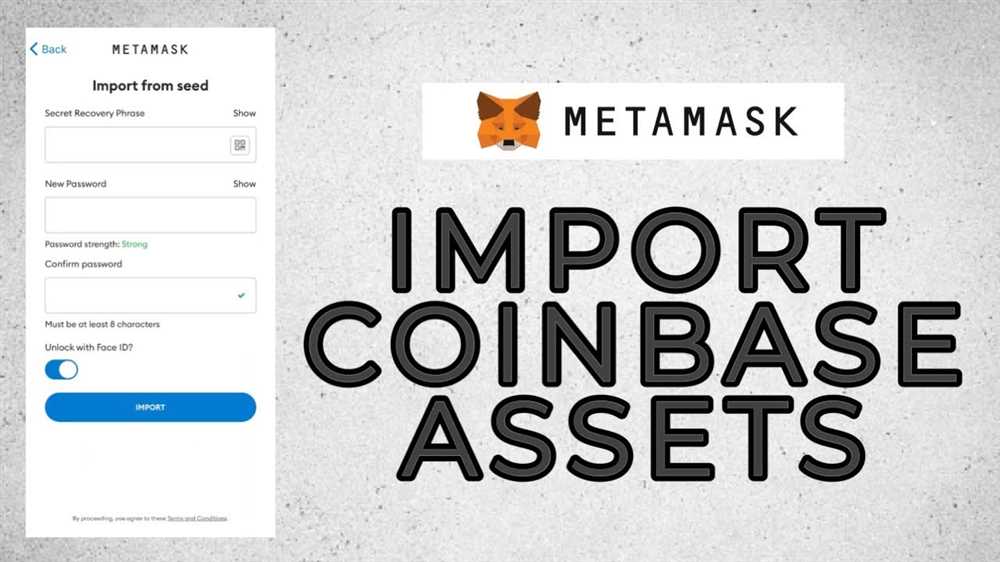
Step 1: Install and Set Up Metamask
To connect your Coinbase wallet to Metamask, you first need to install and set up the Metamask browser extension. Follow the steps below:
1. Install the Metamask Extension
Go to the Metamask website and click on the “Get Chrome Extension” button. This will redirect you to the Google Chrome Web Store.
Click on the “Add to Chrome” button in the top right corner to start the installation process.
2. Create a New Metamask Wallet
After installing the extension, you will see the Metamask fox icon added to your browser’s toolbar. Click on this icon to open the Metamask popup.
Click on the “Get Started” button to create a new wallet. You will be asked to agree to the terms of use.
Create a new password for your wallet and click on the “Create” button.
Click on the “Download Secret Backup Phrase” button and save the backup phrase in a safe place. This phrase is crucial for restoring your wallet in case you lose access to your device.
Confirm the backup phrase by selecting the words in the correct order to proceed.
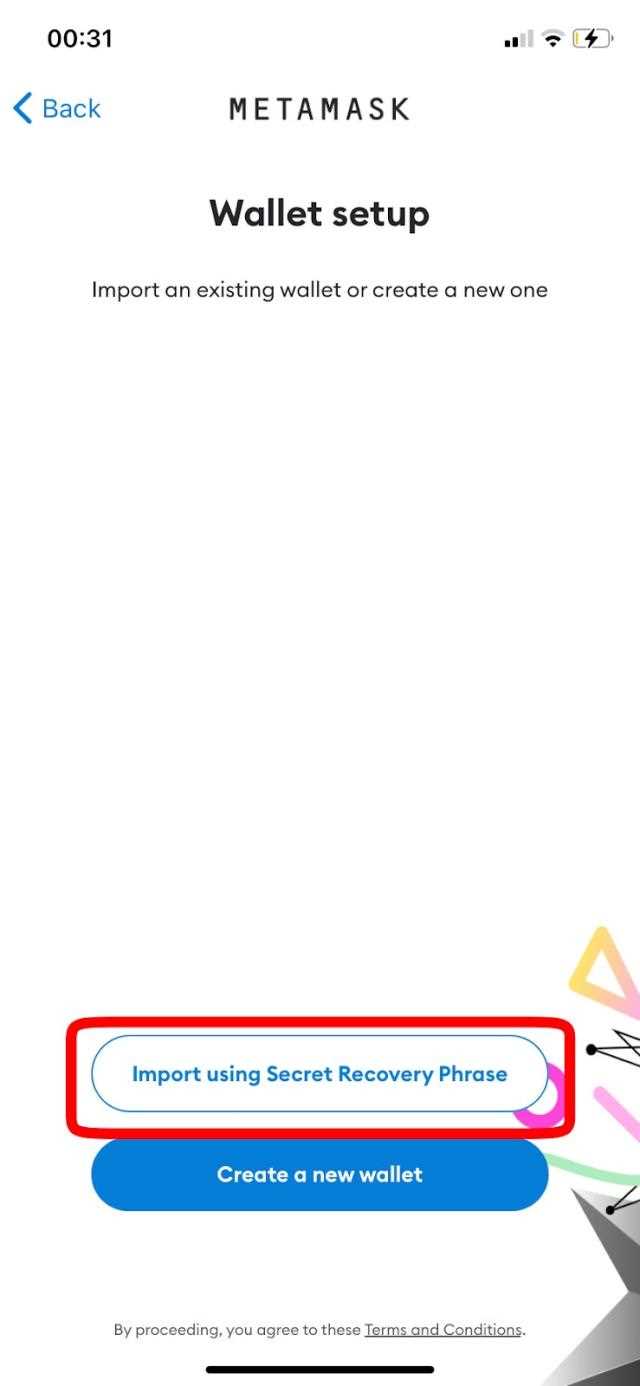
3. Connect Metamask to Coinbase
Now that you have set up your Metamask wallet, it’s time to connect it to your Coinbase account.
Open the Coinbase website and sign in to your account.
Go to the settings page and select the “Connected Apps” tab.
Click on the “Connect” button next to Metamask.
A confirmation popup will appear in Metamask. Click on the “Connect” button to allow Coinbase to access your account.
Note: Make sure you are connecting to the correct Coinbase account and that you trust the application you are connecting to.
That’s it! You have successfully installed and set up Metamask and connected it to your Coinbase wallet. Now you can easily transfer funds between your Coinbase account and Metamask using the Metamask browser extension.
Step 2: Access Coinbase Wallet
Now that you’ve installed Metamask, here’s how you can access your Coinbase Wallet:
| Step | Action |
| 1 | Open the Metamask browser extension by clicking on the Metamask icon in your browser’s toolbar. |
| 2 | Click on the account icon in the top right corner of the Metamask window. |
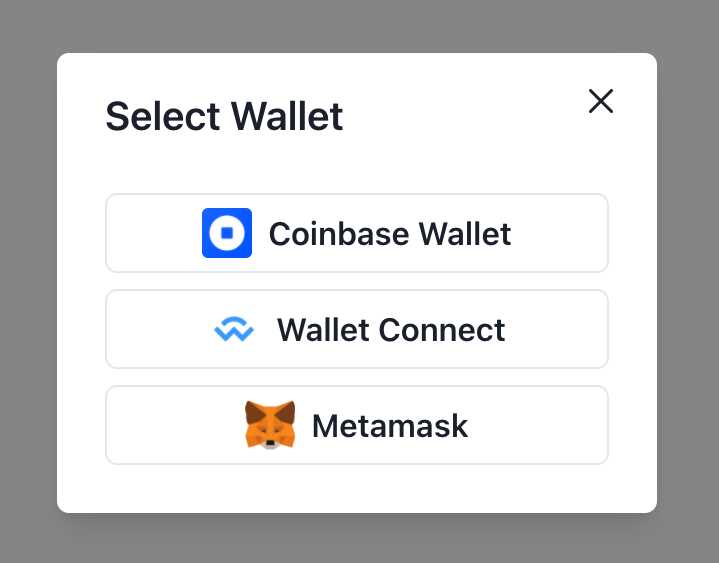
| 3 | Select the “Connect Wallet” option. |
| 4 | From the list of wallet options, choose “Coinbase Wallet”. |
| 5 | You will be redirected to the Coinbase Wallet app. |
| 6 | Authorize the connection by tapping on the “Connect” button within the Coinbase Wallet app. |
| 7 | You will then be redirected back to the Metamask window, and your Coinbase Wallet will be connected. |
Once your Coinbase Wallet is connected to Metamask, you can easily manage your cryptocurrency assets across both platforms. This integration allows for seamless transfer of funds and interaction with decentralized applications.
Step 3: Connect Coinbase Wallet to Metamask
Once you have both Coinbase Wallet and Metamask installed and set up, you can connect them to enable easy transfers between the two.
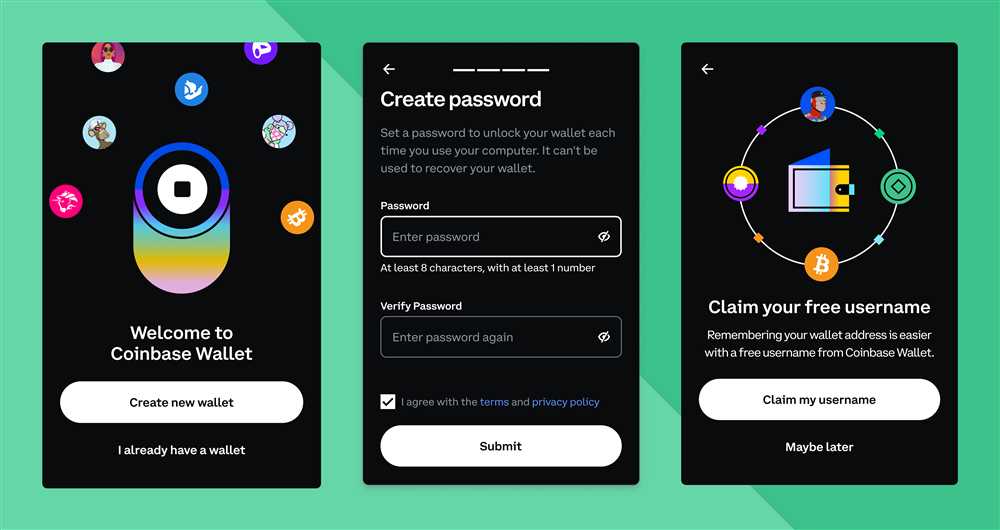
1. Open Coinbase Wallet
Launch the Coinbase Wallet app on your smartphone or tablet. If you haven’t logged in yet, enter your credentials to access your wallet.
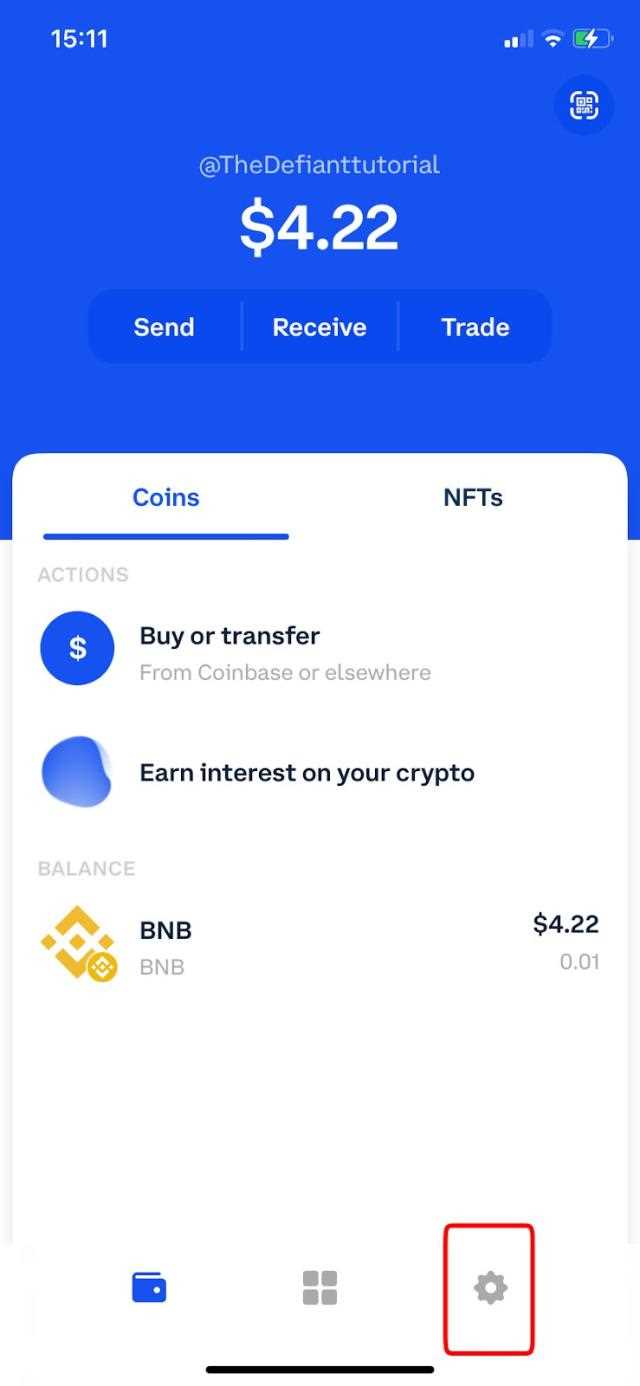
2. Navigate to Wallet Settings
In the Coinbase Wallet app, navigate to the settings by tapping on the gear icon in the bottom right corner of the screen.
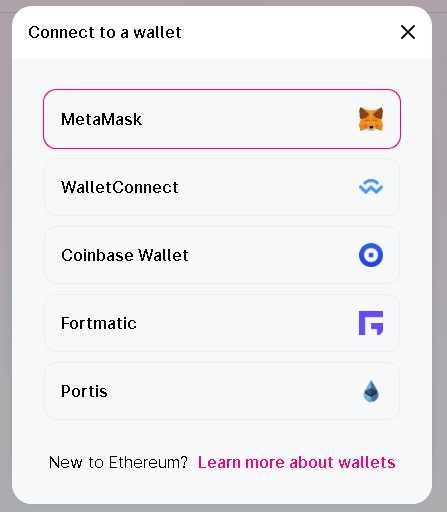
3. Select “Connect to a Wallet”
Under the settings menu, you’ll find an option called “Connect to a Wallet.” Tap on it to proceed.
4. Choose Metamask
You’ll be presented with a list of available wallets to connect. Locate and select “Metamask” from the list.
5. Authorize Connection
Confirm the connection request and authorize the Coinbase Wallet app to connect to your Metamask wallet. Follow the on-screen instructions to complete the process.
6. Wait for Confirmation
After the authorization process is complete, you’ll need to wait a few moments for the connection to be confirmed. This may take a moment, so be patient.
7. Check Wallet Connections
To verify that the connection was successful, return to the settings menu and navigate to the “Connected Wallets” section. You should see Metamask listed here.
| Troubleshooting Tip: | If you encounter any issues during the connection process, double-check that both Coinbase Wallet and Metamask are updated to their latest versions. If the problem persists, you may need to reach out to Coinbase or Metamask support for further assistance. |
|---|
With Coinbase Wallet successfully connected to Metamask, you can now easily transfer assets between the two wallets and take advantage of the features offered by each platform.
Step 4: Confirm the Connection
Once you have entered your Coinbase wallet account details and selected the network you wish to connect to, it’s time to confirm the connection between your Coinbase wallet and Metamask.
1. Verify the Connection Details
Double-check the information you have entered. Make sure that your Coinbase wallet address and network selection are correct.
2. Review the Connection Permissions
Take a moment to review the permissions that you are granting to Metamask. It’s important to understand which actions Metamask will be able to perform on your Coinbase wallet.
For example, Metamask may request permission to view your Coinbase wallet balance, make transactions on your behalf, or access any other relevant information stored in your wallet.
3. Confirm the Connection
If you are satisfied with the connection details and permissions, click on the “Confirm” button to establish the connection between your Coinbase wallet and Metamask.
Once the connection is confirmed, you will be able to access your Coinbase wallet through Metamask and use it to interact with various decentralized applications (Dapps) and perform transactions on the selected network.
Keep in mind that you can always revoke the connection between your Coinbase wallet and Metamask if you no longer wish to use them together.
Why should I connect my Coinbase wallet to Metamask?
Connecting your Coinbase wallet to Metamask allows you to access and manage your Coinbase funds through Metamask’s interface. This provides you with the ability to easily interact with decentralized applications (dApps) and perform transactions on the Ethereum network.
How do I connect my Coinbase wallet to Metamask?
To connect your Coinbase wallet to Metamask, you first need to log in to your Coinbase account and go to the “Settings” section. From there, select the “Connected Apps” tab and click on “Connect with Wallet”, then choose Metamask from the list of available options. Follow the on-screen prompts to complete the connection process.
Can I connect multiple Coinbase wallets to Metamask?
Yes, you can connect multiple Coinbase wallets to Metamask by repeating the connection process for each wallet. Each connected Coinbase wallet will appear as a separate account within Metamask, allowing you to manage and transact with each wallet independently.