
Metamask and Ledger are two popular tools used in the world of cryptocurrency. Metamask is a browser extension wallet that allows users to interact with decentralized applications (dApps) on the Ethereum network. On the other hand, Ledger is a hardware wallet that provides a secure and convenient way to store cryptocurrencies.
Combining the power of Metamask and Ledger allows users to benefit from the security of a hardware wallet while still enjoying the convenience of a browser extension wallet. In this simple guide, we will walk you through the process of connecting your Metamask wallet to your Ledger device.
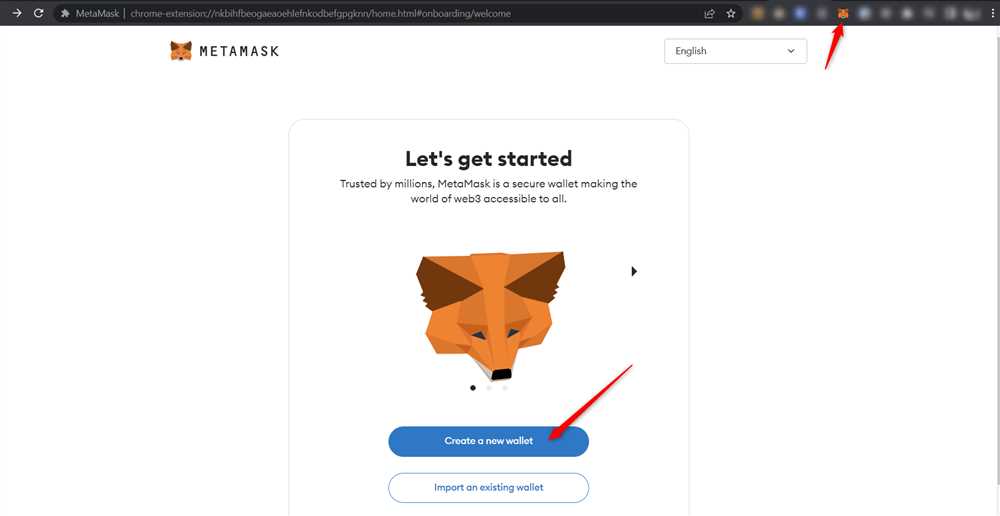
The first step is to make sure you have both Metamask and Ledger installed and set up on your computer. You can find detailed guides on how to install and set up Metamask and Ledger on their respective websites. Once both tools are installed, open your Metamask wallet and click on the account icon in the top right corner to access the account settings.
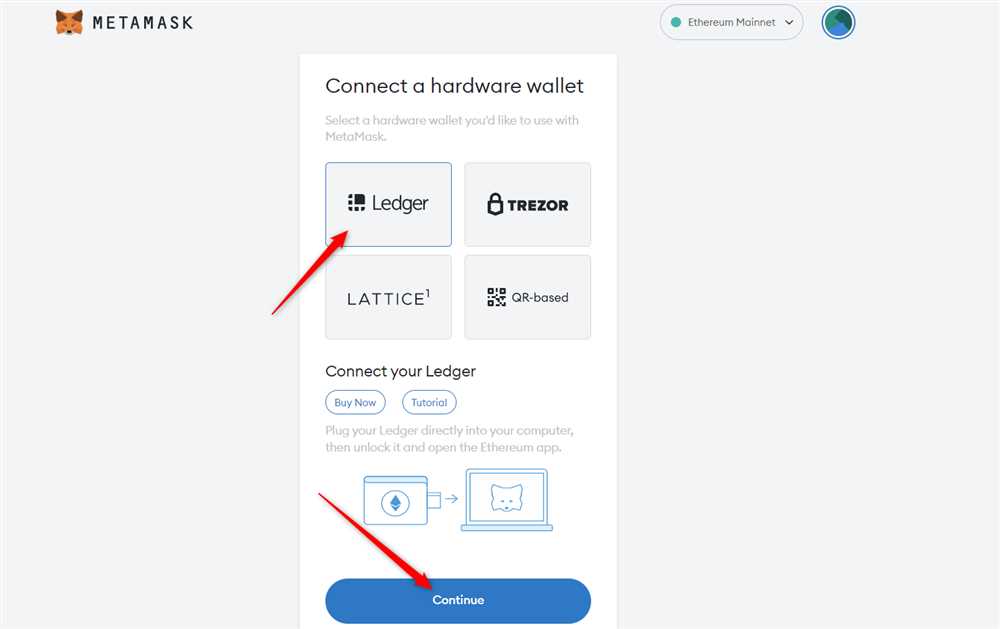
Next, click on the “Connect Hardware Wallet” option. A new window will open, allowing you to select the type of hardware wallet you want to connect. Choose “Ledger” from the list of options. Metamask will then prompt you to connect your Ledger device to your computer using the USB cable. Follow the instructions on the screen to complete the connection.
Once your Ledger device is connected, Metamask will automatically detect it and display a list of available accounts. Select the account you want to connect to Metamask and click on the “Connect” button. Metamask will then verify the connection with your Ledger device and import the selected account into your Metamask wallet. Congratulations! You have successfully connected your Metamask wallet to your Ledger device!
From now on, whenever you want to transact with your Metamask wallet, you can simply confirm the transaction on your Ledger device. This adds an extra layer of security to your transactions, as the private keys never leave your Ledger device. With your Metamask wallet connected to your Ledger device, you can confidently explore the world of decentralized finance and interact with various dApps on the Ethereum network.
Step by Step Guide for Connecting Metamask to Ledger
Connecting your Metamask wallet to your Ledger device is a simple process that ensures the security of your crypto assets. Follow the step-by-step guide below to connect your Metamask wallet to your Ledger device:
| Step 1: | Open the Metamask browser extension and make sure you are on the main dashboard. |
| Step 2: | Connect your Ledger device to your computer and unlock it by entering your PIN code. |
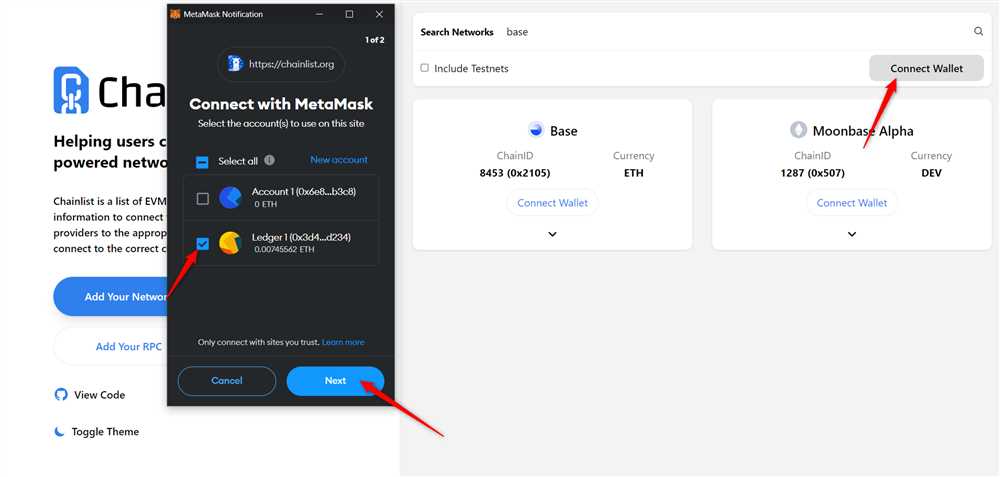
| Step 3: | Click on the Metamask extension icon in your browser and select “Connect Hardware Wallet” from the drop-down menu. |
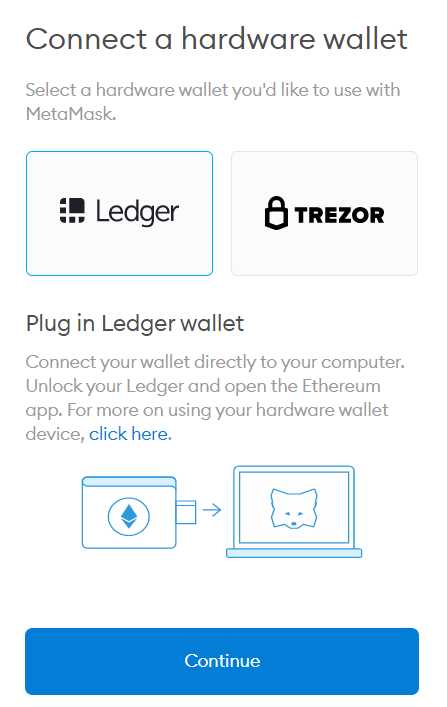
| Step 4: | A new window will open. Select “Ledger” as your hardware wallet provider. |
| Step 5: | Click on the “Connect” button to proceed. |
| Step 6: | A pop-up window will appear, asking you to unlock your Ledger device. Enter your PIN code on the Ledger device. |
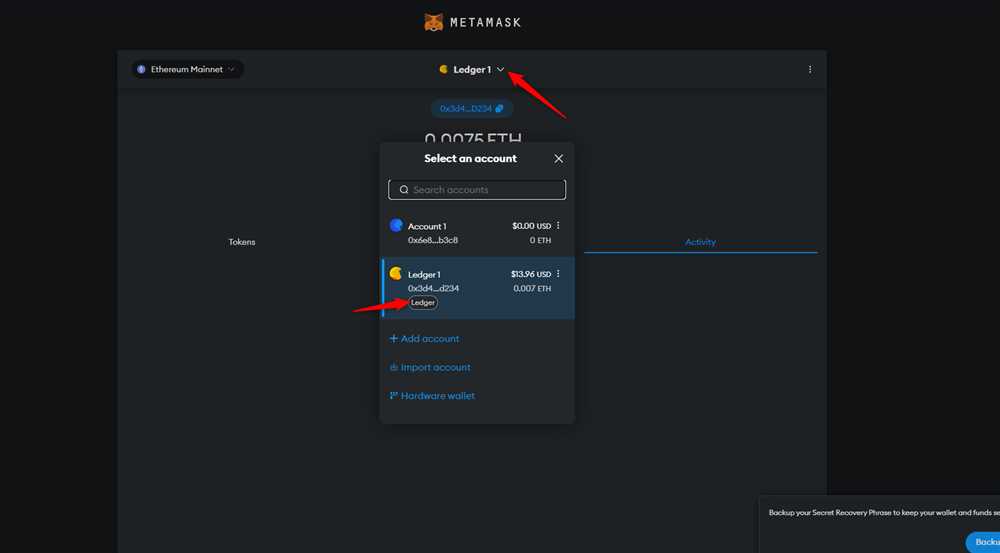
| Step 7: | After unlocking your Ledger device, a new window will appear with the list of accounts associated with your Ledger device. |
| Step 8: | Select the account you want to connect to Metamask and click on the “Import” button. |
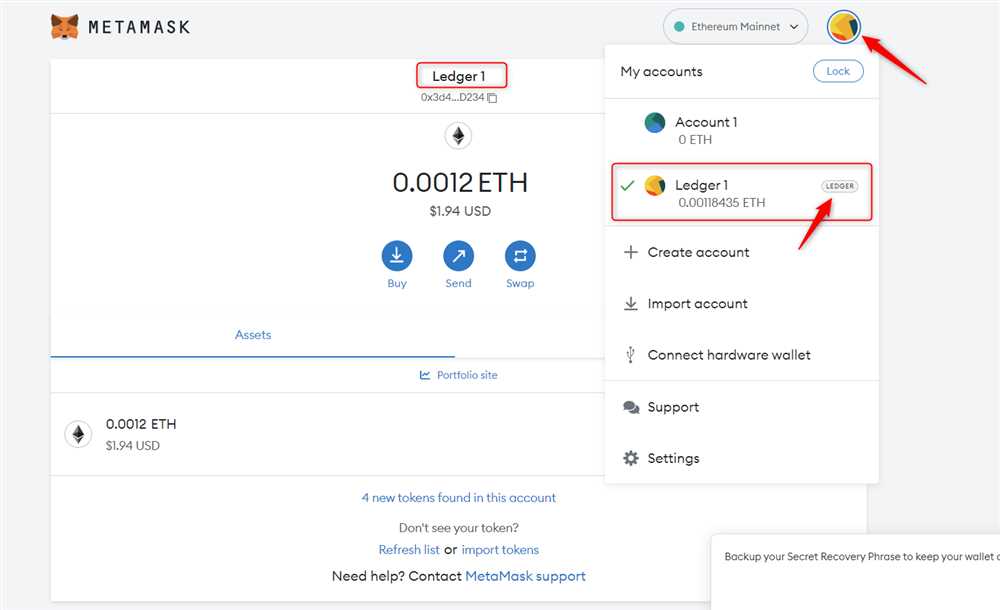
| Step 9: | Your Ledger account is now successfully connected to Metamask. You can now view and manage your Ledger account directly through the Metamask interface. |
By following these simple steps, you can securely connect your Ledger hardware wallet to your Metamask wallet and have full control over your crypto assets.
Connecting Metamask to Ledger: What You Need to Know
If you’re a user of Metamask and own a Ledger hardware wallet, you might be wondering how to connect the two. By connecting your Ledger device to Metamask, you can enhance the security of your transactions and have complete control over your funds.
Why Connect Metamask to Ledger?
Connecting Metamask to your Ledger wallet offers an added layer of security. Metamask acts as a bridge between your Ledger device and the Ethereum network, allowing you to securely sign transactions without exposing your private keys to potential online threats.
How to Connect Metamask to Ledger
The process of connecting Metamask to Ledger is straightforward. Here’s a step-by-step guide:
| Step | Description |
|---|---|
| 1 | Open your Metamask extension in your browser and click on the account icon. |
| 2 | Select “Connect Hardware Wallet” from the dropdown menu. |
| 3 | Click on the “Ledger” option. |
| 4 | Connect your Ledger device to your computer and enter your PIN. |
| 5 | Select the Ethereum account on your Ledger device that you want to connect to Metamask. |
| 6 | Click on “Connect” in Metamask, and you’re all set! |
By following these simple steps, you can easily connect your Metamask wallet to your Ledger device and enjoy the benefits of enhanced security and control.
Step-by-Step Guide to Connect Metamask to Ledger
If you want to add an extra layer of security to your Metamask wallet, you can connect it to your Ledger device. This guide will walk you through the process step-by-step.
Step 1: Install the Latest Version of Metamask
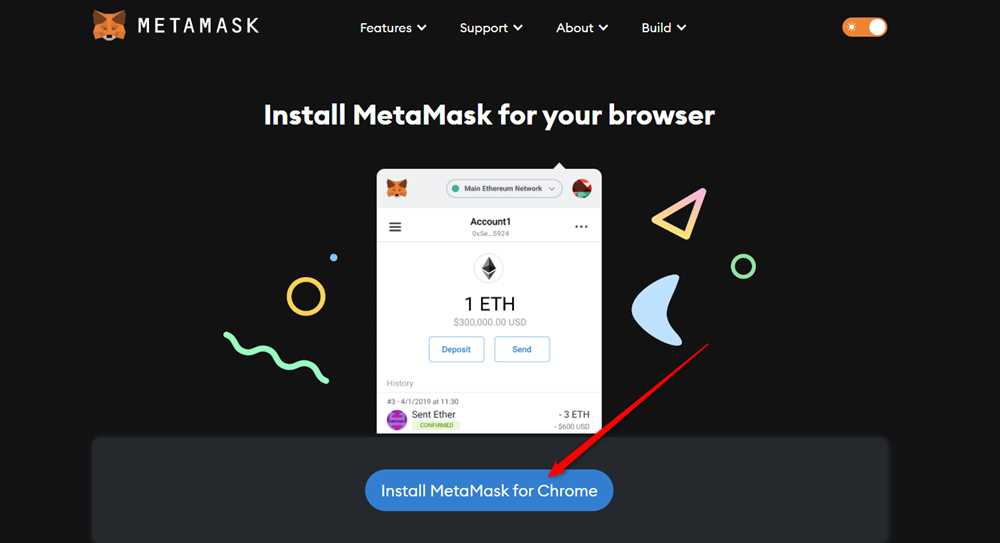
Make sure you have the latest version of Metamask installed on your computer. You can download it from the official Metamask website.
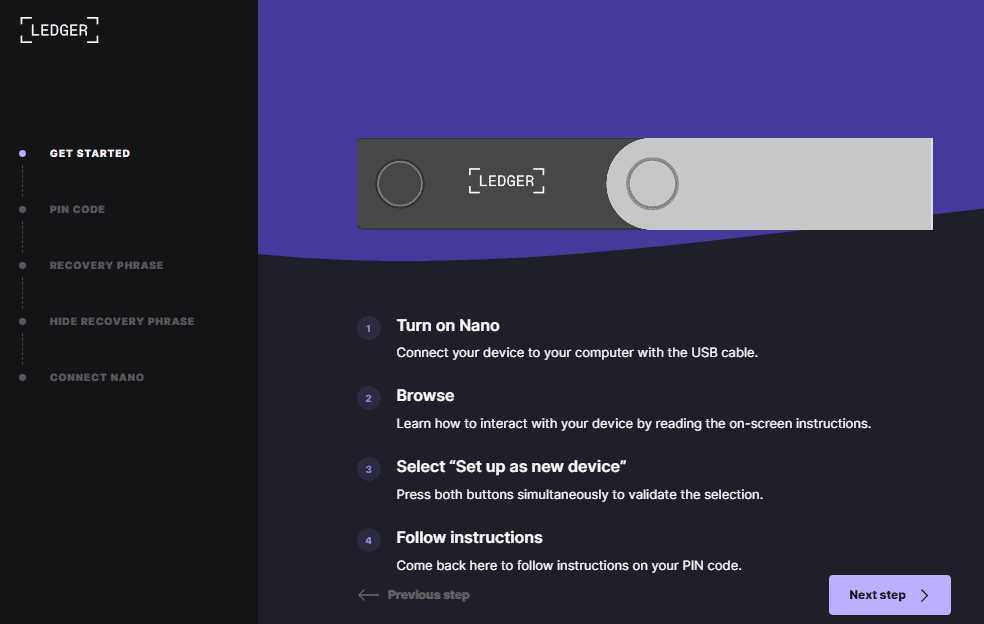
Step 2: Set up your Ledger Device
If you don’t have a Ledger device, you will need to purchase one and set it up following the instructions provided by Ledger. Make sure it is properly connected to your computer.
Step 3: Open Metamask and Click on the Account Image
Launch the Metamask extension in your browser and click on the account image in the top right corner of the interface.
Step 4: Select “Connect Hardware Wallet”
A drop-down menu will appear. Select “Connect Hardware Wallet” to begin the process of connecting your Ledger device.
Step 5: Choose “Ledger” in the Options
A new window will appear with multiple wallet options. Choose “Ledger” from the list to connect your Ledger device to Metamask.
Step 6: Connect your Ledger Device
Metamask will prompt you to connect your Ledger device to your computer if it’s not already connected. Follow the on-screen instructions to complete the connection.
Step 7: Confirm Connection on Ledger Device
Your Ledger device will display a message asking you to confirm the connection. Use the buttons on the device to verify and approve the connection.
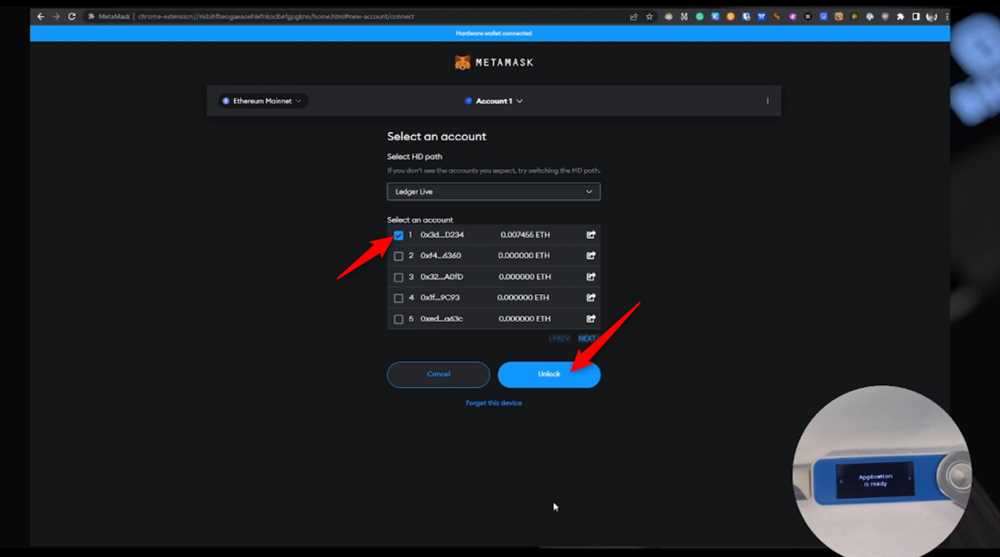
Step 8: Import Account to Metamask
Once the connection is confirmed, you will be prompted to import an account from your Ledger device to Metamask. Choose the account you want to connect and click “Import”.
Step 9: Complete the Import Process
Follow the instructions on the screen to complete the import process. Once done, your Ledger device will be linked to your Metamask wallet, providing an added layer of security.
That’s it! Your Metamask wallet is now connected to your Ledger device. You can now use Metamask with the added security of your Ledger hardware wallet.
What is Metamask?
Metamask is a browser extension that allows users to interact with the Ethereum blockchain. It provides a user-friendly interface for managing digital assets and interacting with decentralized applications.
What is Ledger?
Ledger is a hardware wallet that securely stores cryptocurrency private keys offline. It is considered one of the most secure ways to store digital assets, as the private keys never leave the device.
Why would I want to connect Metamask to Ledger?
Connecting Metamask to Ledger adds an extra layer of security to your Ethereum transactions. It ensures that your private keys are securely stored on the Ledger device, reducing the risk of theft or unauthorized access.