
If you’re a fan of XRP and use Metamask as your go-to Ethereum wallet, you might be wondering how to add XRP to your wallet. Adding XRP to Metamask is actually quite simple, although it does require a few steps. In this guide, we’ll take you through the process, step by step, so you can easily add XRP to your Metamask wallet and start managing your XRP holdings alongside your other cryptocurrencies.
Step 1: Install Metamask
Before you can add XRP to your Metamask wallet, you’ll need to have the Metamask extension installed in your browser. If you haven’t done so already, head to the Metamask website and follow the instructions to download and install the extension for your preferred browser.
Step 2: Create or Import a Wallet
Once Metamask is installed, open the extension and either create a new wallet or import an existing one. If you’re creating a new wallet, Metamask will prompt you to set a password and provide you with a unique recovery seed phrase. Make sure to write down this seed phrase and keep it in a secure place, as it will be your only way to recover your wallet.
Step 3: Connect to the XRP Network
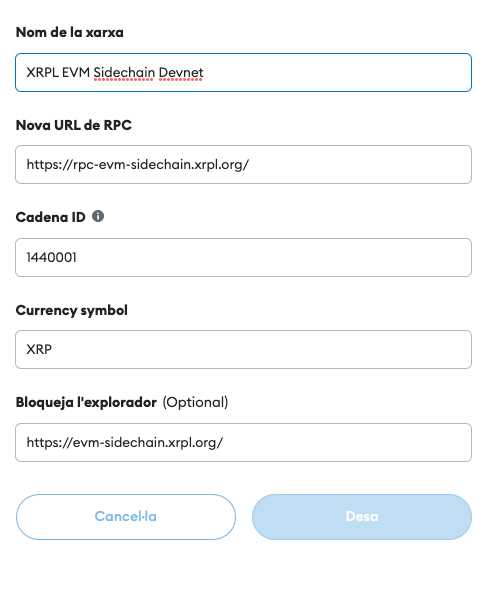
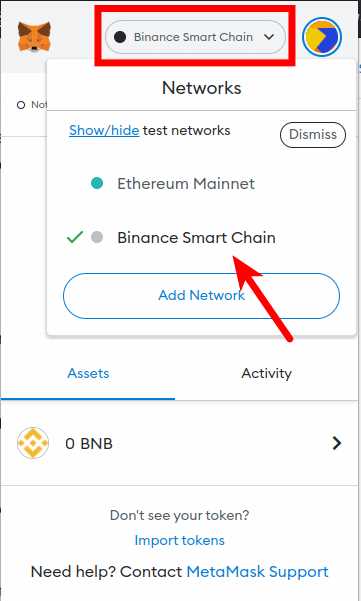
Now that you have a Metamask wallet set up, you’ll need to connect it to the XRP network. Click on the network selector at the top of the Metamask window and choose “Custom RPC” from the dropdown menu. In the “New Network” field, enter the following details:
Network Name: XRP
New RPC URL: https://s1.ripple.com:51234
Chain ID: 0x80000090
Symbol: XRP
To save these settings, click on “Save” and you’ll be connected to the XRP network.
Step 4: Add XRP as a Custom Token
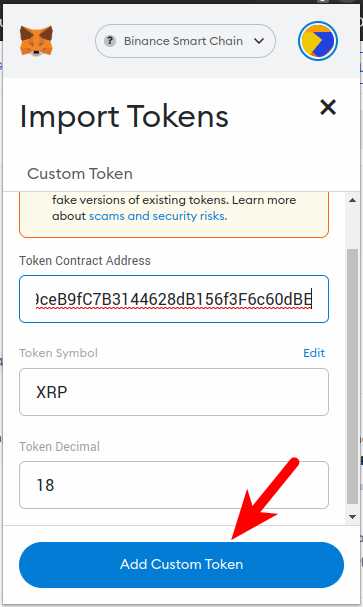
With your Metamask wallet connected to the XRP network, you can now add XRP as a custom token. Click on the Metamask extension icon in your browser toolbar to open the wallet interface. On the main screen, click on “Add Token”, then select the “Custom Token” tab.
Enter the following details:
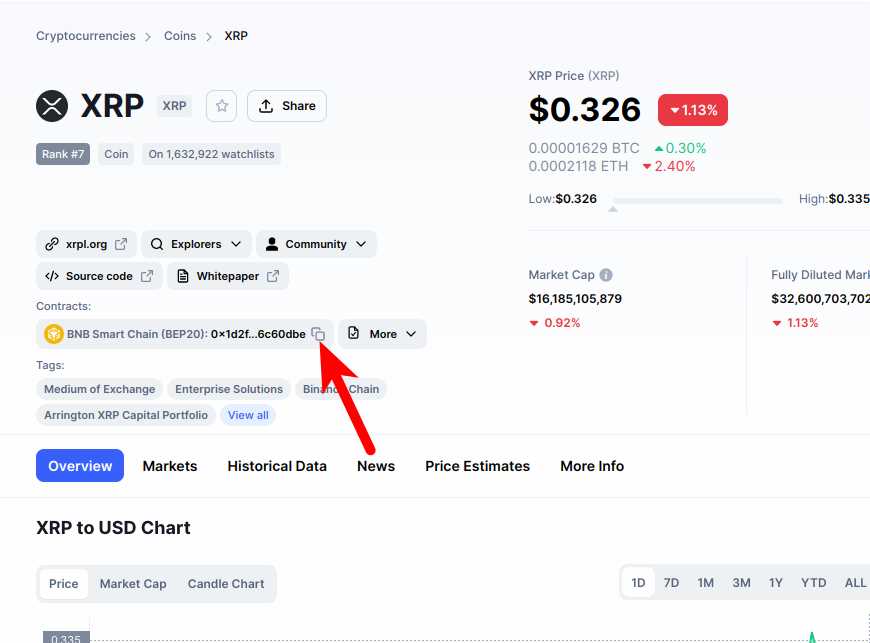
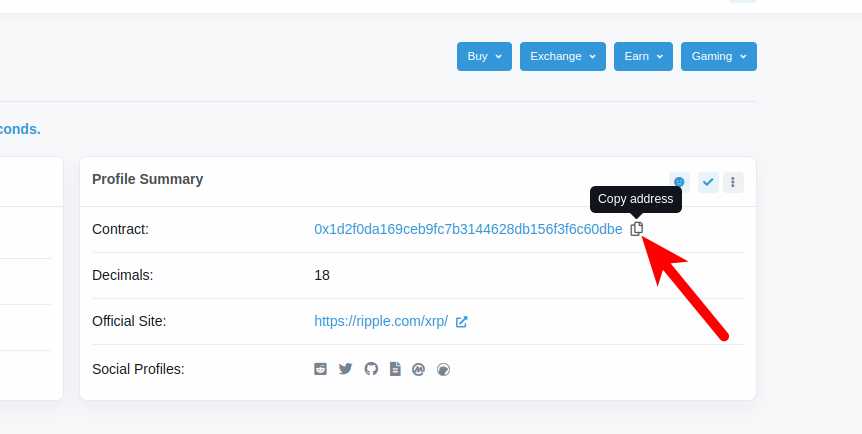
Token Contract Address: 0x…
Token Symbol: XRP
Decimals of Precision: 18
Make sure to replace “0x…” with the actual contract address of XRP. You can find this information on a trusted blockchain explorer or from the XRP project website. Once you’ve entered the details, click on “Next” and then “Add Tokens” to complete the process.
Step 5: Manage Your XRP
With XRP added to your Metamask wallet, you can now easily manage your XRP holdings alongside your other cryptocurrencies. You can send and receive XRP, view your transaction history, and even interact with decentralized applications that support XRP.
Adding XRP to Metamask is a great way to keep all your cryptocurrencies in one place and streamline your crypto management. By following these simple steps, you’ll have XRP added to your wallet in no time.
Step 1: Install Metamask Extension
In order to add XRP to Metamask, you first need to install the Metamask extension on your web browser. Metamask is a cryptocurrency wallet that allows you to manage your XRP and other digital assets.
Here are the steps to install Metamask:
| 1. | Open your web browser and go to the Metamask website. |
| 2. | Click on the “Get Chrome Extension” button if you are using Google Chrome, or the “Get Firefox Extension” button if you are using Mozilla Firefox. |
| 3. | You will be redirected to the Chrome Web Store or Firefox Add-ons page. Click on the “Add to Chrome” button if you are using Google Chrome, or the “Add to Firefox” button if you are using Mozilla Firefox. |
| 4. | Follow the instructions to install the Metamask extension. You may need to give permissions to the extension to access your web browser. |
| 5. | Once the installation is complete, a Metamask icon will appear in your web browser’s toolbar. |
That’s it! You have now installed the Metamask extension. In the next step, we will guide you on how to set up your Metamask wallet and add XRP to it.
Step 2: Create a New Wallet
Once you have installed Metamask, you will need to create a new wallet in order to add XRP to your Metamask account. Follow the steps below to create a new wallet:
- Open Metamask by clicking on the extension icon in your browser toolbar.
- Click on the “Get Started” button.
- Read and accept the terms of use.
- Create a strong password for your wallet. Make sure to use a combination of letters, numbers, and special characters.
- Click on the “Create” button.
- Your wallet will be created, and you will be shown a seed phrase. This seed phrase is a backup of your wallet, so it’s important to write it down and store it in a safe place.
- Confirm your seed phrase by selecting the words in the correct order.
- Click on the “Confirm” button.
- Your wallet is now created and ready to use.
It’s important to note that your wallet is secured by the password and seed phrase. Make sure to keep your password and seed phrase safe and never share them with anyone.
Step 3: Connect Metamask to the Ropsten Test Network
Once you have installed and set up Metamask in your browser, you need to connect it to the Ropsten Test Network in order to interact with XRP on the Ethereum blockchain. Here’s how you can do it:
1. Open the Metamask Extension
Click on the Metamask extension icon in your browser toolbar to open the Metamask interface.
2. Access the Network Selection
In the Metamask interface, click on the network dropdown menu at the top of the screen. By default, it should say “Main Ethereum Network”.
3. Select Ropsten Test Network
From the network dropdown menu, select “Ropsten Test Network.” This will switch your Metamask connection to the Ropsten test network.
Once connected to the Ropsten Test Network, you will be able to interact with XRP tokens on the Ethereum blockchain. You can now proceed to the next step of adding XRP to your Metamask wallet.
Step 4: Import XRP Token to Metamask
Once you have successfully installed and set up Metamask, the next step is to import the XRP token. Follow the steps below:
1. Open Metamask
Click on the Metamask extension icon in your browser’s toolbar to open the Metamask pop-up window.
2. Access the Wallet
If you have set up a password for your Metamask wallet, enter it now to unlock your wallet and access its features.
3. Add Custom Token
Click on the menu button (three horizontal lines) in the upper left corner of the Metamask window. Then select “Add Token” from the drop-down menu.
4. Enter Token Details
In the “Token Contract Address” field, enter the XRP token contract address: 0x836f4b5837c567a4b5a4c5cc5f834a8ff99e0511
In the “Token Symbol” field, enter “XRP”.
In the “Decimals of Precision” field, enter “6”.
5. Confirm and Add Token

After entering the token details, click on the “Next” button to confirm and add the XRP token to your Metamask wallet.
Once the token is added, you will be able to see your XRP balance and make transactions using the XRP token within Metamask.
Remember to always double-check the contract address and other details to ensure you are adding the correct XRP token to your wallet.
Step 5: Add XRP to Metamask
Now that you have successfully installed Metamask and connected it to the Ethereum network, let’s move on to adding XRP to your Metamask wallet. Please note that XRP is not an ERC-20 token, so the process may be slightly different compared to adding other tokens.
1. Obtain XRP Address
First, you will need to obtain your XRP wallet address. If you already have an XRP wallet, you can simply use that address. If not, you can create a new XRP wallet using a trusted wallet provider or exchange.
Make sure to double-check that you have the correct XRP address to avoid any loss of funds.
2. Open Metamask
Open your Metamask wallet by clicking on the extension icon in your browser’s toolbar and entering the required password or passphrase.
3. Click on “Assets” Tab
In the Metamask wallet, click on the “Assets” tab located at the top of the interface.
4. Click on “Add Token”
Within the Assets tab, you will see a list of tokens. Scroll down and click on the “Add Token” button.
5. Enter XRP Token Details
A prompt will appear asking you to enter the token details. In the “Token Contract Address” field, copy and paste the XRP token contract address: [insert XRP contract address].
6. Customize Token Symbol and Decimals
Metamask will automatically fetch the XRP token symbol and decimals. However, you can customize the token symbol and decimals if you prefer. Once you are satisfied, click on the “Next” button.
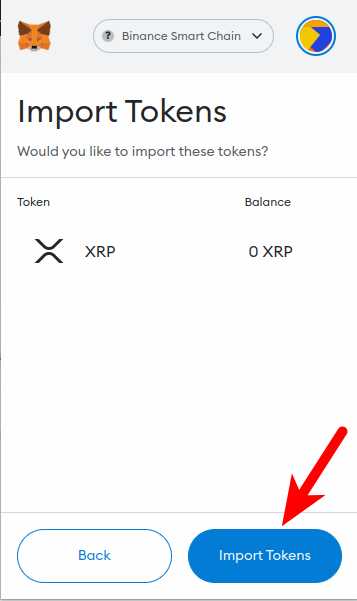
7. Confirm Token Addition
Review the token details and click on the “Add Tokens” button to confirm the addition of XRP to your Metamask wallet.
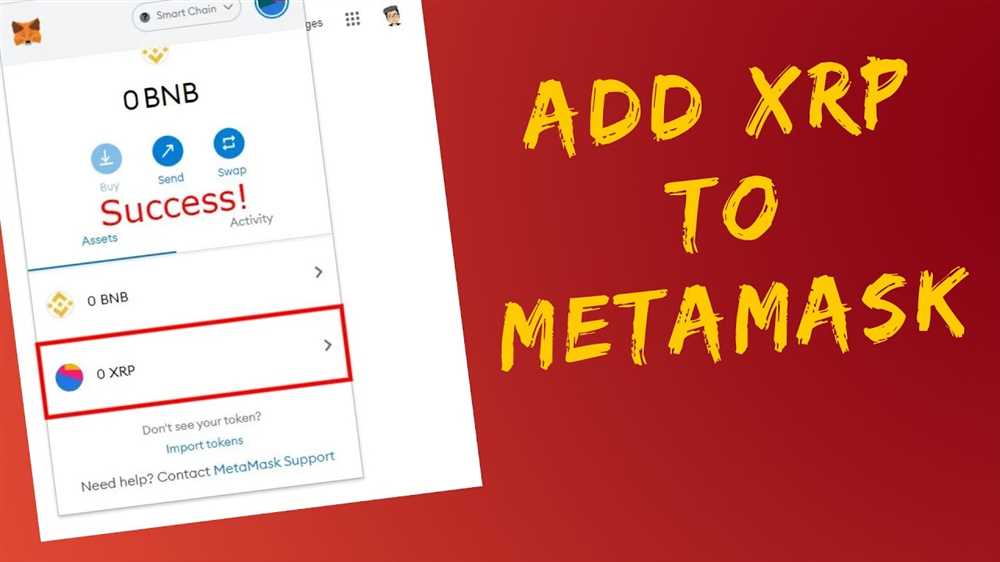
8. XRP Added to Metamask
Congratulations! You have successfully added XRP to your Metamask wallet. You should now see the XRP token listed in your Assets tab.
Remember to keep your XRP wallet address and Metamask password safe and secure.
Disclaimer: The information provided in this guide is for educational purposes only and should not be considered as financial advice. Always do your own research and exercise caution when dealing with cryptocurrencies.
What is Metamask?
Metamask is a browser extension wallet that allows users to interact with decentralized applications on the Ethereum network.
Can I add XRP to Metamask?
No, Metamask primarily supports Ethereum and ERC-20 tokens. It does not natively support XRP.
Is there a way to add XRP to Metamask?
Yes, there is a workaround to add XRP to Metamask using a bridge called Bifrost. The Bifrost bridge allows you to convert XRP to an ERC-20 representation called XRP-BF2 and then add it to your Metamask wallet.