
If you’re an Ethereum enthusiast or a decentralized application (dApp) user, chances are you’ve heard of Metamask. Metamask is a popular browser extension that allows users to interact with the Ethereum blockchain. It’s a handy tool for managing your Ethereum wallet, signing transactions, and accessing dApps.
However, did you know that Metamask also supports other networks apart from the Ethereum mainnet? One of those networks is the Phantom network, a layer 2 scaling solution for Ethereum. By adding the Phantom network to Metamask, you can take advantage of fast and affordable transactions while still benefiting from the security and liquidity of the Ethereum network.
Adding the Phantom network to Metamask is a straightforward process. In this step-by-step guide, we’ll walk you through the process, ensuring that you can start using the Phantom network in no time.
Step 1: Install Metamask
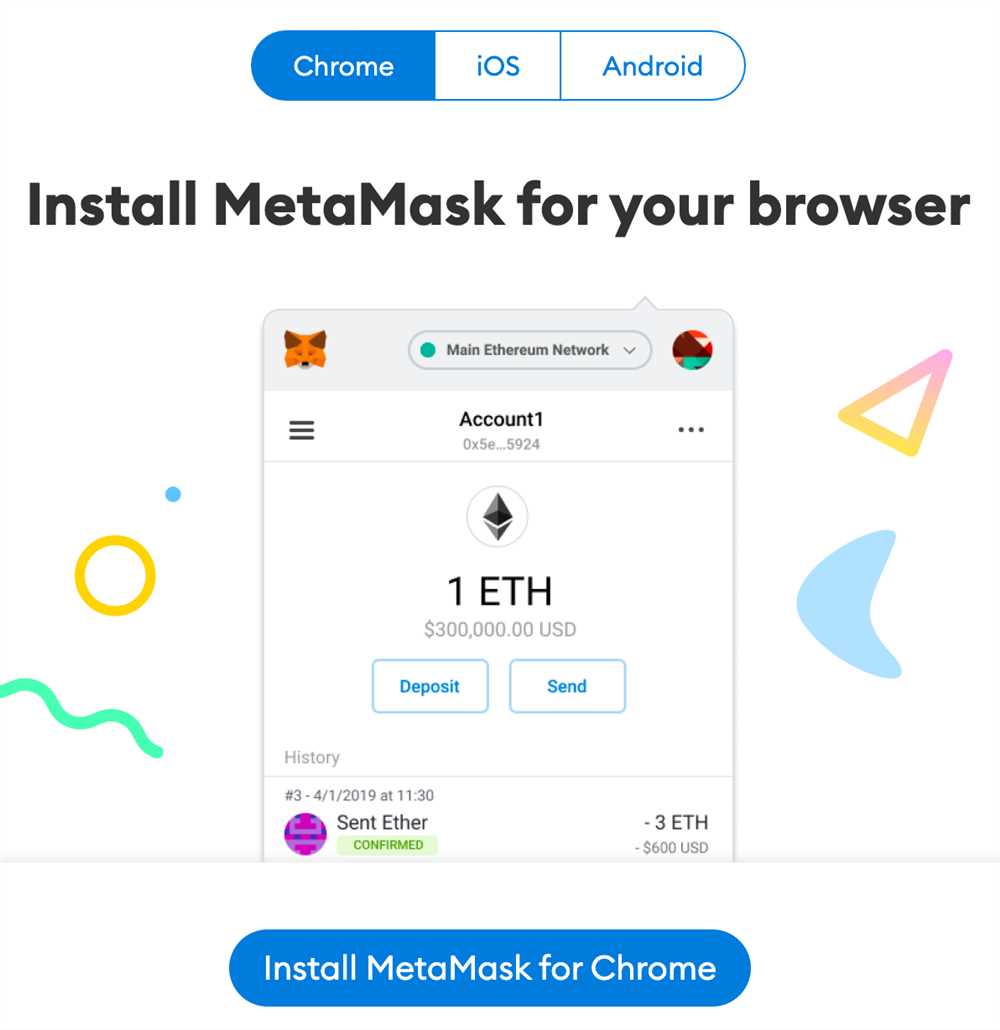
If you haven’t already, the first step is to install the Metamask browser extension. Metamask is available for Chrome, Firefox, Brave, and Edge. Simply search for “Metamask” in your preferred browser’s extension store, click “Add to Chrome” (or the equivalent for your browser), and follow the installation instructions.
Step 2: Create or Import a Wallet
Once Metamask is installed, click on the extension’s icon in your browser’s toolbar. If you already have a Metamask wallet, you can click “Import wallet” and follow the instructions to import your existing wallet using your recovery phrase or private key. If you don’t have a wallet yet, click “Create a Wallet” and follow the steps to create a new one.
Step 3: Access Network Settings
With your wallet set up, you’ll see the Metamask interface. Click on the network dropdown menu in the top right corner (it will likely display “Main Ethereum Network” by default). From the list of available networks, click on “Custom RPC” at the bottom.
Step 4: Add Phantom Network Details
In the “New RPC URL” field, enter the following URL for the Phantom network: https://rpc.phantom.network. For the chain ID, enter 100. Leave the other fields blank and click “Save” to add the Phantom network to Metamask.
Step 5: Switch to the Phantom Network
Once you’ve saved the Phantom network details, you’ll see it listed in the network dropdown menu. Select “Phantom Network” to switch to the Phantom network on Metamask. You’re now ready to use the Phantom network for fast and affordable transactions!
Adding the Phantom network to Metamask opens up a world of possibilities for Ethereum users. Whether you’re a dApp developer or a regular user, the Phantom network offers a scalable and cost-effective solution for your Ethereum needs. With this step-by-step guide, you can easily integrate the Phantom network into your Metamask wallet and start enjoying its benefits.
Step 1: Install the Metamask Extension
Metamask is a popular cryptocurrency wallet and browser extension that allows you to interact with decentralized applications (dApps) on the Ethereum network. In order to add the Phantom network to Metamask, you first need to install the Metamask extension on your browser.
Here’s how you can install the Metamask extension:
- Open your preferred web browser and navigate to the Metamask website.
- Click on the “Get Chrome Extension” or “Get Firefox Add-On” button, depending on your browser.
- Follow the prompts to install the Metamask extension on your browser.
- Once the installation is complete, you will see the Metamask icon in your browser’s toolbar.
- Click on the Metamask icon to open the extension.
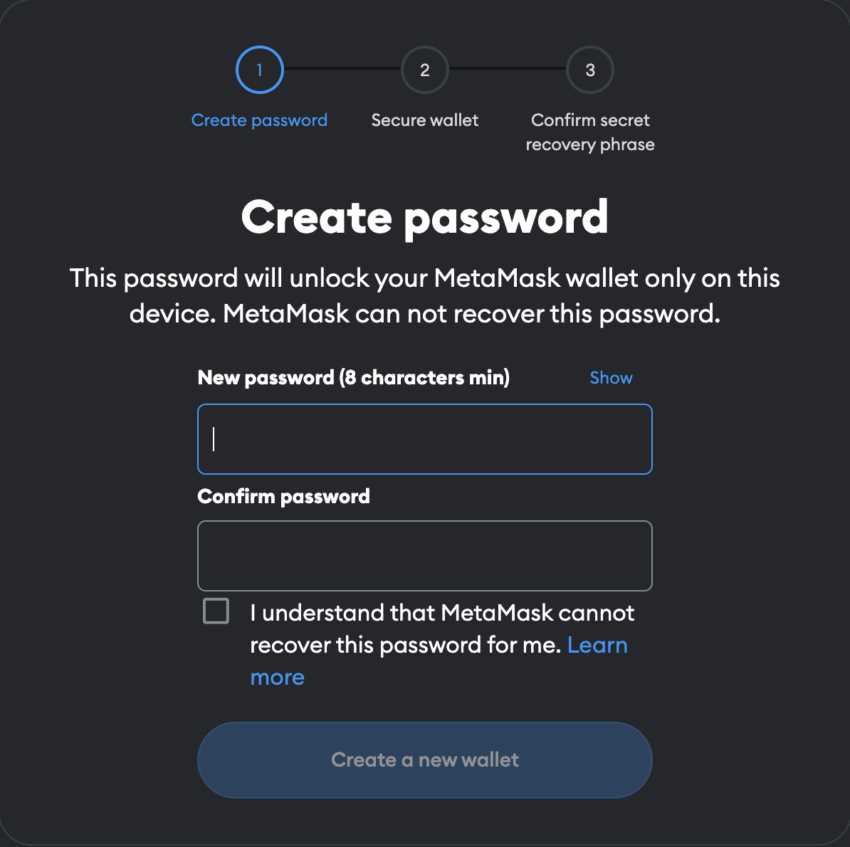
- You will be prompted to create a new wallet or import an existing one. Follow the on-screen instructions to set up your wallet.
- After setting up your wallet, you will be presented with a Terms of Service. Read through it and click “Accept” to proceed.
- Finally, you will be asked to create a password for your wallet. Make sure to choose a strong and secure password.
Once you have installed the Metamask extension and set up your wallet, you are ready to proceed to the next step of adding the Phantom network to Metamask.
Step 2: Accessing the Metamask Settings
Once you have successfully installed Metamask and logged in to your account, you can access the Metamask settings to add the Phantom network. Follow the steps below:
Step 1: Open the Metamask Extension
Click on the Metamask extension icon in your browser toolbar. It is usually a logo that looks like a fox. This will open the Metamask extension pop-up window.
Step 2: Click on the Profile Icon
In the Metamask pop-up window, you will see a profile icon on the top right corner. It normally looks like a circle with your account initials. Click on this icon to access the Metamask settings.
Step 3: Open the Settings Menu
After clicking on the profile icon, a dropdown menu will appear. Locate and click on the “Settings” option in the menu. This will open the Metamask settings menu.
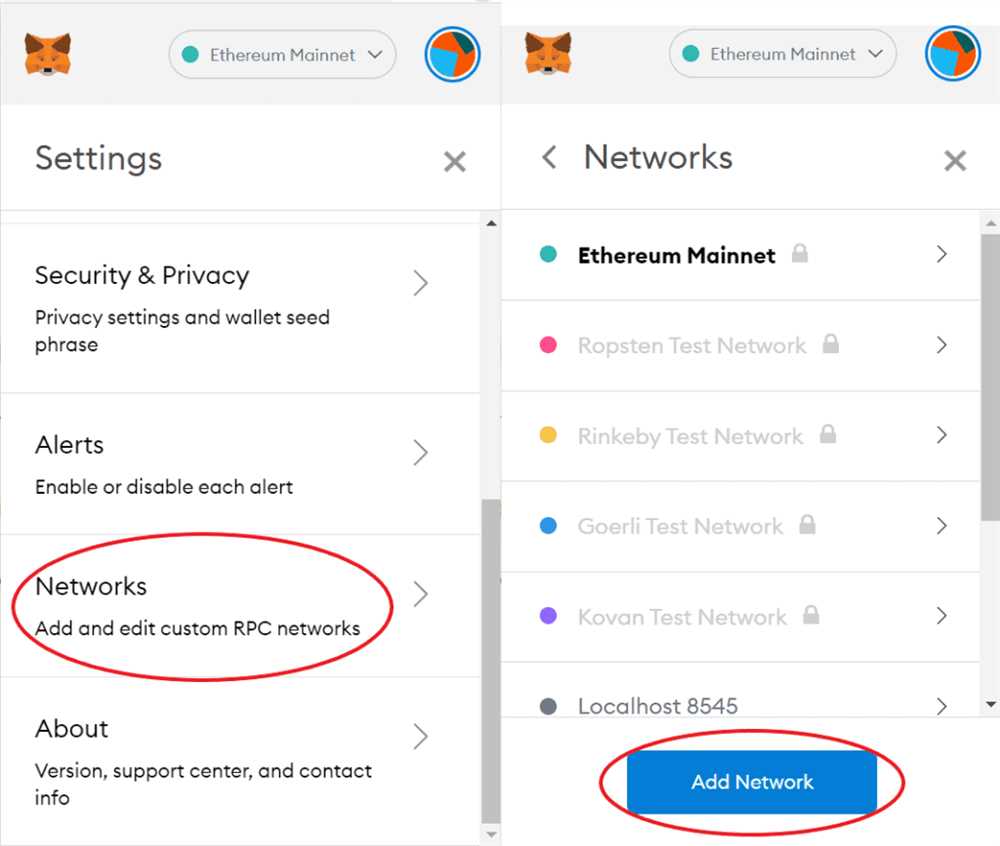
Step 4: Select the Networks tab

In the Metamask settings menu, you will see multiple options. Click on the “Networks” tab to access the network settings.
Step 5: Click on “Add Network”
In the Networks tab, you will see a button labeled “Add Network.” Click on this button to add a new network to Metamask.
Once you have completed these steps, you will be ready to add the Phantom network to Metamask. The next section will guide you through the process of adding the network details.
Step 3: Adding the Phantom Network
Now that you have installed the MetaMask extension and created an account, it’s time to add the Phantom Network to your wallet. Follow these steps:
1. Click on the MetaMask icon in your browser’s toolbar to open the wallet.
2. In the wallet, click on the account avatar in the top-right corner of the screen.
3. From the account menu, select “Settings”.
4. In the settings menu, choose the “Networks” tab.
5. Scroll down and click on the “Add Network” button.
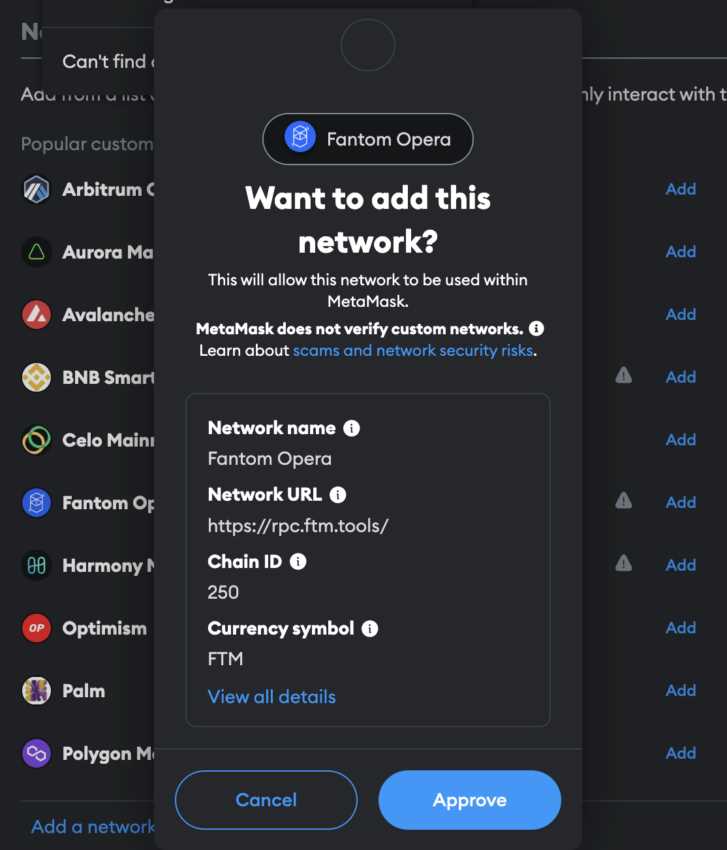
6. A form will appear where you can enter the details of the Phantom Network.
7. Fill in the following information:
Network Name: Phantom Network
New RPC URL: https://rpc.ftm.tools/
Chain ID: 250
Currency Symbol: FTM
Block Explorer URL: https://ftmscan.com/
8. Once you have filled in the information, click on the “Save” button.
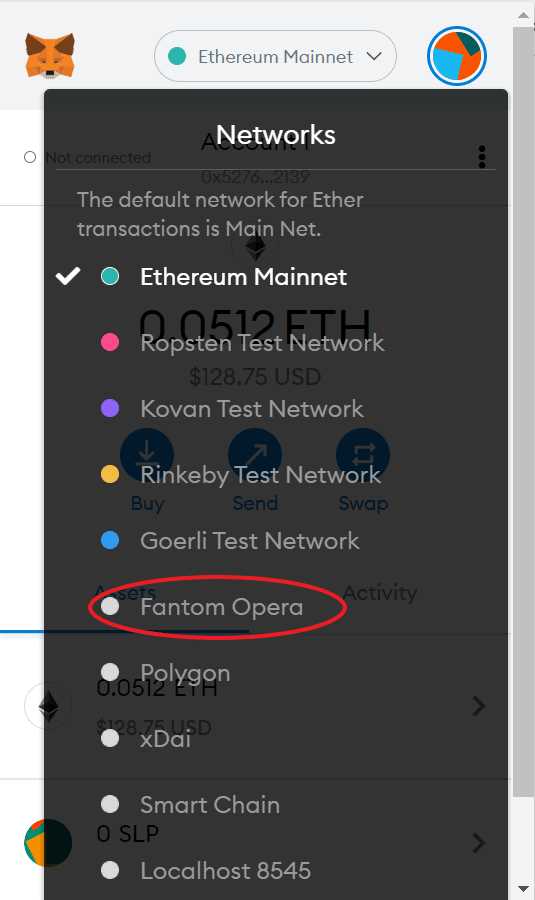
9. The Phantom Network will now appear in the list of available networks in your MetaMask wallet.
10. You can select the Phantom Network by clicking on the network dropdown in the top-right corner of the wallet and choosing “Phantom Network”.
11. Congratulations! You have successfully added the Phantom Network to your MetaMask wallet.
What is Phantom Network in Metamask?
Phantom Network is a layer 2 scaling solution for Ethereum that aims to provide faster and cheaper transactions. It allows users to interact with decentralized applications (dApps) and transfer tokens without the need to pay high gas fees on the Ethereum mainnet.
Why should I add Phantom Network to Metamask?
Adding Phantom Network to Metamask allows you to access decentralized applications (dApps) and transfer tokens on the Phantom Network. This network offers faster and cheaper transactions compared to the Ethereum mainnet, helping you save on gas fees. By adding Phantom Network to Metamask, you can take advantage of these benefits and seamlessly interact with dApps built on this layer 2 scaling solution for Ethereum.
Can I switch between Phantom Network and the Ethereum mainnet in Metamask?
Yes, you can switch between Phantom Network and the Ethereum mainnet in Metamask. Simply click on the network dropdown in your Metamask extension and select the desired network. This allows you to switch between different networks and access the respective decentralized applications (dApps) and tokens available on each network.