
If you’re interested in using the Fantom network, you’ll need to add it to your Metamask wallet. Adding Fantom to Metamask allows you to seamlessly access the native tokens and decentralized applications on the Fantom network. In this step-by-step guide, we’ll walk you through the process of adding Fantom to Metamask so you can start exploring all that the Fantom ecosystem has to offer.
Step 1: Install Metamask
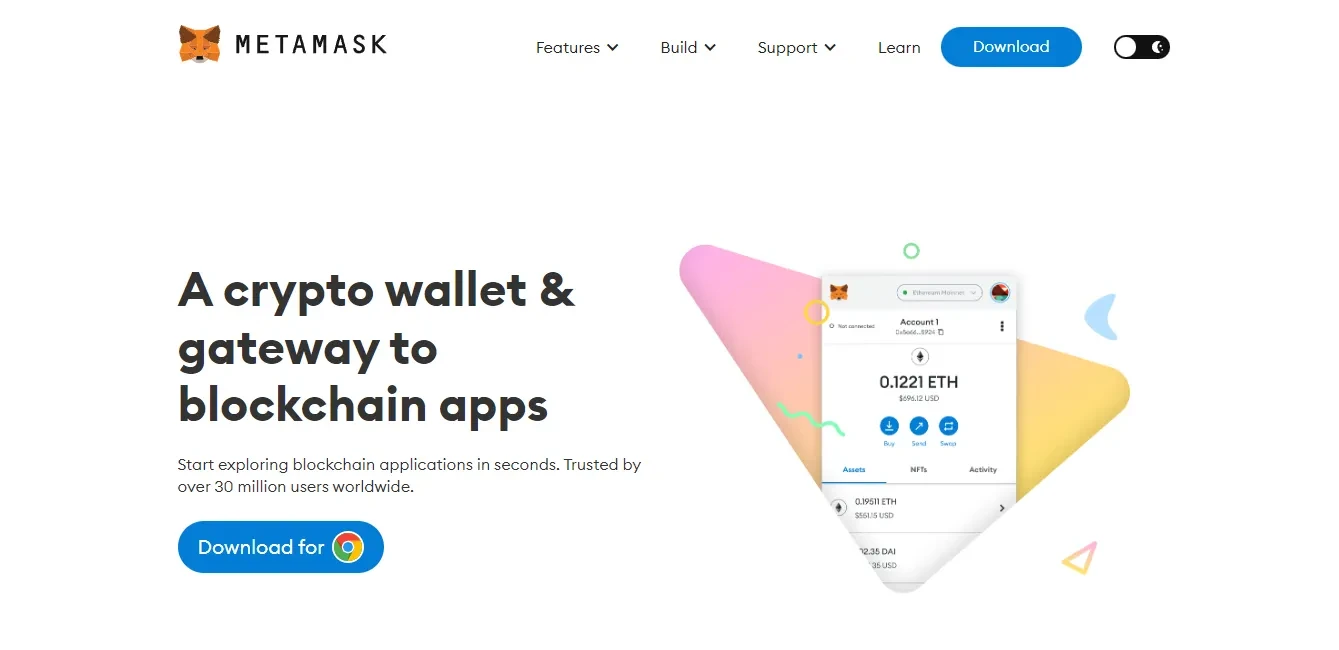
If you haven’t already, you’ll need to install the Metamask browser extension. Metamask is available for Chrome, Firefox, and Brave browsers. Simply go to the website of your preferred browser and search for “Metamask”. Click on the official Metamask website and follow the instructions to install the extension.
Step 2: Create or Import a Wallet
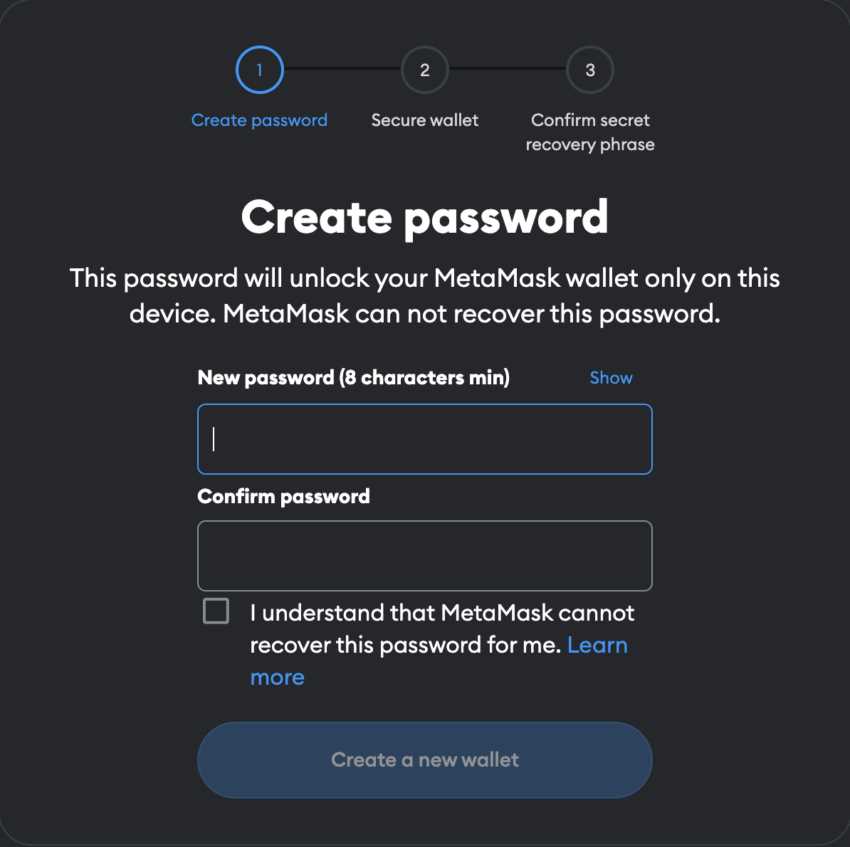
Once you have Metamask installed, you’ll need to create a new wallet or import an existing one. If you’re creating a new wallet, follow the prompts to set up a strong password and to securely back up your seed phrase. If you’re importing a wallet, click on the “Import Wallet” option and enter your seed phrase or private key.
Step 3: Connect to the Fantom Network
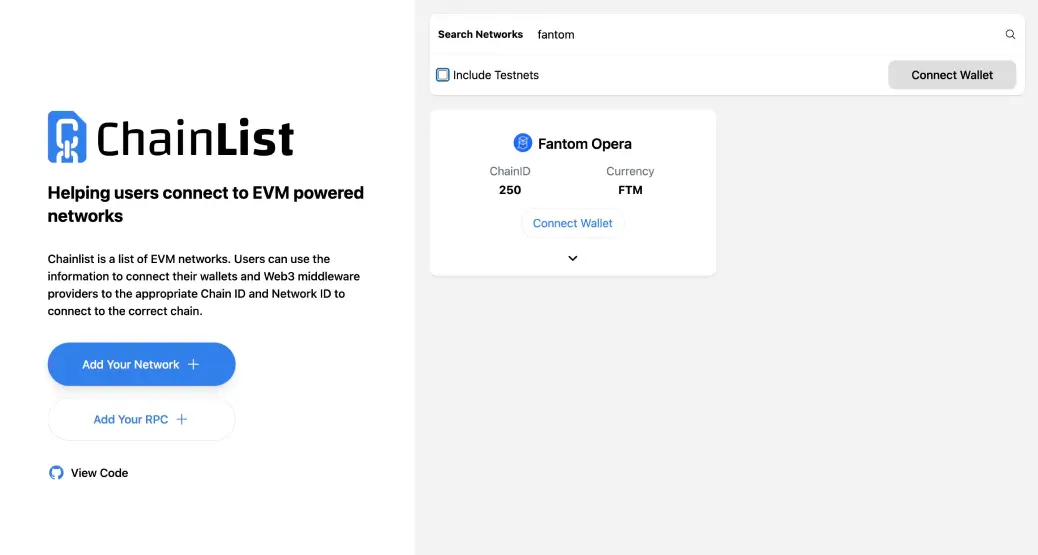
With your Metamask wallet set up, it’s time to connect to the Fantom network. To do this, click on the Metamask extension in your browser and select the dropdown menu next to the network name. Scroll down until you see the “Custom RPC” option and click on it. In the “New RPC URL” field, enter “https://rpc.ftm.tools” and click “Save”.
Step 4: Add the Fantom Token
To add the Fantom token to your Metamask wallet, click on the Metamask extension and select the Fantom network from the dropdown menu. Once connected to the Fantom network, click on the “Assets” tab and select “Add Token”. In the “Token Contract Address” field, enter “0x21be370d5312f44cb42ce377bc9b8a0cef1a4c83” and click “Next”. Metamask should automatically fill in the rest of the token details. Click “Add Tokens” to complete the process.
That’s it! You’ve successfully added Fantom to your Metamask wallet. Now you can seamlessly interact with the Fantom network, trade and store your Fantom tokens, and explore the growing ecosystem of decentralized applications. Enjoy your journey into the world of Fantom!
Why Add Fantom to Metamask?

Fantom is a decentralized blockchain platform that is designed to provide fast and scalable solutions for decentralized applications (dApps). By adding Fantom to Metamask, you gain access to the Fantom network, allowing you to interact with various dApps and tokens built on the Fantom ecosystem.
Here are a few reasons why you might want to consider adding Fantom to Metamask:
1. Access to Fantom dApps
By adding Fantom to Metamask, you can easily access and use decentralized applications (dApps) that are built on the Fantom platform. These dApps offer a wide range of functionalities, including decentralized finance (DeFi) protocols, gaming platforms, and decentralized exchanges (DEXs). By connecting your Metamask wallet to Fantom, you can seamlessly interact with these dApps and explore the full potential of the Fantom ecosystem.
2. Trade and Swap Tokens
Adding Fantom to Metamask allows you to trade and swap tokens on the Fantom network. You can connect your Metamask wallet to decentralized exchanges (DEXs) like Sushiswap and SpiritSwap, enabling you to buy, sell, and swap tokens directly from your wallet. This gives you convenient access to a wide range of assets and allows you to participate in the growing decentralized finance (DeFi) ecosystem on Fantom.
3. Participate in Staking and Yield Farming
By adding Fantom to Metamask, you can also participate in staking and yield farming opportunities on the Fantom network. Staking allows you to lock your tokens in a smart contract and earn rewards for securing the network. Yield farming involves providing liquidity to decentralized finance (DeFi) protocols in exchange for rewards. With Fantom integrated into Metamask, you can easily stake your tokens or participate in yield farming to earn passive income on the Fantom network.
Adding Fantom to Metamask is a simple process that can greatly enhance your experience and capabilities within the Fantom ecosystem. Whether you want to explore dApps, trade tokens, or participate in staking and yield farming, integrating Fantom with Metamask opens up a world of possibilities.
Step 1: Setting Up Metamask
To add Fantom to Metamask, you need to first ensure that you have the Metamask browser extension installed. Metamask is a digital wallet and browser extension that allows you to interact with the Ethereum blockchain. Here’s how you can set it up:
Step 1.1: Install Metamask
Go to the Metamask website and download the extension for your preferred browser (e.g. Chrome or Firefox). Once the extension is downloaded, click on the installation file to install it.
Step 1.2: Create a Metamask Account
After installing Metamask, you will see the Metamask icon in your browser’s toolbar. Click on the icon and follow the steps to create a new account. Make sure to set a strong password and write down your seed phrase, as this will be needed to recover your account.
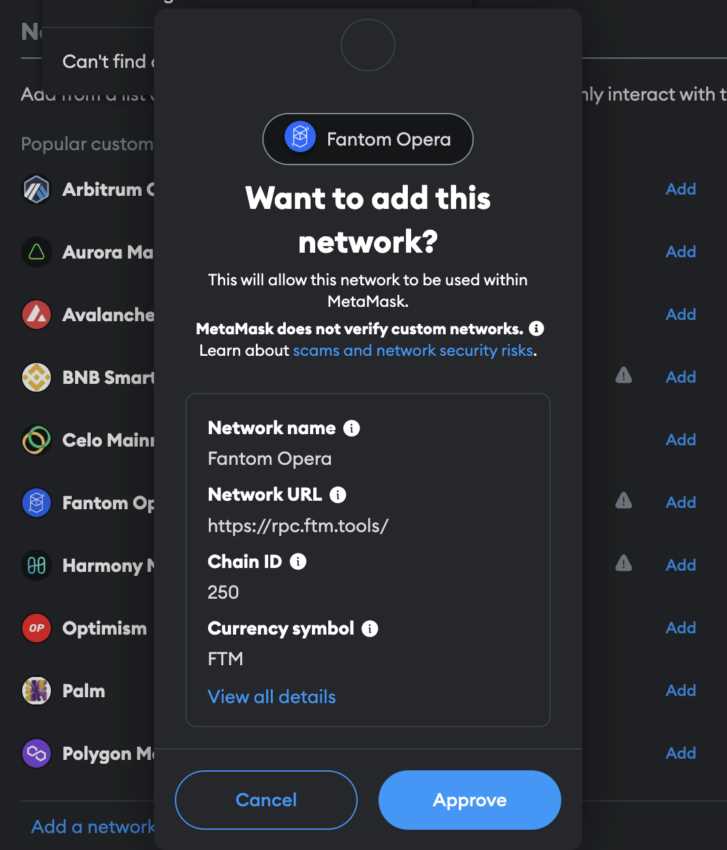
Step 1.3: Connect Metamask to the Fantom Network
By default, Metamask is connected to the Ethereum network. To add Fantom to Metamask, you need to connect it to the Fantom Opera network. Follow these steps:
- Click on the Metamask icon in your browser toolbar to open the extension.
- Click on the network selection dropdown (e.g. “Main Ethereum Network”).
- Select “Custom RPC” at the bottom of the dropdown.
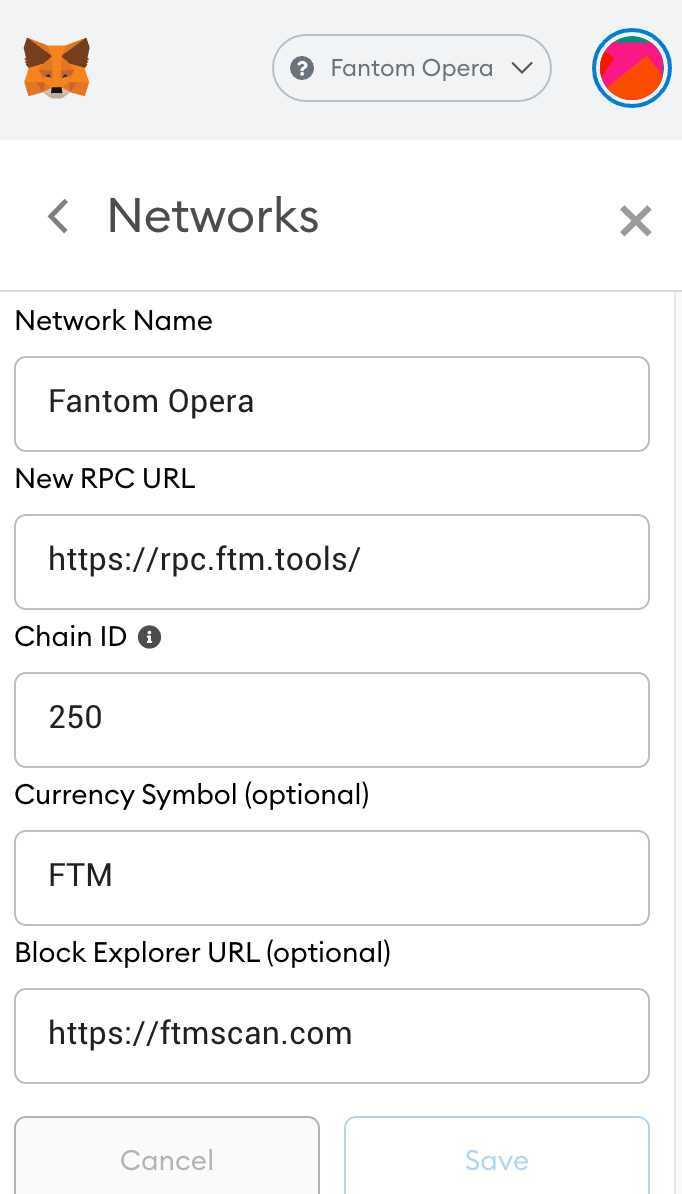
- In the “New RPC URL” field, enter the Fantom Opera network URL: https://rpc.ftm.tools/.
- Click the “Save” button to save the network configuration.
Once you’ve completed these steps, you will have successfully set up Metamask and connected it to the Fantom Opera network. You are now ready to add Fantom to your Metamask wallet and start interacting with the Fantom blockchain!
Step 2: Adding the Fantom Network
After installing the MetaMask extension and creating your wallet, you will need to add the Fantom network to your MetaMask wallet in order to access tokens and interact with the Fantom blockchain.
Step 2.1: Open MetaMask
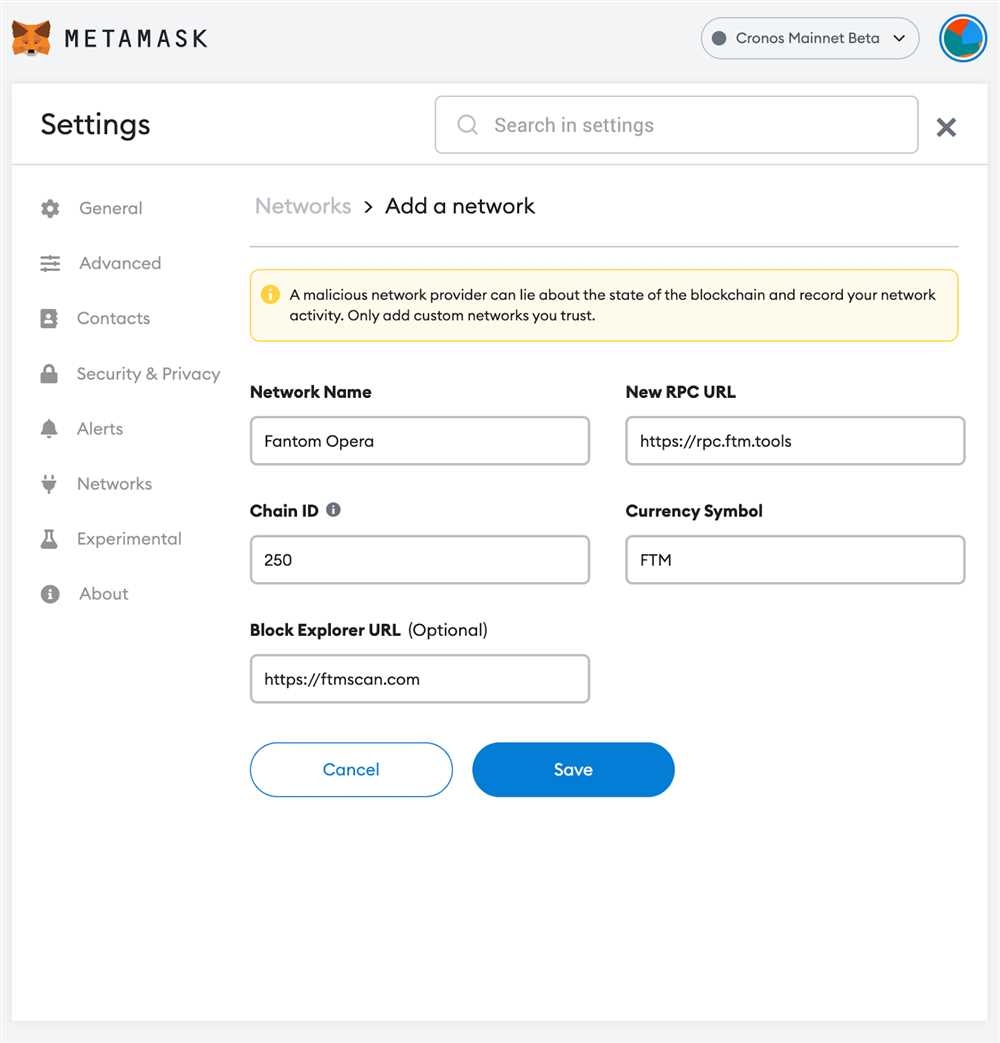
Open your MetaMask wallet by clicking on the extension icon in your browser’s toolbar.
Step 2.2: Switch to Custom RPC
On the MetaMask pop-up, click on the network dropdown menu and select “Custom RPC”. This will allow you to add the Fantom network manually.
Step 2.3: Fill in Network Details

In the “New RPC URL” field, enter the Fantom network’s RPC URL: https://rpcapi.fantom.network. You can leave the “Chain ID” field blank, as MetaMask will automatically detect it.
In the “Explorer URL” field, enter the Fantom network’s block explorer URL: https://ftmscan.com/. This will allow you to view transaction details and other information on the Fantom network.
Step 2.4: Save the Network
Click on the “Save” button to add the Fantom network to your MetaMask wallet. MetaMask will display a warning message about the network not being verified. You can ignore this message and proceed.
Congratulations! You have successfully added the Fantom network to your MetaMask wallet. You can now use your wallet to interact with the Fantom blockchain and access tokens on the network.
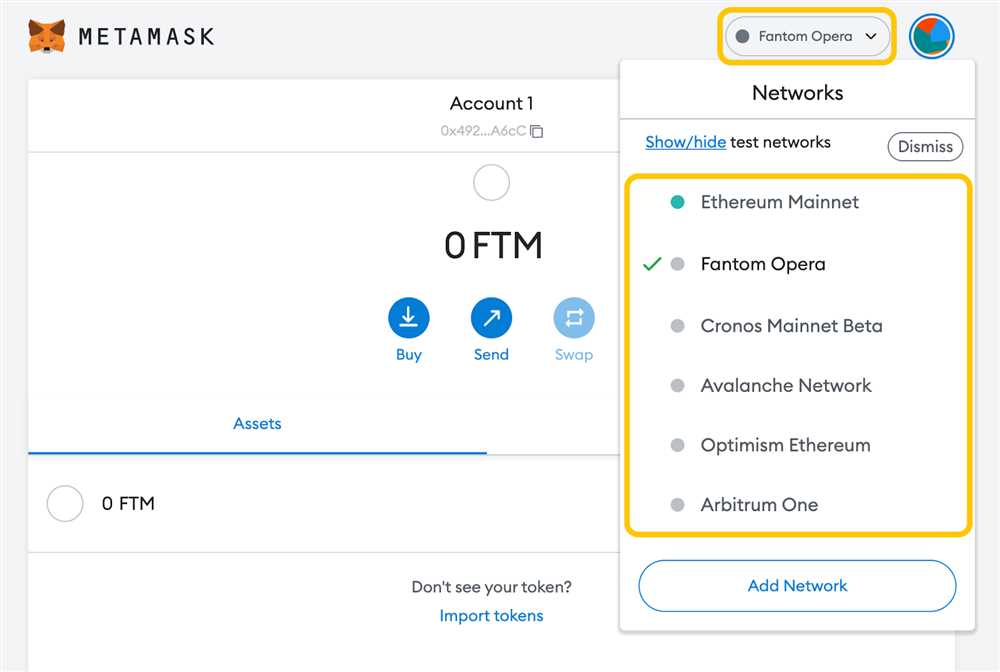
Step 3: Verifying the Fantom Network
After adding the Fantom network to your Metamask wallet, the next step is to verify the network to ensure that you are connected to the correct one.
To verify the Fantom network, follow these steps:
- Click on the Metamask extension icon in your browser toolbar to open the wallet.
- Click on the account name at the top of the wallet to reveal a drop-down menu.
- Select “Settings” from the drop-down menu.
- In the Settings menu, click on “Networks”.
- Scroll down to find the Fantom network that you added in the previous step.
- Click on the Fantom network to open its details.
- Check that the RPC URL is set to
https://rpc.ftm.tools. - Verify that the Chain ID is set to
250. - Ensure that the Currency symbol and Block Explorer settings are correct.
- Once you have verified all the details, click on the “Save” button to save the changes.
By following these steps, you have successfully verified the Fantom network in your Metamask wallet. You can now start using your wallet to interact with the Fantom network and participate in decentralized applications on the platform.
What is Metamask?
Metamask is a cryptocurrency wallet that works as a browser extension, allowing users to interact with decentralized applications (dApps) on the Ethereum network.
Why would I want to add Fantom to Metamask?
Adding Fantom to Metamask would allow you to interact with decentralized applications (dApps) and perform transactions on the Fantom network.
How do I add Fantom to Metamask?
To add Fantom to Metamask, you need to go to the Networks tab in Metamask, click on “Add Network,” and fill in the required details such as network name, RPC URL, chain ID, symbol, and block explorer URL.
What is the RPC URL for Fantom?
The RPC URL for Fantom is https://rpc.ftm.tools/.
Where can I find the block explorer URL for Fantom?
You can find the block explorer URL for Fantom on the Fantom website or by doing a simple search on your preferred search engine.