
Metamask is a popular browser extension that allows users to interact with the Ethereum blockchain. It provides a convenient way to manage digital assets and interact with decentralized applications (dApps) without the need for a complete Ethereum node. However, to fully utilize Metamask, you need to add Ethereum to your wallet. In this step-by-step guide, we will walk you through the process of adding Ethereum to Metamask.
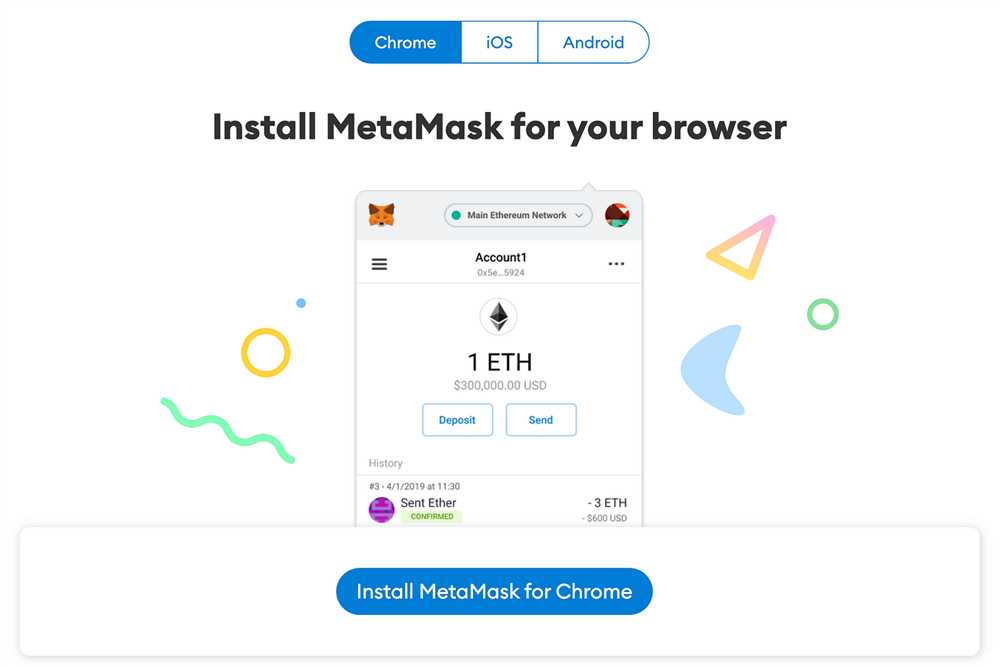
Step 1: Install Metamask
If you haven’t already installed Metamask, you can do so by visiting the official website or searching for it in your browser’s extension store. Once installed, open Metamask, and create a new wallet or import an existing one using your seed phrase.
Step 2: Access the Ethereum Network Settings
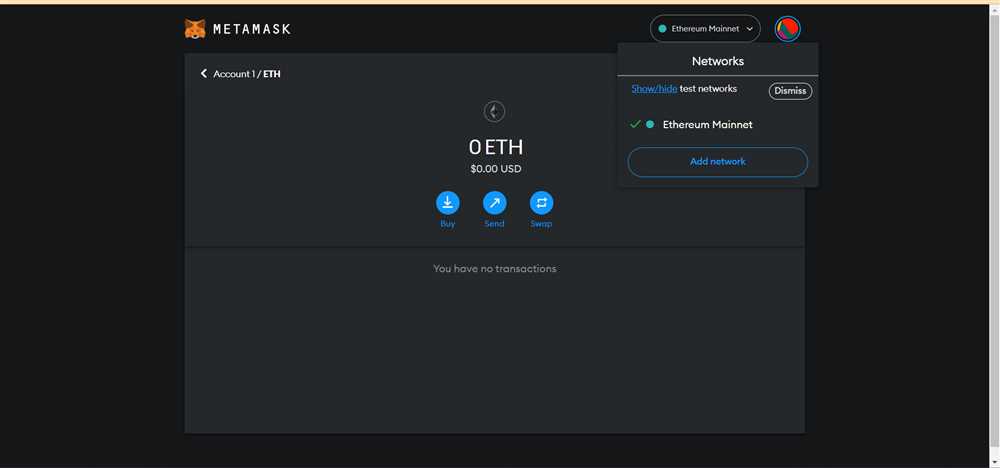
After setting up your wallet, click on the Metamask icon in your browser’s extension toolbar. This will open the Metamask interface. Next, click on the network dropdown, which is usually set to “Main Ethereum Network” by default.
Step 3: Add Custom Ethereum Network
In the network dropdown, scroll down and click on “Custom RPC” to add a custom Ethereum network. This will allow you to connect to other Ethereum networks, such as test networks or private networks. Here, you will need to enter the network details, including the network name, RPC URL, chain ID, symbol, and block explorer URL.
Step 4: Obtain Ethereum
To add Ethereum to your Metamask wallet, you will need to purchase or obtain Ethereum from a cryptocurrency exchange or another wallet. Once you have acquired Ethereum, you will need to send it to your Metamask wallet. To do this, copy your wallet address from the Metamask interface and use it as the recipient address when sending Ethereum.
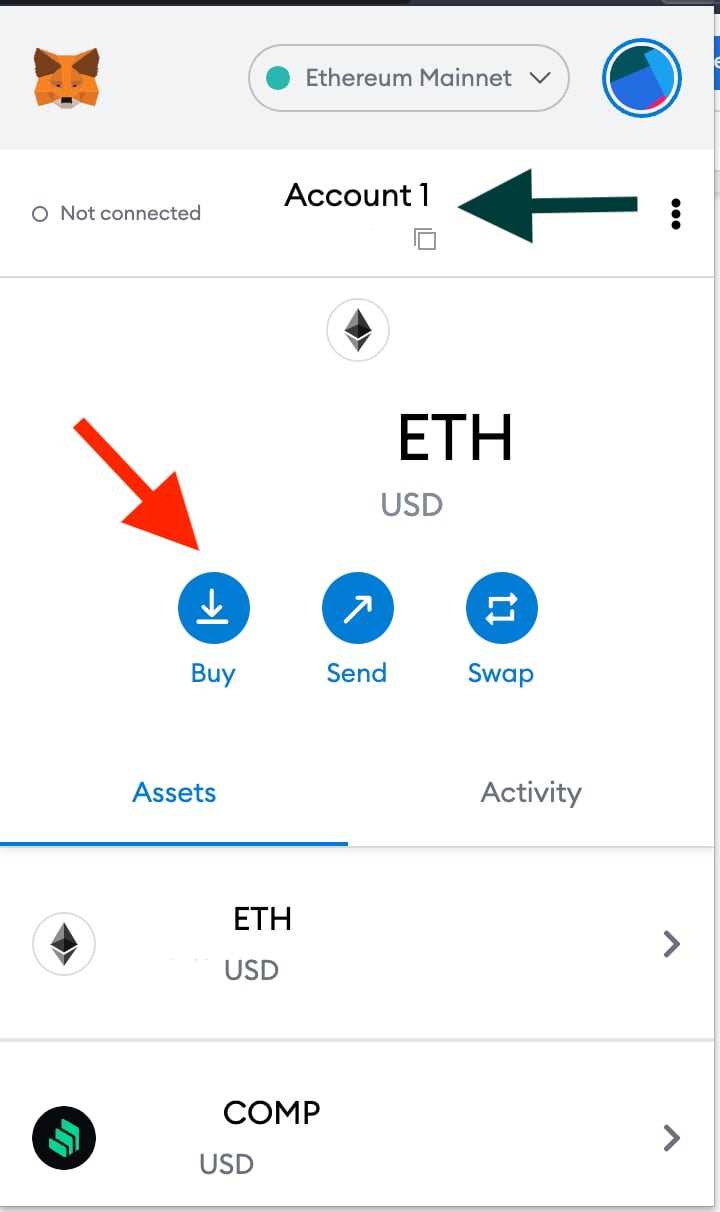
Step 5: Check Your Balance
After successfully adding Ethereum to your Metamask wallet, you can check your balance by clicking on the account icon in the top right corner of the Metamask interface. This will display your account details, including your Ethereum balance.
Congratulations! You have now successfully added Ethereum to your Metamask wallet. You can now use your Ethereum to interact with decentralized applications, participate in token sales, and much more.
What is Metamask?
Metamask is a web browser extension that allows users to interact with the Ethereum blockchain. It serves as a digital wallet, enabling users to manage and store their Ethereum currency and other ERC-20 tokens securely. Metamask provides users with a convenient way to access decentralized applications (DApps) and participate in various blockchain activities, such as trading cryptocurrencies, accessing decentralized finance (DeFi) platforms, and interacting with smart contracts.
With Metamask, users can enjoy the benefits of a seamless and user-friendly interface that integrates directly into their web browser. It eliminates the need for users to download a separate application or rely on a third-party wallet. By simply installing the Metamask extension, users can create and import Ethereum accounts, send and receive transactions, and manage their digital assets.
Key Features of Metamask:
Metamask offers several key features that make it a popular choice among Ethereum users:
- Secure Storage: Metamask uses encryption to securely store users’ private keys and seed phrases locally on their device. This provides an added layer of security and control over their digital assets.
- Easy Account Management: Metamask allows users to create and manage multiple Ethereum accounts within a single interface. Users can easily switch between accounts and select the appropriate one for their desired transactions.
- Browser Integration: As a browser extension, Metamask integrates with popular web browsers like Chrome, Firefox, and Brave. This allows users to access Ethereum-based DApps and services directly from their browser.
- Customizable Gas Fees: Metamask allows users to configure the gas fees for their Ethereum transactions. This provides flexibility in choosing the speed and cost of their transactions according to their preferences and current network conditions.
- Network Support: Metamask supports multiple Ethereum networks, including the mainnet, testnets (such as Ropsten, Kovan, and Rinkeby), and custom networks. Users can switch between networks to access different blockchain ecosystems and test their applications.
In summary, Metamask is a versatile tool that empowers users to easily connect with the Ethereum blockchain and participate in the decentralized finance revolution. Its secure storage, account management capabilities, browser integration, customizable gas fees, and network support make it a go-to choice for Ethereum enthusiasts and developers alike.
Why use Metamask for Ethereum?
Metamask is a popular browser extension that allows users to interact with the Ethereum blockchain. Here are some key reasons why you should consider using Metamask for your Ethereum transactions:
| Convenience: | Metamask provides a user-friendly interface that makes it easy for anyone to interact with Ethereum without the need for advanced technical skills. It acts as a bridge between your browser and the Ethereum network, enabling you to access decentralized applications (dApps) and make secure transactions. |
| Security: | Metamask allows you to store your Ethereum private keys locally on your device, ensuring that you have full control over your funds. It also offers features like password protection and hardware wallet integration, further enhancing the security of your assets. |
| Compatibility: | Metamask is compatible with popular browsers like Chrome, Firefox, and Brave, making it easily accessible to a wide range of users. It also provides a mobile wallet version, allowing you to manage your Ethereum on the go. |
| Interoperability: | Metamask can be used with various Ethereum-based dApps, enabling you to seamlessly interact with decentralized applications. It acts as a bridge between your browser and dApps, eliminating the need for separate wallets or additional accounts. |
| Ecosystem Integration: | Metamask integrates with various Ethereum development tools and platforms, making it a preferred choice for developers. It provides a web3 API that allows developers to build and interact with Ethereum-powered applications, opening up a world of possibilities for innovation. |
By using Metamask for Ethereum, you can enjoy the benefits of a user-friendly interface, enhanced security, compatibility with various browsers and dApps, and seamless integration with the Ethereum ecosystem. It simplifies the process of interacting with Ethereum, making it accessible to both beginners and experienced users.
Getting Started with Metamask
If you are new to Metamask, here is a step-by-step guide to help you get started:
1. Install Metamask Extension:
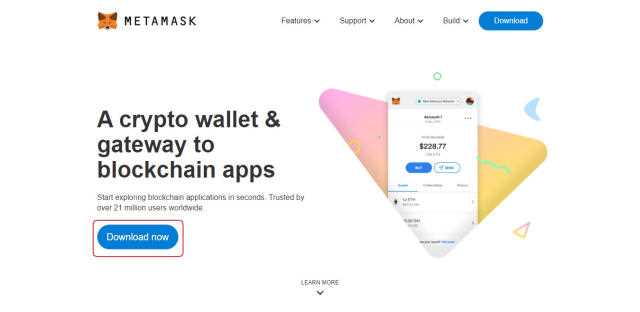
Visit the Metamask website (https://metamask.io/) and download the extension for your browser. Follow the instructions to add it to your browser.
2. Create a New Wallet:
Once the extension is installed, click on the Metamask icon in your browser toolbar. Click on “Create a Wallet” and follow the instructions to set a strong password and save your secret backup phrase.
3. Import an Existing Wallet:
If you already have a Metamask wallet or want to import an existing wallet, click on the Metamask icon in your browser toolbar and select “Import Wallet”. Enter your secret backup phrase and follow the instructions to import your wallet.
4. Connect to the Ethereum Network:
After setting up your wallet, click on the network dropdown in the top center of the Metamask window and select “Ethereum Mainnet” to connect to the Ethereum network.
5. Add Ethereum to your Wallet:
To add Ethereum to your wallet, you can purchase it from a cryptocurrency exchange or receive it from another Ethereum user. Once you have the Ethereum, click on the “Send” button in your Metamask wallet and enter the recipient’s Ethereum address. Confirm the transaction to add Ethereum to your wallet.
That’s it! You are now ready to start using Metamask and interacting with Ethereum dApps and smart contracts.
Creating a Metamask account
To start using Metamask and adding Ethereum to it, you need to create a Metamask account. Follow the step-by-step instructions below to create your account:
|
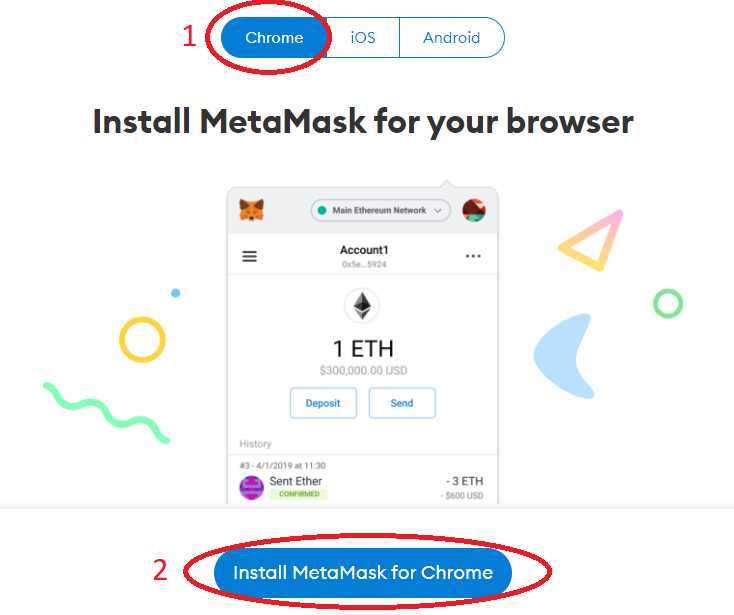
Step 1: |
Visit the official Metamask website and click on the “Get Chrome Extension” button if you are using Google Chrome. If you are using a different browser, you can choose to download the Metamask plugin for your browser. |
|
Step 2: |
After installing the Metamask plugin, you will see a fox icon in your browser toolbar. Click on this icon to open the Metamask extension. |
|
Step 3: |
Click on the “Get Started” button to begin the account creation process. |
|
Step 4: |
Read and accept the terms of use by clicking on the “Accept” button. |
|
Step 5: |
Create a new password for your Metamask account. Make sure to choose a strong and secure password to protect your funds. |
|
Step 6: |
Click on the “Create” button to create your account. |
|
Step 7: |
Metamask will generate a secret backup phrase consisting of 12 words. It is important to write down this phrase and keep it in a safe place. This backup phrase can be used to restore access to your account if you lose your password or device. |
|
Step 8: |
Confirm your backup phrase by selecting the words in the correct order. This step ensures that you have properly recorded your backup phrase and have it available when needed. |
|
Step 9: |
Once you have confirmed your backup phrase, your Metamask account will be created. You can now start using it to manage Ethereum and interact with decentralized applications. |
Congratulations! You have successfully created your Metamask account. Now you can proceed to adding Ethereum to your Metamask wallet.
Installing Metamask extension
In order to add Ethereum to Metamask, you first need to install the Metamask extension in your preferred web browser. Here’s a step-by-step guide on how to do it:
- Open your web browser (Google Chrome, Firefox, or Brave).
- Go to the extension marketplace of your browser by typing in the following URL: chrome://extensions, about:addons, or brave://extensions respectively.
- Use the search bar to find the Metamask extension.
- Click on the “Add to Chrome” (or similar) button to start the installation process.
- A pop-up window will appear. Click on “Add extension” to confirm.
- Wait for the installation to complete.
- Once installed, you will see an icon for the Metamask extension in the top right corner of your browser.
- Click on the icon to open the Metamask extension.
- A welcome screen will appear. Click on “Get Started” to begin setting up Metamask.
- You will be prompted to create a new wallet or import an existing one. Follow the instructions to create a new wallet.
- Set a strong password for your wallet and click “Create”.
- A secret backup phrase will be generated. Write it down and keep it safe. This backup phrase can be used to recover your wallet in case you lose access to your device.
- Confirm your backup phrase by selecting the words in the correct order.
- Your Metamask wallet is now set up and ready to use!
Now that you have installed the Metamask extension, you can proceed to add Ethereum to your wallet.
Setting up Metamask
To start using Metamask, follow these step-by-step instructions:
1. Install the Metamask browser extension
The first step is to install the Metamask browser extension. Visit the Metamask website at https://metamask.io and click on the “Download” button. This will redirect you to the extension’s page on the Chrome Web Store or other browser’s extension marketplace. Click on the “Add to…” button and follow the instructions to complete the installation.
2. Create a new Metamask wallet
Once the extension is installed, you will see the Metamask icon next to the address bar in your browser. Click on the icon to open Metamask. In the Metamask pop-up window, click on the “Get Started” button and then select “Create a Wallet” from the options provided.
Follow the instructions to set a strong password for your wallet and then click on “Create.” Metamask will automatically generate a unique 12-word recovery phrase that you need to write down and keep in a safe place. This recovery phrase is crucial for restoring access to your wallet in case you forget your password or lose your device.
3. Confirm your recovery phrase
Metamask will ask you to confirm your recovery phrase to ensure that you have written it down correctly. Enter the words in the correct order and click “Confirm” to proceed.
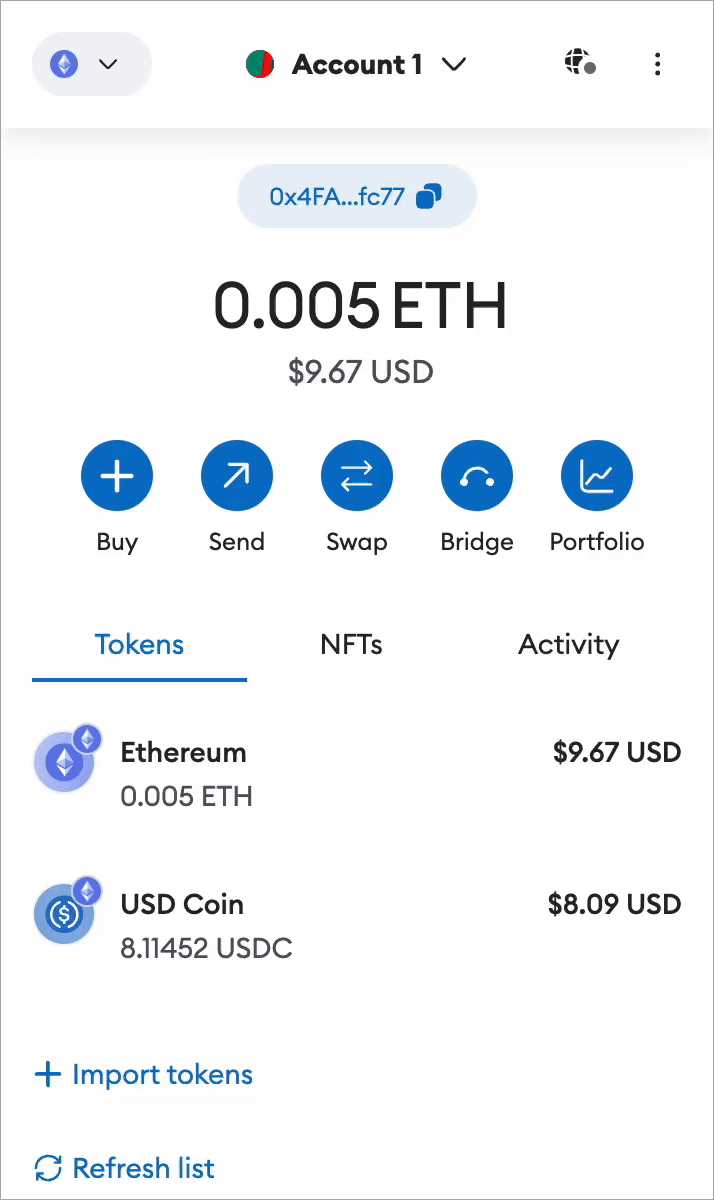
4. Add Ethereum to your Metamask wallet
Now that your wallet is set up, you need to add some Ethereum to it. Click on the account name on the top of the Metamask window and select “Account Details.” Copy the address of your wallet by clicking on the “Copy” button next to it.
Send some Ethereum to this address from your existing cryptocurrency exchange or wallet. Make sure you double-check the recipient address before confirming the transaction.
5. Connect Metamask to your browser
Finally, connect Metamask to your browser by clicking on the account name on the top of the Metamask window and selecting “Connect Hardware Wallet” or “Import Account.” Follow the instructions provided to complete the process.
Once Metamask is properly set up, you can start using it to interact with Ethereum decentralized applications (dApps) through your browser. Enjoy the benefits of securely managing your Ethereum assets and participating in the exciting world of decentralized finance!
What is Metamask?
Metamask is a cryptocurrency wallet that allows users to store, manage, and interact with Ethereum and other Ethereum-based tokens.
Can I add tokens other than Ethereum to Metamask?
Yes, you can add other Ethereum-based tokens to Metamask. To do this, go to the “Add Token” section in Metamask and enter the contract address of the token you want to add.
Is it safe to add Ethereum to Metamask?
Yes, it is generally safe to add Ethereum to Metamask. However, it is important to ensure that you are using a trusted source to download Metamask, and to keep your private key or seed phrase secure.