
Metamask is a popular cryptocurrency wallet that allows users to easily manage their digital assets and interact with decentralized applications (dApps) on the Ethereum blockchain. With the recent rise in popularity of the Polygon network, many users are looking to add ETH to Polygon in order to take advantage of its fast and inexpensive transactions.
If you’re new to Polygon and Metamask, don’t worry! In this step-by-step guide, we will walk you through the process of adding ETH to Polygon in your Metamask wallet. By following these simple instructions, you’ll be able to seamlessly transfer your ETH to Polygon and start exploring the world of decentralized finance (DeFi) on this exciting network.
Step 1: Set up Metamask
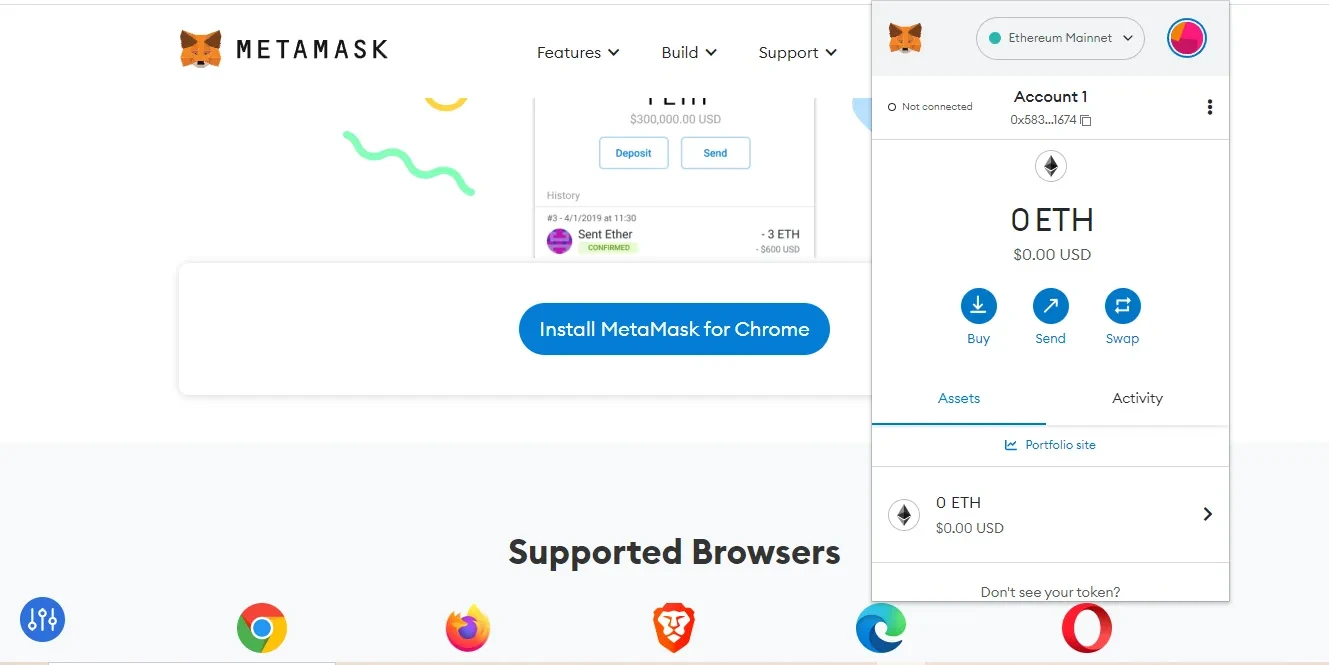
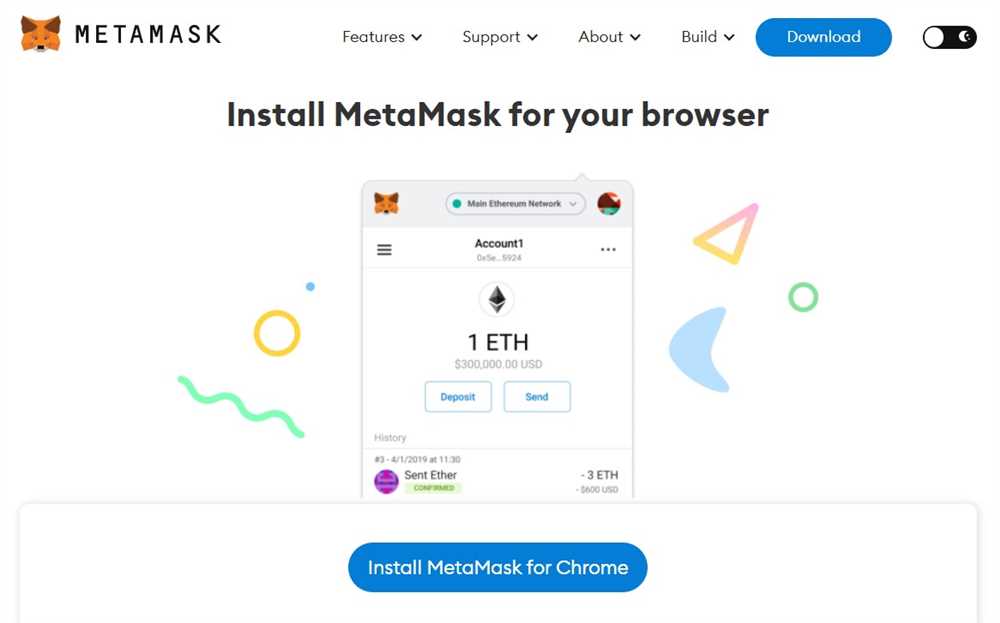
The first step is to install the Metamask wallet extension on your preferred web browser. Once installed, create a new wallet or import an existing one using your 12-word recovery phrase. Make sure to store this phrase in a secure place, as it is the key to accessing your funds.
Step 2: Switch to the Polygon Network
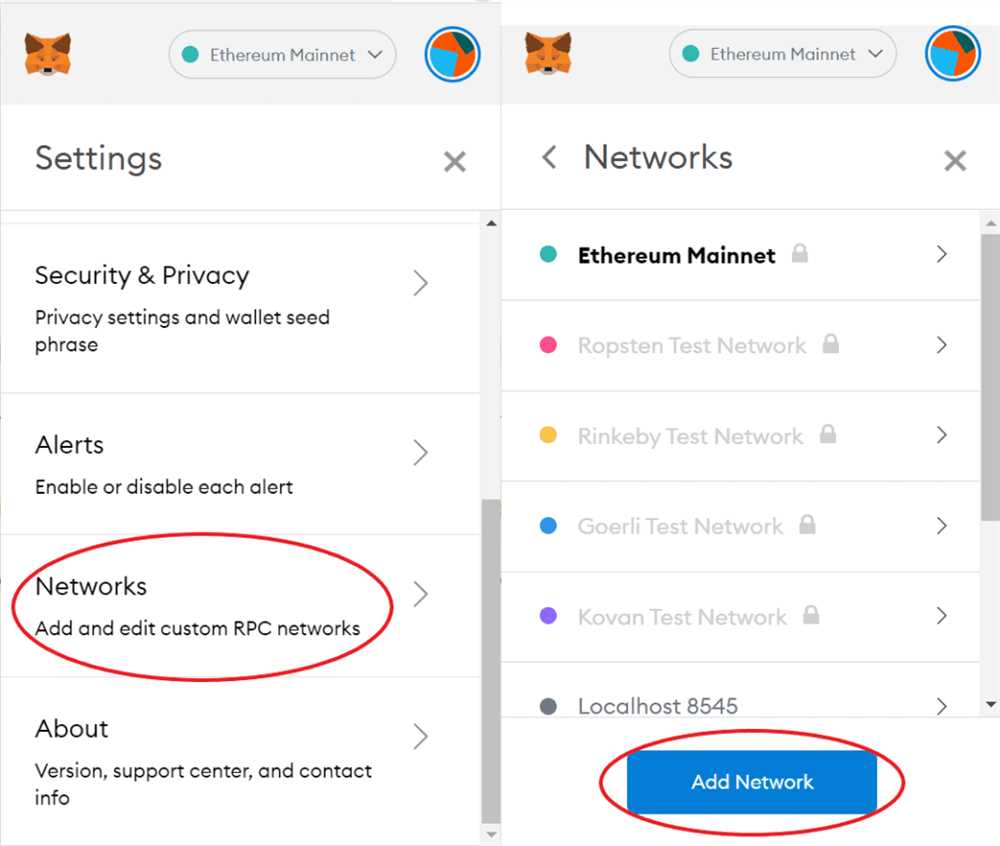
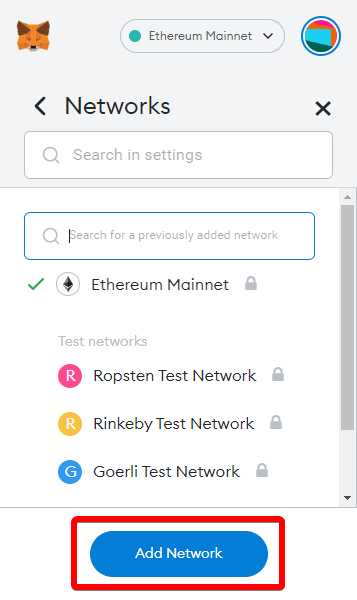
After setting up your Metamask wallet, click on the network selection dropdown menu in the top-right corner. Scroll down and select “Custom RPC” to manually add the Polygon network. Enter the following details:
Network Name: Polygon
New RPC URL: https://rpc-mainnet.maticvigil.com/
Chain ID: 137
Symbol: MATIC
Block Explorer URL: https://polygonscan.com/
Step 3: Get Some ETH
In order to interact with the Polygon network, you’ll need to have some ETH in your Metamask wallet. If you already have ETH on the Ethereum network, you can transfer it to your Metamask wallet using the usual Ethereum addresses. If not, you can purchase ETH from a reputable cryptocurrency exchange and send it to your Metamask wallet.
Step 4: Bridge your ETH to Polygon
Now that you have ETH in your Metamask wallet, you’ll need to bridge it to the Polygon network. Visit the Polygon PoS Bridge website and connect your Metamask wallet. Enter the amount of ETH you wish to bridge and follow the instructions to complete the transaction. Once the bridge is complete, your ETH will be available on the Polygon network.
Step 5: Enjoy the Benefits of Polygon!
With your ETH now on the Polygon network, you can start exploring the various dApps and DeFi protocols available on this fast and scalable blockchain. Whether you’re looking to trade on decentralized exchanges (DEXs), provide liquidity for yield farming, or participate in exciting new projects, Polygon offers a wide range of opportunities for you to leverage your assets and take part in the growing ecosystem.
By following these five simple steps, you can easily add ETH to Polygon in your Metamask wallet and unlock the full potential of this innovative blockchain network. Start your journey into the world of Polygon today and experience the future of decentralized finance!
Step 1: Install and Set Up Metamask Extension
In order to add ETH to Polygon in Metamask, you must first install and set up the Metamask extension on your preferred web browser. Follow these steps:
- Open your web browser and visit the official Metamask website.
- Click on the “Get Chrome Extension” button if you are using Google Chrome. For other browsers, click on the corresponding button.
- The extension will start downloading automatically. Once it has finished, click on the downloaded file to begin the installation. Follow the on-screen instructions to complete the installation process.
- After the installation is complete, you will see the Metamask icon in your browser’s toolbar.
- Click on the Metamask icon to launch the extension and get started with the setup.
- Click on the “Get Started” button to create a new wallet.
- Read and accept the terms and conditions of using Metamask.
- Choose a strong password for your wallet. Make sure to remember it or store it in a secure place.
- Click on the “Create” button to create your wallet.
- You will be presented with a secret backup phrase. This phrase is very important as it can be used to restore access to your wallet in case you forget your password. Write down the phrase and store it in a safe place.
- Confirm your backup phrase by selecting the words in the correct order.
- Once you have confirmed your backup phrase, your Metamask wallet will be successfully set up and ready to use.
Now that you have installed and set up Metamask, you can proceed to the next step of adding ETH to Polygon.
Step 2: Create a Polygon Wallet
In order to add ETH to Polygon in Metamask, you will first need to create a Polygon wallet. Here are the steps to follow:
1. Install and Set Up Metamask
If you don’t already have Metamask installed, you will need to download and install the Metamask browser extension. Once installed, create a new wallet or import an existing one by following the prompts.
2. Switch to the Polygon Network

Once you have Metamask set up, you will need to switch to the Polygon network. Click on the network dropdown in the top right corner of the Metamask extension and select “Custom RPC”. In the “New RPC URL” field, enter the following URL:
https://rpc-mainnet.maticvigil.com/
3. Add the Network
After entering the RPC URL, click on the “Save” button. Metamask will save the network and you will see “Polygon Mainnet” selected in the network dropdown.
4. Get MATIC Tokens
In order to add ETH to Polygon, you will need to have MATIC tokens. If you don’t have any MATIC tokens, you can purchase them on a cryptocurrency exchange or transfer them from another wallet to your Metamask Polygon wallet.
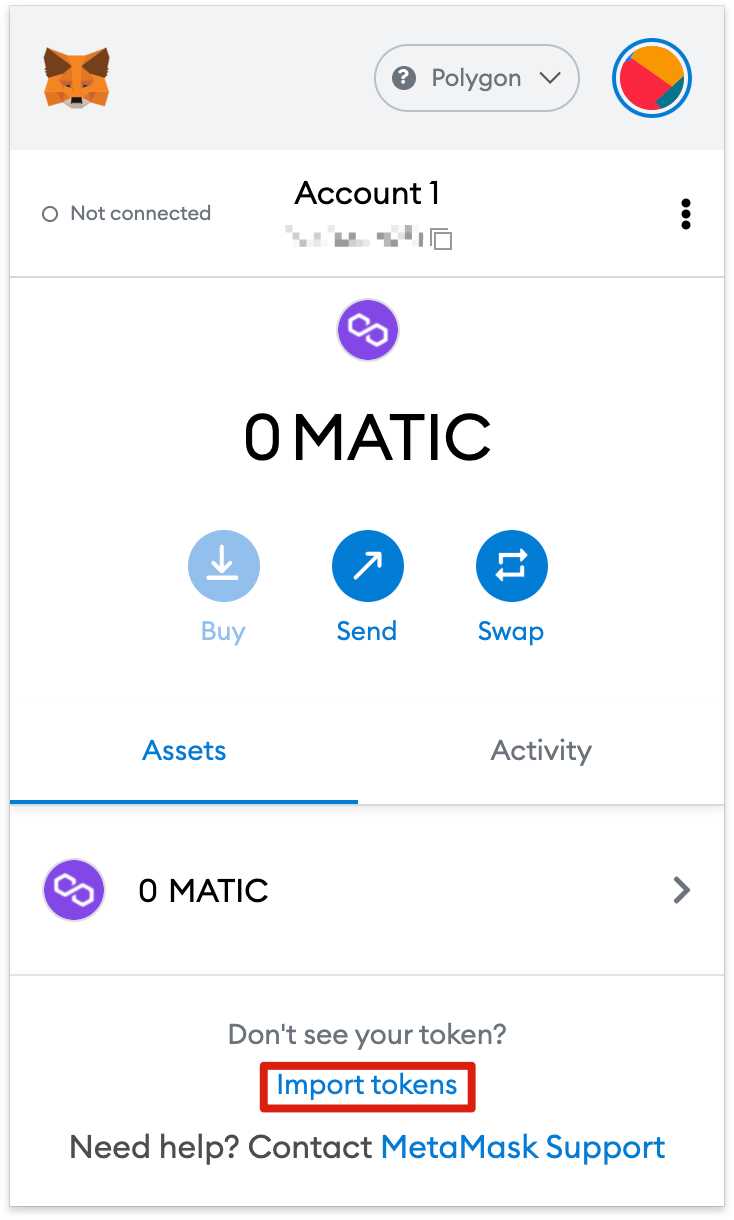
5. Deposit ETH to Polygon
Now that you have MATIC tokens in your Metamask Polygon wallet, you can deposit ETH to Polygon. To do this, click on the Metamask extension icon and select your Polygon wallet. Then, click on the “Send” button and enter the recipient’s address and the amount of ETH you wish to send. Confirm the transaction and wait for it to be processed.
Once the transaction is confirmed, you will have successfully added ETH to Polygon in Metamask.
Step 3: Transfer ETH from Ethereum Mainnet to Polygon
Now that you have added the Polygon network to your Metamask, it’s time to transfer some ETH from the Ethereum Mainnet to your Polygon wallet. Follow the steps below:
- Open your Metamask wallet and make sure you’re on the Polygon network.
- Click on the “Send” button to initiate a transaction.
- In the “Recipient” field, enter your Polygon wallet address. This is the wallet address you obtained in Step 1.
- Enter the amount of ETH you want to transfer to Polygon.
- Review the transaction details and ensure everything is correct.
- Click on the “Advanced Options” and set the gas fee to a level you’re comfortable with. Keep in mind that lower gas fees may result in slower transaction confirmation times.
- Click on the “Next” button to proceed.
- Confirm the transaction by clicking on the “Confirm” button.
- Wait for the transaction to be processed and confirmed on the Ethereum Mainnet. This may take some time depending on network congestion.
- Once the transaction is confirmed, you will see your ETH balance updated in your Polygon wallet.
Congratulations! You have successfully transferred ETH from the Ethereum Mainnet to Polygon. Now you can start using your ETH on the Polygon network for various decentralized applications and transactions.
Step 4: Add the Polygon Network to Metamask
In order to add the Polygon network to your Metamask wallet, you will need to follow these steps:
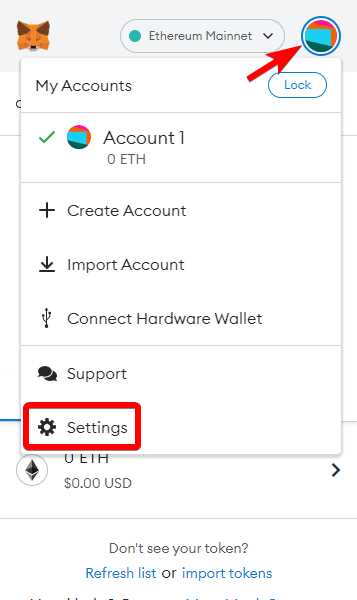
Step 1: Open Metamask
First, open the Metamask browser extension or mobile app and make sure you are logged into your account.
Step 2: Click on the Network Selection
Next, click on the network selection dropdown menu located at the top of the Metamask interface. This is where you can choose which network to connect to.
Step 3: Select “Custom RPC”
From the network selection dropdown menu, select “Custom RPC” to add a new network manually.
Step 4: Fill in Network Details
Now, you will need to fill in the network details for the Polygon network.
Enter the following information:
- Network Name: Polygon
- New RPC URL: https://rpc-mainnet.maticvigil.com/ (for the mainnet) or https://rpc-mumbai.maticvigil.com/ (for the testnet)
- Chain ID: 137 (for the mainnet) or 80001 (for the testnet)
- Symbol: MATIC
- Block Explorer URL: https://polygonscan.com/ (for the mainnet) or https://mumbai.polygonscan.com/ (for the testnet)
Double check that all the details are entered correctly.
Step 5: Save the Network
Once you have entered the network details, click on the “Save” button to save the network to your Metamask wallet.
That’s it! You have successfully added the Polygon network to your Metamask wallet. Now you can easily transfer and interact with ETH on the Polygon network.
Step 5: Swap ETH for MATIC on Polygon
Now that you have transferred ETH to your Polygon network, it’s time to swap it for MATIC tokens. Follow the steps below to make the swap:
- Open the QuickSwap website (https://quickswap.exchange/) in your browser.
- Connect your Metamask wallet to the QuickSwap website by clicking on the “Connect Wallet” button at the top right corner of the page.
- In the wallet connection popup, select the Metamask option.
- Confirm the connection by clicking on the “Next” button.
- Once your wallet is connected, make sure the “From” field is set to ETH and the “To” field is set to MATIC.
- Enter the amount of ETH you wish to swap into the “From Amount” field.
- Review the estimated amount of MATIC you will receive in the “To Amount” field.
- Click on the “Swap” button to initiate the transaction.
- A Metamask popup will appear, displaying the transaction details. Review the details and click on the “Confirm” button to proceed.
- Wait for the transaction to be processed. This may take a few moments to complete.
- Once the transaction is confirmed, you will see the MATIC tokens in your Metamask wallet.
Congratulations! You have successfully swapped your ETH for MATIC tokens on the Polygon network. You can now use these tokens for various purposes within the Polygon ecosystem.
What is Metamask?
Metamask is a cryptocurrency wallet and browser extension that allows users to manage and interact with decentralized applications (dApps) on the Ethereum blockchain.
Why would I want to add ETH to Polygon?
Adding ETH to Polygon allows you to access and use dApps and protocols on the Polygon network, which offers faster and cheaper transactions compared to the Ethereum mainnet.