
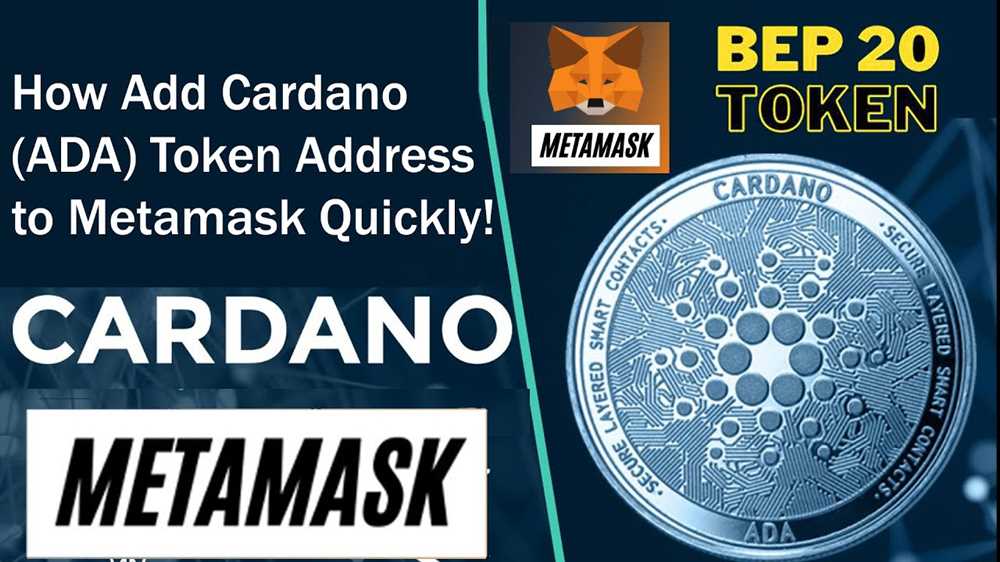
If you’re an avid Cardano enthusiast looking to manage your ADA tokens through Metamask, you’re in the right place. This step-by-step guide will walk you through the process of adding Cardano to your Metamask wallet, allowing you to easily access and interact with the Cardano blockchain.
Step 1: Install Metamask
The first step is to ensure you have Metamask installed on your web browser. If you don’t have it yet, simply visit the Metamask website and follow the instructions to install the extension.
Step 2: Create or Import a Wallet
Once you have Metamask installed, open the extension and either create a new wallet or import an existing one using your seed phrase or JSON file.
Step 3: Connect to Cardano Mainnet
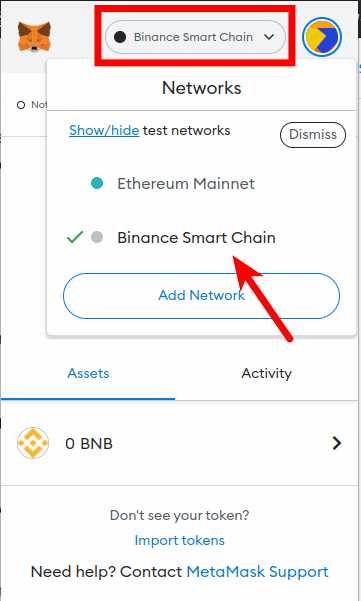
After setting up your wallet, click on the network dropdown in the Metamask extension and select “Custom RPC”. In the “New Network” settings, enter the following details to connect to the Cardano mainnet:
– Network Name: Cardano
– New RPC URL: https://explorer.cardano.org/en
– Chain ID: 1
– Symbol: ADA
– Block Explorer URL: https://explorer.cardano.org
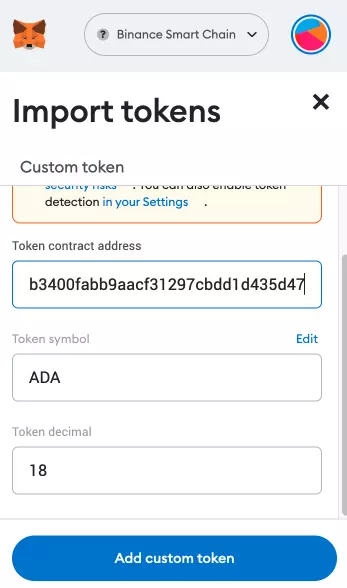
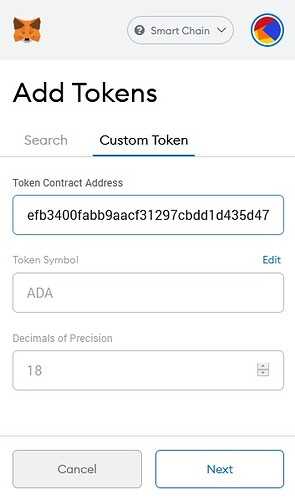
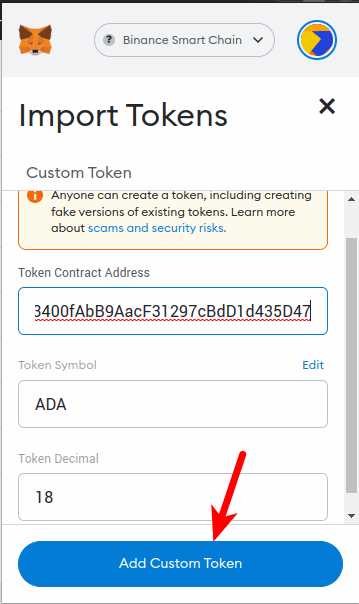
Step 4: Add Cardano Token
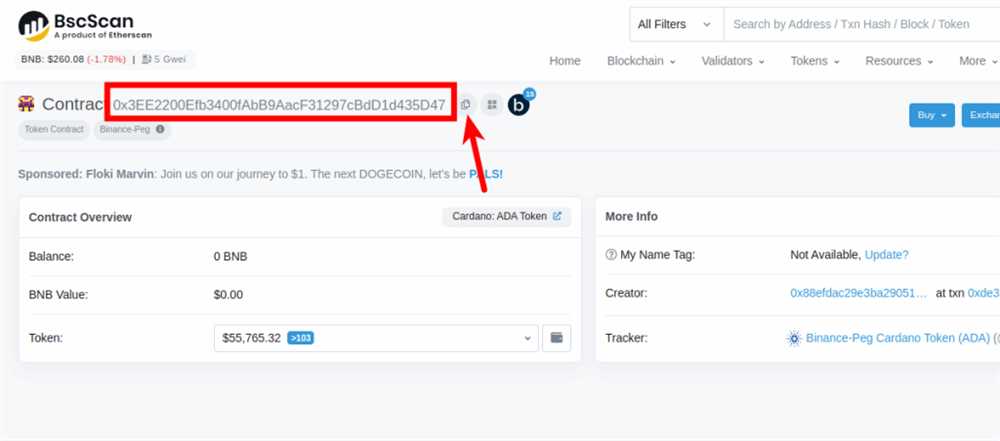
With the Cardano mainnet connected, click on the Metamask extension again and select “Add Token”. In the “Token Contract Address” field, enter the Cardano ADA token contract address:
– Cardano ADA Token Contract Address: 0x…
Once the token address is entered, Metamask will automatically fetch the token details, including the symbol, decimals, and balance.
Step 5: Start Managing Your Cardano ADA
Now that you have Cardano added to your Metamask wallet, you can start managing your ADA tokens. You can send and receive ADA, interact with Cardano dApps, and view your ADA balance directly within the Metamask extension.
Congratulations! You’ve successfully added Cardano to Metamask and can now enjoy the benefits of managing your ADA tokens with ease.
Step 1: Install Metamask Extension
To start using Cardano with Metamask, you first need to install the Metamask extension in your browser. Metamask is a digital wallet that allows you to interact with decentralized applications (dApps) on the Ethereum blockchain, and with some configuration, it can be used to connect with other blockchains like Cardano as well. Follow the steps below to install the Metamask extension:
- Open your preferred web browser (Chrome, Firefox, Brave, etc.) and go to the Metamask website.
- Click on the “Download” button to initiate the download process.
- Once the download is complete, click on the downloaded file to start the installation.
- Follow the on-screen instructions to complete the installation process.
- After the installation is finished, a new tab will open with the Metamask logo and a suggestion to import an existing wallet or create a new one.
- Click on the “Get Started” button to create a new wallet.
- Set a strong password for your wallet and make sure to remember it. You will need this password every time you want to access your wallet.
- If you want to be able to recover your wallet using a seed phrase, make sure to write it down and keep it in a safe place. This will be your only option to recover your funds in case you lose access to your wallet.
- Once you have completed the setup process, you will be redirected to the Metamask interface.
Congratulations! You have successfully installed the Metamask extension in your browser. In the next step, we will show you how to add the Cardano network to your Metamask wallet.
Learn how to install Metamask extension to your preferred browser
To start using Metamask with Cardano, you need to install the Metamask extension on your preferred browser. Follow these step-by-step instructions to install Metamask:
- Open your preferred browser (Chrome, Firefox, or Brave) and go to the extension/add-on store.
- Search for “Metamask” in the store’s search bar.
- Click on the Metamask extension/add-on from the search results.
- Click on the “Add to Chrome” (or “Add to Firefox” or “Add to Brave”) button to start the installation process.
- After the installation is complete, you will see a new Metamask icon added to your browser’s toolbar.
- Click on the Metamask icon in the toolbar and select the “Get Started” button.
- A new tab will open, and you will be prompted to create a new Metamask account. Follow the instructions to set up your account.
- Once your account is set up, you can import an existing wallet or create a new wallet using the Seed Phrase.
- After importing or creating a wallet, you will be asked to secure it with a password.
- Once your password is set, you will have successfully installed and set up Metamask on your preferred browser.
Congratulations! You now have Metamask installed and ready to use with Cardano. You can now proceed to add Cardano to Metamask and start interacting with the Cardano blockchain.
Step 2: Create Metamask Wallet
To add Cardano to Metamask, you first need to have a Metamask wallet. If you already have one, you can skip this step and proceed to Step 3. If not, follow the steps below to create a Metamask wallet:
1. Install the Metamask Extension
The first step is to install the Metamask extension on your web browser. Metamask is compatible with most major web browsers, including Chrome, Firefox, Brave, and Edge. You can find the Metamask extension in the extension stores of these browsers.
2. Set Up a New Wallet
After you have installed the Metamask extension, a fox icon will appear in your browser toolbar. Click on the fox icon to open the Metamask popup. On the popup, click on the “Get Started” button to begin the wallet setup process.
On the next screen, click on the “Create a Wallet” option. You will be asked to create a password for your wallet. Make sure to use a strong password and keep it secure.
After creating a password, you will be shown a unique set of 12 seed phrases. It is extremely important to write down these seed phrases and keep them in a safe place. The seed phrases are the keys to your wallet and can be used to restore access to your funds if you forget your password or lose access to your device.
Once you have written down the seed phrases, you will be asked to confirm them in the correct order. This is to ensure that you have correctly recorded the seed phrases. After confirming the seed phrases, your Metamask wallet will be created.
3. Connect your Wallet
Now that you have created your Metamask wallet, you need to connect it to the Cardano network. To do this, click on the network selection dropdown on the Metamask popup and select “Custom RPC”.
In the “New RPC URL” field, enter the Cardano network’s RPC URL: https://mainnet.infura.io/v3/YOUR_INFURA_PROJECT_ID. Replace YOUR_INFURA_PROJECT_ID with your Infura project ID, which you obtained in Step 1.
Click on the “Save” button to save the network settings. Metamask will now be connected to the Cardano network.
Congratulations! You have successfully created a Metamask wallet and connected it to the Cardano network. You are now ready to proceed to the next step and add Cardano to your Metamask wallet.
Learn how to create a new wallet on Metamask
Metamask is a popular wallet that allows users to securely manage and store their cryptocurrencies. If you want to store Cardano (ADA) in your Metamask wallet, you’ll first need to create a new wallet on the Metamask platform. Follow the step-by-step guide below to create a new wallet on Metamask:
Step 1: Install the Metamask Extension
The first step is to install the Metamask extension in your web browser. Metamask supports multiple browsers, including Chrome, Firefox, and Brave. Visit the official Metamask website or the respective browser extension store to download and install Metamask.
Step 2: Set Up a New Wallet
After installing the Metamask extension, click on the Metamask icon in your browser toolbar. You’ll be prompted to create a new wallet or import an existing one. Select “Create a Wallet” to proceed.
Enter a strong, unique password for your wallet. Make sure to choose a password that you can remember but is also difficult for others to guess. Once you’ve entered the password, click on the “Create” button.
Metamask will then display a set of backup words or seed phrase. This seed phrase is crucial for recovering your wallet in case of emergencies or if you switch devices. It’s important to write down these backup words and store them in a safe place. Click on the words in the correct order to confirm that you’ve written them down correctly.
After confirming the backup words, your wallet will be successfully created. Metamask will then ask you to confirm your seed phrase by selecting the correct words from a list of words that are displayed. Once you’ve confirmed the backup words again, your wallet will be fully set up and ready to use.
It’s important to note that Metamask generates a unique Ethereum address for your wallet. If you want to add Cardano to your Metamask wallet, you’ll need to use a bridge solution like the one provided by ADALite. This will allow you to access your Cardano wallet on the Metamask platform.
Congratulations! You’ve successfully created a new wallet on Metamask. You can now explore the features offered by Metamask, including sending and receiving cryptocurrencies, interacting with decentralized applications (DApps), and managing your digital assets securely.
Step 3: Add Cardano Network
Once you have successfully installed Metamask on your browser, follow these steps to add the Cardano network:
Step 3.1: Open Metamask
Click on the Metamask extension icon in your browser’s toolbar to open the Metamask wallet. If you don’t see the icon, you may need to pin it to your toolbar.
Step 3.2: Switch to the Ethereum Mainnet
If you are already on a different network in Metamask, such as Ethereum Testnet, switch to the Ethereum Mainnet first. To do this, click on the network name at the top of the Metamask wallet interface and select “Ethereum Mainnet” from the dropdown menu.
Step 3.3: Add Cardano Network
To add the Cardano network, click on the network name again and select “Custom RPC” from the dropdown menu. This will open a dialog box where you can configure the network settings.
Step 3.4: Fill in the Network Details
In the dialog box, fill in the following details:
| Network Name | Cardano Mainnet |
| New RPC URL | https://mainnet.infura.io/v3/YOUR_INFURA_PROJECT_ID |
| Chain ID | 1 |
| Currency Symbol | ADA |
| Block Explorer URL | https://cardanoscan.io/ |
Make sure to replace YOUR_INFURA_PROJECT_ID with your actual Infura project ID.
Step 3.5: Save and Connect
After filling in the network details, click on the “Save” button. Metamask will now be connected to the Cardano network.
Congratulations! You have successfully added the Cardano network to Metamask. You can now use your Metamask wallet to interact with Cardano dApps and perform transactions on the Cardano network.
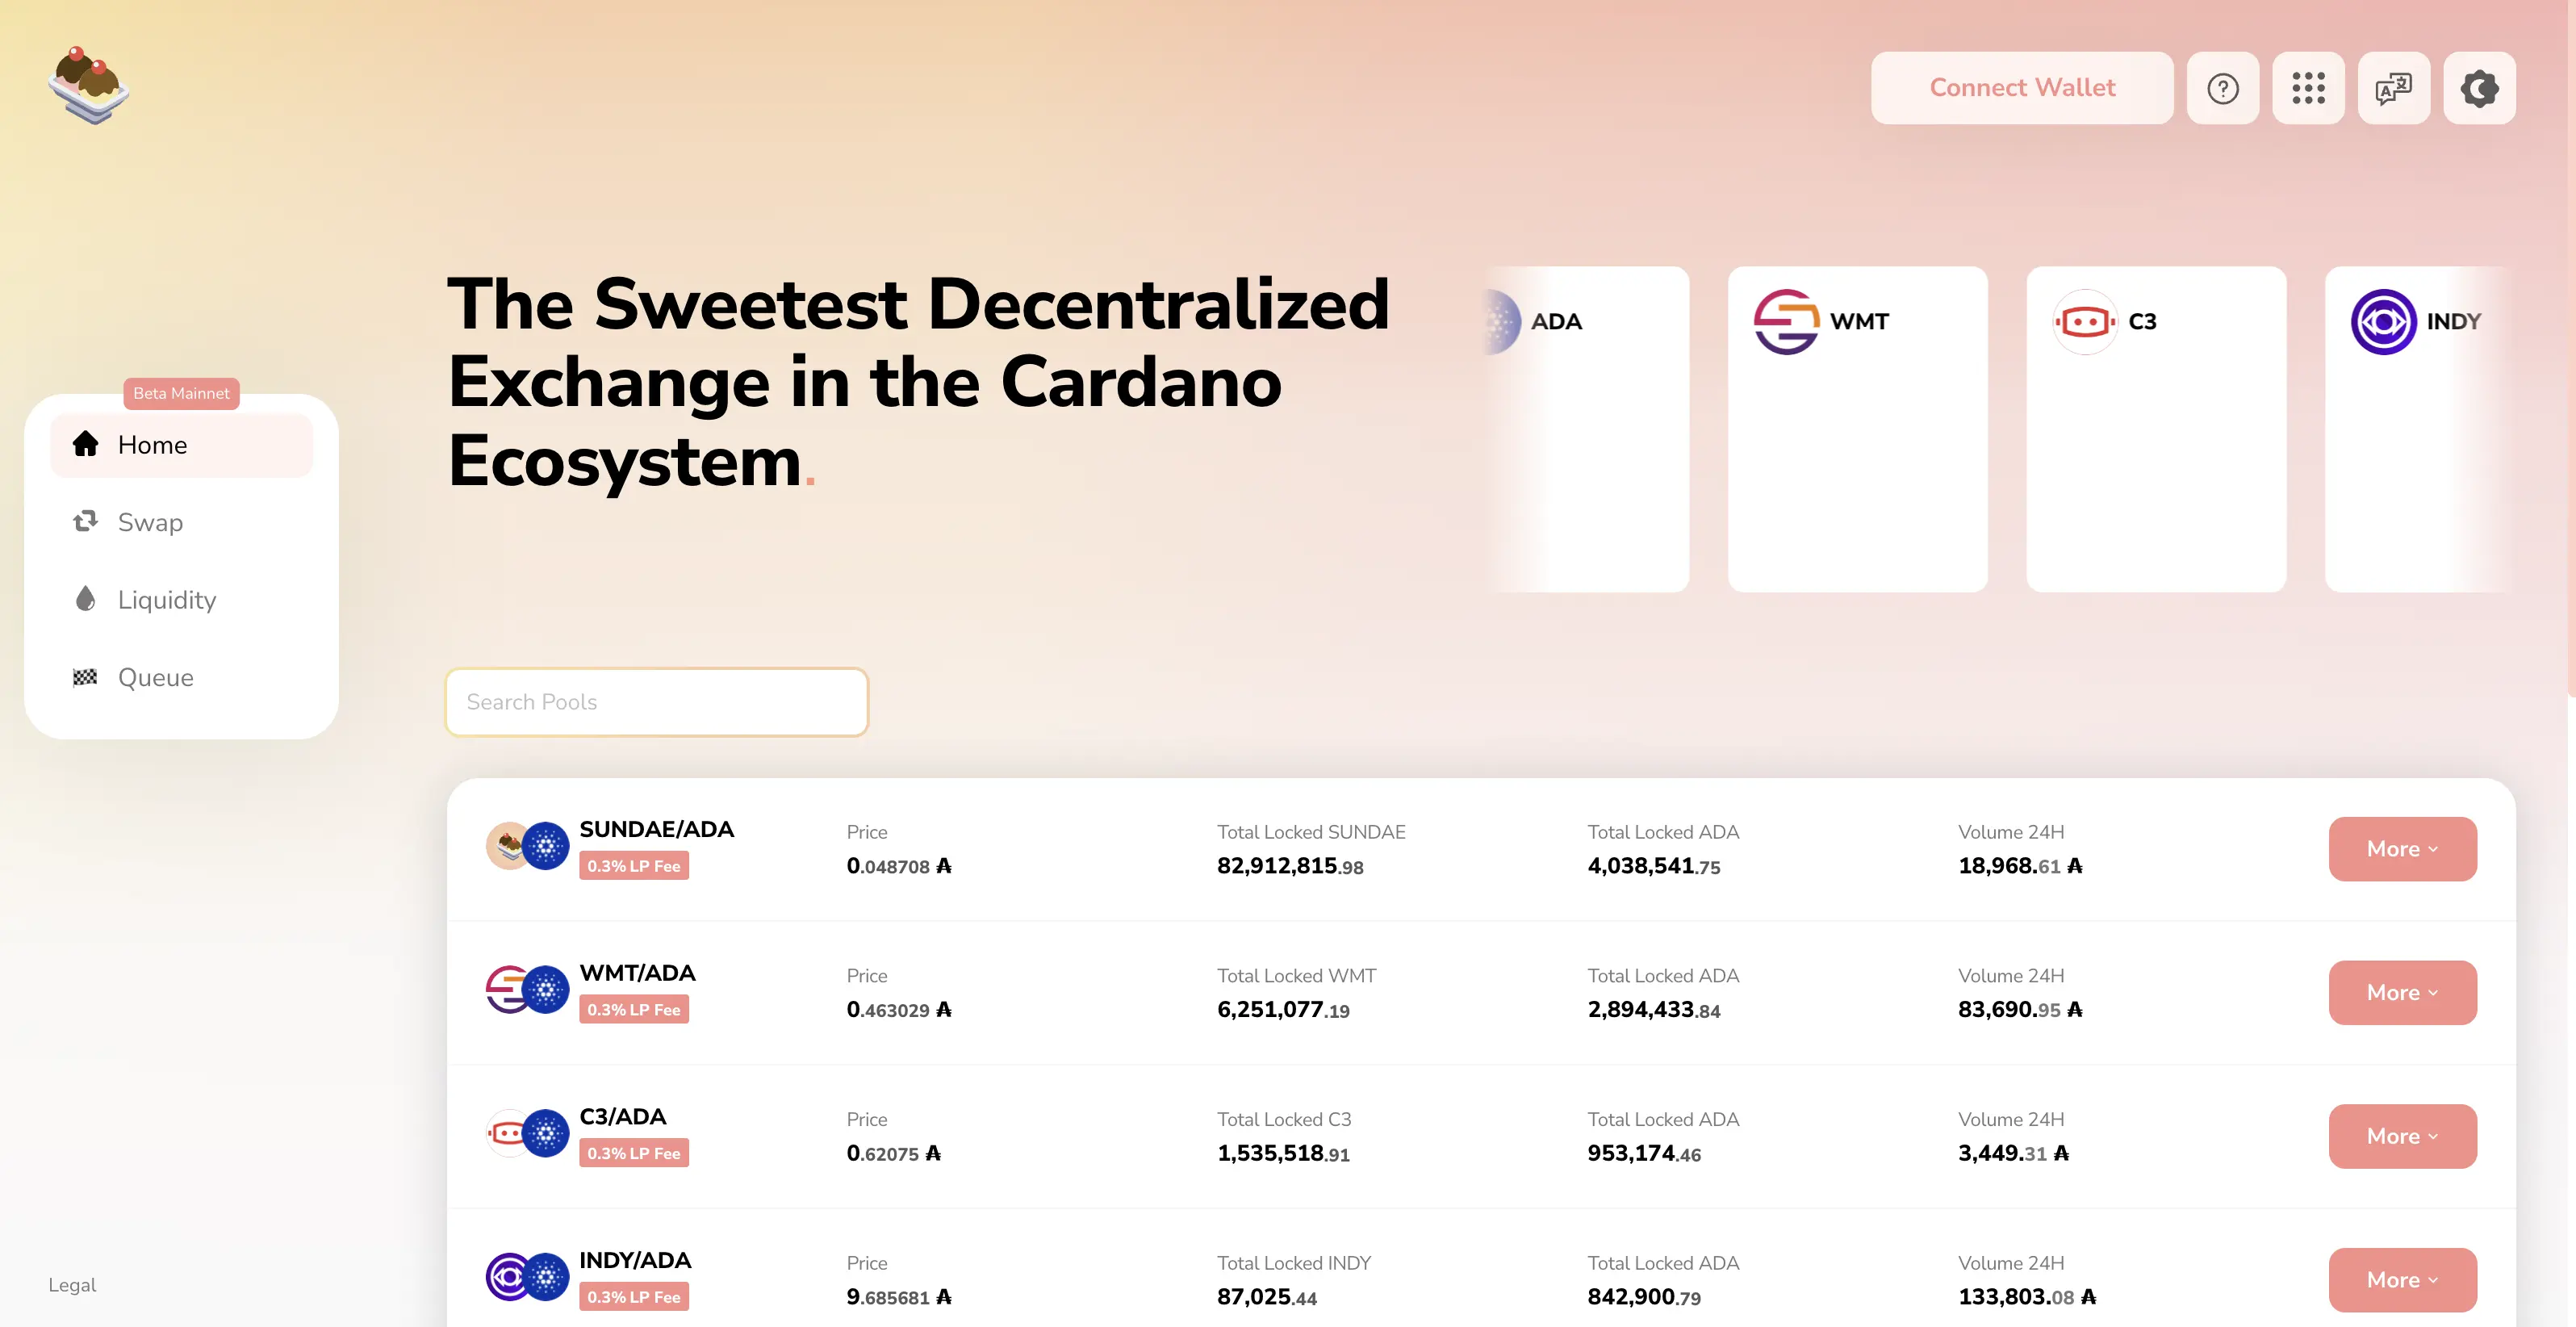
What is Cardano?
Cardano is a blockchain platform that aims to provide a more secure and sustainable infrastructure for the development of decentralized applications.
Why would I want to add Cardano to Metamask?
Adding Cardano to Metamask allows you to interact with the Cardano ecosystem directly through a familiar interface. You can manage your Cardano assets, participate in decentralized applications, and securely store your ADA tokens.
What is Metamask?
Metamask is a browser extension wallet that allows users to manage their Ethereum-based assets, interact with decentralized applications, and securely store their cryptocurrencies.