
Welcome to our step-by-step guide on how to easily add Binance Smart Chain (BSC) to your MetaMask wallet. Binance Smart Chain is a blockchain platform that offers a fast and low-cost alternative to Ethereum. By adding BSC to your MetaMask wallet, you will be able to interact with decentralized applications (DApps) and tokens that are built on the Binance Smart Chain.
MetaMask is a popular browser extension wallet that allows users to manage their Ethereum wallets and interact with Ethereum-based DApps. By adding BSC to MetaMask, you can expand your wallet’s capabilities and access a wider range of DApps and tokens.
Adding BSC to MetaMask is a simple process that involves adding the BSC network to your wallet settings. In this guide, we will walk you through the steps you need to follow to seamlessly add BSC to your MetaMask wallet.
Let’s get started!
Easy Way to Add BSC to Metamask: Step-by-Step Guide
If you’re interested in entering the world of decentralized finance (DeFi) or exploring the wide range of decentralized applications (DApps) available on the Binance Smart Chain (BSC), you’ll need to add BSC to your Metamask wallet. Metamask is one of the most popular wallets for interacting with the Ethereum blockchain, but with a few simple steps, you can also connect it to the BSC network.
Step 1: Install the Metamask extension
If you already have Metamask installed, skip to the next step. Otherwise, visit the official Metamask website and install the browser extension for your preferred web browser.
Step 2: Set up Metamask
After installing the extension, open Metamask and follow the instructions to create a new wallet or import an existing one. Make sure to securely store your seed phrase in a safe place.
Step 3: Switch to the BSC Network
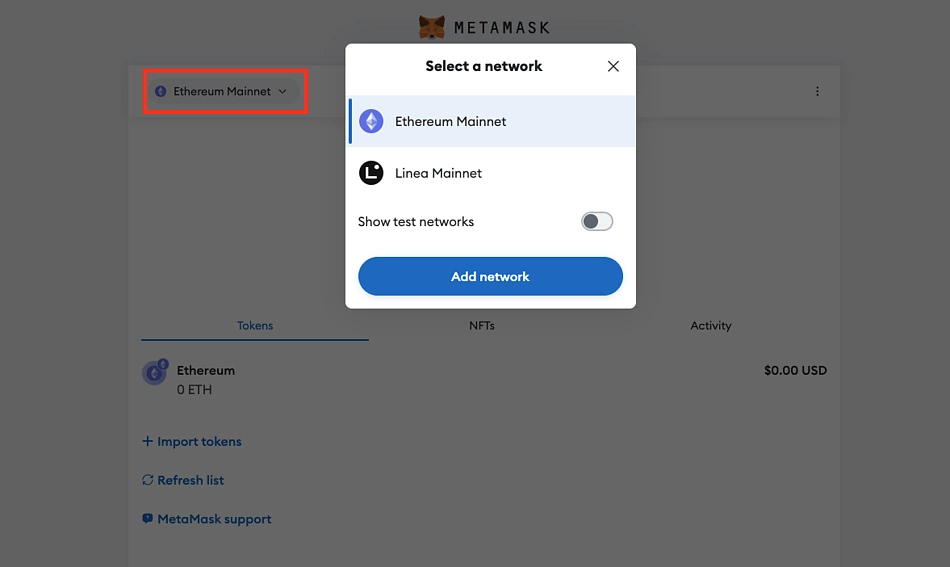
Once your wallet is set up, click on the Metamask icon in your browser to open the extension. At the top of the Metamask window, you’ll see the Ethereum network selected by default. Click on it to open the network selection menu.

From the network selection menu, scroll down and click on “Custom RPC” to manually add a new network.
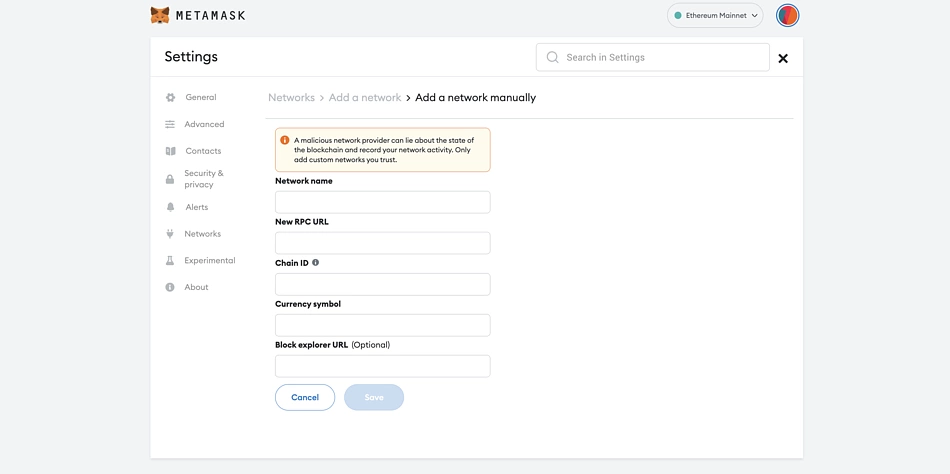
Step 4: Add BSC network details
In the “Custom RPC” section, you’ll need to enter the following details to connect to the BSC network:
- Network Name: Binance Smart Chain
- New RPC URL: https://bsc-dataseed1.defibit.io or any other BSC RPC URL
- Chain ID: 56
- Symbol: BNB
- Block Explorer URL: https://bscscan.com
After entering these details, click on the “Save” button to add the BSC network to Metamask.
Step 5: Switch to the BSC network
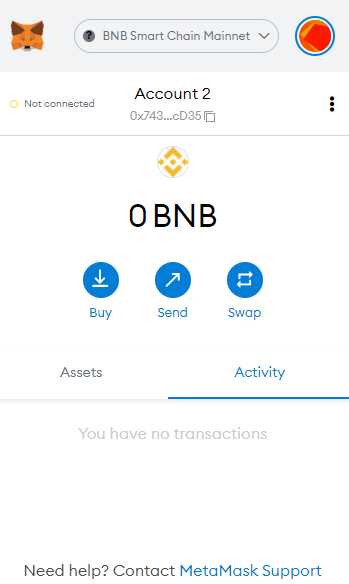
Once the BSC network is added, you can switch to it by selecting “Binance Smart Chain” from the network selection menu. Metamask will now be connected to the BSC network, and you’ll be able to view your BSC wallet balance and interact with DApps and smart contracts on the BSC network.
Step 6: Importing BSC tokens
If you already have BSC tokens in another wallet, you can import them into Metamask by clicking on the Metamask extension, selecting the Binance Smart Chain network, then clicking on “Add Token” to add the token’s contract address and import it into your Metamask wallet.
Note: Make sure to only import tokens from trusted sources and verify the token’s contract address before importing it into your wallet.
By following these simple steps, you can easily add BSC to your Metamask wallet and start exploring the world of decentralized finance on the Binance Smart Chain.
Install and set up Metamask extension

To add BSC to Metamask, you first need to install the Metamask extension on your browser. Follow the steps below to set it up:
Step 1: Install Metamask
1. Open your preferred web browser and visit the official Metamask website.
2. Click on the “Get Chrome Extension” button if you are using Google Chrome or “Get Firefox Addon” if you are using Mozilla Firefox.
3. You will be redirected to the respective extension store. Click on the “Add to Chrome” button if you are using Chrome or “Add to Firefox” button if you are using Firefox.
4. Wait for the installation process to complete.
Step 2: Set up Metamask

1. Once the extension is installed, click on the Metamask icon located at the top-right corner of your browser window.
2. Click on the “Get Started” button.
3. Read and accept the terms of use by clicking on the “Accept” button.
4. Create a new wallet by clicking on the “Create a Wallet” button.
5. Choose a strong password and enter it in the designated field. Click on the “I agree” button after reading the terms of use.
6. In the next step, you will be shown a sequence of secret backup words. It is crucial to write down these words and keep them in a safe place. Click on the “Next” button once you have noted them down correctly.
7. Verify your backup by selecting the correct words in the specified order. This step ensures that you have correctly noted down your secret backup words. Click on the “Confirm” button.
8. Congratulations! You have successfully set up your Metamask wallet. You can now manage your Ethereum and Binance Smart Chain assets using the Metamask extension.
Now that you have installed and set up the Metamask extension, you can proceed to the next steps to add BSC to your wallet.
Import Binance Smart Chain network
To add the Binance Smart Chain network to your Metamask wallet, follow the step-by-step instructions below:
Step 1: Access Network Settings
Open your Metamask wallet and click on the network selection dropdown at the top of the interface. By default, it displays “Main Ethereum Network”.
Step 2: Add Custom RPC Network
In the network selection dropdown, scroll down to the bottom and click on “Custom RPC”.
Step 3: Provide Network Details

Enter the following details to connect to the Binance Smart Chain network:
| Network Name | Binance Smart Chain |
| New RPC URL | https://bsc-dataseed.binance.org/ |
| Chain ID | 56 |
| Symbol | |
| Block Explorer URL | https://bscscan.com |
Step 4: Save Network
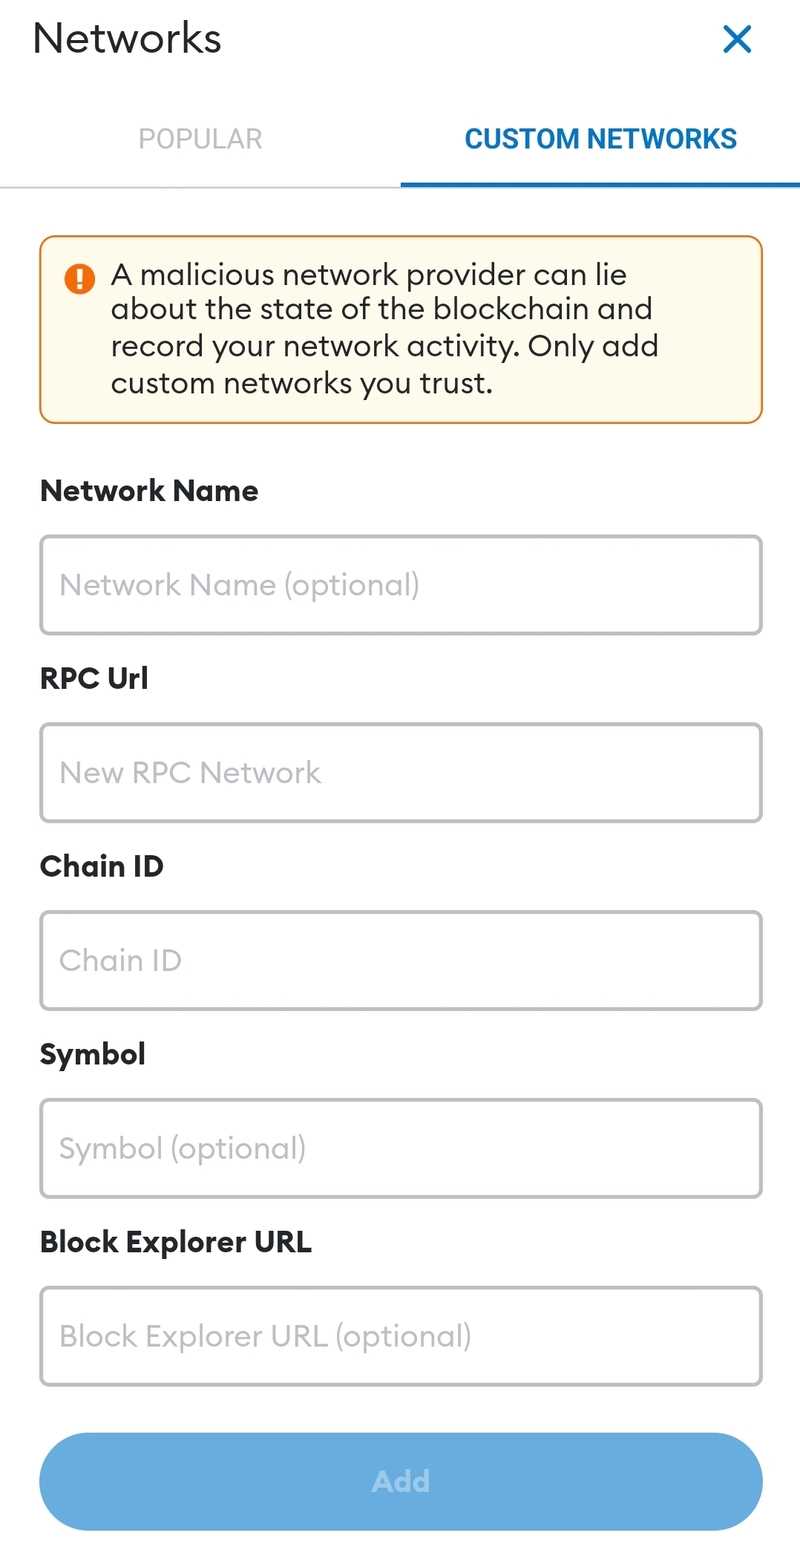
Click on “Save” to add the Binance Smart Chain network to your Metamask wallet. The network should now appear in the network selection dropdown.
Your Metamask wallet is now connected to the Binance Smart Chain network. You can now easily switch between different networks and interact with decentralized applications (dApps) and smart contracts on the Binance Smart Chain.
Add Binance Smart Chain (BSC) tokens to your Metamask wallet
Metamask is a popular browser extension that allows users to interact with decentralized applications (DApps) and securely manage their cryptocurrency assets. By default, it is set to work with the Ethereum network, but with a few simple steps, you can add support for Binance Smart Chain (BSC) tokens to your Metamask wallet.
Step 1: Install or update Metamask extension
If you haven’t installed Metamask yet, head over to the official website and download the extension for your preferred browser. If you already have Metamask installed, make sure it is updated to the latest version to ensure compatibility with BSC.
Step 2: Set up Binance Smart Chain network
Open Metamask and click on the network selection dropdown (usually displayed as “Ethereum Mainnet” or “Ropsten Test Network”). Scroll down and select “Custom RPC” to manually add a new network.
In the “New RPC URL” field, enter the following URL: https://bsc-dataseed.binance.org/
Set the “Chain ID” to 56 and enter “BSC” or any preferred name for the network in the “Network Name” field.
Save the changes and return to the Metamask home screen.
Step 3: Add BSC token to your wallet
Click on the Metamask extension icon in your browser to open the wallet. If it’s already open, refresh the page to ensure the changes are in effect.
At the bottom of the wallet screen, click on “Add Token.”
In the “Token Contract Address” field, enter the contract address of the BSC token you want to add. You can usually find this information on the token’s website or through trusted token listing platforms.
Metamask should automatically populate the “Token Symbol” and “Decimals of Precision” fields based on the token’s contract address. If not, enter the correct values manually.
Click on “Next” and then on “Add Tokens” to complete the process.
Step 4: Manage and use your BSC tokens
Once the BSC token is successfully added to your Metamask wallet, you can now view and manage your balances. You can also use BSC tokens to interact with DApps and participate in various decentralized finance (DeFi) activities.
Remember to always double-check the contract address and other details when adding tokens to your wallet to ensure you’re interacting with legitimate and trustworthy projects.
Note: The steps provided in this guide are accurate at the time of writing. However, the user interface and functionality of Metamask may change over time. Always refer to the official Metamask documentation for the most up-to-date instructions.
What is BSC?
BSC stands for Binance Smart Chain. It is a blockchain platform that runs in parallel with the Binance Chain. It was created to provide a high-performance and low-fee environment for decentralized applications (dApps) and tokens.
Why would I want to add BSC to my Metamask?
Adding BSC to your Metamask wallet allows you to use decentralized applications and interact with tokens built on the Binance Smart Chain. It expands the range of possibilities and opportunities available to you within the decentralized finance (DeFi) ecosystem.
Are there any fees associated with adding BSC to Metamask?
No, there are no fees associated with adding BSC to your Metamask wallet. However, please note that there may be fees involved when using the Binance Smart Chain network for transactions and interactions with dApps and tokens.
Can I use my Metamask wallet on both Ethereum and Binance Smart Chain?
Yes, you can use your Metamask wallet on both Ethereum and Binance Smart Chain. When adding BSC to your Metamask, it creates a parallel network, allowing you to switch between Ethereum and BSC networks with ease. You can manage and interact with both Ethereum-based and BSC-based assets using the same wallet.