
If you’re investing in cryptocurrencies and using the popular Ethereum wallet, Metamask, you may have encountered the need to add BEP20 tokens to your wallet. BEP20 tokens are tokens that are built on the Binance Smart Chain (BSC) and are compatible with the Ethereum Virtual Machine (EVM). In this step-by-step guide, we will walk you through the process of adding BEP20 tokens to your Metamask wallet.
Step 1: Open Metamask and Get the Contract Address
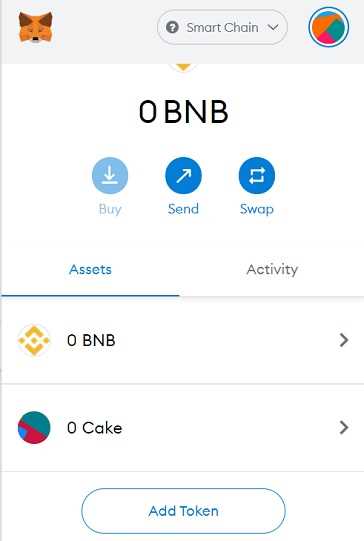
The first step is to open your Metamask wallet and navigate to the main page. Here, you will see the option to add a token. Click on the “Add Token” button, and a new window will appear. In this window, you will need to provide the contract address of the BEP20 token you want to add.
Step 2: Find the Contract Address
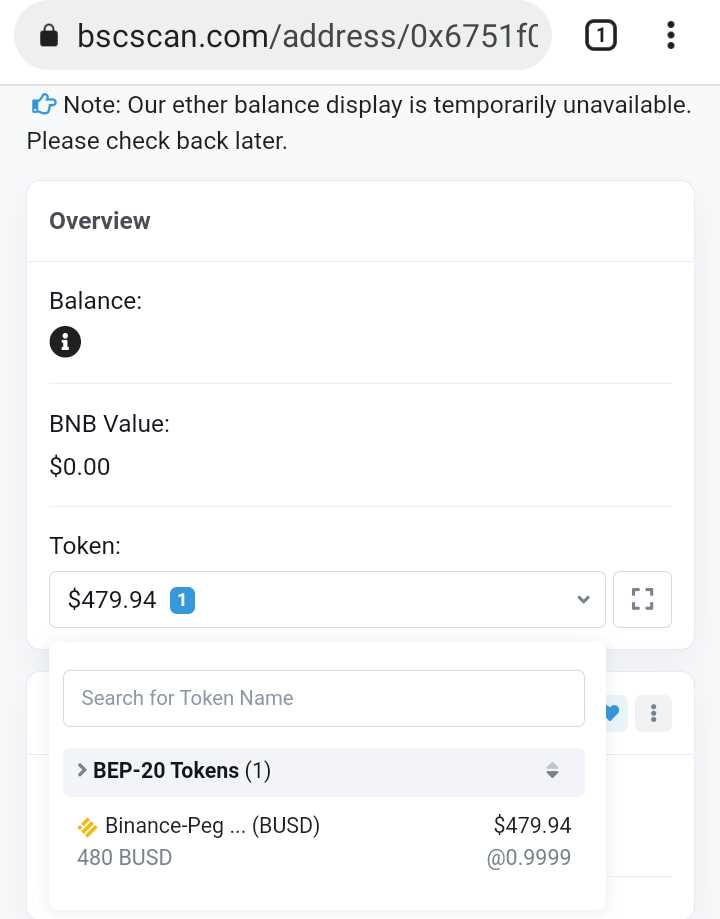
To find the contract address of the BEP20 token, you will need to visit a blockchain explorer like BscScan or Binance Chain Explorer. Search for the token you want to add and copy the contract address from the search results.
Step 3: Paste the Contract Address
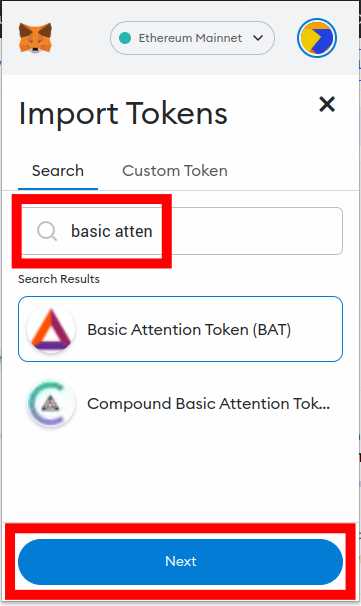
Now that you have the contract address, go back to the Metamask window where you are adding a token. Paste the contract address in the designated field and click on the “Next” button.
Step 4: Customize the Token
In this step, you have the option to customize the token by adding a custom name, symbol, and decimal places. You can choose to use the default values provided or enter your own. Once you’re satisfied with the customization, click on the “Add Tokens” button.
Step 5: Success!
Congratulations! You have successfully added the BEP20 token to your Metamask wallet. You will now be able to see the token balance and perform transactions with it.
Adding BEP20 tokens to Metamask is a straightforward process that allows you to easily manage your portfolio of cryptocurrencies. By following this step-by-step guide, you can ensure that you have access to all the tokens you need in your Metamask wallet.
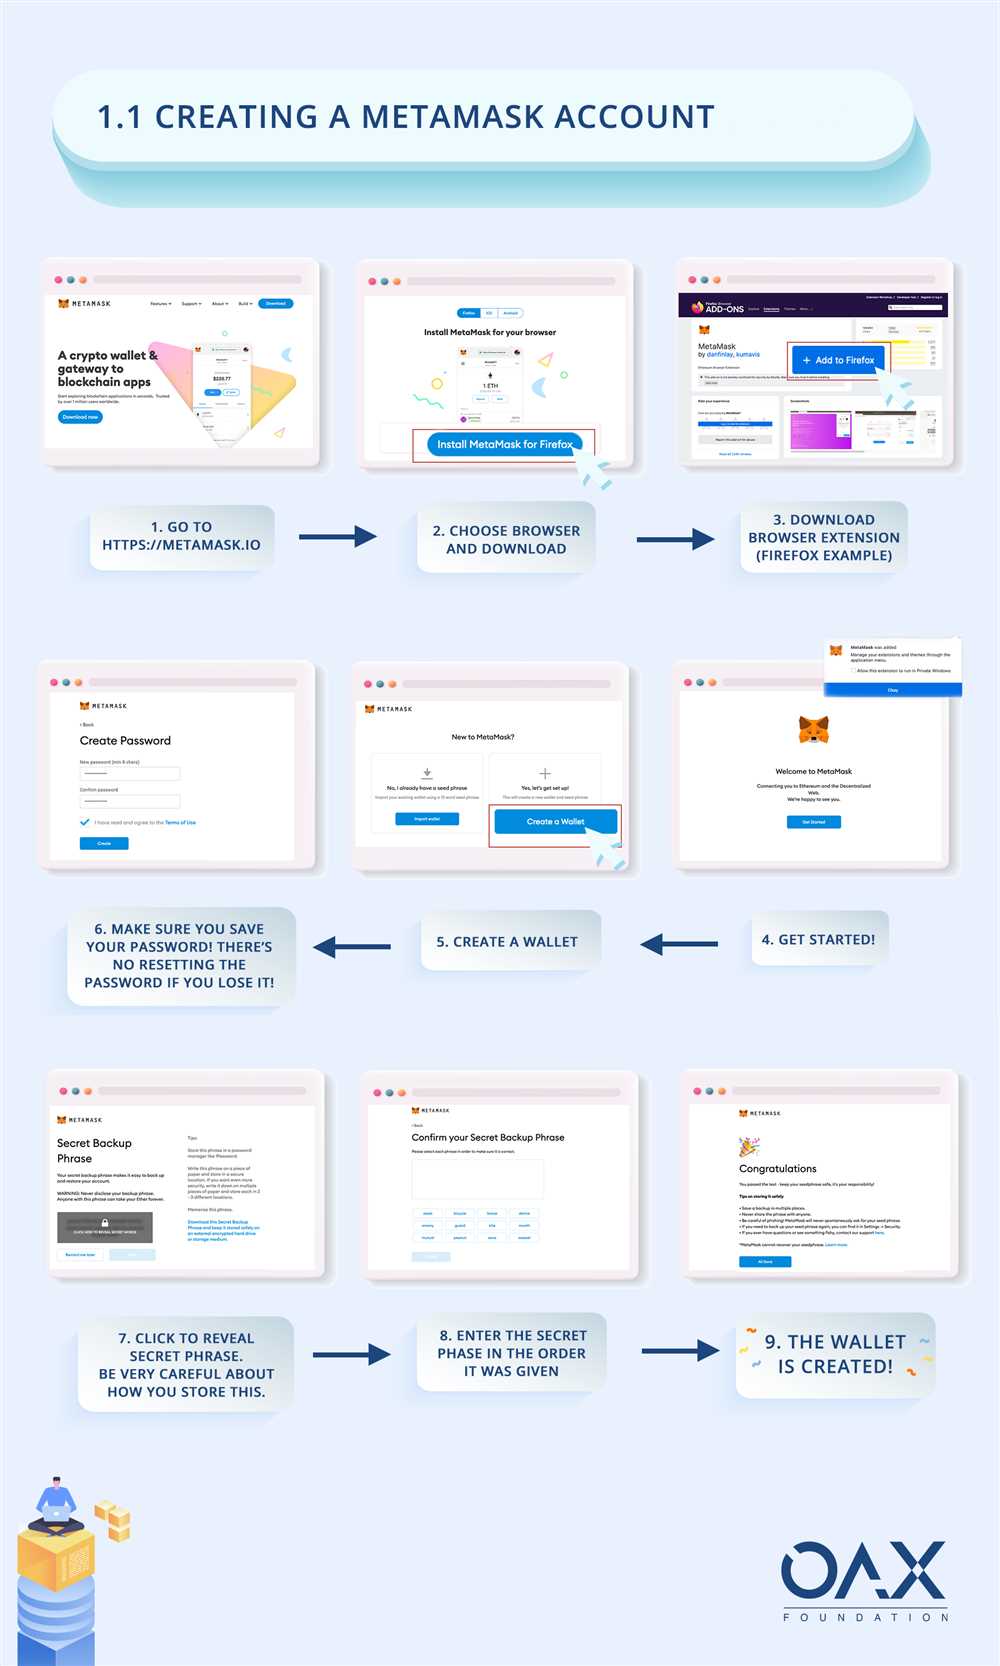
Step 1: Install Metamask Extension
To begin the process of adding BEP20 tokens to Metamask, you first need to install the Metamask extension on your preferred web browser. Follow the steps below to install Metamask:
- Open your web browser and go to the official Metamask website.
- Click on the “Get Chrome Extension” button if you are using Google Chrome, or “Get Firefox Extension” if you are using Mozilla Firefox.
- Click on the “Add to Chrome” button for Google Chrome, or “Add to Firefox” button for Mozilla Firefox.
- A pop-up window will appear asking for confirmation to add the extension. Click on the “Add extension” button.
- The Metamask extension will now be added to your browser. You will see the Metamask icon appear at the top right corner of your browser window.
Once you have successfully installed the Metamask extension, you can proceed to the next step of adding BEP20 tokens to Metamask.
Step 2: Create or Import a Metamask Wallet
To get started with adding BEP20 tokens to Metamask, you first need to have a wallet. If you already have a Metamask wallet, you can skip this step and move on to the next one. If you don’t have a wallet yet, follow the steps below to create or import one.
- Go to the official Metamask website and click on the “Get Chrome Extension” button if you are using Google Chrome. If you are using a different browser, follow the instructions provided on the website to install the extension.
- Once the extension is installed, click on the Metamask icon in your browser’s toolbar to launch the wallet.
- Click on the “Create Wallet” button if you want to create a new wallet. Follow the on-screen instructions to set up a password and generate your wallet’s seed phrase. Make sure to save your seed phrase in a safe and secure place, as it can be used to recover your wallet in case you forget your password.
- If you already have a Metamask wallet and want to import it instead, click on the “Import Wallet” button. Enter your wallet’s seed phrase and follow the on-screen instructions to complete the import process.
- Once your wallet is created or imported, you will be redirected to the wallet interface. Congratulations, you now have a Metamask wallet!
It is important to note that the seed phrase is a sensitive piece of information that should be kept private and not shared with anyone. Be cautious of scams or phishing attempts that may ask for your seed phrase. Always double-check the official sources and ensure you are using the correct website or application when interacting with your wallet.
Step 3: Find the BEP20 Token Contract Address
Before you can add a BEP20 token to Metamask, you will need to locate the token’s contract address. The contract address is a unique identifier for the token on the blockchain.
To find the BEP20 token contract address, you can follow these steps:
- Visit a trusted token listing website like CoinMarketCap or Binance.
- Search for the token you want to add to Metamask using its ticker symbol or full name.
- Once you find the token, open its token profile page.
- Look for the “Contract Address” or “Contract” section on the token profile page.
- Copy the contract address to your clipboard. Ensure that you have copied the entire address correctly.
It is important to verify the accuracy of the contract address before adding it to Metamask. You can do this by double-checking the address against multiple trusted sources or by consulting the official project website or documentation.
Once you have the correct BEP20 token contract address, you are ready to move on to the next step of adding the token to Metamask.
Step 4: Add the BEP20 Token to Metamask
After you have obtained the BEP20 token contract address from the token’s website or developer, you can add it to your Metamask wallet by following these simple steps:
1. Open Metamask Extension
Open your Metamask browser extension by clicking on the Metamask icon in your browser’s toolbar.
2. Navigate to the Tokens Tab
In the Metamask extension, click on the “Assets” tab and then select “Tokens”.
3. Click on the “Add Token” Button
On the Tokens tab, click on the “Add Token” button.
4. Enter Token Contract Information

A new window will appear where you can enter the token contract information:
| Token Contract Address: | Enter the BEP20 token contract address that you obtained earlier. |
|---|---|
| Token Symbol: | This field will be automatically populated based on the token contract address. |
| Decimal Places: | This field will also be automatically populated based on the token contract address. |
5. Click on the “Next” Button
After entering the token contract information, click on the “Next” button.
6. Confirm Token Addition
In the confirmation window, review the token’s details and click on the “Add Tokens” button to proceed.
Congratulations! You have successfully added the BEP20 token to your Metamask wallet. You can now view and manage your BEP20 token balances within Metamask.
Step 5: Verify and Use the Added BEP20 Token
After successfully adding the BEP20 token to your Metamask wallet, the next step is to verify its details and start using it for transactions.
To verify the added token, follow these steps:
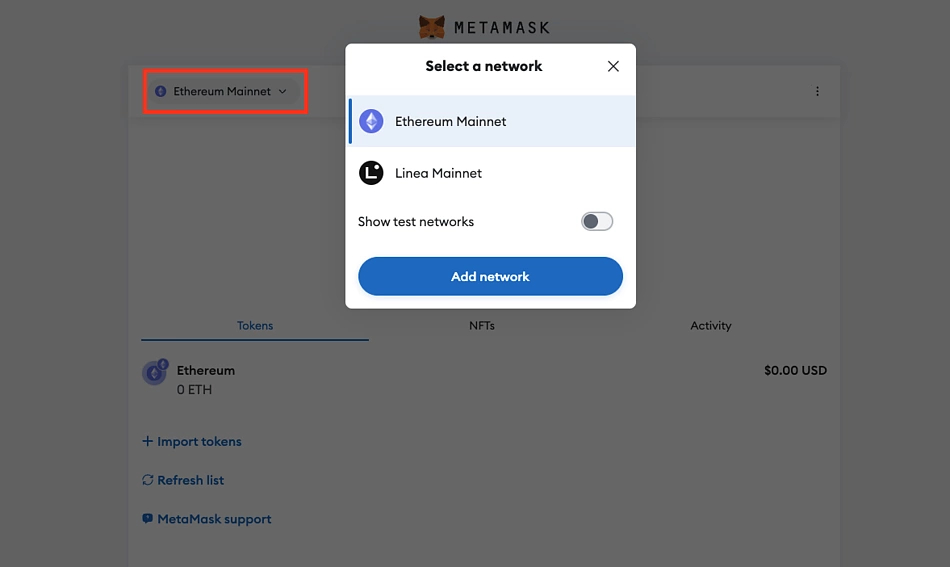
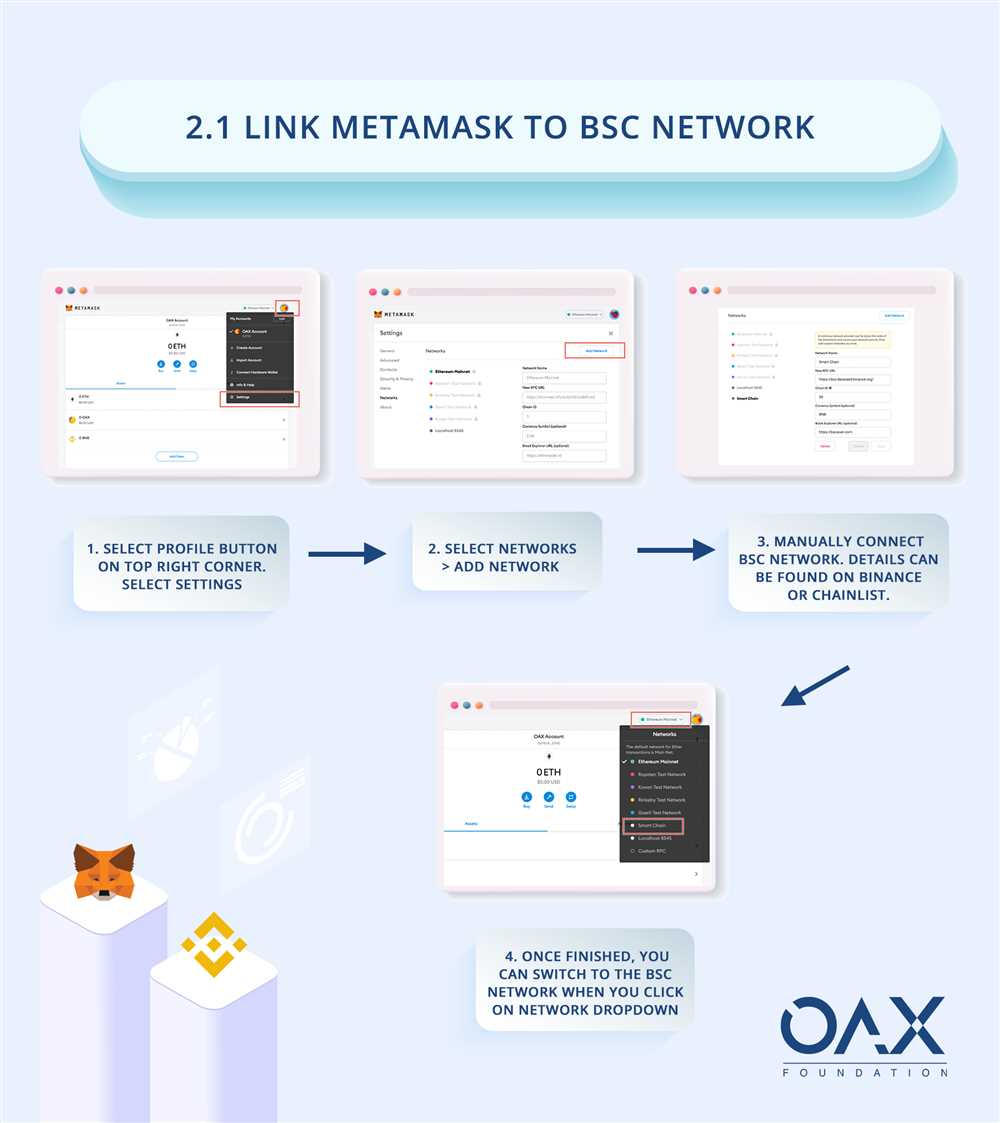
- Open your Metamask wallet extension on your browser.
- Click on the menu icon (three horizontal lines) in the top right corner of the wallet.
- From the dropdown menu, select “Add Token”.
- In the “Add Token” window, click on the “Custom Token” tab.
- Enter the contract address of the added token in the “Token Contract Address” field.
- The token symbol, name, and decimals should automatically populate.
- Click on “Next” to proceed with the verification process.
- Review the token details and click on “Add Tokens” to add the token to your Metamask wallet.
Once the token is successfully verified, you can start using it for transactions. To use the added BEP20 token, follow these steps:
- Open your Metamask wallet extension on your browser.
- Click on the menu icon (three horizontal lines) in the top right corner of the wallet.
- From the dropdown menu, select the added BEP20 token.
- Click on the “Send” button to initiate a transaction with the token.
- Enter the recipient’s wallet address and the amount of the token you want to send.
- Review the transaction details and click on “Confirm” to complete the transaction.
With these steps, you can successfully verify and use the added BEP20 token in your Metamask wallet.
What is Metamask?
Metamask is a digital wallet that allows users to store, manage, and trade cryptocurrencies. It is a browser extension and can be used with popular browsers like Chrome, Firefox, and Brave.