
Metamask is one of the most popular Ethereum wallets, allowing users to securely store and manage their digital assets. One of the assets that can be added to Metamask is USDT, a stablecoin that is pegged to the US dollar. Adding a USDT address to Metamask is a simple process that can be completed in just a few steps. In this guide, we will walk you through the process, ensuring that you can easily add your USDT address to your Metamask wallet.
Step 1: Install Metamask
The first step is to install Metamask if you haven’t already. Metamask is available as a browser extension for Chrome, Firefox, and Brave. Simply search for Metamask in the extension store of your preferred browser and follow the instructions to install it.
Step 2: Create or Import a Wallet
Once you have Metamask installed, you need to create a new wallet or import an existing one. If you are creating a new wallet, follow the prompts to set a password and save your seed phrase. If you are importing an existing wallet, click on the Metamask extension in your browser, select “Import Wallet,” and enter your seed phrase.
Step 3: Open the Metamask Wallet
With your wallet created or imported, click on the Metamask extension in your browser to open the wallet interface. You will see your account balance and a list of supported assets.
Step 4: Add a USDT Token
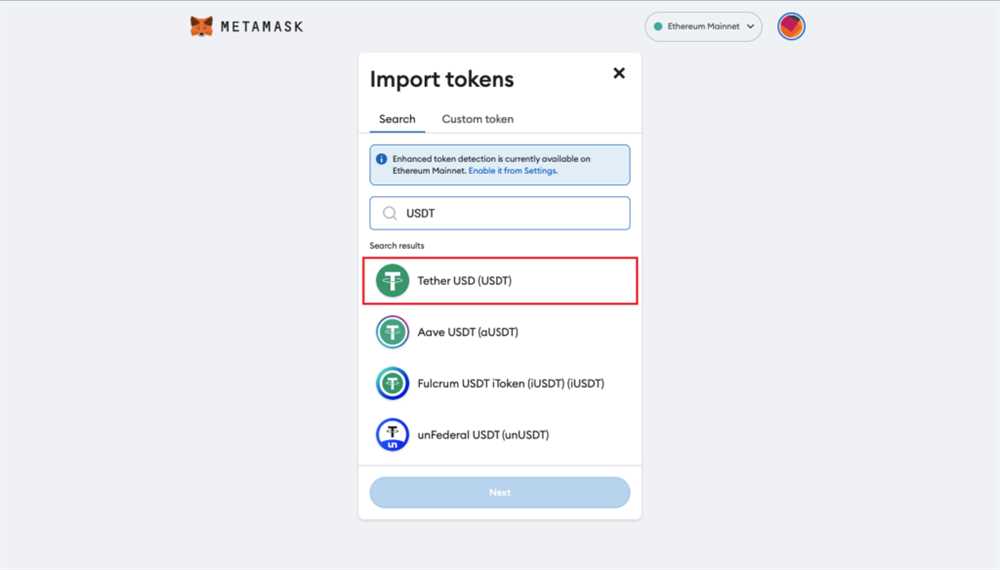
To add a USDT address to Metamask, click on the “Add Token” button on the main wallet screen. A window will pop up, allowing you to search for the USDT token. Enter “USDT” in the search bar and select “USDT (ERC20)” from the list of results.
Step 5: Confirm and Add USDT
After selecting the USDT token, click on the “Next” button. Metamask will display the token details, including the contract address. Double-check that the contract address matches the one you want to add, as there are multiple versions of USDT available on different blockchains. Once you have confirmed the details, click on the “Add Tokens” button to complete the process.
That’s it! You have successfully added a USDT address to your Metamask wallet. You can now view your USDT balance and make transactions using Metamask.
Note: Adding a USDT address to Metamask will allow you to view your USDT balance and make transactions, but it does not give you ownership of the USDT tokens. To own USDT, you need to purchase or receive them from another party and send them to your Metamask address.
Install Metamask Extension
To begin the process of adding a USDT address to your Metamask wallet, you first need to install the Metamask extension on your preferred browser. Follow the steps below to install the Metamask extension:
| 1. | Open your browser and go to the extensions marketplace. |
| 2. | Search for “Metamask” in the extensions marketplace. |
| 3. | Click on the “Add to [Browser Name]” button to install the Metamask extension. |
| 4. | Follow the prompts to complete the installation process. |
Once the installation is complete, you will see the Metamask icon added to your browser’s toolbar. Click on the icon to open the Metamask extension.
Now that you have installed the Metamask extension, you can proceed to the next step of adding a USDT address to your wallet.
Set Up Metamask Wallet
To set up a Metamask wallet, follow these steps:
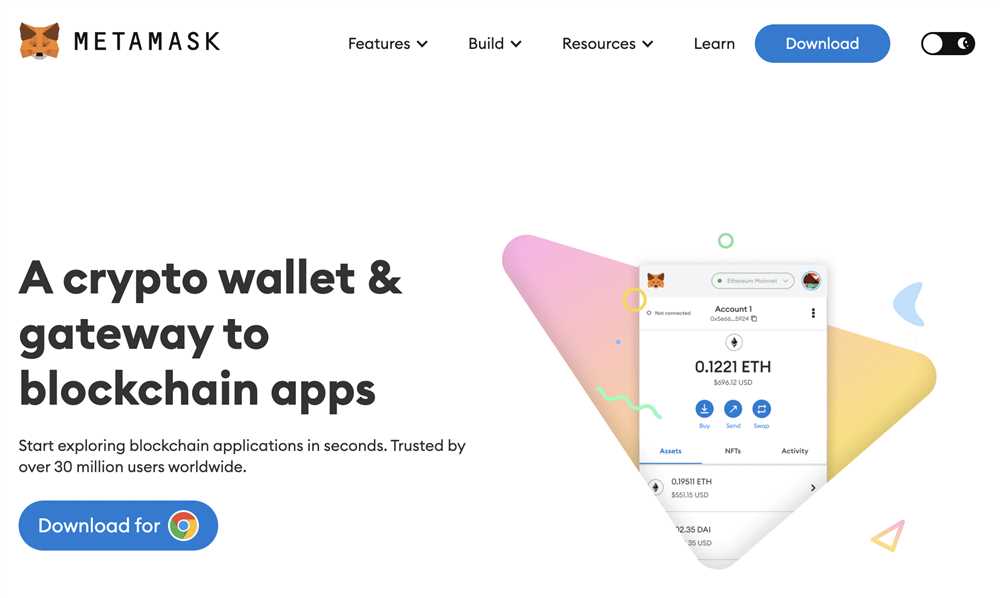
- Go to the Metamask website at https://metamask.io/.
- Click on the “Download” button and select the appropriate version for your browser (Chrome, Firefox, or Brave).
- Once the extension is downloaded, click on it to install and add it to your browser.
- A welcome screen will appear. Click on the “Get Started” button.
- You will be presented with two options: “Import Wallet” or “Create Wallet.” Choose the option that best suits your needs.
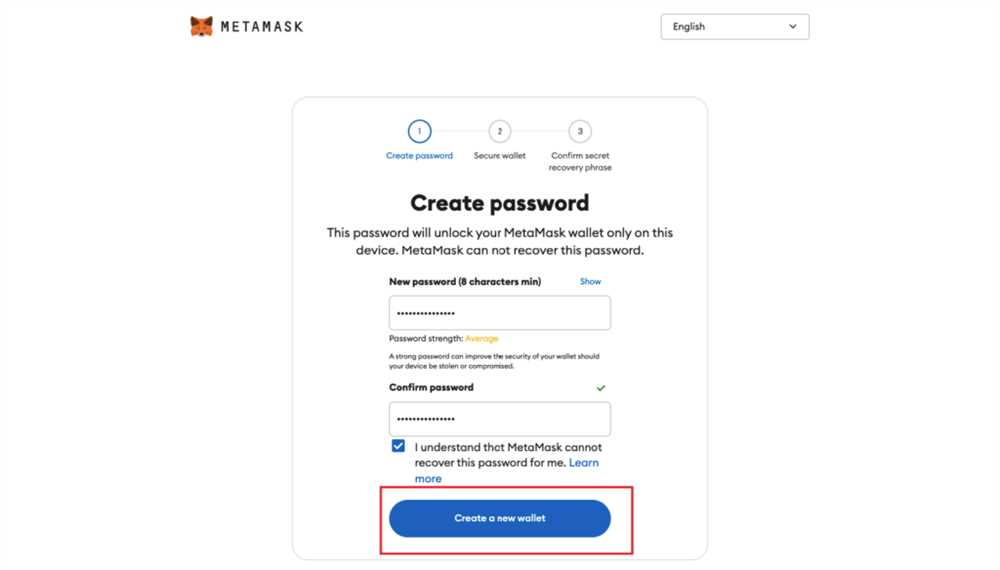
- If you choose to import a wallet, you will need to enter your recovery phrase. If you choose to create a new wallet, you will be prompted to create a password.
- After entering the necessary information, click on the “Create” or “Import” button.
- A privacy notice will appear. Read through it and click on the “Accept” button to proceed.
- Metamask will generate a unique seed phrase for your wallet. Make sure to write this down and store it in a safe place. This seed phrase is crucial for recovering your wallet in case of loss or theft.
- Confirm your seed phrase by selecting the words in the correct order.
- Once your seed phrase is confirmed, your Metamask wallet will be created.
- You can now use your Metamask wallet to store, send, and receive USDT and other cryptocurrencies.
Setting up a Metamask wallet is quick and easy. Just follow these steps, and you’ll be ready to start using your wallet in no time!
Add a Custom Token
Once you have added your USDT address to your Metamask wallet, you will need to add the custom token for USDT. This will allow you to see your USDT balance and perform transactions with the token.
Here are the steps to add a custom token:
Step 1: Open Metamask
Open your Metamask extension or mobile app and make sure you are logged in to your account.
Step 2: Access Token List
In the Metamask interface, click on the menu icon (usually three horizontal lines) in the top left corner. From the menu, select “Add Token” and choose “Custom Token”.
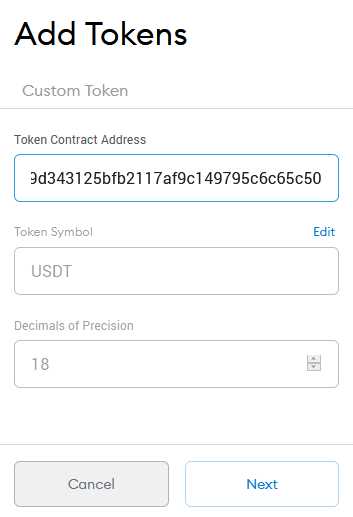
Step 3: Enter Token Details
In the “Token Contract Address” field, enter the USDT token contract address: [Enter token contract address here]. The other fields such as Token Symbol and Decimals of Precision should automatically fill in.
Note: If the fields do not autofill, you can manually enter USDT for the Token Symbol and 6 for the Decimals of Precision.
Step 4: Confirm Token Addition
Click on “Next” or “Add Token” to confirm the addition of the USDT custom token to your Metamask wallet.
Congratulations! You have successfully added the USDT custom token to your Metamask wallet. You can now view your USDT balance and perform transactions with the token directly from your wallet.
Enter USDT Address

1. Go to your Metamask wallet and click on the “Assets” tab.
2. Scroll down and locate the USDT token. Click on the “…” button next to it and select “Add Token”.
3. In the search bar, enter the USDT contract address: 0xdAC17F958D2ee523a2206206994597C13D831ec7.
4. Metamask should automatically detect the USDT token. Verify that it displays the correct token symbol (USDT) and decimal places (6).
5. Click on the “Add Tokens” button to add the USDT token to your wallet.
6. Once added, you will be able to see your USDT balance and make transactions with the token using your Metamask wallet.
| Token Symbol | USDT |
|---|---|
| Token Contract Address | 0xdAC17F958D2ee523a2206206994597C13D831ec7 |
| Decimal Places | 6 |
What is Metamask wallet?
Metamask wallet is a cryptocurrency wallet that allows users to store, manage, and interact with Ethereum-based tokens and decentralized applications (DApps) through their web browser.
Why should I add a USDT address to my Metamask wallet?
Adding a USDT address to your Metamask wallet allows you to store and manage your USDT tokens in one place. It also enables you to interact with USDT-supported decentralized applications (DApps) directly from your wallet.
Are there any fees associated with adding a USDT address to Metamask?
No, there are no fees associated with adding a USDT address to Metamask. However, you may incur transaction fees when sending or receiving USDT tokens.
Can I add multiple USDT addresses to my Metamask wallet?
Yes, you can add multiple USDT addresses to your Metamask wallet. Simply follow the same steps mentioned earlier for each address you want to add.